Love this? Save it for later!
Share the inspiration with your friends
The last cookie disappeared before I even got a sip of my milk. My husband looked at the empty plate, then at me, with that particular expression he gets when he’s already planning to ask for something again. “You only made six?” he said, not quite accusing, just disappointed. That’s the thing about a small batch — it forces you to be present. You can’t mindlessly reach for another because there aren’t any left to mindlessly reach for.
I developed this recipe on a Tuesday night, not because I was testing for a blog post, but because I had a leftover half-stick of butter in the fridge and a craving that wouldn’t quit. I didn’t want a full dozen cookies hanging around the house, tempting me for days. I wanted exactly six perfect, chewy, slightly underdone chocolate chip cookies that I could eat warm and be done with. No Tupperware of leftovers staring at me from the counter the next morning.
Honestly, the first batch was a happy accident. I used a single egg yolk instead of a whole egg (because that’s all I had), I browned the butter on a whim, and I let the dough rest for exactly as long as it took me to wash the mixing bowl. What came out of the oven was the best small batch chewy chocolate chip cookies I’d ever made. The edges were crisp, the centers were soft, and the chocolate was still melty in a way that felt illegal at 9 p.m. on a random weeknight.
This recipe isn’t complicated. It doesn’t require a stand mixer or a trip to a specialty store. It’s just good baking math scaled down to human proportions. When you want cookies but you don’t want to commit to a week’s worth of temptation, this is your answer. Trust me on this one.
Why You’ll Love This Recipe
I’ve tested this recipe more times than I care to admit. I’ve made it with all-purpose flour, bread flour, and a blend of both. I’ve tried chilling the dough for five minutes and for five hours. I’ve used dark chocolate chips, milk chocolate chunks, and even chopped up a good quality chocolate bar when I was feeling fancy. Through all that trial and error, this version came out on top every single time. Here’s why it works:
- Perfectly Portioned: You get exactly six cookies. Not eight, not ten, not a dozen. Six. It’s the Goldilocks of cookie batches — just right for a quiet night in, a small family treat, or when you’re baking just for yourself.
- Simple Ingredients: You probably have everything you need right now. Butter, sugar, an egg yolk, flour, baking soda, salt, vanilla, and chocolate chips. No weird specialty ingredients that you’ll use once and forget about.
- Ready in Under 30 Minutes: From the moment you pull out the butter to the moment you’re pulling cookies out of the oven, you’re looking at about 25 minutes. That’s faster than ordering delivery in most neighborhoods.
- That Perfect Chewy Texture: The secret is the browned butter and the single egg yolk. The browned butter adds a nutty depth of flavor, and the yolk gives you chewy centers without making the cookies cakey. It’s the texture you dream about.
- No Leftovers to Tempt You: Let’s face it — a full batch of cookies in the house is dangerous. This recipe gives you just enough to satisfy the craving without leaving you with a container of cookies calling your name at 11 p.m.
What makes this recipe different from all the other small batch cookie recipes out there? It’s the balance. I didn’t just divide a standard recipe by two and hope for the best. I rebuilt it from the ground up to work at this scale. The ratio of butter to flour, the single yolk instead of a whole egg, the precise amount of brown sugar for maximum moisture — every element was tested and retested until it was right. These aren’t just smaller versions of a bigger cookie. They’re their own perfect thing.
What Ingredients You Will Need
This recipe uses simple, everyday ingredients to create something genuinely special. The magic isn’t in obscure ingredients — it’s in how you treat the ones you already have. Here’s what you’ll need and why each one matters:
For the Cookies
- Unsalted Butter, 4 tablespoons (56g): You’ll brown this butter, which is the secret weapon of this recipe. Browning the butter evaporates some of the water content and develops nutty, toasty flavor compounds. I use unsalted so I can control the salt level myself. If you only have salted butter, just reduce the added salt by a pinch.
- Granulated Sugar, 3 tablespoons (38g): This adds sweetness and helps with spreading. The granulated sugar also contributes to those slightly crispy edges that contrast so beautifully with the chewy center.
- Light Brown Sugar, 3 tablespoons (42g), packed: Brown sugar is where the moisture lives. It contains molasses, which not only adds a deeper flavor but also keeps the cookies soft and chewy for days — if they last that long. Pack it firmly into your measuring spoon for accuracy.
- One Large Egg Yolk: This is non-negotiable for the texture. Using just the yolk gives you richness and tenderness without the excess moisture that a whole egg white would add. The white would make the cookies puffier and cakier, which is not what we’re going for here.
- Vanilla Extract, ½ teaspoon: Pure vanilla extract makes a difference here. Imitation vanilla will work in a pinch, but since this is a small batch where every ingredient matters, I recommend the real stuff. It rounds out the flavor and makes the chocolate taste more chocolatey.
- All-Purpose Flour, ⅔ cup (83g): Standard all-purpose flour gives these cookies the perfect structure. I’ve tested this with bread flour, and while it does make them slightly chewier, it also makes them a bit tougher. Stick with AP flour for the best balance. Spoon and level your flour — don’t scoop directly from the bag or you’ll end up with too much.
- Baking Soda, ¼ teaspoon: This is our leavening agent. It helps the cookies spread and rise just enough. Make sure your baking soda is fresh — if it’s been sitting in your cabinet for over a year, it might be time for a new box.
- Salt, ¼ teaspoon: Salt is not optional in cookies. It balances the sweetness and enhances every other flavor. I use fine sea salt for the dough and sometimes sprinkle a little flaky sea salt on top before baking for that fancy bakery look.
- Semi-Sweet Chocolate Chips, ⅓ cup (60g): Semi-sweet is my go-to because it’s not too sweet and not too bitter — it hits that perfect middle ground. You can use milk chocolate if you prefer a sweeter cookie, or dark chocolate if you want a more intense flavor. Chopped chocolate bars also work beautifully here and create those lovely pools of melted chocolate.
Optional Add-Ins
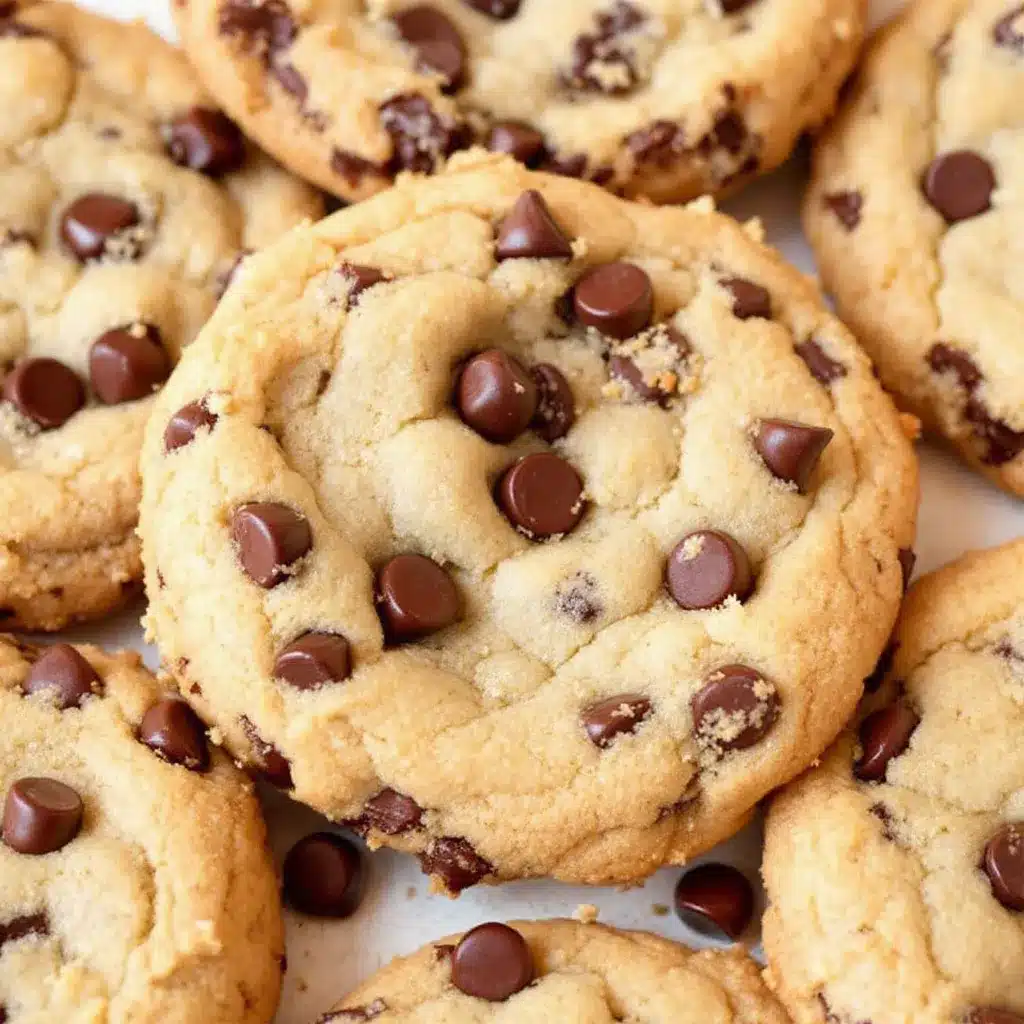
- Flaky Sea Salt: A sprinkle on top right when they come out of the oven takes these cookies to another level. The salty crunch against the sweet, soft cookie is absolutely addictive.
- Chopped Nuts: About 2 tablespoons of toasted walnuts or pecans add a lovely crunch. Just fold them in with the chocolate chips.
Equipment Needed
You don’t need a fancy kitchen to make these cookies. Here’s what you’ll actually use:
- Small Saucepan: For browning the butter. A light-colored saucepan is ideal because you can see the butter change color as it browns. If you only have dark cookware, just pay close attention to the smell and the sound.
- Mixing Bowl: Any medium-sized bowl will do. I use a glass bowl because I like to see that everything is fully combined.
- Whisk: For combining the sugars and the browned butter. A fork will work in a pinch, but a whisk makes the job much easier.
- Rubber Spatula: For folding in the flour and chocolate chips. It helps you scrape the sides of the bowl and get every bit of dough incorporated.
- Baking Sheet: A small baking sheet works perfectly for six cookies. I use a quarter sheet pan, but any baking sheet will do. If you only have a large one, that’s fine too — just space the cookies out.
- Parchment Paper or Silicone Baking Mat: This prevents sticking and helps the cookies spread evenly. Parchment paper is cheap and makes cleanup effortless. Silicone mats work great too, but they can sometimes cause cookies to spread a bit more.
- Cookie Scoop or Tablespoon: For portioning the dough evenly. A #40 cookie scoop (about 1.5 tablespoons) is perfect for this recipe. If you don’t have one, just use a regular tablespoon and make sure each portion is roughly the same size.
- Cooling Rack: Not strictly necessary, but it helps the cookies cool evenly without getting soggy bottoms. If you don’t have one, just let them cool on the baking sheet for a few minutes, then transfer to a plate.
I’ve made these cookies with nothing but a fork, a cereal bowl, and a toaster oven before. They still turned out great. Don’t let a lack of fancy equipment stop you.
Preparation Method
Let’s make some cookies. This process is straightforward, but each step matters. Pay attention to the visual cues and you’ll nail it every time.
- Brown the butter. Place the 4 tablespoons of unsalted butter in a small saucepan over medium heat. Let it melt completely, then continue cooking, swirling the pan occasionally. The butter will foam up, then the foam will subside, and you’ll start to see brown specks forming at the bottom of the pan. This takes about 4-5 minutes. The butter should smell nutty and toasted — like a warm hazelnut. Once it reaches a deep amber color, immediately remove it from the heat and pour it into a heat-safe mixing bowl. Don’t walk away during this step. Burnt butter happens fast and there’s no coming back from it.
- Cool the butter slightly. Let the browned butter sit for about 2-3 minutes. You want it warm but not hot — if you add the sugars to boiling hot butter, it’ll melt the sugar too much and change the texture of the cookies. If you add it to cold butter, the sugar won’t dissolve properly. Warm is the sweet spot.
- Add the sugars. Add the 3 tablespoons of granulated sugar and 3 tablespoons of packed light brown sugar to the warm browned butter. Whisk vigorously until the mixture is smooth and the sugars have dissolved into the butter. It should look like wet sand — thick, glossy, and slightly grainy. This takes about 30 seconds of good whisking.
- Add the egg yolk and vanilla. Drop in the single egg yolk and ½ teaspoon of vanilla extract. Whisk until the mixture is pale, thick, and falls in ribbons from the whisk. This should take about 1 minute. The mixture will look almost like a thin caramel sauce. It should be smooth and emulsified, not separated or greasy.
- Add the dry ingredients. Sprinkle the ⅔ cup of all-purpose flour, ¼ teaspoon of baking soda, and ¼ teaspoon of salt over the wet mixture. Use a rubber spatula to fold everything together. Stir just until you no longer see streaks of flour — about 10-15 strokes. Overmixing at this stage develops gluten, which makes cookies tough. We want tender, not tough.
- Fold in the chocolate chips. Add the ⅓ cup of semi-sweet chocolate chips and fold them in with a few gentle strokes. Make sure they’re evenly distributed throughout the dough. If you’re adding any optional nuts or flaky salt, fold them in now.
- Chill the dough (optional but recommended). Cover the bowl with plastic wrap and pop it in the fridge for at least 30 minutes. This step is optional, but it makes a difference. Chilling the dough solidifies the butter, which means the cookies spread less and develop a chewier texture. If you’re in a rush, you can skip this step, but your cookies will be flatter and thinner. I usually chill mine while I preheat the oven and clean up.
- Preheat the oven. Set your oven to 350°F (175°C). Line your baking sheet with parchment paper or a silicone mat. If you chilled the dough, take it out of the fridge while the oven preheats — about 10 minutes — so it softens slightly and is easier to scoop.
- Portion the dough. Use a cookie scoop or a tablespoon to portion the dough into 6 equal balls, each about 1.5 tablespoons in size. Place them on the prepared baking sheet, spacing them about 2 inches apart. They’ll spread, but not too much since this is a small batch. Gently press down on each ball just slightly to flatten the tops — this helps them bake evenly.
- Bake. Place the baking sheet on the middle rack of your preheated oven. Bake for 10-12 minutes. At 10 minutes, the cookies will look puffy, golden around the edges, and still soft in the center. This is exactly what you want. At 12 minutes, they’ll be slightly more set but still chewy. I pull mine at 10 minutes for that gooey center that makes you close your eyes when you bite into it. The cookies will continue to bake on the hot sheet after you take them out.
- Cool on the baking sheet. Let the cookies rest on the baking sheet for 5 minutes. This is crucial — they’re too fragile to move right away. During this time, they’ll set up just enough to be handled. If you try to move them immediately, they’ll fall apart.
- Transfer to a cooling rack. After 5 minutes, use a spatula to transfer the cookies to a wire cooling rack. If you want that fancy bakery look, sprinkle a little flaky sea salt on top while they’re still warm. Let them cool completely if you can resist — or eat one warm with a glass of cold milk. I won’t judge.
Cooking Tips & Techniques
Over the course of testing this recipe, I’ve made every mistake in the book. Here’s what I learned so you don’t have to make the same ones:
Don’t skip browning the butter. I know it adds an extra step, but it’s the single most impactful thing you can do for flavor. The first time I made these without browning the butter, they were good. The second time, with browned butter, they were unforgettable. The nutty, toasty notes from the browned butter complement the chocolate in a way that regular melted butter just can’t replicate.
Measure your flour correctly. This is the most common baking mistake. If you scoop your measuring cup directly into the flour bag, you can end up with 20-30% more flour than the recipe calls for. That extra flour makes cookies dry and cakey. Instead, use a spoon to fluff the flour in its container, then spoon it into your measuring cup and level it off with a straight edge. It takes five extra seconds and makes a world of difference.
Watch the bake time like a hawk. Ovens vary wildly. My oven runs slightly hot, so I start checking at 9 minutes. Your oven might need a full 12 minutes. The visual cues are more reliable than the timer: the edges should be golden brown, the centers should look puffy and slightly underdone, and the kitchen should smell like a bakery. When in doubt, pull them out early. Underbaked cookies are fixable (just pop them back in for a minute). Overbaked cookies are just sad, crunchy discs.
Let them rest. I know it’s hard. The smell is intoxicating. But those 5 minutes on the baking sheet are not optional. The cookies are still baking internally, and moving them too soon will cause them to break. Use that time to pour yourself a glass of milk and prepare for the experience.
Double the recipe if you must. This recipe scales up beautifully. If you want 12 cookies, simply double every ingredient. The baking time stays roughly the same, though you might need to bake in two batches if your oven is small. I’ve done this many times when I needed cookies for a gathering but didn’t want to commit to a full 24-cookie recipe.
Variations & Adaptations
One of the best things about this recipe is how adaptable it is. Here are some variations I’ve tried and loved:
Gluten-Free Version: Substitute the all-purpose flour with a good quality 1-to-1 gluten-free baking flour blend. I’ve had excellent results with Bob’s Red Mill 1-to-1 Baking Flour. The texture is slightly more delicate, but the flavor is still fantastic. Add an extra tablespoon of flour if the dough seems too sticky.
Double Chocolate Chip: Replace 2 tablespoons of the all-purpose flour with 2 tablespoons of unsweetened cocoa powder. The cookies will be darker, richer, and taste like a brownie-cookie hybrid. Use white chocolate chips or milk chocolate chips for contrast — the dark cocoa pairs beautifully with the sweetness.
Peanut Butter Swirl: Before baking, drop small dollops of creamy peanut butter on top of each cookie dough ball and use a toothpick to swirl it in. The peanut butter gets slightly crispy on the edges and stays soft in the center. It’s a dangerous combination. If you love peanut butter and chocolate together, this is your version.
Vegan Adaptation: Use vegan butter (I like Miyoko’s or Country Crock Plant Butter) and replace the egg yolk with 1 tablespoon of aquafaba (the liquid from a can of chickpeas) mixed with ½ teaspoon of cornstarch. The texture won’t be exactly the same — slightly less chewy — but they’ll still be delicious and entirely plant-based.
Add Some Crunch: Fold in ¼ cup of toasted chopped pecans or walnuts along with the chocolate chips. The nuts add texture and a savory note that balances the sweetness. I like to toast the nuts in a dry skillet for 2-3 minutes before adding them to bring out their flavor.
Serving & Storage Suggestions
These cookies are best served warm, obviously. But here’s how to make the most of them at every stage:
Serving: Serve these cookies slightly warm with a cold glass of milk, a cup of coffee, or a scoop of vanilla ice cream for an extra indulgent treat. If you’re feeling fancy, sandwich two cookies with a layer of chocolate ganache or vanilla buttercream for the ultimate cookie sandwich. They’re also fantastic crumbled over a bowl of ice cream or used as a topping for a milkshake.
Storing: Store any leftover cookies (if there are any) in an airtight container at room temperature for up to 3 days. To keep them soft, add a slice of bread to the container — the cookies will absorb the moisture from the bread and stay chewy. Replace the bread slice every day if you’re storing them longer.
Freezing: These cookies freeze beautifully. You can freeze the baked cookies in a freezer-safe bag for up to 3 months. To reheat, pop them in a 300°F oven for 5 minutes or microwave for 10-15 seconds. Alternatively, you can freeze the raw dough balls on a baking sheet, then transfer them to a freezer bag. When you’re ready to bake, just add 2-3 minutes to the baking time — no need to thaw. This is my favorite method for having fresh cookies on demand without the commitment of a full batch.
How Flavors Develop: These cookies are actually better the next day. The flavors meld together overnight, and the texture becomes even chewier. If you can resist eating them all on day one, you’ll be rewarded with an even better cookie on day two. I’ve tested this. It’s true.
Nutritional Information & Benefits
Let’s be honest — these are cookies, not health food. But here’s the nutritional breakdown so you can make informed choices:
| Nutrient | Per Cookie (1 of 6) |
|---|---|
| Calories | 210 |
| Total Fat | 12g |
| Saturated Fat | 7g |
| Cholesterol | 45mg |
| Sodium | 180mg |
| Total Carbohydrates | 26g |
| Dietary Fiber | 1g |
| Sugars | 16g |
| Protein | 3g |
These cookies are made with real butter and real sugar, and that’s part of what makes them so satisfying. The small batch size actually helps with portion control — you get exactly six cookies, no more, no less. If you’re watching your sugar intake, you can reduce the granulated sugar to 2 tablespoons without significantly affecting the texture. The brown sugar is harder to reduce because it provides moisture, but you can cut it back slightly if needed.
For those with dietary restrictions, note that these cookies contain gluten (from the flour), dairy (from the butter), and eggs (from the yolk). See the variations section for gluten-free and vegan adaptations.
Frequently Asked Questions
Can I use margarine instead of butter?
I don’t recommend it. Margarine has a higher water content than butter, which will make the cookies spread too much and turn out greasy. Butter gives you the best flavor and texture. If you need a dairy-free option, use a good quality vegan butter stick, not the spreadable kind in a tub.
Why did my cookies turn out flat?
Flat cookies usually mean one of three things: your butter was too warm when you mixed the dough, you didn’t chill the dough long enough, or you used too much sugar. Make sure your browned butter is warm but not hot before adding the sugars, and don’t skip the chilling step if you can help it. Also, check that your baking soda is fresh — old baking soda loses its leavening power.
Can I make this recipe with a whole egg instead of just the yolk?
You can, but the texture will be different. Using a whole egg adds more moisture and protein, which makes the cookies puffier and cakier rather than chewy. If you only have a whole egg and no way to separate it, go ahead and use it — you’ll still get good cookies, just not the chewy ones this recipe is designed for.
How do I know when the butter is properly browned?
Look for three signs: color, smell, and sound. The butter will turn a deep amber color with brown specks at the bottom of the pan. It will smell nutty and toasted, like a warm hazelnut. And you’ll hear it change from a vigorous sizzle to a quieter, more gentle bubbling. The whole process takes about 4-5 minutes over medium heat. Don’t walk away from the stove.
Can I double this recipe?
Absolutely. This recipe scales perfectly. Double every ingredient and you’ll have 12 cookies. The baking time stays the same, though you might need to bake in two batches depending on your oven size. I’ve done this many times when I needed more cookies for a party or gathering.
Conclusion
These small batch chewy chocolate chip cookies are exactly what a cookie should be — crisp around the edges, soft and chewy in the center, loaded with melty chocolate, and made with ingredients you already have in your kitchen. They’re the kind of cookies that make you feel like a hero when you pull them out of the oven, even if it’s just a random Tuesday night and the only person you’re impressing is yourself.
The beauty of this recipe is its simplicity. You don’t need a stand mixer. You don’t need a trip to the store. You just need a little butter, a little sugar, a single egg yolk, and about 25 minutes. That’s it. And what you get in return is six perfect cookies that taste like they came from a bakery, but with the warmth and love of something made in your own kitchen.
I’d love to hear how these turn out for you. Did you add nuts? Did you try the double chocolate version? Did you eat all six in one sitting? (No judgment here.) Leave a comment below and let me know. And if you’re looking for more small batch treats, check out my chocolate chip pumpkin bread or these no-bake protein balls for another quick fix. Happy baking, friends.
Pin This Recipe!
Small Batch Chewy Chocolate Chip Cookies: Best Easy Recipe

These small batch chewy chocolate chip cookies are perfectly portioned for a quiet night in, with crisp edges, soft centers, and melty chocolate. Made with browned butter and a single egg yolk, they deliver bakery-quality flavor in under 30 minutes.
- Prep Time: 15 minutes
- Cook Time: 10 minutes
- Total Time: 25 minutes
- Yield: 6 cookies 1x
- Category: Dessert
- Cuisine: American
Ingredients
- 4 tablespoons (56g) unsalted butter
- 3 tablespoons (38g) granulated sugar
- 3 tablespoons (42g) packed light brown sugar
- 1 large egg yolk
- ½ teaspoon vanilla extract
- ⅔ cup (83g) all-purpose flour
- ¼ teaspoon baking soda
- ¼ teaspoon salt
- ⅓ cup (60g) semi-sweet chocolate chips
- Flaky sea salt (optional, for topping)
- 2 tablespoons toasted walnuts or pecans (optional)
Instructions
- Brown the butter: Place 4 tablespoons unsalted butter in a small saucepan over medium heat. Melt completely, then continue cooking, swirling occasionally, until butter foams, subsides, and brown specks form at the bottom (about 4-5 minutes). Remove from heat immediately and pour into a heat-safe mixing bowl.
- Cool the butter slightly: Let the browned butter sit for 2-3 minutes until warm but not hot.
- Add the sugars: Add 3 tablespoons granulated sugar and 3 tablespoons packed light brown sugar to the warm butter. Whisk vigorously until smooth and glossy, about 30 seconds.
- Add the egg yolk and vanilla: Add 1 large egg yolk and ½ teaspoon vanilla extract. Whisk until pale, thick, and falls in ribbons, about 1 minute.
- Add the dry ingredients: Sprinkle ⅔ cup all-purpose flour, ¼ teaspoon baking soda, and ¼ teaspoon salt over the wet mixture. Fold with a rubber spatula just until no streaks of flour remain (10-15 strokes).
- Fold in the chocolate chips: Add ⅓ cup semi-sweet chocolate chips and fold gently until evenly distributed. If using optional nuts or flaky salt, fold in now.
- Chill the dough (optional but recommended): Cover bowl with plastic wrap and refrigerate for at least 30 minutes.
- Preheat the oven: Set oven to 350°F (175°C). Line a baking sheet with parchment paper or a silicone mat.
- Portion the dough: Scoop dough into 6 equal balls (about 1.5 tablespoons each). Place on prepared baking sheet, spacing 2 inches apart. Gently press down slightly to flatten tops.
- Bake: Place baking sheet on middle rack. Bake for 10-12 minutes. At 10 minutes, cookies should be puffy, golden around edges, and soft in center. For gooey centers, pull at 10 minutes.
- Cool on the baking sheet: Let cookies rest on the baking sheet for 5 minutes. They will continue to bake internally.
- Transfer to a cooling rack: Use a spatula to transfer cookies to a wire rack. If desired, sprinkle flaky sea salt on top while warm. Cool completely or serve warm.
Notes
For best results, chill the dough for at least 30 minutes to prevent spreading and enhance chewiness. Measure flour correctly by spooning and leveling. Watch bake time closely; underbaked cookies are fixable, overbaked are not. Cookies are even better the next day as flavors meld.
Nutrition
- Serving Size: 1 cookie
- Calories: 210
- Sugar: 16
- Sodium: 180
- Fat: 12
- Saturated Fat: 7
- Carbohydrates: 26
- Fiber: 1
- Protein: 3
Keywords: small batch cookies, chewy chocolate chip cookies, easy cookie recipe, browned butter cookies, single serving cookies


