Love this? Save it for later!
Share the inspiration with your friends
I was standing in the middle of the candy aisle at Target, three weeks before Halloween, staring at a wall of orange-and-black wrappers. And honestly? I felt kind of hollow about it.
Don’t get me wrong—I love a good fun-size Snickers as much as the next person. But I was putting together treat bags for my kid’s class party, and I wanted something that felt a little more… me. Something that said “I thought about this” without looking like I was trying too hard. I wanted the treat bags to have a homemade touch, but I also knew I didn’t have time to pipe royal icing onto sugar cookies for twenty-four kids. (Let’s be real, I barely have patience for that with my own family.)
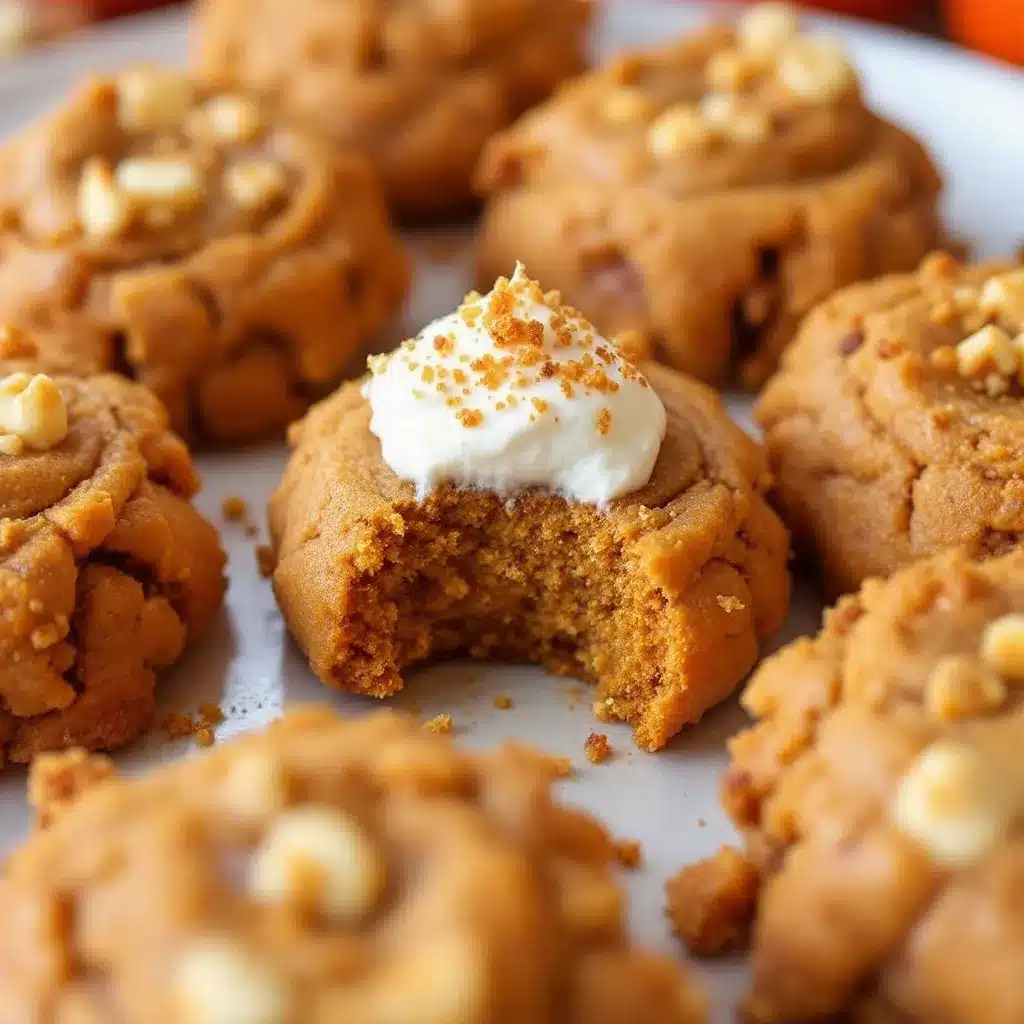
So I started thinking about what would fit in a little cellophane bag, survive being tossed into a backpack, and still make someone smile when they opened it. That’s when these Easy Mini Pumpkin Pie Cookies came to life. They’re tiny, they’re cute, they taste like a sliver of actual pumpkin pie, and they take less than thirty minutes to throw together. No rolling pins. No chilling dough. No stress.
It was one of those quiet kitchen victories where you realize the best ideas come when you stop forcing them. I made a test batch, stuffed them into a few treat bags with a twist tie, and handed them to my son’s friends after school. They disappeared in about four minutes. One little girl asked if she could have the recipe for her birthday party. That’s when I knew I had something worth sharing.
So here they are—the cookie that saved my Halloween planning, and honestly, my whole attitude toward treat bags. Let’s make them together.
Why You’ll Love These Mini Pumpkin Pie Cookies
I have made a lot of Halloween treats over the years. Some were gorgeous and took all day. Others were quick but looked like an afterthought. These cookies sit right in that sweet spot where they look like you fussed, but you absolutely did not fuss. Here is why they work so well for treat bags:
- Super Fast: From start to finish, you are looking at about 25 minutes. That includes baking time. You can have a batch done before the first trick-or-treater rings your bell.
- No Special Equipment: You don’t need cookie cutters, piping bags, or any of that. Just a mini muffin tin and a spoon. That’s it.
- Perfect for Treat Bags: These are sturdy enough to stack in a cellophane bag without crumbling into dust. They hold up way better than a frosted cookie would.
- Real Pumpkin Flavor: We are not messing around with artificial pumpkin spice extract here. These actually taste like a tiny bite of pumpkin pie, thanks to real pumpkin puree and a careful blend of warm spices.
- Crowd-Pleasing Size: They are mini, so kids feel like they are getting a special treat, and adults don’t feel guilty grabbing two or three. Everybody wins.
The first time I brought these to a Halloween playdate, one of the moms asked if I had made mini pie crusts from scratch. I laughed and told her the truth—it’s actually a shortcut dough that tastes like the real thing without the work. That little moment of “wait, really?” is exactly the kind of reaction I love getting from a recipe.
What Ingredients You Will Need
This recipe keeps things simple. You probably already have most of these in your pantry, which is the whole point. Here is what you need:
For the Cookie Base
- 1 cup all-purpose flour (spooned and leveled—don’t scoop straight from the bag or you’ll get too much)
- ½ cup unsalted butter, softened (I use Land O Lakes, but any good butter works)
- ¼ cup granulated sugar
- ¼ cup packed light brown sugar (this gives a little molasses depth)
- ½ cup pumpkin puree (not pumpkin pie filling—make sure it’s 100% pure pumpkin. Libby’s is my go-to)
- 1 large egg yolk (save the white for breakfast or a frittata)
- 1 teaspoon vanilla extract
For the Spice Blend
- 1 teaspoon pumpkin pie spice (or make your own: ½ tsp cinnamon, ¼ tsp nutmeg, ¼ tsp ginger, pinch of cloves)
- ½ teaspoon ground cinnamon
- ¼ teaspoon salt
- ¼ teaspoon baking powder
For the Topping (Optional but Highly Recommended)
- ¼ cup powdered sugar (for a light dusting)
- ¼ cup white chocolate chips, melted (for drizzling, if you want to get fancy)
- Pinch of flaky sea salt (trust me on this one)
That is seriously it. No condensed milk, no complicated pastry dough, no fussy fillings. The pumpkin puree keeps these cookies tender and soft, almost like a little cake bite, while the butter and sugars give them that rich, caramelized edge. If you have made my pumpkin cream cheese muffins, you will recognize a similar approach to building flavor without overcomplicating things.
Equipment Needed
You do not need a fancy bakery setup for these. Here is what you will want to have on hand:
- Mini muffin tin (the 24-cup size is perfect—if you only have a 12-cup, just bake in batches)
- Mixing bowls (one medium, one small)
- Hand mixer or stand mixer (you can do this by hand with a wooden spoon, but a mixer makes it easier to cream the butter and sugar)
- Rubber spatula (for scraping down the bowl)
- Small cookie scoop or teaspoon (for portioning the dough evenly)
- Cooling rack (a wire rack helps them cool without getting soggy on the bottom)
- Parchment paper or non-stick spray (for greasing the muffin tin)
If you don’t have a mini muffin tin, you can absolutely use a regular muffin tin and just make slightly larger cookies—just increase the baking time by a few minutes. I have done it both ways, and honestly, the mini version is cuter for treat bags. But the regular size works great for a dessert table or alongside a cup of coffee.
Preparation Method
Alright, let’s get into the kitchen and make these. The whole process moves fast, so read through the steps once before you start. I promise it is easy, but knowing what comes next helps you stay ahead of the game.
- Preheat your oven to 350°F (175°C). Spray your mini muffin tin with non-stick spray or line the cups with mini paper liners. I prefer spraying because the cookies get a slightly crisper edge, but liners make cleanup even easier. Your call.
- Cream the butter and sugars together. In a medium mixing bowl, beat the softened butter, granulated sugar, and brown sugar together until light and fluffy. This takes about 2-3 minutes with a hand mixer on medium speed. You want the mixture to look pale and a little airy. Scrape down the sides of the bowl with your spatula halfway through.
- Add the wet ingredients. Drop in the pumpkin puree, egg yolk, and vanilla extract. Beat on low speed until everything is combined. The mixture will look a little loose and maybe even a bit curdled—that is totally normal. Don’t panic. The flour will bring it all together.
- Mix the dry ingredients separately. In a small bowl, whisk together the flour, pumpkin pie spice, cinnamon, salt, and baking powder. This step is important because it distributes the spices evenly. Nobody wants a bite that is all baking powder and no cinnamon.
- Combine wet and dry. Add the dry ingredients to the wet mixture in two additions, mixing on low speed after each addition. Stop as soon as the flour disappears. Overmixing will make these cookies tough, and we want them tender. The dough will be soft and slightly sticky—that is correct.
- Fill the muffin cups. Use your small cookie scoop or a teaspoon to drop a rounded scoop of dough into each mini muffin cup. You want each cup about ¾ full. The cookies will puff up a little but not spread much, so don’t worry about them overflowing.
- Bake for 10-12 minutes. Rotate the pan halfway through for even baking. The cookies are done when the edges look set and a toothpick inserted into the center comes out clean or with just a few moist crumbs. The tops will look slightly domed and golden around the edges.
- Cool in the pan for 5 minutes. This is important—if you try to take them out immediately, they will fall apart. Let them rest in the tin for exactly 5 minutes, then transfer them to a wire rack to cool completely.
- Add the finishing touches. Once the cookies are completely cool, dust them with powdered sugar, drizzle with melted white chocolate, or sprinkle with a tiny pinch of flaky sea salt. Or do all three. I won’t judge.
The first time I made these, I got impatient and tried to pop them out of the pan after two minutes. Let’s just say I learned my lesson. That five-minute rest is non-negotiable. Use that time to wash your mixing bowl or get your treat bags ready.
Cooking Tips & Techniques
I have made these mini pumpkin pie cookies about a dozen times now, tweaking little things each batch. Here is what I learned so you don’t have to repeat my mistakes:
Use room temperature ingredients. Cold butter won’t cream properly with the sugar, and cold pumpkin can make the dough seize up. Leave your butter out for about 30 minutes before you start, and let the pumpkin puree sit on the counter while you prep your other ingredients.
Don’t skip the parchment or spray. These cookies are tender, which means they can stick to an unprepared pan. I learned this the hard way when I thought “non-stick pan” meant I didn’t need to grease it. It does not. Grease your pan.
Measure your flour correctly. Spoon the flour into your measuring cup and level it off with a knife. If you scoop directly from the bag, you can end up with up to 25% more flour, which makes these cookies dry and dense. Nobody wants a dry pumpkin cookie.
Let them cool completely before adding toppings. If you dust powdered sugar on warm cookies, it melts into a sticky mess. If you drizzle warm white chocolate on warm cookies, it slides right off. Patience here pays off in presentation.
If you are making these for a big Halloween party and want to batch them out efficiently, I recommend making the dough first, baking all the trays, and then doing the toppings assembly-line style. It goes so much faster than trying to do one tray start to finish at a time.
And if you are looking for another no-fuss Halloween treat that kids love, my mummy hot dogs are a total hit at parties and take almost no effort to put together.
Variations & Adaptations
One of the best things about this recipe is how easy it is to change up. Here are some ways I have adapted it depending on the occasion or what I had in the pantry:
Gluten-Free Version: Swap the all-purpose flour for a 1:1 gluten-free baking flour blend. I have used Bob’s Red Mill and King Arthur Measure for Measure with great results. The texture is slightly more tender, but nobody in my family noticed the difference.
Dairy-Free Version: Use vegan butter sticks (like Miyoko’s or Country Crock Plant Butter) in place of regular butter. Make sure your white chocolate chips are dairy-free as well. The cookies will be a tiny bit less rich, but still delicious.
Add Mix-Ins: Fold in ¼ cup of mini chocolate chips, chopped pecans, or dried cranberries before scooping the dough. The chocolate version is honestly dangerous—pumpkin and chocolate is a combination I don’t reach for enough.
Change the Spice Profile: If you are not a pumpkin pie spice fan, use a mix of cinnamon and cardamom for a more sophisticated flavor. Or add a pinch of cayenne pepper for a spicy-sweet twist that adults will love.
Make Them Vegan: Replace the butter with vegan butter, the egg yolk with a flax egg (1 tablespoon flaxseed meal + 3 tablespoons water, let sit for 5 minutes), and use a non-dairy yogurt in place of the pumpkin if needed. I tested this once for a friend’s vegan Halloween party, and they held up beautifully.
I have also made these as a quick Thanksgiving dessert when I didn’t want to make a whole pie. They feel festive without the commitment of a full pie pan. If you love pumpkin desserts as much as I do, you should also check out my chocolate chip pumpkin bread with cream cheese swirl—it is basically fall in loaf form.
Serving & Storage Suggestions
These cookies are at their best the day you bake them, but they store surprisingly well if you follow a few simple rules.
For Treat Bags: Once the cookies are completely cool and topped, place them in small cellophane bags (about 3-4 per bag) and tie with a ribbon or twist tie. They stay fresh at room temperature for up to 3 days in the bags. If you are making them ahead for a party, assemble the bags the night before and keep them in a cool, dry place.
For Storing in a Container: Layer the cookies between sheets of parchment paper in an airtight container. They will keep at room temperature for up to 4 days. Do not refrigerate them—the fridge dries them out and makes them taste stale.
For Freezing: These freeze beautifully. Place the cooled, untopped cookies in a single layer on a baking sheet and freeze for 1 hour. Transfer to a freezer-safe bag or container and freeze for up to 3 months. When you are ready to serve, thaw them at room temperature for about 30 minutes, then add your toppings. I have done this for holiday baking marathons, and it is a lifesaver.
Reheating: If you want that just-baked warmth, pop a cookie in the microwave for about 10 seconds. It softens the texture and brings out the pumpkin flavor. I actually prefer them at room temperature, but my husband microwaves every single one.
Flavor Development: Honestly, these cookies taste even better on day two. The spices have time to mellow and meld together, and the texture settles into a perfect soft-bite consistency. If you can resist eating them all immediately, you will be rewarded.
Nutritional Information & Benefits
Here is the approximate nutritional breakdown for one mini cookie (based on 24 cookies, without toppings):
- Calories: 85
- Total Fat: 4.5g
- Saturated Fat: 2.5g
- Carbohydrates: 10g
- Sugar: 6g
- Fiber: 0.5g
- Protein: 1g
- Sodium: 45mg
These are not health food, but they are a lighter option compared to a full slice of pumpkin pie or a frosted Halloween sugar cookie. The pumpkin puree adds a small amount of vitamin A and fiber, which is more than most cookies can claim. If you use the white chocolate drizzle, add about 15 calories per cookie.
For anyone watching their sugar intake, you can reduce the brown sugar to 2 tablespoons and add an extra tablespoon of pumpkin puree. The cookies will be slightly less sweet but still flavorful. I have tested this version for a friend who is diabetic, and it worked well.
If you are looking for a completely different kind of treat bag idea, my black cat Halloween sugar cookies are another fun option that kids absolutely adore.
Conclusion
These Easy Mini Pumpkin Pie Cookies have become my go-to Halloween treat bag solution, and I honestly think they will become yours too. They are fast, forgiving, and somehow manage to feel both homemade and effortless at the same time. That is a hard balance to strike in the kitchen, and this recipe nails it.
I love that I can make a batch in under half an hour, stuff them into little bags, and send my kid off to school with something that makes him proud. No stress, no mess, no last-minute panic. Just a simple, delicious cookie that tastes like fall in miniature form.
If you make these, I would love to hear how they turned out. Did you add chocolate chips? Skip the topping? Double the batch? Drop a comment below and let me know. And if you put them in treat bags and your kids’ friends go crazy over them—well, you heard it here first.
Happy Halloween, and happy baking. You have got this.
Frequently Asked Questions
Can I use pumpkin pie filling instead of pumpkin puree?
No, please do not. Pumpkin pie filling is pre-sweetened and spiced, and it will throw off the entire balance of the recipe. Stick with 100% pure pumpkin puree. Libby’s is the most reliable brand, but store brands work fine too.
Can I make these cookies ahead of time for a Halloween party?
Absolutely. You can bake the cookies up to 3 days in advance and store them in an airtight container at room temperature. Add the powdered sugar or white chocolate drizzle the day you plan to serve them for the best presentation.
Why did my cookies come out dry?
This usually happens for one of two reasons: you overmeasured the flour, or you overbaked them. Make sure you spoon and level the flour, and pull the cookies out of the oven as soon as a toothpick comes out clean. Even an extra minute in the oven can dry them out.
Can I freeze the dough instead of the baked cookies?
Yes. Scoop the dough into the mini muffin tin cups, freeze until solid, then pop the frozen dough balls into a freezer bag. When you are ready to bake, place them directly into a greased mini muffin tin and add 2-3 minutes to the baking time. No need to thaw.
How many cookies does this recipe make?
This recipe makes exactly 24 mini cookies if you fill each cup about ¾ full. If your mini muffin tin has 24 cups, you will use the whole batch. If you have a 12-cup tin, just bake in two batches. The dough holds up fine at room temperature while the first batch bakes.
Pin This Recipe!
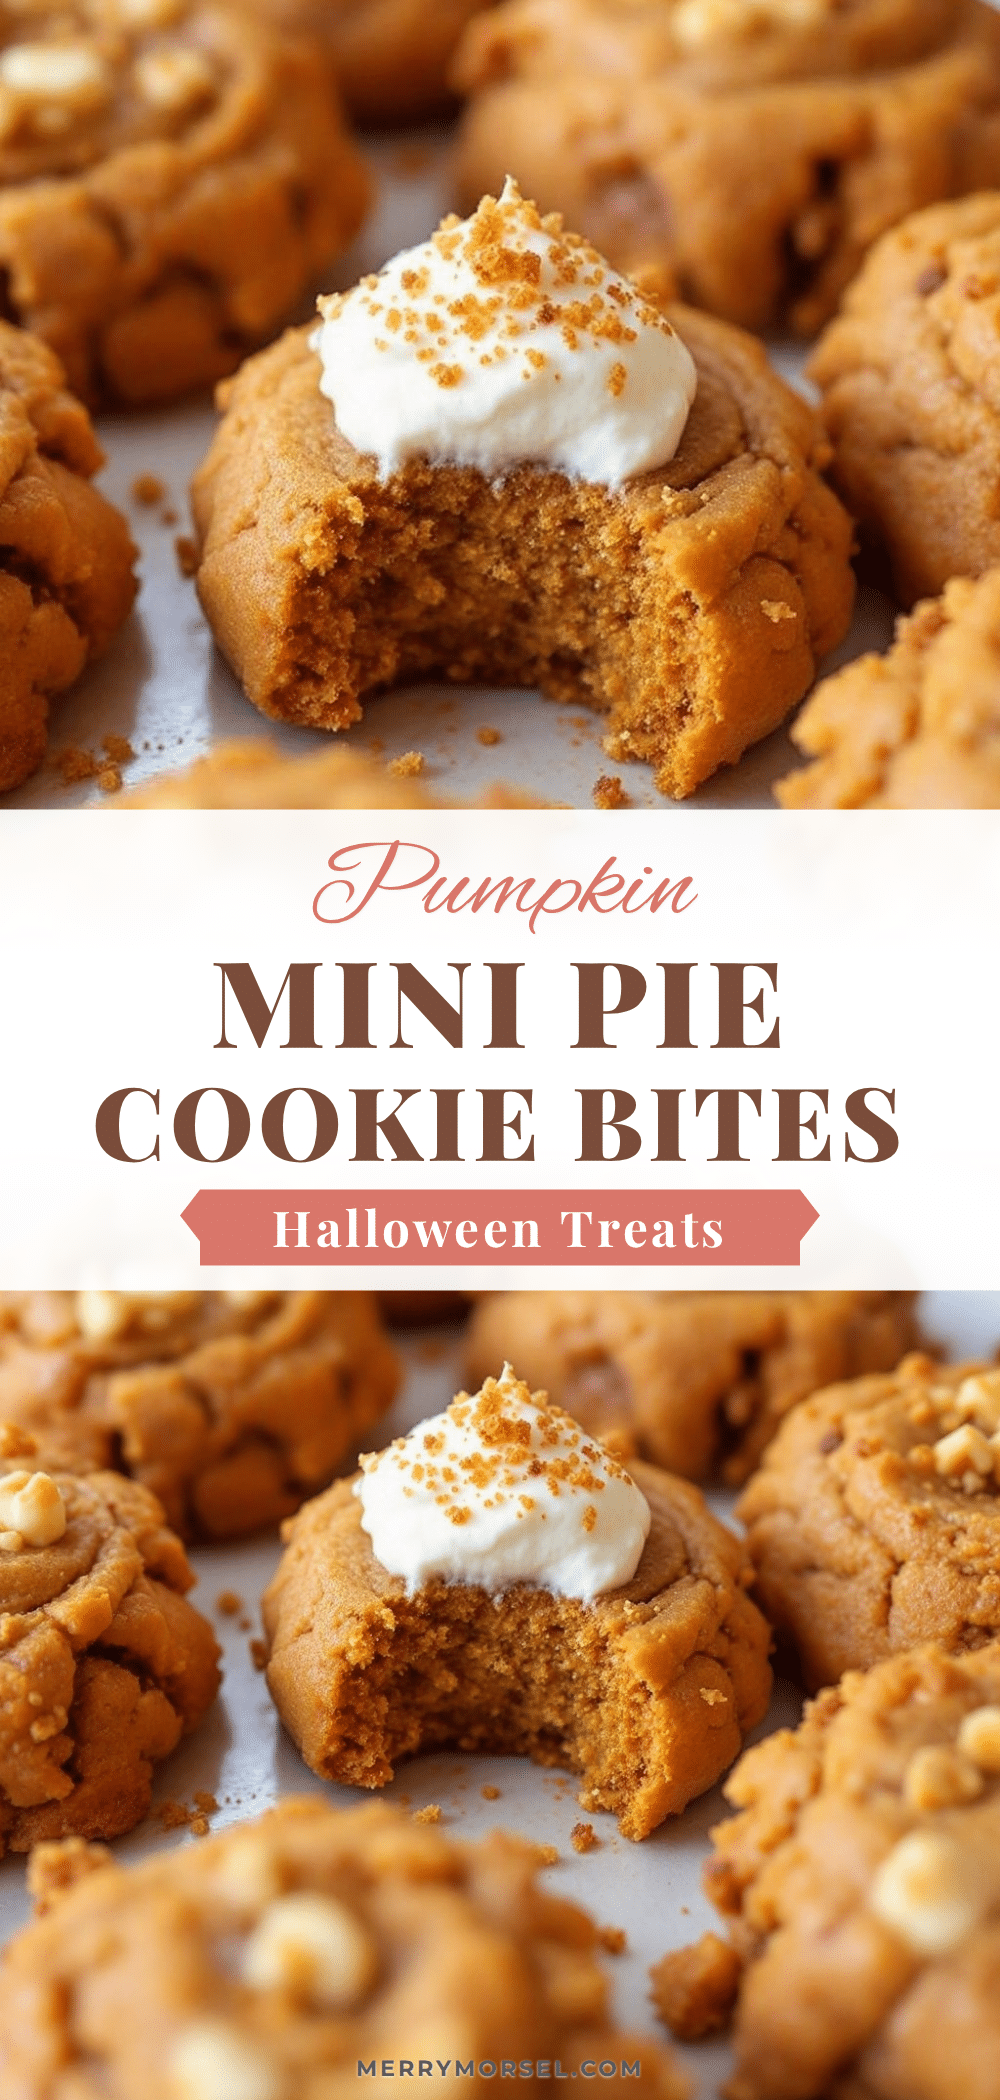
Easy Mini Pumpkin Pie Cookies for Halloween Bags
These Easy Mini Pumpkin Pie Cookies are the perfect Halloween treat bag idea. They are tiny, cute, taste like a sliver of actual pumpkin pie, and take less than 30 minutes to make with no rolling pins or chilling dough.
- Prep Time: 15 minutes
- Cook Time: 12 minutes
- Total Time: 27 minutes
- Yield: 24 cookies 1x
- Category: Dessert
- Cuisine: American
Ingredients
- 1 cup all-purpose flour (spooned and leveled)
- ½ cup unsalted butter, softened
- ¼ cup granulated sugar
- ¼ cup packed light brown sugar
- ½ cup pumpkin puree (100% pure pumpkin, not pumpkin pie filling)
- 1 large egg yolk
- 1 teaspoon vanilla extract
- 1 teaspoon pumpkin pie spice (or ½ tsp cinnamon, ¼ tsp nutmeg, ¼ tsp ginger, pinch of cloves)
- ½ teaspoon ground cinnamon
- ¼ teaspoon salt
- ¼ teaspoon baking powder
- ¼ cup powdered sugar (for dusting, optional)
- ¼ cup white chocolate chips, melted (for drizzling, optional)
- Pinch of flaky sea salt (optional)
Instructions
- Preheat your oven to 350°F (175°C). Spray your mini muffin tin with non-stick spray or line the cups with mini paper liners.
- In a medium mixing bowl, beat the softened butter, granulated sugar, and brown sugar together until light and fluffy, about 2-3 minutes with a hand mixer on medium speed. Scrape down the sides of the bowl halfway through.
- Add the pumpkin puree, egg yolk, and vanilla extract. Beat on low speed until combined. The mixture may look loose or curdled—this is normal.
- In a small bowl, whisk together the flour, pumpkin pie spice, cinnamon, salt, and baking powder.
- Add the dry ingredients to the wet mixture in two additions, mixing on low speed after each addition. Stop as soon as the flour disappears. The dough will be soft and slightly sticky.
- Use a small cookie scoop or teaspoon to drop a rounded scoop of dough into each mini muffin cup, filling each about ¾ full.
- Bake for 10-12 minutes, rotating the pan halfway through. The cookies are done when the edges look set and a toothpick inserted into the center comes out clean or with a few moist crumbs.
- Cool in the pan for 5 minutes, then transfer to a wire rack to cool completely.
- Once completely cool, dust with powdered sugar, drizzle with melted white chocolate, or sprinkle with flaky sea salt, if desired.
Notes
Use room temperature ingredients for best results. Do not skip greasing the pan. Measure flour correctly by spooning and leveling. Let cookies cool completely before adding toppings. For gluten-free, use a 1:1 gluten-free flour blend. For dairy-free, use vegan butter and dairy-free white chocolate chips. Cookies can be frozen for up to 3 months.
Nutrition
- Serving Size: 1 cookie
- Calories: 85
- Sugar: 6
- Sodium: 45
- Fat: 4.5
- Saturated Fat: 2.5
- Carbohydrates: 10
- Fiber: 0.5
- Protein: 1
Keywords: mini pumpkin pie cookies, Halloween treat bag cookies, easy pumpkin cookies, no-roll pumpkin cookies, mini muffin tin cookies


