Love this? Save it for later!
Share the inspiration with your friends
I used to think Halloween party food was a total lost cause. For years, I’d show up to costume parties with a store-bought veggie tray or a bag of chips, convinced that anything “themed” would either taste terrible or take three hours to assemble. Honestly, I was fine with being that person. Then last October, my friend Jen texted me a photo from her kitchen counter. It was a baking sheet full of these little hot dogs wrapped in what looked like tiny white bandages, with little mustard eyes peeking out. She’d made them for her kids’ classroom party, and the caption just said, “I’m obsessed.” I almost scrolled past, but something about how silly and simple they looked made me stop.
I asked for the recipe, and she sent back a two-line text. Crescent dough. Hot dogs. Bake. That was it. I laughed out loud. I mean, was this even cooking? But then I made them for my own Halloween gathering the next weekend, and let me tell you—they vanished in fifteen minutes. My brother-in-law, who swears he doesn’t do “cute food,” ate six of them standing over the kitchen island. I caught him trying to sneak another one when he thought no one was looking. That moment changed my whole outlook on party appetizers.
These Easy Mummy Hot Dogs aren’t just a gimmick. They’re genuinely delicious, ridiculously easy, and they make everyone at the party smile. Maybe you’ve been there—standing in the grocery store aisle, wondering if you should buy the plastic cauldron of cheese dip. Skip it. This is better.
Why You’ll Love This Recipe
I’ve tested this recipe at four separate gatherings now, and it gets the same reaction every time. People hover. Kids grab them by the handful. Adults pretend they’re just “sampling” one, then go back for three more. Here’s why these little mummies work so well:
- Unbelievably Easy: You only need three main ingredients, and the whole thing comes together in about 20 minutes. No complicated shaping, no fancy tools.
- Simple Ingredients: Crescent dough sheets and hot dogs. That’s the base. You probably already have ketchup or mustard for the eyes.
- Perfect for Halloween Parties: They look like adorable little mummies, which makes them an instant hit at any spooky gathering. Kids love them, adults love them, everyone loves them.
- Crowd-Pleaser: I’ve served these alongside fancy dips and elaborate appetizers, and the mummy hot dogs are always the first thing to disappear. Always.
- Next-Level Comfort Food: Buttery, flaky crescent dough wrapped around a juicy hot dog? It’s simple, but it’s perfect. The texture combo is unbeatable.
What makes this version different from every other hot dog recipe out there is the wrapping technique. I’ll show you exactly how to get that mummy look without the dough unraveling or puffing up into a blob. It’s a small trick, but it makes all the difference between “cute” and “I can’t believe those are hot dogs.”
This isn’t just good party food. It’s the kind of recipe that makes you feel like a holiday hero without actually working for it. You’ll walk into that party holding a tray of mummies, and people will actually applaud. I’m not kidding.
What Ingredients You Will Need
This recipe keeps things brutally simple. You don’t need a specialty grocery store or obscure ingredients. Everything here is a pantry staple or something you can grab in five minutes at any supermarket.
- 1 can (8 oz) refrigerated crescent roll dough – Look for the sheet-style crescent dough if you can find it. Pillsbury makes one that’s just a solid rectangle, which saves you from having to press the perforated seams together. If you can only find the perforated kind, just pinch the seams closed firmly with your fingers.
- 8 hot dogs – Use your favorite brand. I personally like all-beef hot dogs for better flavor, but turkey or chicken hot dogs work fine too. For a truly kid-friendly version, use the smaller cocktail-sized hot dogs and cut the dough strips smaller.
- Mustard or ketchup – This is for the mummy eyes. Yellow mustard gives a classic “mummy” look with that bright yellow color, but ketchup works too. You can even use small dots of sriracha if you want spicy mummies.
- Optional: Cooking spray or melted butter – A light brush of melted butter or a spritz of cooking spray on the baking sheet keeps the bottoms from sticking. I’ve made these without it and they still came off fine, but it’s a nice safety net.
That’s literally it. No eggs for washing, no sesame seeds, no weird spices. The crescent dough has enough butter and salt in it to carry the whole thing. If you want to get fancy, you can sprinkle a little everything bagel seasoning or garlic powder on top before baking, but honestly, they’re perfect as is.
One tip I learned the hard way: Don’t use jumbo hot dogs for this. They’re too thick and the dough doesn’t wrap around them evenly. Stick with standard-size hot dogs, and if you’re feeling ambitious, the cocktail-sized ones make fantastic bite-sized mummies for appetizer platters.
Equipment Needed
You don’t need much for this recipe, which is part of the appeal. Here’s what you’ll want to have on hand:
- Baking sheet – A standard half-sheet pan works perfectly. No need for anything fancy.
- Parchment paper or silicone baking mat – This prevents sticking and makes cleanup unbelievably easy. I use a Silpat mat and it’s been a game-changer.
- Sharp knife or pizza cutter – You’ll be cutting the crescent dough into thin strips. A pizza cutter makes this faster, but a sharp knife works just fine.
- Small bowl – For the mustard or ketchup you’ll use for the eyes. A tiny dipping bowl or even a shot glass works.
- Toothpick or small skewer – This helps you dot the mustard eyes onto the baked mummies without making a mess. You can also use the tip of a knife.
If you don’t have a silicone baking mat, don’t sweat it. Parchment paper is cheap and works just as well. I’ve even made these directly on a greased baking sheet and they came out fine—just a bit more scrubbing afterward.
Preparation Method
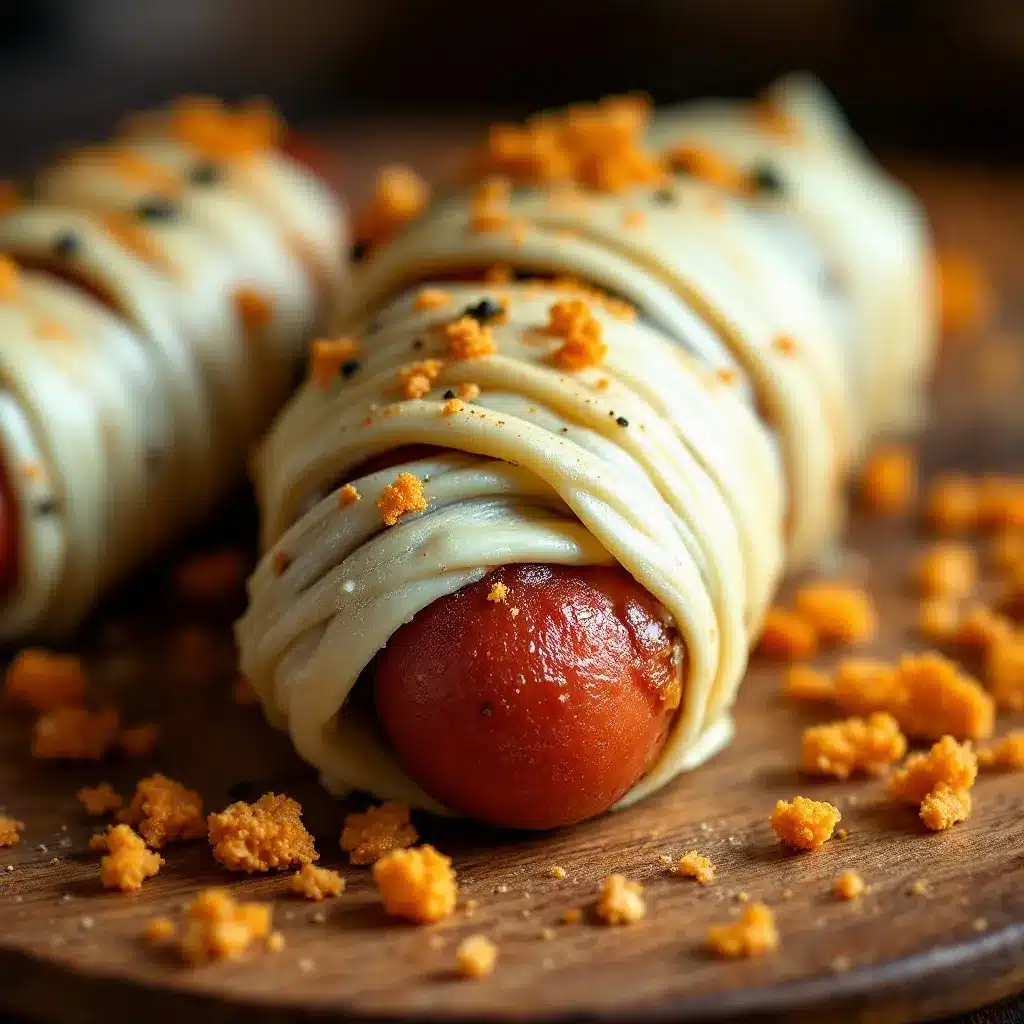
This is the fun part. The whole process takes about 20 minutes from start to finish, and most of that is hands-off baking time.
- Preheat your oven to 375°F (190°C). Line your baking sheet with parchment paper or a silicone mat. This step is worth doing—trust me, you don’t want to scrape burnt crescent dough off a metal pan.
- Unroll the crescent dough. If you’re using the sheet-style dough, lay it flat on a cutting board. If you’re using the perforated kind, press the seams together firmly with your fingers until you have a solid rectangle. Don’t worry if it’s not perfectly smooth; the dough is forgiving.
- Cut the dough into thin strips. Using a sharp knife or pizza cutter, slice the dough lengthwise into strips about 1/4-inch wide. You should get about 8 to 10 strips per sheet. They don’t have to be perfectly even—mummies look better with slightly ragged bandages anyway.
- Wrap the hot dogs. Take one hot dog and start wrapping a dough strip around it at a slight angle, leaving a small gap near the top for the “face.” Overlap the dough slightly as you go, just like wrapping a real bandage. Leave about an inch of hot dog exposed at the top for the eyes. Don’t wrap too tightly—the dough will expand as it bakes, and you want a little room for that.
- Place the wrapped hot dogs on the baking sheet. Space them about 2 inches apart. They won’t spread much, but you want a little airflow around each one for even browning.
- Bake for 12 to 15 minutes. Keep an eye on them. You want the dough to be golden brown and puffy. The hot dogs will be heated through and slightly plump. If you like a darker, crispier dough, let them go an extra minute or two.
- Let them cool for 2 to 3 minutes. This is important—the dough will be molten hot straight out of the oven. Give them a few minutes to set before adding the eyes.
- Add the eyes. Dip a toothpick or the tip of a knife into mustard or ketchup, then dot two small eyes onto the exposed hot dog at the top of each mummy. You can make them look surprised, angry, or just blank—it’s your call.
One thing I learned from a very messy first attempt: Don’t add the eyes before baking. The mustard will bake into a weird crusty blob, and the eyes will look more like warts than eyes. Always add them after baking, when the hot dogs are still warm enough for the mustard to stick but not so hot that it runs off.
Cooking Tips & Techniques
I’ve made these mummy hot dogs at least a dozen times now, and I’ve collected a few tricks that make the process smoother and the results better.
Don’t overwork the dough. Crescent dough is delicate. If you handle it too much, it gets tough and loses that flaky texture. Cut your strips quickly and wrap them loosely. A little imperfection in the wrapping actually makes the mummies look more authentic—real mummies aren’t perfectly bandaged either.
Use room-temperature dough. Cold dough cracks when you try to cut it into thin strips. Let the can sit on the counter for about 10 minutes before opening it. If you’re in a rush (and let’s face it, Halloween prep is always a rush), you can run the sealed can under warm water for 30 seconds.
Watch the baking time. I once left a batch in for 17 minutes because I was answering a text, and they came out dark brown and brittle. The perfect window is 12 to 14 minutes, depending on your oven. Start checking at 12 minutes. The dough should be golden, not brown.
Make ahead strategy. You can wrap the hot dogs up to 4 hours ahead of time and keep them covered in the fridge. Pop them in the oven right before your guests arrive. They’re best served warm, but they’re still delicious at room temperature for about an hour.
The dipping sauce situation. These mummies are fantastic on their own, but they’re even better with a dipping sauce. I like to serve them with a little bowl of ketchup and a bowl of yellow mustard. The kids at my last party made a game of dipping the mummies in “blood” (ketchup) and “mummy slime” (mustard). It was disgusting and hilarious.
One mistake I made early on: I wrapped the dough too tightly, thinking it would look neater. Instead, the dough split open during baking and the hot dog burst out the side. Give those mummies a little breathing room.
Variations & Adaptations
This basic recipe is a great starting point, but I’ve played around with it quite a bit. Here are some variations that have worked well:
Spicy Mummies: Use spicy Italian sausage links instead of hot dogs, and add a thin slice of jalapeño under the dough before wrapping. The heat cuts through the buttery dough beautifully.
Cheesy Mummies: Before wrapping, cut a slit lengthwise down the center of each hot dog and stuff it with a thin strip of cheddar cheese or a string cheese stick. The cheese melts into the hot dog as it bakes, and it’s incredibly good.
Veggie Mummies: Swap the hot dogs for vegetarian or vegan sausages. Field Roast brand works really well. The dough is already vegetarian, so this is a simple swap that keeps everyone happy.
Breakfast Mummies: Use breakfast sausage links instead of hot dogs, and brush the dough with a little maple syrup before baking. Serve them at a Halloween morning brunch. I did this last year and my kids still ask for them on random Saturdays.
Gluten-Free Option: There are gluten-free crescent dough options available now. I’ve used the one from Immaculate Baking, and it works well. The texture is slightly different—a little more crumbly—but the mummies still look great and taste delicious.
My personal favorite variation is the cheesy mummy. I tried it on a whim one night when I had leftover string cheese in the fridge, and now I can’t go back. The melted cheese stretches when you pull the mummy apart, which is both gross and wonderful.
Serving & Storage Suggestions
These mummy hot dogs are best served warm, straight from the oven. The dough is at its flakiest and the hot dog is perfectly juicy. I like to arrange them on a platter with a small bowl of mustard in the center, like a little dipping station. If you’re feeling extra festive, you can scatter some black and orange sprinkles around the platter or add a few plastic spiders for decoration.
For drinks, these pair well with pretty much anything. Kids love them with apple cider or soda. Adults? A cold beer or a crisp hard cider is perfect. The salty, buttery flavor of the dough balances nicely with something bubbly.
If you have leftovers (which honestly, rarely happens), store them in an airtight container in the refrigerator for up to 3 days. The dough will soften slightly, but they’re still tasty.
To reheat, pop them in a 350°F oven for about 5 minutes. The microwave works in a pinch, but the dough gets chewy instead of flaky. I’ve also reheated them in an air fryer at 350°F for 3 minutes, and they came out almost as good as fresh.
One thing I’ve noticed: the flavor actually develops a bit overnight. The mustard eyes kind of soak into the hot dog, and the dough absorbs some of the hot dog’s smokiness. They’re not as visually perfect the next day, but they’re still delicious.
Nutritional Information & Benefits
Let’s be real—these are party appetizers, not health food. But here’s the breakdown for one mummy hot dog (based on standard ingredients):
- Calories: Approximately 180-220 per serving
- Protein: 7-9 grams
- Carbohydrates: 14-16 grams
- Fat: 12-14 grams
- Sodium: 500-600 mg
The crescent dough provides some carbohydrates for quick energy, and the hot dog contributes protein. If you use turkey or chicken hot dogs, you can reduce the fat and calories by about 30%. For a slightly healthier twist, you can also use low-fat crescent dough, though the texture won’t be quite as flaky.
If you’re watching sodium, look for low-sodium hot dogs and check the crescent dough label—some brands have significantly less salt than others.
I’m not going to pretend these are a health food, but for a once-a-year Halloween treat, they’re perfectly fine. Everything in moderation, right? And honestly, the joy they bring to a party is worth every calorie.
Conclusion
These Easy Mummy Hot Dogs have become my go-to Halloween party contribution, and I don’t see that changing anytime soon. They’re simple enough to make on a busy weeknight, cute enough to impress at a costume party, and genuinely delicious enough that people eat them without any irony or pretense.
I love that this recipe lets me feel creative without actually having to do much work. It’s the perfect kind of shortcut cooking—store-bought dough, basic hot dogs, and a little imagination. The mummy wrapping technique makes people think you spent way more time than you actually did, and honestly, that’s a superpower worth having.
I’d love to hear how yours turn out. Did you try the cheesy version? Did you make spicy mummies? Did your kids eat them before they even made it to the party? Drop a comment below and let me know. And if you’ve got a favorite Halloween party recipe, share that too—I’m always looking for new ideas.
Go make some mummies. Your party guests will thank you.
Frequently Asked Questions
Can I make these mummy hot dogs ahead of time?
Yes, you can wrap the hot dogs up to 4 hours ahead and keep them covered in the fridge. Bake them just before serving for the best texture.
What if I can’t find crescent dough sheets?
Regular crescent rolls with perforations work fine. Just pinch the seams together firmly before cutting into strips. It takes an extra 30 seconds.
Can I use cocktail sausages instead of hot dogs?
Absolutely. Cocktail sausages make perfect bite-sized mummies. Cut your dough strips a little shorter and wrap them the same way. Reduce baking time to about 10 minutes.
How do I keep the dough from unraveling during baking?
Place the wrapped hot dogs seam-side down on the baking sheet. The weight of the hot dog holds the end of the dough in place as it bakes.
Can I freeze these after baking?
Yes, you can freeze baked mummy hot dogs for up to 2 months. Reheat them directly from frozen in a 350°F oven for about 8 minutes. The texture won’t be quite as flaky, but they’re still good.
Pin This Recipe!
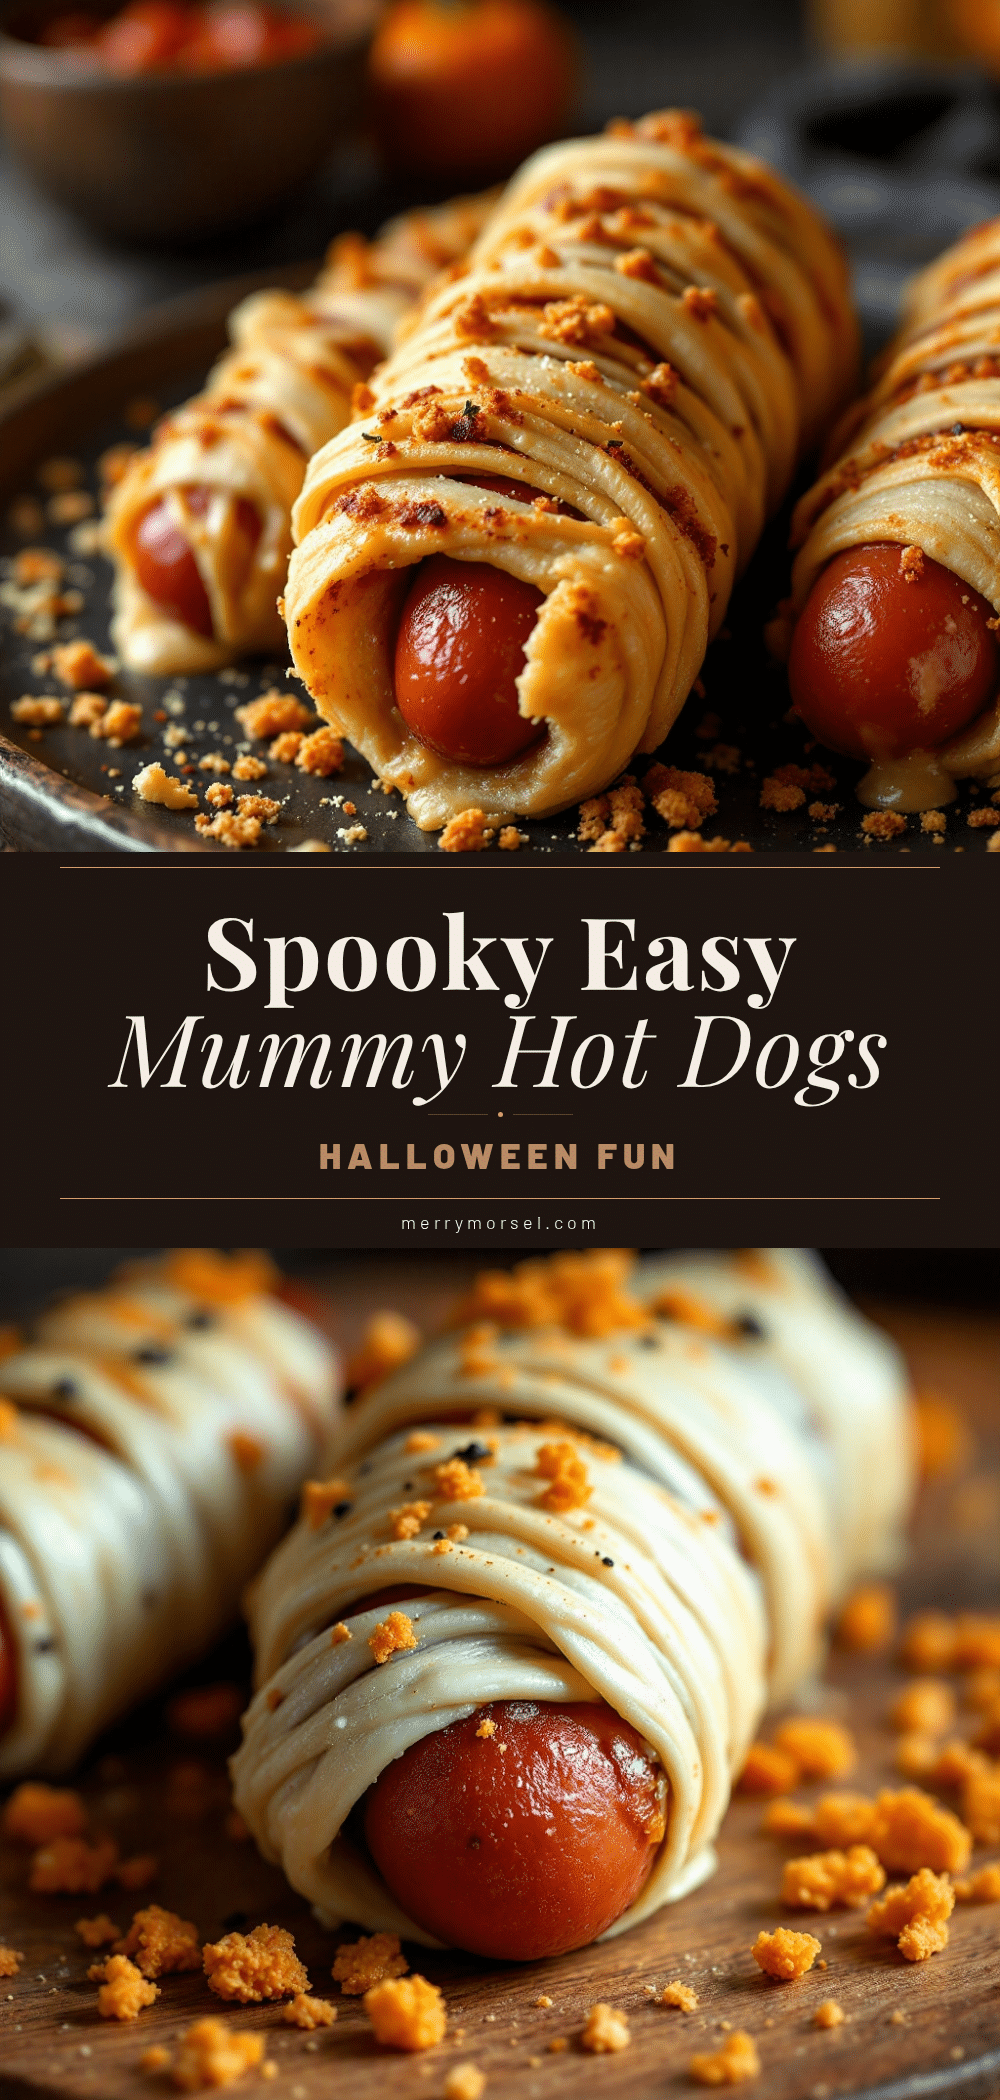
Easy Mummy Hot Dogs: Best Halloween Party Appetizer

These Easy Mummy Hot Dogs are a fun and delicious Halloween party appetizer made with just three ingredients. Crescent dough wrapped around hot dogs creates adorable mummies that everyone will love.
- Prep Time: 10 minutes
- Cook Time: 15 minutes
- Total Time: 25 minutes
- Yield: 8 servings 1x
- Category: Appetizer
- Cuisine: American
Ingredients
- 1 can (8 oz) refrigerated crescent roll dough
- 8 hot dogs
- Mustard or ketchup (for eyes)
- Optional: Cooking spray or melted butter
Instructions
- Preheat your oven to 375°F (190°C). Line your baking sheet with parchment paper or a silicone mat.
- Unroll the crescent dough. If using sheet-style dough, lay it flat on a cutting board. If using perforated dough, press the seams together firmly to form a solid rectangle.
- Cut the dough into thin strips about 1/4-inch wide using a sharp knife or pizza cutter. You should get about 8 to 10 strips.
- Wrap each hot dog with a dough strip at a slight angle, leaving a small gap near the top for the face. Overlap the dough slightly as you go. Leave about an inch of hot dog exposed at the top for the eyes. Do not wrap too tightly.
- Place the wrapped hot dogs on the prepared baking sheet, spacing them about 2 inches apart.
- Bake for 12 to 15 minutes, until the dough is golden brown and puffy.
- Let them cool for 2 to 3 minutes.
- Dip a toothpick or the tip of a knife into mustard or ketchup, then dot two small eyes onto the exposed hot dog at the top of each mummy.
Notes
Don’t add the eyes before baking, as the mustard will bake into a crusty blob. Use room-temperature dough to prevent cracking. For best results, place wrapped hot dogs seam-side down on the baking sheet to prevent unraveling. Can be wrapped up to 4 hours ahead and refrigerated before baking.
Nutrition
- Serving Size: 1 mummy hot dog
- Calories: 200
- Sugar: 3
- Sodium: 550
- Fat: 13
- Saturated Fat: 4.5
- Carbohydrates: 15
- Protein: 8
Keywords: Halloween, mummy hot dogs, party appetizer, crescent dough, hot dogs, easy recipe, kid-friendly


