Love this? Save it for later!
Share the inspiration with your friends
My oldest son looked at his lunchbox with the same expression he reserves for broccoli and paperwork. “Mom,” he said, holding up a sandwich bag, “the bread got squished again.” I get it. Nobody wants a flattened, sad sandwich at noon. I had been seeing those cute sushi-style lunchbox rolls all over social media, and honestly, I thought they looked like a gimmick. Rice, seaweed, and ham? It sounded like a mess waiting to happen. But the squished-sandwich problem was real, and I was desperate.
So I tried it one Sunday night. I laid out my nori, spread the rice, layered the ham and cheese, and rolled it up tight. The first one fell apart. The second one was a little lopsided. But the third one? It looked like something from a store. I packed four of them in his lunchbox with a little soy sauce dip, expecting him to come home and tell me it was weird. Instead, he asked for them again. And again. And now, these Easy Ham and Cheese Lunchbox Sushi Rolls have become a regular thing in our house, and honestly, they solved a problem I didn’t think had a simple answer.
These rolls are not fancy. They do not have raw fish or exotic ingredients. They are just a smart, tasty way to pack a lunch that actually stays together. If you have ever dealt with a soggy sandwich or a kid who refuses to eat the same old thing, this recipe might just change your lunch game.
Why You Will Love This Recipe
I have tested this recipe about a dozen times to get the texture and flavor just right. It is not just another lunch idea—it is the one that actually works. Here is why I keep coming back to it:
- Quick & Easy: These rolls come together in under 20 minutes. Perfect for busy school mornings or a fast lunch prep the night before.
- Simple Ingredients: You probably already have everything you need in your kitchen. No fancy sushi-grade fish or special gadgets required.
- Perfect for Lunchboxes: They hold up beautifully. No squished bread, no soggy fillings—just neat little rolls that stay intact until lunchtime.
- Crowd-Pleaser: My kids love them, but I have also packed them for my own work lunches. They are a hit with adults and kids alike.
- Unbelievably Delicious: The combination of salty ham, creamy cheese, and seasoned rice wrapped in nori is surprisingly satisfying. It is comfort food with a fun twist.
What makes this recipe different from other sushi roll ideas is the simplicity. I am not trying to reinvent the wheel here. I am just giving you a reliable, kid-friendly version that actually tastes good and does not require a culinary degree. And honestly, the first time I took a bite, I was shocked at how well the flavors worked together. It is one of those recipes that makes you wonder why you did not think of it sooner.
If you are looking for other quick and satisfying meals, you might also enjoy these Easy Cheese Quesadilla Dippers with Homemade Salsa for another fun lunch option.
What Ingredients You Will Need
This recipe uses simple, everyday ingredients to create something that feels special. Most of these are pantry staples or easily found at any grocery store.
- Sushi rice (1 cup, uncooked) – Short-grain rice works best because it gets sticky and holds the roll together. I use Nishiki brand for consistent results. Regular long-grain rice will not work the same way.
- Water (1 ¼ cups) – For cooking the rice. Use filtered water for the best flavor.
- Rice vinegar (2 tablespoons) – This gives the rice that classic sushi flavor. You can use seasoned rice vinegar if you want a little extra sweetness.
- Sugar (1 tablespoon) – Balances the acidity of the vinegar. Leave it out if you are using seasoned rice vinegar.
- Salt (½ teaspoon) – Enhances the overall flavor of the rice.
- Nori sheets (4 sheets) – These are dried seaweed sheets. Look for them in the international aisle of your grocery store. They come in packs of 10 usually.
- Ham slices (8 slices) – Use your favorite deli ham. I prefer black forest ham for its slightly smoky flavor, but honey ham works great too.
- Cheese slices (4 slices) – Provolone, Swiss, or mild cheddar all work beautifully. I usually go with provolone because it rolls well and has a mild taste that kids love.
- Cream cheese (2 tablespoons, softened) – This is my secret ingredient. A thin spread of cream cheese adds a creamy tang that ties everything together. (Optional but highly recommended)
- Soy sauce (for dipping) – Low-sodium soy sauce is best so the rolls do not get too salty.
For a fun variation, you can swap the ham for turkey or even leftover roast chicken. If you want a vegetarian version, try using thinly sliced cucumber or avocado instead of meat. Just keep in mind that the texture changes, so you might need to adjust your rolling technique.
Equipment Needed
You do not need a fancy sushi kit for this recipe. Here is what I use:
- Medium saucepan with a tight-fitting lid – For cooking the rice. A heavy-bottomed pot prevents scorching.
- Wooden or silicone rice paddle – Helps mix the vinegar into the rice without mashing it. A regular spatula works too.
- Bamboo sushi mat – This makes rolling much easier and gives you tight, even rolls. You can find them for under five dollars at most grocery stores.
- Sharp knife – A sharp knife is crucial for clean cuts. A dull knife will squish the roll and make a mess.
- Small bowl of water – Keep this nearby to wet your hands and knife. Sticky rice is much easier to handle with wet fingers.
- Cutting board – For assembling and slicing the rolls.
- Plastic wrap – Wrap the bamboo mat in plastic wrap to keep it clean and prevent the rice from sticking.
If you do not have a bamboo mat, you can use a clean kitchen towel or even just your hands. The rolls might not be as tight, but they will still taste great. I have made plenty of imperfect rolls that disappeared just as fast as the perfect ones.
Preparation Method

Let me walk you through this step by step. I have made enough mistakes to know exactly what works and what does not.
- Cook the rice. Rinse 1 cup of sushi rice under cold water until the water runs clear. This removes excess starch and helps the rice get that perfect sticky texture. Add the rinsed rice and 1 ¼ cups of water to a medium saucepan. Bring to a boil over medium-high heat, then reduce the heat to low, cover, and simmer for 15 minutes. Do not lift the lid during cooking. After 15 minutes, turn off the heat and let it sit, covered, for another 10 minutes. Fluff the rice gently with a paddle or spatula.
- Season the rice. In a small bowl, mix 2 tablespoons of rice vinegar, 1 tablespoon of sugar, and ½ teaspoon of salt until dissolved. While the rice is still warm, pour the vinegar mixture over it and fold it in gently using a cutting motion. Be careful not to mash the rice. Let it cool to room temperature. Hot rice will make the nori soggy.
- Prepare your workstation. Lay a bamboo mat on your cutting board and cover it with plastic wrap. Fill a small bowl with water and keep it nearby. Place your nori sheets, ham slices, cheese slices, and cream cheese within easy reach.
- Assemble the roll. Place one nori sheet shiny side down on the bamboo mat. Wet your hands with water (this is important—dry hands will stick to the rice). Grab about ½ cup of seasoned rice and spread it evenly over the nori, leaving about a 1-inch border at the top edge. Press the rice down gently but firmly. You want an even layer, not a thick clump.
- Add the fillings. Spread a thin layer of cream cheese down the center of the rice (optional but so good). Layer 2 slices of ham on top of the cream cheese, slightly overlapping. Place 1 slice of cheese on top of the ham. Do not overfill—less is more here. Too much filling makes the roll hard to close and prone to falling apart.
- Roll it up. Using the bamboo mat, lift the edge of the nori closest to you and start rolling away from you. Keep the roll tight by gently squeezing the mat as you go. When you reach the exposed nori border at the top, wet it with a little water to seal the roll. Give the mat a final gentle squeeze to secure everything.
- Slice the roll. Using a sharp knife, cut the roll in half first, then cut each half into 3 or 4 pieces. Wipe the knife clean with a damp cloth between cuts to prevent sticking. This gives you clean, neat slices.
- Repeat. Continue with the remaining nori sheets and fillings. You should get about 4 rolls total, which makes around 12 to 16 pieces depending on how thick you slice them.
The first time I made these, I used too much rice and ended up with bulging rolls that looked more like stuffed pillows. Learn from my mistake—keep the rice layer thin and even. Also, make sure your knife is sharp. A dull blade will squish the roll and drag the filling out. I ruined two rolls before I figured that out.
Cooking Tips & Techniques
After making these rolls more times than I can count, I have picked up a few tricks that make the process smoother and the results better.
Keep your hands wet. This is the number one tip for working with sushi rice. The rice is incredibly sticky, and dry hands will make a mess. I keep a bowl of water nearby and dip my fingers before touching the rice every single time. It makes spreading the rice so much easier.
Do not overfill the rolls. I know it is tempting to pile on the ham and cheese, but less really is more. Overstuffed rolls are hard to close and tend to burst open when you slice them. Stick to two slices of ham and one slice of cheese per roll. Your rolls will look neater and hold together better.
Use room temperature cream cheese. If you are using the cream cheese spread, make sure it is softened. Cold cream cheese is difficult to spread evenly and can tear the nori. Let it sit on the counter for about 15 minutes before you start assembling.
Slice with confidence. When cutting the rolls, use a smooth, sawing motion rather than pressing straight down. Pressing down squishes the roll. A sharp knife and gentle sawing give you clean cuts. And wipe the knife between slices—trust me on this one.
Timing matters. I like to cook the rice and let it cool while I prep the other ingredients. That way, everything is ready to go when the rice is at the right temperature. Warm rice spreads more easily than cold rice, but it should not be hot when it touches the nori.
If you enjoy quick and satisfying meals, you might also like these Easy No-Bake Protein Balls for another grab-and-go option.
Variations & Adaptations
One of the best things about this recipe is how easy it is to change up. Here are some variations I have tried and loved:
- Turkey and Swiss: Swap the ham for sliced turkey and use Swiss cheese. It has a slightly nutty flavor that pairs beautifully with the rice. This is my second favorite combination.
- Veggie Cream Cheese: Skip the meat entirely and spread a layer of veggie cream cheese on the rice. Add thin strips of cucumber, bell pepper, and avocado for a fresh, crunchy roll. My vegetarian friends love this version.
- Spicy Mayo Drizzle: Mix a tablespoon of mayonnaise with a teaspoon of sriracha and drizzle it over the fillings before rolling. It adds a nice kick without being overwhelming. My husband insists on this version.
- Gluten-Free Option: Use gluten-free tamari instead of soy sauce for dipping, and make sure your ham and cheese are certified gluten-free. Most are, but it is worth checking the labels.
- Breakfast Sushi: This sounds weird, but hear me out. Use scrambled eggs instead of ham, add a slice of cheddar, and roll it up. It is basically a breakfast burrito in sushi form. My kids think it is hilarious and delicious.
I once tried a version with pepperoni and mozzarella, thinking it would be like a pizza roll. It was okay, but the pepperoni made the roll greasy and hard to slice. Stick with leaner meats for best results.
Serving & Storage Suggestions
These rolls are best served at room temperature or slightly chilled. I usually pack them straight from the fridge into a lunchbox in the morning, and by lunchtime, they are perfect.
For serving, I like to arrange the slices on a plate with a small dish of soy sauce for dipping. If I am packing them for lunch, I put the soy sauce in a small leakproof container. You can also serve them with pickled ginger and wasabi if you want the full sushi experience, but my kids prefer them plain.
Storage is simple. Place the rolls in an airtight container and refrigerate for up to 2 days. I do not recommend freezing them because the texture of the rice changes and becomes grainy. If you are meal prepping, make the rice and slice the fillings ahead of time, then assemble the rolls in the morning. They only take a few minutes to roll up.
The flavors actually meld together nicely after a few hours in the fridge. The rice absorbs a bit of the ham and cheese flavor, and the nori softens slightly, which makes the rolls easier to eat. I actually prefer them after they have sat for an hour or two.
For a complete lunch, pair these rolls with some fresh fruit, veggie sticks, or a small side of edamame. It makes for a balanced meal that feels special without being complicated. If you are packing for a picnic, these rolls travel well and do not require reheating.
Nutritional Information & Benefits
Here is an estimated nutritional breakdown for one serving (about 4 pieces, which is roughly one roll):
- Calories: 280
- Protein: 14g
- Carbohydrates: 38g
- Fat: 8g
- Fiber: 1g
- Sodium: 620mg
These numbers will vary depending on the type of ham and cheese you use. Using low-sodium ham and reduced-fat cheese can bring the numbers down a bit.
The sushi rice provides quick energy from carbohydrates, making these rolls a great option for active kids or busy adults. The ham offers a good amount of protein to keep you full, and the cheese adds calcium for bone health. If you use the cream cheese, you get a small amount of probiotics, which are good for digestion.
For those watching their sodium intake, opt for low-sodium soy sauce and check the labels on your ham and cheese. Some deli meats can be surprisingly high in salt. Also, this recipe is naturally nut-free and egg-free, making it a safe option for many school lunchboxes.
I like that these rolls feel like a treat but are actually balanced. They have protein, carbs, and fat in reasonable amounts, and they keep my kids full until after-school snacks roll around.
Conclusion
These Easy Ham and Cheese Lunchbox Sushi Rolls have honestly changed the way I think about packed lunches. They are simple enough to make on a busy Sunday night, fun enough that my kids actually look forward to eating them, and versatile enough that we never get bored. The first time I made them, I was skeptical. Now, I am a full convert.
I encourage you to try this recipe and make it your own. Swap the fillings, adjust the seasoning, or add a little spicy mayo if that is your thing. The beauty of this recipe is how forgiving it is. Even a lopsided roll tastes good. And if your kids are anything like mine, they will probably ask for them again tomorrow.
Have you tried making these rolls? I would love to hear how they turned out. Drop a comment below and let me know what fillings you used or if you came up with a fun variation. And if you are looking for more easy lunch ideas, check out these Best Easy Freezer Breakfast Burritos for Busy Students for another make-ahead option. Happy rolling!
Frequently Asked Questions
Can I use regular white rice instead of sushi rice?
You can, but the texture will be different. Sushi rice is short-grain and becomes sticky when cooked, which helps the roll hold together. Regular long-grain rice does not have the same starch content and will likely fall apart. If you are in a pinch, try using medium-grain rice as a substitute.
How do I keep the nori from getting soggy in the lunchbox?
Nori naturally softens over time, but you can slow this down by making sure the rice is completely cool before assembling the rolls. Also, pack the rolls in an airtight container and add a small silica gel packet (food-safe ones) to absorb excess moisture. Most of the time, the slight softening actually makes the rolls easier to eat.
Can I make these rolls ahead of time?
Yes, you can make them up to 2 days in advance. Store them in an airtight container in the refrigerator. I do not recommend making them more than 2 days ahead because the nori becomes too soft and the rice starts to dry out. For best results, assemble them the night before or the morning of.
Are these rolls safe for school lunchboxes?
Absolutely. Since they do not contain raw fish or any perishable ingredients that require strict temperature control, they are perfectly safe for packed lunches. Just include an ice pack if you are worried about the cream cheese staying cool. Most lunchboxes will keep them at a safe temperature for several hours.
My rolls keep falling apart. What am I doing wrong?
This usually happens for one of three reasons: too much filling, not enough rice, or the nori is not sealed properly. Make sure you leave a 1-inch border of exposed nori at the top of the sheet, and wet it well before sealing. Also, use a bamboo mat to apply even pressure while rolling. And remember—less filling makes for tighter, sturdier rolls.
Pin This Recipe!
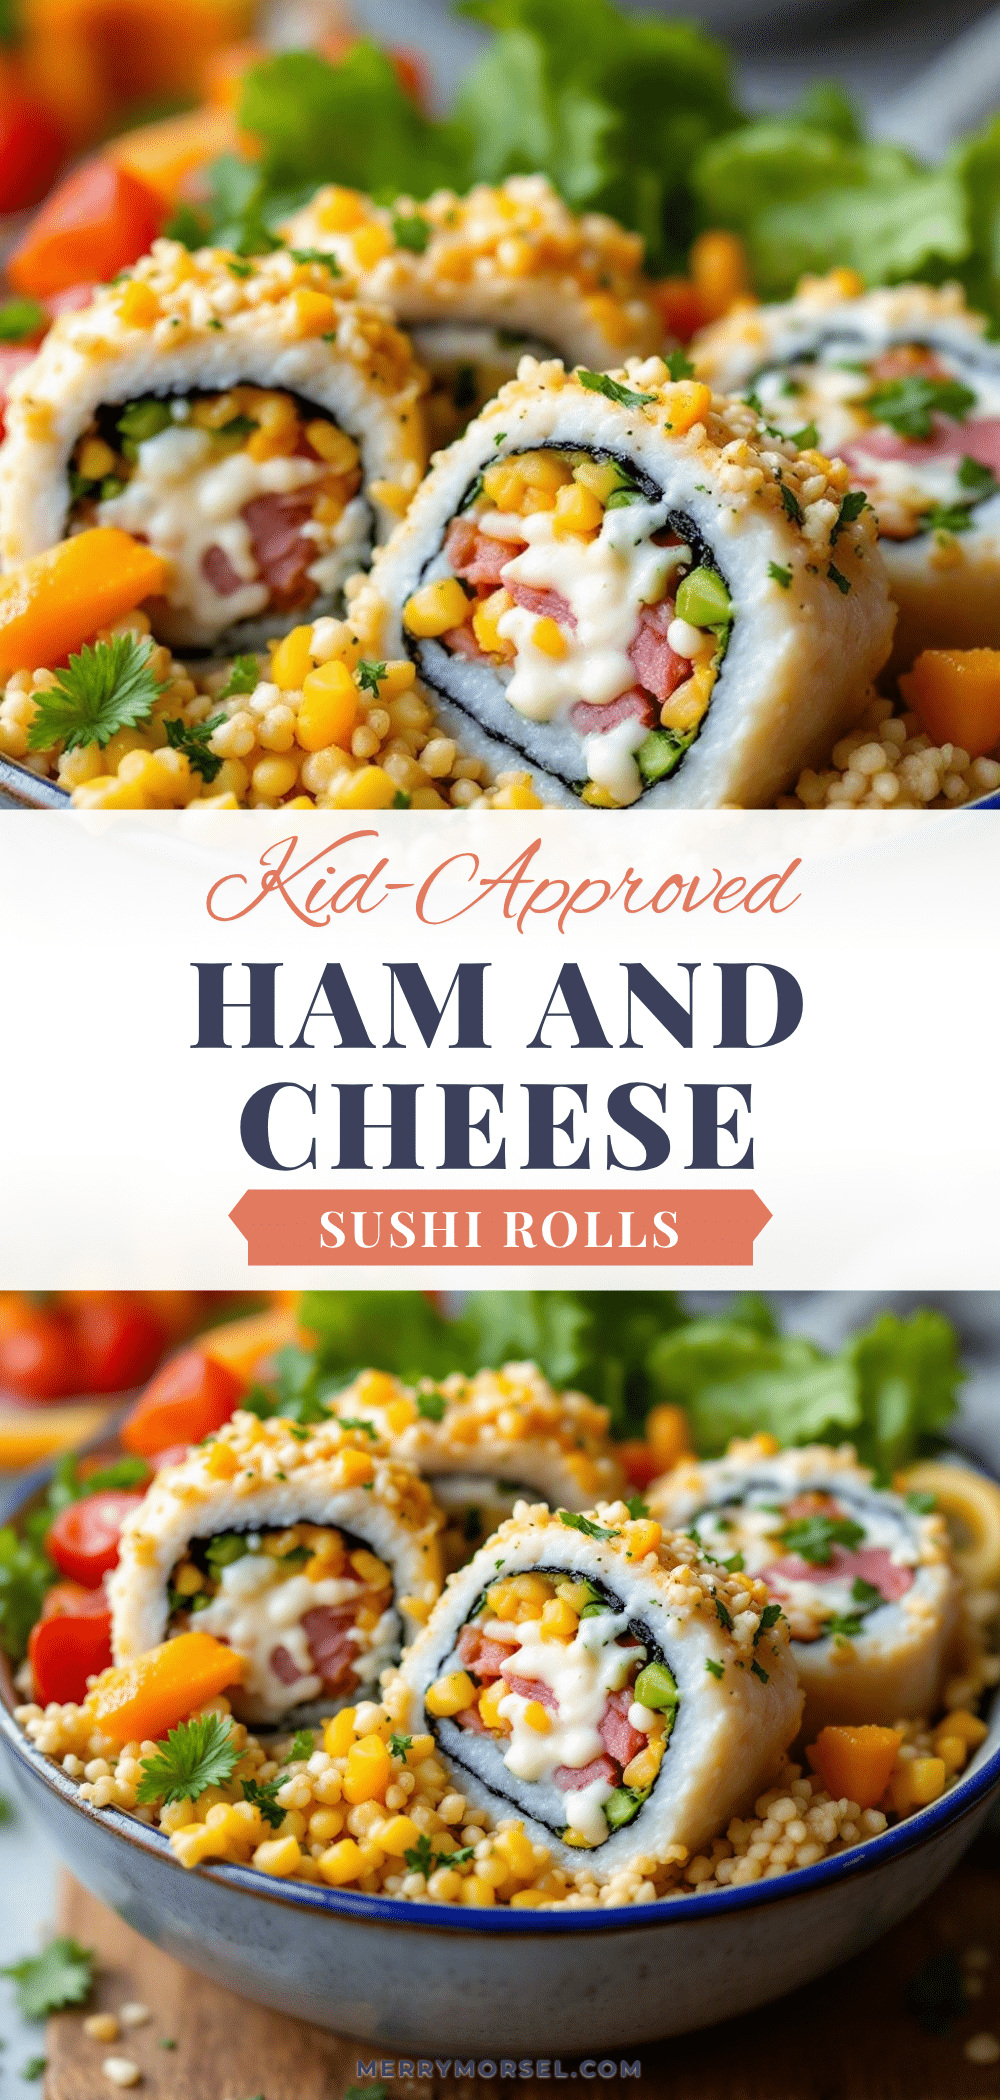
Easy Ham and Cheese Lunchbox Sushi Rolls

These Easy Ham and Cheese Lunchbox Sushi Rolls are a fun, kid-friendly twist on packed lunches. Made with simple ingredients like sushi rice, ham, and cheese, they hold up beautifully and are ready in under 20 minutes.
- Prep Time: 10 minutes
- Cook Time: 15 minutes
- Total Time: 25 minutes
- Yield: 4 servings 1x
- Category: Lunch
- Cuisine: Japanese-inspired
Ingredients
- 1 cup sushi rice (uncooked)
- 1 ¼ cups water
- 2 tablespoons rice vinegar
- 1 tablespoon sugar
- ½ teaspoon salt
- 4 nori sheets
- 8 slices ham (e.g., black forest or honey ham)
- 4 slices cheese (provolone, Swiss, or mild cheddar)
- 2 tablespoons cream cheese (softened, optional)
- Soy sauce (for dipping, low-sodium preferred)
Instructions
- Rinse 1 cup of sushi rice under cold water until the water runs clear. Add the rinsed rice and 1 ¼ cups of water to a medium saucepan. Bring to a boil over medium-high heat, then reduce heat to low, cover, and simmer for 15 minutes. Do not lift the lid. After 15 minutes, turn off the heat and let it sit, covered, for another 10 minutes. Fluff the rice gently.
- In a small bowl, mix 2 tablespoons of rice vinegar, 1 tablespoon of sugar, and ½ teaspoon of salt until dissolved. While the rice is still warm, pour the vinegar mixture over it and fold it in gently using a cutting motion. Let the rice cool to room temperature.
- Lay a bamboo mat on a cutting board and cover it with plastic wrap. Fill a small bowl with water. Place nori sheets, ham slices, cheese slices, and cream cheese within easy reach.
- Place one nori sheet shiny side down on the bamboo mat. Wet your hands with water. Spread about ½ cup of seasoned rice evenly over the nori, leaving a 1-inch border at the top edge. Press the rice down gently but firmly.
- Spread a thin layer of cream cheese down the center of the rice (optional). Layer 2 slices of ham on top of the cream cheese, slightly overlapping. Place 1 slice of cheese on top of the ham.
- Using the bamboo mat, lift the edge of the nori closest to you and roll away from you, keeping the roll tight by gently squeezing the mat. When you reach the exposed nori border, wet it with a little water to seal the roll. Give the mat a final gentle squeeze.
- Using a sharp knife, cut the roll in half first, then cut each half into 3 or 4 pieces. Wipe the knife clean with a damp cloth between cuts.
- Repeat with the remaining nori sheets and fillings to make about 4 rolls (12 to 16 pieces total).
Notes
Keep your hands wet when handling rice to prevent sticking. Do not overfill the rolls; less filling makes tighter, sturdier rolls. Use room temperature cream cheese for easy spreading. Slice with a sharp knife using a sawing motion for clean cuts. The rolls are best served at room temperature or slightly chilled. Store in an airtight container in the refrigerator for up to 2 days. Do not freeze.
Nutrition
- Serving Size: 1 roll (about 4 piec
- Calories: 280
- Sugar: 3
- Sodium: 620
- Fat: 8
- Saturated Fat: 4
- Carbohydrates: 38
- Fiber: 1
- Protein: 14
Keywords: ham and cheese sushi rolls, lunchbox sushi, easy sushi recipe, kid-friendly sushi, ham and cheese rolls


