Love this? Save it for later!
Share the inspiration with your friends
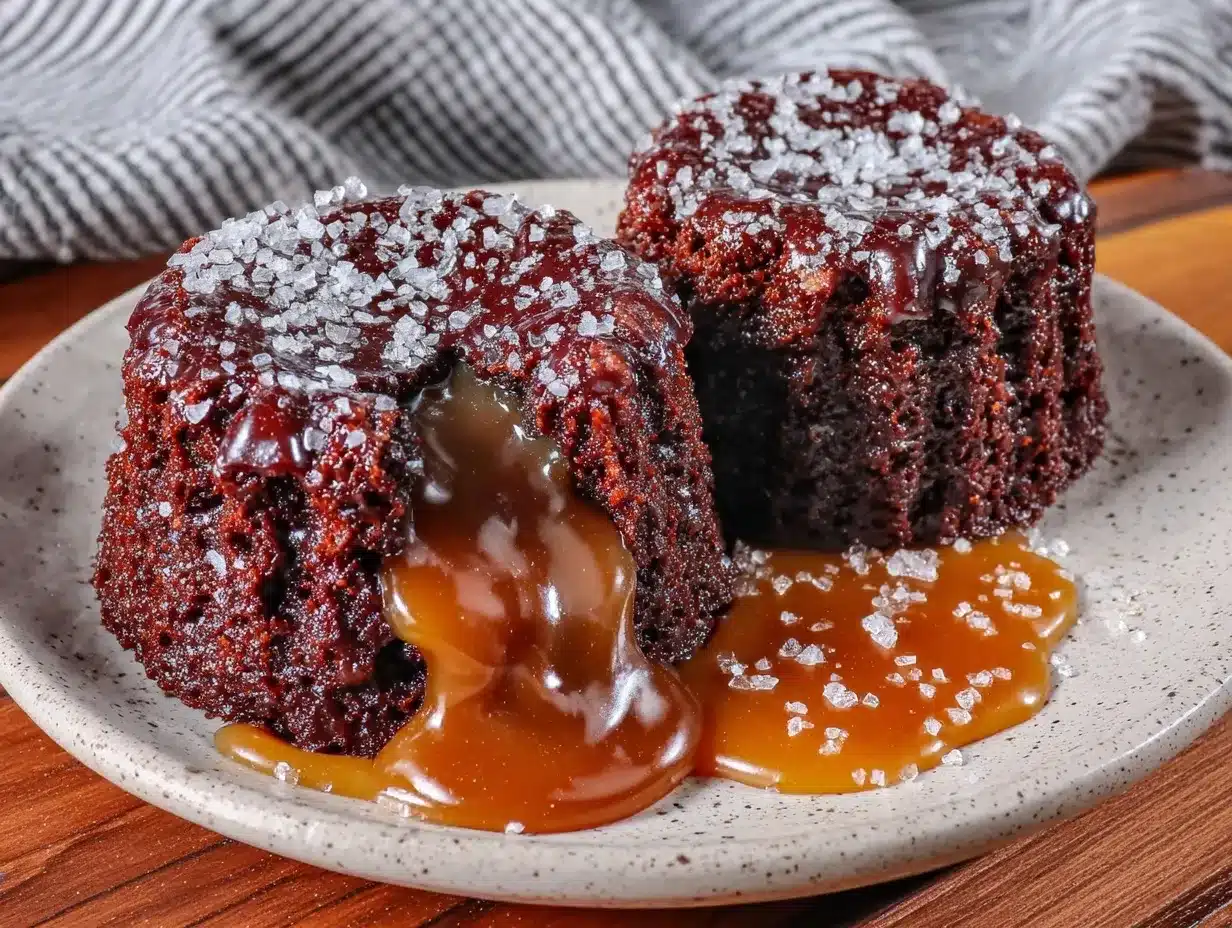
“You know that moment when you walk into a tiny little bakery on a rainy Thursday afternoon, and the smell of warm chocolate and caramel just grabs you by the heart? That’s exactly how I stumbled on this recipe for Decadent Salted Caramel Chocolate Lava Cakes for Two. I wasn’t even planning to bake that day—honestly, I was just escaping the drizzle—but the owner, a cheerful woman named Marla, insisted I try a sample. One bite, and I was hooked.
Marla’s kitchen was small, cluttered with mismatched bowls and a cracked ceramic ramekin that seemed to have seen better days. She told me, “This recipe’s been passed down from my grandmother, but I’ve tweaked it for couples who want something indulgent without the fuss.” I scribbled down the recipe on a napkin, juggled a hot cup of coffee, and nearly spilled it when a cat darted underfoot. Typical day, right?
Ever since that rainy afternoon, I’ve been making these salted caramel chocolate lava cakes whenever I want to impress someone special or simply treat myself. Maybe you’ve been there—craving something rich, warm, and a little bit fancy, but without the big time commitment. That’s exactly what this recipe delivers: a luscious molten center, the perfect balance of salty caramel and bittersweet chocolate, all baked in just under 30 minutes.
Let me tell you, this isn’t just another chocolate cake. It’s a cozy, intimate dessert experience designed for two, making it perfect for date nights, anniversaries, or when you just want to spoil yourself and a friend. And the best part? You don’t have to be a pastry chef to pull it off. So, if you’re ready to bring a little magic into your kitchen, keep reading—I promise this decadent salted caramel chocolate lava cakes recipe will become your new favorite.
Why You’ll Love This Recipe
Making Decadent Salted Caramel Chocolate Lava Cakes for Two feels like a little celebration every time. As someone who’s tested this recipe over a dozen times (and yes, eaten way too many), I can confidently say it hits the perfect note of indulgence and simplicity.
- Quick & Easy: Ready in about 30 minutes, this recipe fits perfectly into busy evenings or spontaneous dessert cravings.
- Simple Ingredients: No need for specialty stores—just pantry staples and a few quality chocolates make this magic happen.
- Perfect for Intimate Occasions: Made just for two, it’s ideal for romantic dinners, cozy nights in, or small celebrations.
- Crowd-Pleaser: Even folks who claim they’re “not really dessert people” often can’t resist a second helping.
- Unbelievably Delicious: The molten salted caramel center paired with rich chocolate cake offers that perfect gooey texture and flavor contrast.
What sets this recipe apart is the balance. I mean, plenty of lava cakes out there are dry or too sweet, but here the salted caramel cuts through the richness in the best way. Plus, the method includes a little trick—folding the batter gently and timing the bake just right—that guarantees a molten center every time. Honestly, it’s the kind of dessert that makes you close your eyes after the first bite and smile, savoring the moment.
What Ingredients You Will Need
This recipe uses straightforward, wholesome ingredients that come together to create a luxurious dessert without any fuss. Most of these are kitchen staples, and you can easily swap a few items if needed.
- Bittersweet Chocolate (4 oz / 115 g): Choose a good quality chocolate with around 70% cocoa for that rich depth. I usually go for Ghirardelli or Valrhona if I can find it.
- Unsalted Butter (½ cup / 115 g): Softened, not melted, to blend smoothly into the batter.
- Granulated Sugar (½ cup / 100 g): Adds sweetness and helps with the cake’s tender crumb.
- All-Purpose Flour (⅓ cup / 40 g): Provides structure without weighing down the lava cake.
- Large Eggs (2): Room temperature eggs help create a light, airy texture.
- Salted Caramel Sauce (⅓ cup / 80 ml): Store-bought or homemade, this is the star of the molten center. If you want to try your hand at making it, a simple mix of sugar, butter, cream, and sea salt works wonders.
- Sea Salt Flakes (a pinch): Sprinkled on top to amplify that salted caramel magic.
- Vanilla Extract (1 tsp): Optional, but it adds a subtle warmth to the batter.
Substitutions: You can swap all-purpose flour for gluten-free flour blend if needed, and dairy-free butter or coconut oil works as a substitute for butter, though it slightly changes the texture. If you prefer a vegan version, try replacing eggs with flax eggs and using a vegan caramel sauce.
Equipment Needed
- Ramekins (2, 6 oz / 180 ml size): Essential for shaping and baking the individual lava cakes. If you don’t have ramekins, small oven-safe custard cups or even a muffin tin lined with foil can work.
- Mixing Bowls: One medium bowl for the batter and another for melting chocolate.
- Double Boiler or Microwave-Safe Bowl: For melting chocolate and butter gently without burning.
- Whisk and Spatula: For combining ingredients smoothly and folding gently.
- Measuring Cups and Spoons: Accuracy matters here to get the texture just right.
- Oven: Preheated to ensure even cooking.
Personally, I find silicone spatulas the best for folding the batter delicately, and a kitchen timer is a lifesaver to avoid overbaking. If you’re on a budget, reusable silicone ramekins are great and easy to clean. Just make sure your ramekins are well-greased or dusted with cocoa powder so the cakes slip out easily.
Preparation Method
- Preheat your oven to 425°F (220°C). Place a baking tray in the oven to warm up while you prepare the batter—this helps give the lava cakes a nice rise and quick baking.
- Grease your ramekins thoroughly with butter, then dust with cocoa powder. This step is crucial for easy unmolding later. I learned the hard way that skipping this leads to a sticky mess.
- Melt the chocolate and butter together. Use a double boiler or microwave in 30-second bursts, stirring between each, until smooth and glossy. Watch closely—burnt chocolate is a tragedy.
- In a separate bowl, whisk the eggs, sugar, and vanilla extract until pale and slightly thickened, about 2-3 minutes. This incorporates air for a lighter cake.
- Gently fold the melted chocolate mixture into the egg mixture. Do this slowly to keep as much air in the batter as possible.
- Sift the flour over the batter and fold it in carefully until just combined. Overmixing here can make the cake dense.
- Pour half of the batter evenly into the two ramekins. Then, spoon about 2 tablespoons (30 ml) of salted caramel sauce into the center of each ramekin.
- Top with the remaining batter, covering the caramel. Smooth the surface with a spatula.
- Transfer the ramekins onto the preheated baking tray. Bake for 12-14 minutes. The edges should be set, but the center will still jiggle slightly when you gently shake the ramekin.
- Remove from oven and let the cakes rest for 1-2 minutes. This helps the lava center settle just enough without cooling completely.
- Run a knife around the edges to loosen the cakes, then carefully invert them onto dessert plates.
- Sprinkle a pinch of sea salt flakes on top while warm to enhance the salted caramel flavor.
Pro tip: If your lava cakes don’t ooze molten caramel when cut, you might have baked them a little too long. Next time, reduce baking time by a minute or two. Also, avoid reheating these in the microwave as it can make the texture rubbery; instead, enjoy them fresh or gently warm them in a low oven.
Cooking Tips & Techniques
Getting that perfect molten center can be a little tricky, but once you’ve got it down, it’s pure magic. Here’s what I’ve learned:
- Temperature control is key. Make sure your oven is fully preheated. I keep an oven thermometer handy because ovens can be wildly inaccurate.
- Don’t overmix the batter. Folding gently keeps the air bubbles intact, which makes the cake lighter and the lava center luscious.
- Use high-quality chocolate. The flavor depends heavily on the chocolate you pick. I once tried a cheap chocolate bar and ended up with a bland lava cake—lesson learned!
- Timing is everything. Start checking at 12 minutes—ovens vary, so watch for that delicate jiggle in the center.
- Prep your ramekins carefully. Butter and cocoa powder prevent sticking, and trust me, scraping molten cake off a ramekin is no fun.
- Multitasking helps. While the cakes bake, you can quickly whip up a fresh berry compote or prepare coffee to serve alongside.
Honestly, this recipe taught me patience and precision. One time, I got distracted mid-bake (hello, phone buzzing), and the cakes ended up more cakey than lava-like. But that day’s “mistake” turned into a tasty chocolate souffle-like treat, so it wasn’t a total loss!
Variations & Adaptations
If you want to switch things up or accommodate different diets, here are some ideas I’ve tried and loved:
- Peanut Butter Lava: Swap the salted caramel for a dollop of creamy peanut butter in the center. The salty-sweet combo is addictive.
- Berry Surprise: Add a teaspoon of raspberry jam or fresh berries inside along with or instead of caramel for a fruity twist.
- Gluten-Free Version: Use a 1:1 gluten-free flour blend. The texture changes slightly but still turns out wonderfully gooey.
- Dairy-Free Adaptation: Replace butter with vegan margarine or coconut oil, and use a dairy-free caramel sauce. I recommend coconut cream-based caramel for the richest flavor.
- Spiced Chocolate: Add a pinch of cinnamon or cayenne pepper to the batter for a warming kick.
One personal favorite is mixing in a teaspoon of espresso powder into the batter. It deepens the chocolate flavor without making it taste like coffee. Give it a try if you want something a little unexpected yet satisfying.
Serving & Storage Suggestions
Serve these lava cakes warm and fresh for the ultimate experience. They’re perfect on their own or paired with a scoop of vanilla ice cream or a dollop of whipped cream. For a little extra flair, dust with powdered sugar or garnish with fresh mint leaves.
If you’re planning to store leftovers (if there are any!), keep the cakes covered in the refrigerator for up to 2 days. Reheat gently in a low oven (about 300°F / 150°C) for 5-7 minutes to bring back that molten texture.
Freezing individual cakes before baking is also an option. Freeze the batter in ramekins, wrap tightly with plastic wrap and foil, and bake straight from frozen—just add an extra 3-4 minutes to the baking time.
Fun fact: the flavors develop even more the next day, so if you make these ahead, the salted caramel and chocolate meld beautifully overnight.
Nutritional Information & Benefits
Each serving of these Decadent Salted Caramel Chocolate Lava Cakes for Two is roughly 450-500 calories, depending on the exact ingredients and portion size. While these cakes are certainly an indulgence, they also contain some beneficial nutrients.
- Dark Chocolate: Rich in antioxidants and minerals like iron and magnesium.
- Eggs: Provide protein and essential vitamins.
- Salted Caramel: Adds flavor with moderate amounts of sugar and fat, so best enjoyed in moderation.
If you’re watching carbs or sugar, consider using a sugar substitute or a low-sugar caramel sauce. This recipe can be adapted to fit gluten-free, dairy-free, and vegan diets with the substitutions mentioned earlier.
Conclusion
Honestly, Decadent Salted Caramel Chocolate Lava Cakes for Two are one of those recipes that turn an ordinary evening into something special without spending hours in the kitchen. The gooey caramel center combined with rich chocolate cake is comfort food at its very best—simple, satisfying, and just a little bit fancy.
Feel free to tweak the flavors, try different fillings, or add your own creative touch. I love how this recipe welcomes experimentation but still guarantees a delicious result. If you give it a try, I’d love to hear how your version turned out or what variations you came up with. Drop a comment or share your experience—it’s always exciting to see how others make it their own!
Remember, the best desserts are the ones baked with a little love (and maybe a dash of salt). Happy baking!
FAQs
Can I make these lava cakes ahead of time?
Yes! You can prepare the batter and fill the ramekins, then refrigerate for up to 24 hours before baking. Just add a minute or two to the baking time if baking straight from the fridge.
What if I don’t have ramekins?
You can use small oven-safe custard cups or even muffin tins lined with foil. Just adjust the baking time slightly and watch for that soft center.
How do I know when the lava cakes are done?
The edges should look set and firm, while the center jiggles slightly when you gently shake the ramekin. Overbaking will result in a fully set cake without the molten center.
Can I use milk chocolate instead of bittersweet?
You can, but the cake will be sweeter and less intense. If using milk chocolate, consider reducing the sugar slightly in the recipe.
Is it possible to make this recipe vegan?
Absolutely. Use flax eggs or a commercial egg replacer, dairy-free butter or coconut oil, and a vegan caramel sauce. Texture and flavor may vary but still delicious!
Pin This Recipe!
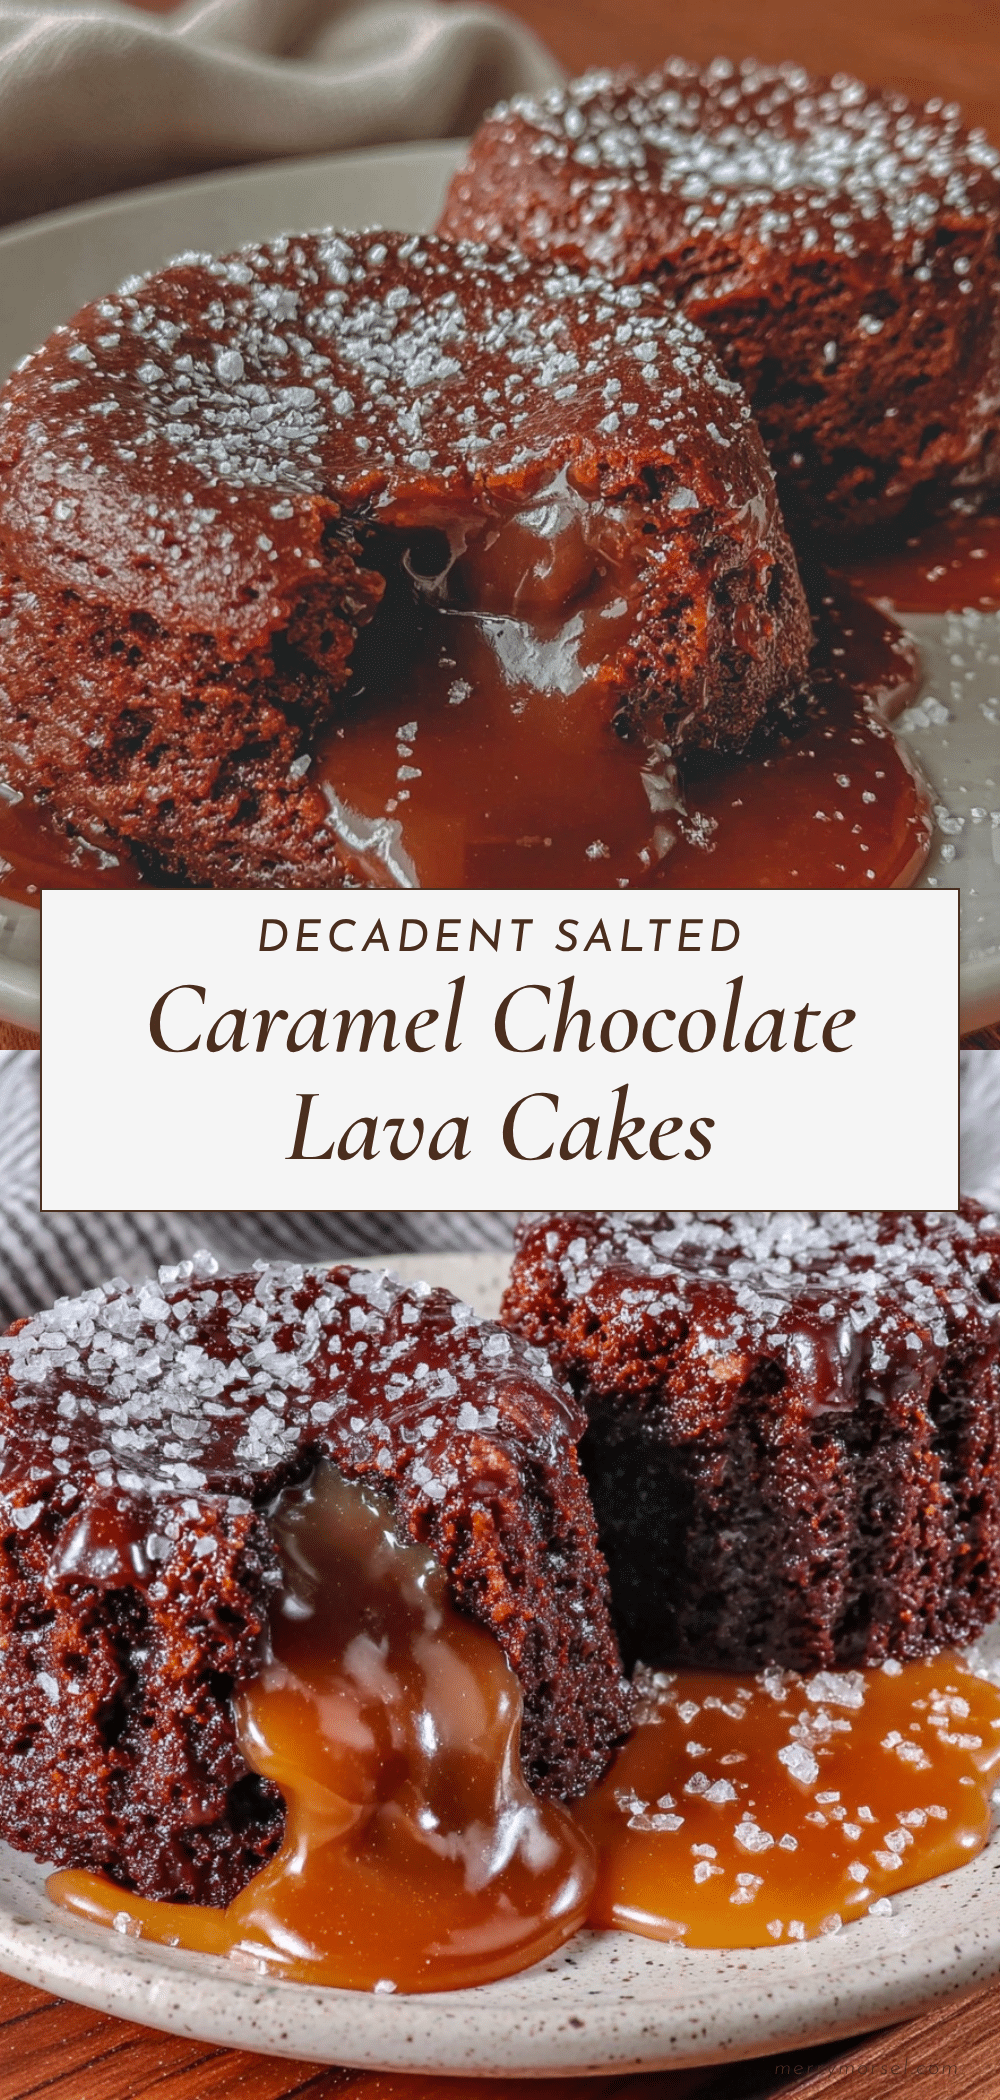
Decadent Salted Caramel Chocolate Lava Cakes for Two
A rich and indulgent dessert featuring a molten salted caramel center and bittersweet chocolate cake, perfect for intimate occasions and ready in under 30 minutes.
- Prep Time: 10 minutes
- Cook Time: 14 minutes
- Total Time: 24 minutes
- Yield: 2 servings 1x
- Category: Dessert
- Cuisine: American
Ingredients
- 4 oz (115 g) bittersweet chocolate (around 70% cocoa)
- ½ cup (115 g) unsalted butter, softened
- ½ cup (100 g) granulated sugar
- ⅓ cup (40 g) all-purpose flour
- 2 large eggs, room temperature
- ⅓ cup (80 ml) salted caramel sauce (store-bought or homemade)
- Pinch of sea salt flakes
- 1 tsp vanilla extract (optional)
Instructions
- Preheat your oven to 425°F (220°C). Place a baking tray in the oven to warm up.
- Grease two 6 oz (180 ml) ramekins thoroughly with butter, then dust with cocoa powder.
- Melt the chocolate and butter together using a double boiler or microwave in 30-second bursts, stirring until smooth.
- In a separate bowl, whisk the eggs, sugar, and vanilla extract until pale and slightly thickened, about 2-3 minutes.
- Gently fold the melted chocolate mixture into the egg mixture slowly to keep air in the batter.
- Sift the flour over the batter and fold in carefully until just combined.
- Pour half of the batter evenly into the two ramekins.
- Spoon about 2 tablespoons (30 ml) of salted caramel sauce into the center of each ramekin.
- Top with the remaining batter, smoothing the surface with a spatula.
- Place the ramekins on the preheated baking tray and bake for 12-14 minutes until edges are set but center jiggles slightly.
- Remove from oven and let rest for 1-2 minutes.
- Run a knife around the edges to loosen the cakes, then invert onto dessert plates.
- Sprinkle a pinch of sea salt flakes on top while warm.
Notes
Ensure ramekins are well-greased and dusted with cocoa powder for easy unmolding. Avoid overbaking to maintain molten center. Use high-quality chocolate for best flavor. For vegan or gluten-free versions, substitute ingredients as suggested. Do not reheat in microwave to avoid rubbery texture; warm gently in oven instead.
Nutrition
- Serving Size: 1 lava cake per serv
- Calories: 475
- Sugar: 30
- Sodium: 150
- Fat: 30
- Saturated Fat: 18
- Carbohydrates: 45
- Fiber: 4
- Protein: 7
Keywords: salted caramel, chocolate lava cake, molten cake, dessert for two, easy dessert, romantic dessert, quick dessert