Love this? Save it for later!
Share the inspiration with your friends
I’ve made a lot of ugly ghosts in my time. And I mean genuinely ugly—lopsided, cracked, sinking into themselves like they’d given up on haunting entirely. The first batch I attempted for my niece’s Halloween party looked less like friendly spirits and more like sad, deflated marshmallows that had seen things. I almost threw the whole tray in the trash. But then I stuck those chocolate chip eyes on anyway, plated them up, and the kids ate every single one before I could even explain what they were supposed to be. That’s the thing about these ghost meringue cookies with chocolate chip eyes—they don’t need to be perfect. They just need to exist. And honestly, that’s kind of the point.
These little ghosts have become my unexpected Halloween tradition. Not because they’re fancy or because I nail them every time, but because they’re the one recipe where imperfection actually works in your favor. A cracked meringue ghost looks like it’s been through something spooky. A slightly tilted chocolate chip eye gives them personality. I’ve stopped trying to control the outcome and started letting the meringue do what meringue does. It’s been liberating, honestly. And every October, when I pull out my piping bag and that bowl of egg whites, I remember that the best recipes aren’t about perfection—they’re about the joy of making something that makes people smile.
Why You’ll Love This Recipe
Let me tell you why these ghost meringue cookies with chocolate chip eyes have earned a permanent spot in my Halloween rotation. First off, they’re ridiculously easy. Like, embarrassingly easy. You don’t need a pastry degree or any fancy equipment. If you can whip egg whites and pipe a blob, you can make these.
- Naturally Gluten-Free & Dairy-Free: Meringue is basically just egg whites and sugar, so these are safe for almost everyone at the party. No one has to miss out on the fun.
- Surprisingly Low in Calories: For a cookie, these are practically guilt-free. Each ghost has about 15 calories. You can eat four without blinking.
- Perfect for Kids: My niece and nephew love helping with this one. They get to place the chocolate chip eyes, and honestly, their ghosts always look more creative than mine.
- Make-Ahead Friendly: These store beautifully in an airtight container for up to two weeks. You can bake them days before your Halloween party and they’ll still be perfect.
- Instant Crowd-Pleaser: I’ve brought these to Halloween potlucks, school parties, and family gatherings. They disappear faster than anything else on the table. People can’t resist the cute factor.
What makes this recipe different from other meringue cookies I’ve tried? It’s the texture. These come out crispy on the outside with a slightly chewy, marshmallow-like center. The chocolate chip eyes add just enough richness to balance the sweetness. I spent three Halloweens tweaking the oven temperature and baking time to get that perfect contrast. And you know what? I finally cracked it. These ghosts hold their shape, they don’t crack (well, not too much), and they taste like little clouds of vanilla happiness. If you’ve ever tried making meringue cookies and ended up with a sticky mess, trust me—this recipe is the one that will change your mind.
What Ingredients You Will Need
This recipe uses simple, pantry-friendly ingredients to create something that looks like it took hours of effort. The magic is in the technique, not the shopping list. Here’s what you’ll need:
- 3 large egg whites, room temperature (cold eggs won’t whip up as well, so let them sit out for 30 minutes)
- ¾ cup granulated sugar (170 grams, use superfine if you have it—it dissolves faster)
- ¼ teaspoon cream of tartar (this stabilizes the meringue and prevents it from collapsing)
- 1 teaspoon vanilla extract (pure vanilla, not imitation—trust me on this one)
- Pinch of salt (just a tiny one, to balance the sweetness)
- ⅓ cup mini chocolate chips (for the eyes—I prefer Ghirardelli or Enjoy Life for allergy-friendly options)
Ingredient Tips & Substitutions:
- If you don’t have cream of tartar, you can substitute ½ teaspoon of lemon juice or white vinegar. It does the same job of stabilizing the egg whites.
- For the sugar, regular granulated works fine, but superfine sugar dissolves more easily into the egg whites. You can make your own by pulsing regular sugar in a food processor for 30 seconds.
- I recommend using room temperature eggs. Cold eggs are harder to whip and won’t reach the same volume. To speed things up, place your eggs in a bowl of warm water for 5 minutes.
- For the chocolate chips, mini chips work best because they’re small enough to stay put on the meringue. Regular chips will slide off or make your ghosts look like they have bulging eyes (which could be fun, actually).
- If you’re avoiding dairy, check your chocolate chips. Some brands add milk solids. Enjoy Life makes excellent dairy-free mini chips.
Equipment Needed
You don’t need a fully stocked bakery to make these ghost meringue cookies with chocolate chip eyes. Here’s what I use:
- Electric mixer (stand mixer or hand mixer—both work, but a stand mixer makes it easier since you can walk away while it whips)
- Large mixing bowl (glass or metal—plastic can retain grease and prevent egg whites from whipping properly)
- Piping bag (disposable or reusable—I prefer disposable for easy cleanup)
- Large round piping tip (or just snip the end off the piping bag—I’ve done both and honestly, snipping the bag works fine)
- Baking sheet (lined with parchment paper—do NOT skip the parchment, trust me)
- Rubber spatula (for folding in the chocolate chips gently)
- Kitchen scale (optional but helpful—meringue is finicky and precise measurements matter)
If you don’t have a piping bag, you can use a zip-top bag with the corner snipped off. It’s not as elegant, but it works. I’ve done it in a pinch and the ghosts still turned out cute. For the piping tip, a Wilton 1A or any large round tip works great. Just make sure the opening is big enough that the chocolate chips can pass through without getting stuck.
Preparation Method
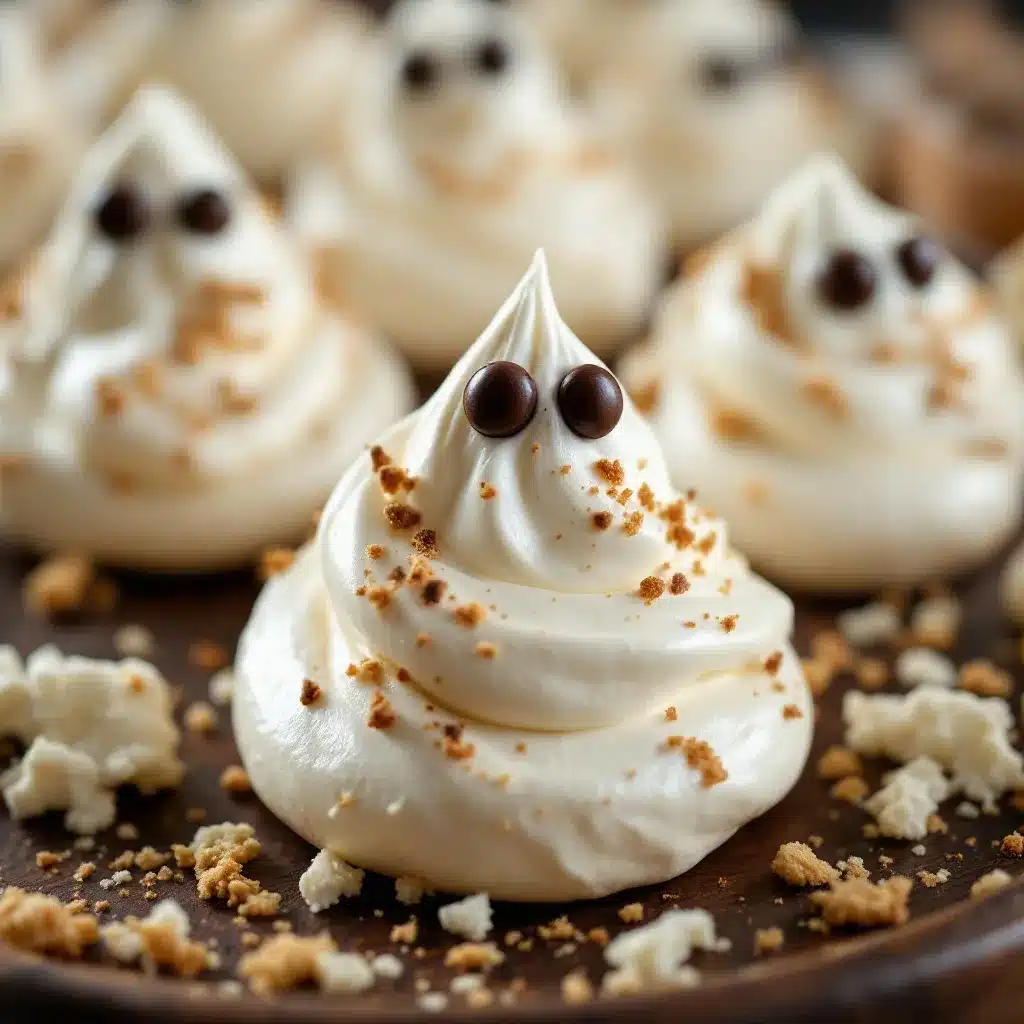
Now for the fun part—making these little ghosts come to life. Follow these steps carefully and you’ll have a tray of adorable ghost meringue cookies with chocolate chip eyes in about two hours (most of that is baking time).
- Preheat your oven to 200°F (95°C). Yes, that’s low. Meringues bake low and slow. Line a baking sheet with parchment paper and set aside.
- Clean your bowl and beaters thoroughly. Any trace of grease will ruin your meringue. I wipe everything down with a little lemon juice on a paper towel to be safe. This sounds extra, but I’ve ruined too many batches of egg whites to take chances.
- Separate your eggs while cold. Cold eggs separate more easily. But then let the whites come to room temperature before whipping—about 30 minutes on the counter. I’ve tested this both ways and room temperature whites whip up fluffier every time.
- Add the egg whites and cream of tartar to your bowl. Beat on medium speed until frothy, about 1-2 minutes. You should see small bubbles forming and the mixture starting to look opaque.
- Gradually add the sugar. With the mixer running on medium-high, add the sugar one tablespoon at a time. This is important—adding it all at once will deflate your meringue. I usually take about 3-4 minutes to add all the sugar.
- Continue beating until stiff peaks form. This takes about 5-7 minutes total with a stand mixer, longer with a hand mixer. You’ll know it’s ready when the meringue is glossy, thick, and holds a stiff peak when you lift the beater. Rub a little between your fingers—if it feels gritty, keep beating. It should feel smooth.
- Add the vanilla and salt. Beat for another 30 seconds until incorporated. The meringue will deflate slightly, but that’s normal.
- Fold in the mini chocolate chips. Use a rubber spatula and fold gently. You want the chips distributed evenly without deflating the meringue too much. About 10-15 folds should do it.
- Transfer to your piping bag. If you’re using a piping tip, insert it into the bag first. If you’re snipping the end, cut about ½ inch off the tip. I prefer the snipped-bag method for ghosts because it gives you more control over the shape.
- Pipe the ghosts onto the prepared baking sheet. Hold the piping bag straight up and pipe a round blob about 1½ inches wide. Then pull up slightly to create a small peak on top—that’s the ghost’s head. Leave about 1 inch between each ghost. They don’t spread much, but you want air to circulate.
- Add extra chocolate chip eyes if needed. Some chips will have sunk into the meringue. I like to press a few extra chips into each ghost’s face before baking. Gently push them in so they stick. Two eyes per ghost, slightly angled for maximum personality.
- Bake for 90 minutes. Yes, 90 minutes. I know it seems long, but remember—low and slow. The meringues should be dry to the touch and easily peel off the parchment paper when done. They shouldn’t be brown at all. If they start to color, your oven is too hot.
- Turn off the oven and leave the ghosts inside to cool completely. This is the secret to perfectly dry meringues. Leave them in the turned-off oven for at least 1 hour, or overnight if you have time. The residual heat continues drying them out without browning.
- Remove from the oven and let cool completely on the baking sheet. They should lift off the parchment easily. If they stick, they need more time in the oven.
Sensory Cues: At step 6, your meringue should look like shaving cream—thick, glossy, and completely white. When you lift the beater, the peak should stand straight up without drooping. At step 12, the ghosts should feel dry and firm to the touch. If they feel soft or sticky, give them another 15 minutes in the oven.
Cooking Tips & Techniques
I’ve learned these lessons the hard way, so you don’t have to. Here are my best tips for perfect ghost meringue cookies with chocolate chip eyes every time:
Don’t overbeat your meringue. I did this once and ended up with grainy, separated egg whites that looked like scrambled eggs. Stiff peaks are the goal, but stop the moment you get there. Overbeaten meringue loses its structure and weeps moisture during baking.
Humidity is your enemy. Meringue absorbs moisture from the air, which makes it sticky and prevents it from drying properly. Don’t make these on a rainy day. I learned this the hard way when I tried making them during a summer thunderstorm and ended up with a tray of sticky blobs.
Use a clean, dry bowl. I cannot stress this enough. Any trace of egg yolk, grease, or water will prevent your egg whites from whipping. I wipe my bowl with a paper towel dipped in lemon juice before starting. It’s a habit I picked up from a pastry chef friend and it works like magic.
Pipe in one smooth motion. Don’t stop and start—your ghosts will have weird lumps. Practice on a piece of parchment first if you’re nervous. I still do a few test ghosts every time.
Rotate the baking sheet halfway through. Ovens have hot spots. I rotate my sheet at the 45-minute mark to ensure even drying. If your ghosts are browning on one side, your oven runs hot and you might need to lower the temperature to 190°F.
Let them cool completely in the oven. This is non-negotiable. Taking them out while warm will cause them to crack and deflate. I usually make these at night and leave them in the turned-off oven overnight. They’re always perfect in the morning.
Store in an airtight container. Meringue absorbs moisture from the air and gets sticky. I store mine in a glass jar with a tight lid and they stay crispy for up to two weeks. If they do get soft, you can re-crisp them in a 200°F oven for 15 minutes.
Variations & Adaptations
One of the best things about these ghost meringue cookies with chocolate chip eyes is how easy they are to customize. Here are some variations I’ve tried and loved:
Pumpkin Spice Ghosts: Add 1 teaspoon of pumpkin pie spice to the sugar before whipping. The spices blend beautifully into the meringue and give these a fall flavor that’s perfect for Thanksgiving. I made these for a Friendsgiving party and they were gone in minutes.
Peppermint Ghosts: Swap the vanilla extract for ½ teaspoon of peppermint extract and fold in crushed candy canes instead of chocolate chips. These are great for Christmas—just call them snow ghosts. My kids love making these in December.
Vegan Meringue Ghosts: Use aquafaba (the liquid from a can of chickpeas) instead of egg whites. One can of chickpeas yields about ½ cup of aquafaba, which replaces 3 egg whites. Whip it with cream of tartar and sugar exactly the same way. It works surprisingly well, though the texture is slightly less crisp.
Colored Ghosts: Add a drop of food coloring (gel works best) at the stiff peak stage. Orange ghosts for Halloween, pink for Valentine’s Day, green for St. Patrick’s Day. I’ve made rainbow ghosts for birthday parties and they were a huge hit.
Dip in Chocolate: Once baked and cooled, dip the bottoms of the ghosts in melted dark chocolate. Let them set on parchment paper. The chocolate adds richness and makes them look even more professional. I did this for a bake sale and they sold out first.
Spooky Variations: For an extra creepy look, use black gel food coloring to draw tiny mouths on the ghosts after baking. Or skip the chocolate chips entirely and use mini candy eyeballs (the kind you find at baking supply stores). They look hilarious.
Serving & Storage Suggestions
These ghost meringue cookies with chocolate chip eyes are best served at room temperature. They’re light, airy, and practically melt in your mouth. Here’s how I like to serve them:
Presentation Ideas: Arrange them on a black or orange platter for Halloween parties. I like to scatter a few candy pumpkins around the plate for color. For a spooky effect, place them on a cake stand with a few fake spiderwebs draped underneath. Kids go crazy for this.
Pairing Suggestions: These ghosts pair beautifully with hot cocoa, coffee, or a glass of cold milk. They’re also great alongside a pumpkin spice latte or a warm apple cider. For adults, try them with a glass of dessert wine or a dark stout beer—the sweetness of the meringue balances the bitterness beautifully.
Storage Instructions: Store in an airtight container at room temperature for up to 2 weeks. Do NOT refrigerate—the moisture will make them sticky. If you live in a humid climate, add a silica gel packet to the container to absorb excess moisture. I learned this trick from a baker friend and it works wonders.
Freezing Instructions: These freeze beautifully! Place them in a single layer in a freezer-safe container with parchment paper between layers. Freeze for up to 3 months. Thaw at room temperature for 30 minutes before serving. They’ll taste like they just came out of the oven.
Re-crisping Tip: If your ghosts lose their crunch (which happens in humid weather), pop them in a 200°F oven for 10-15 minutes. Let them cool completely before serving. This trick has saved many batches of meringue for me.
How Flavors Develop: These ghosts actually taste better the next day. The vanilla flavor deepens and the texture becomes perfectly crisp throughout. I always make mine a day ahead of any party. They’re also great for Halloween goodie bags—just wrap them individually in cellophane bags tied with orange ribbon.
Nutritional Information & Benefits
Per ghost (based on 24 cookies):
- Calories: 42
- Total Fat: 1g
- Saturated Fat: 0.5g
- Cholesterol: 0mg
- Sodium: 18mg
- Total Carbohydrates: 9g
- Sugars: 8g
- Protein: 1g
Health Benefits: These ghost meringue cookies with chocolate chip eyes are surprisingly light compared to traditional cookies. Egg whites are pure protein and contain no fat or cholesterol. They’re also a good source of selenium and B vitamins. The sugar content is moderate for a dessert, especially since you’re only eating one or two at a time (okay, maybe three).
Dietary Considerations: This recipe is naturally gluten-free, dairy-free, and nut-free. It’s also low in fat and cholesterol-free. If you use dairy-free chocolate chips, it’s completely vegan-friendly. The only potential allergen is eggs, so be mindful if you’re serving to someone with an egg allergy. For a nut-free version, just make sure your chocolate chips are processed in a nut-free facility.
Personal Wellness Perspective: I love that these ghosts let me enjoy a sweet treat without the heavy feeling that comes with butter cookies or brownies. They’re light enough that I don’t feel guilty having a couple after dinner. And since they’re naturally gluten-free, I can serve them to friends with dietary restrictions without having to make a separate batch. That’s a win in my book.
Conclusion
These ghost meringue cookies with chocolate chip eyes have become more than just a Halloween recipe in my house—they’re a tradition. Every year, my niece and nephew come over and we spend an afternoon making ghosts together. Their ghosts are always lopsided and goofy and absolutely perfect. And honestly, that’s what I love most about this recipe. It doesn’t demand perfection. It invites creativity.
If you’ve never made meringue before, don’t be intimidated. Yes, it’s a little finicky, but this recipe is forgiving. Your first batch might not look like the photos, but they’ll still taste amazing. And the second batch? That’s when the magic happens. You’ll find your rhythm, you’ll figure out the piping, and you’ll fall in love with the process.
I’d love to see your ghost creations! Tag me when you make these, leave a comment below with your favorite variation, or share a photo of your spooky (or not-so-spooky) ghosts. And if you’re looking for more Halloween fun, check out my spooky witch finger cookie sticks or these easy mummy hot dogs for the perfect party spread. Happy haunting, friends!
Frequently Asked Questions
Why did my meringue cookies turn out sticky?
Sticky meringue usually means they weren’t baked long enough or the humidity was too high. Make sure you bake them for the full 90 minutes and let them cool completely in the turned-off oven. If you live in a humid climate, try baking them on a dry day and store them with a silica gel packet.
Can I use liquid egg whites from a carton?
I don’t recommend it. Carton egg whites are pasteurized and often contain stabilizers that prevent them from whipping properly. Fresh egg whites from whole eggs give you the best volume and texture. If you must use carton whites, look for ones labeled “whipping” or “for meringue.”
How do I know when my meringue is whipped enough?
You’re looking for stiff, glossy peaks that hold their shape when you lift the beater. The meringue should feel smooth when you rub a little between your fingers—not gritty. If it still feels grainy, keep beating. This usually takes 5-7 minutes with a stand mixer.
Can I make these without a piping bag?
Absolutely! You can use a zip-top bag with the corner snipped off, or simply drop spoonfuls of meringue onto the baking sheet and shape them with the back of the spoon. They won’t look as uniform, but they’ll still taste delicious. I’ve done the spoon method when I couldn’t find my piping bag and the ghosts had a charmingly rustic look.
How do I prevent my ghosts from cracking?
Cracking happens when the temperature changes too quickly. Make sure your oven temperature is accurate (use an oven thermometer if you have one) and let the ghosts cool completely in the turned-off oven. Rapid cooling causes the meringue to contract and crack. Also, avoid opening the oven door during baking unless absolutely necessary.
Pin This Recipe!
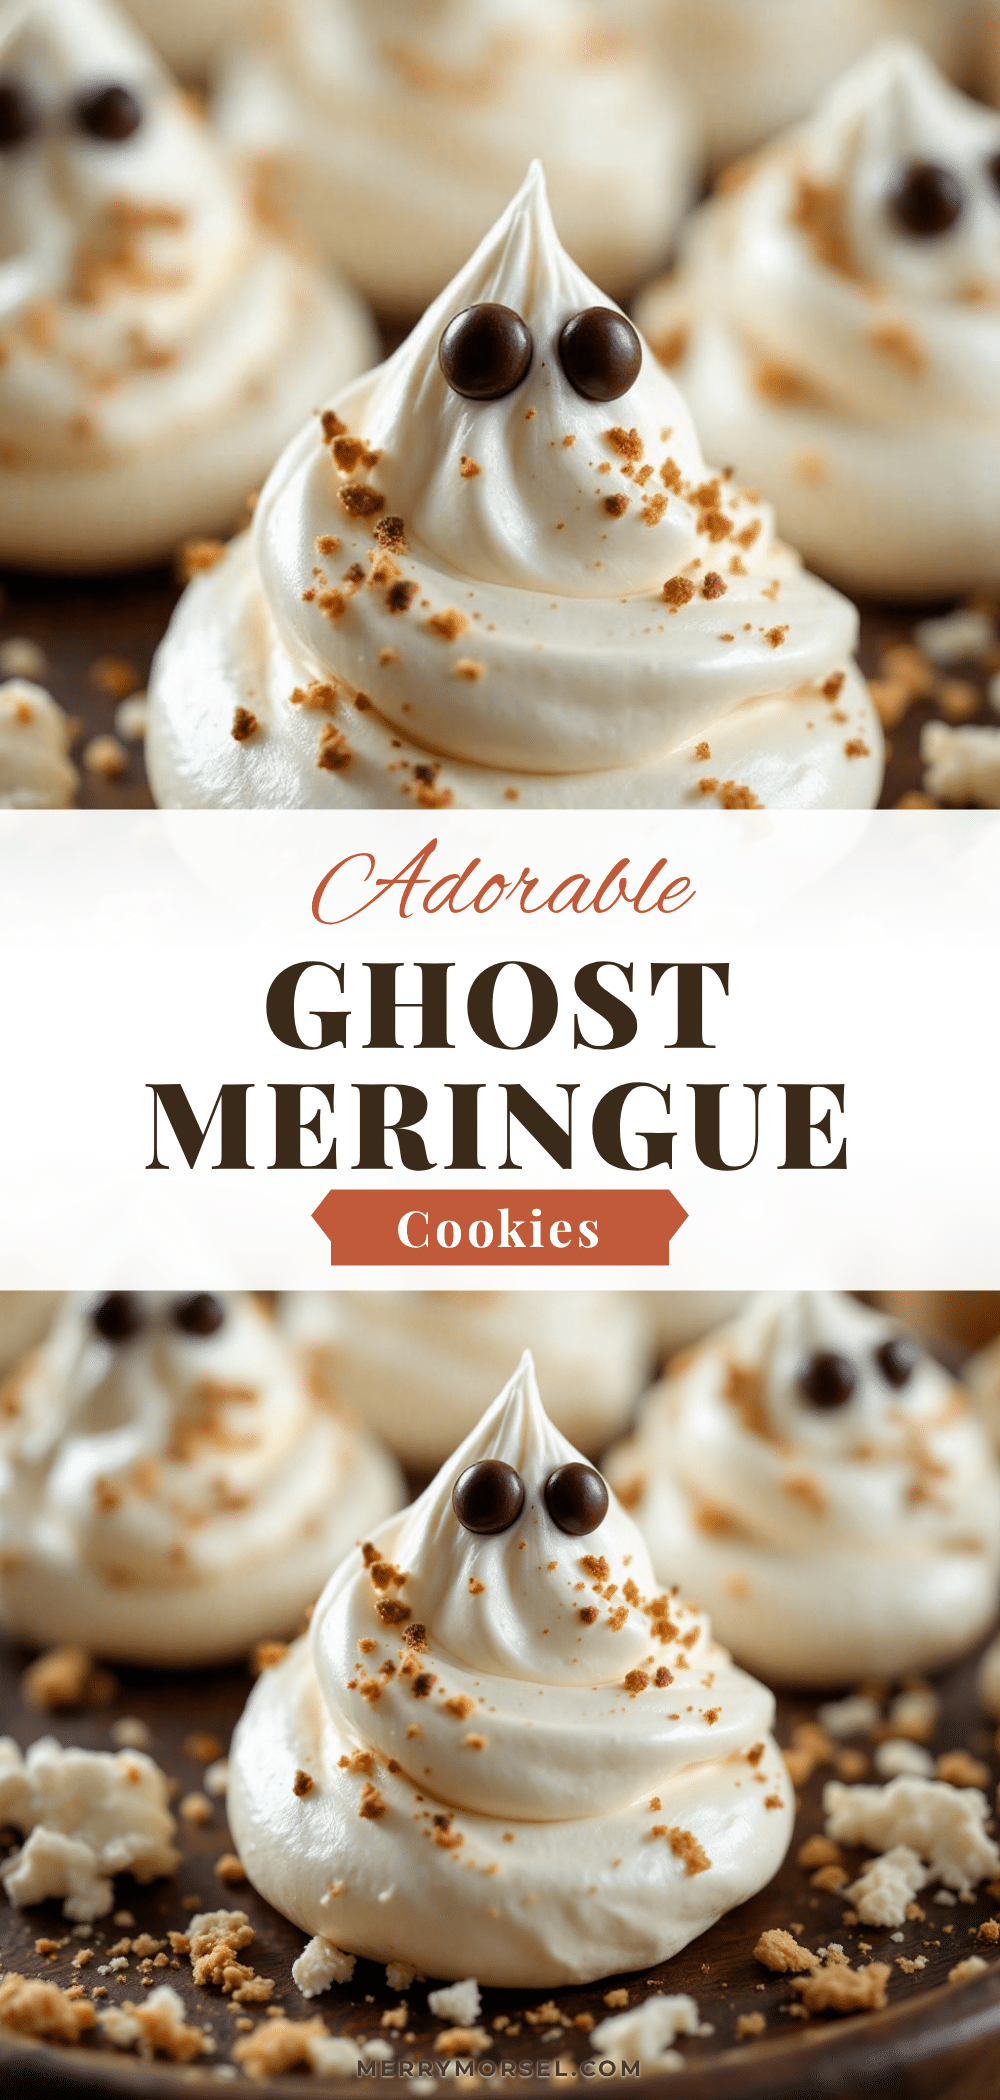
Ghost Meringue Cookies Recipe with Chocolate Chip Eyes
These adorable ghost meringue cookies with chocolate chip eyes are light, airy, and naturally gluten-free and dairy-free. Perfect for Halloween parties, they’re easy to make and forgiving of imperfections, with a crispy exterior and marshmallow-like center.
- Prep Time: 20 minutes
- Cook Time: 90 minutes
- Total Time: 2 hours 50 minutes (including cooling)
- Yield: 24 cookies 1x
- Category: Dessert
- Cuisine: American
Ingredients
- 3 large egg whites, room temperature
- ¾ cup granulated sugar (170 grams)
- ¼ teaspoon cream of tartar
- 1 teaspoon vanilla extract (pure)
- Pinch of salt
- ⅓ cup mini chocolate chips
Instructions
- Preheat your oven to 200°F (95°C). Line a baking sheet with parchment paper and set aside.
- Clean your bowl and beaters thoroughly to remove any grease. Wipe with a paper towel dipped in lemon juice if needed.
- Separate your eggs while cold, then let the whites come to room temperature for about 30 minutes.
- Add the egg whites and cream of tartar to your bowl. Beat on medium speed until frothy, about 1-2 minutes.
- Gradually add the sugar one tablespoon at a time with the mixer running on medium-high, taking about 3-4 minutes.
- Continue beating until stiff, glossy peaks form, about 5-7 minutes total. The meringue should feel smooth when rubbed between fingers.
- Add the vanilla and salt, beat for another 30 seconds until incorporated.
- Gently fold in the mini chocolate chips with a rubber spatula, about 10-15 folds.
- Transfer the meringue to a piping bag fitted with a large round tip or with the end snipped off.
- Pipe ghosts onto the prepared baking sheet: pipe a round blob about 1½ inches wide, then pull up slightly to create a small peak. Leave 1 inch between ghosts.
- Press extra chocolate chips into each ghost’s face for eyes if needed, slightly angled for personality.
- Bake for 90 minutes. The meringues should be dry to the touch and easily peel off the parchment.
- Turn off the oven and leave the ghosts inside to cool completely, at least 1 hour or overnight.
- Remove from the oven and let cool completely on the baking sheet. They should lift off easily.
Notes
Don’t make these on a humid day as meringue absorbs moisture. Use room temperature egg whites for best volume. If meringue feels gritty, keep beating until smooth. Let ghosts cool completely in the turned-off oven to prevent cracking. Store in an airtight container at room temperature for up to 2 weeks. Re-crisp in a 200°F oven for 10-15 minutes if they lose crunch.
Nutrition
- Serving Size: 1 cookie
- Calories: 42
- Sugar: 8
- Sodium: 18
- Fat: 1
- Saturated Fat: 0.5
- Carbohydrates: 9
- Protein: 1
Keywords: ghost meringue cookies, Halloween cookies, meringue cookies, chocolate chip eyes, gluten-free cookies, dairy-free cookies, easy Halloween dessert


