Love this? Save it for later!
Share the inspiration with your friends
I was standing in line at the craft store last October, holding a bag of fake spiderwebs and a tube of red gel food coloring, when the woman behind me peered into my cart and laughed. “You’re either making something really fun or really disturbing,” she said. I glanced down at my haul—almond slivers, green food coloring, and a bag of flour were already in there—and I realized how suspicious it must have looked. I told her about the witch finger cookies I’d been dreaming up, and she didn’t just smile; she pulled out her phone and showed me a photo of her grandmother’s handwritten recipe card for something similar. “She used to make these every Halloween,” she said, “but she’d always forget to take the almond off before baking, so they’d look like they had warts.”
I tucked that detail away, and honestly, it changed everything. That tiny imperfection—the accidental warts—made the cookies feel more real, more creepy, more alive. I went home and started experimenting, and what came out of my oven that night was a batch of spooky witch finger cookie sticks that looked like they belonged in a haunted bakery. The first batch was a disaster, let me tell you. The dough was too sticky, the fingers looked like misshapen sausages, and the almond “nails” kept falling off. But by the third try, I had it. The dough held its shape, the almonds stayed put, and the knuckles actually looked knobby.
Maybe you’ve been there—staring at a Pinterest board full of perfect Halloween treats and wondering if you could actually pull them off. These spooky witch finger cookie sticks are the answer. They look complicated, but they’re surprisingly forgiving. And honestly, the imperfections are what make them scary. A crooked finger, a cracked knuckle, a nail that’s slightly off-center—that’s the good stuff. That’s what makes people do a double-take at the dessert table.
Why You’ll Love This Recipe
I’ve tested this recipe more times than I care to admit, and I can tell you with confidence: these spooky witch finger cookie sticks are the perfect Halloween treat. They’re not just another sugar cookie cutout—they’re an experience. Here’s why they work so well:
- Quick & Easy: From start to finish, you’re looking at about 45 minutes. The dough comes together in one bowl, and there’s no chilling required. I mean it—no waiting around for the dough to firm up.
- Simple Ingredients: Flour, butter, sugar, eggs, vanilla, and almond extract. That’s it. You probably have everything in your pantry right now, minus maybe the almond slivers for the nails.
- Perfect for Halloween Parties: These cookies are the star of any spread. Kids love them, adults get a kick out of them, and they’re guaranteed to generate gasps and giggles.
- Crowd-Pleaser: They’re basically buttery shortbread cookies dressed up in disguise. The flavor is familiar and comforting—the scary part is just the look.
- Unbelievably Delicious: The almond extract gives them a subtle marzipan-like flavor that pairs perfectly with the buttery shortbread base. And the almond “nail” on top? It toasts slightly during baking, adding a nutty crunch.
What makes these different from every other witch finger cookie recipe out there is the texture. I spent hours tweaking the flour-to-butter ratio until I got a dough that’s sturdy enough to hold its shape but tender enough to melt in your mouth. No rock-hard cookies here. They’re crisp on the outside, soft in the center, and just the right amount of creepy.
This is comfort food with a Halloween twist. It’s the kind of recipe that makes you feel like a kid again, standing in the kitchen with flour on your nose, giggling at how gross your creation looks. And honestly, that’s the whole point.
What Ingredients You Will Need
This recipe uses simple, everyday ingredients to create something that looks like it crawled out of a witch’s pantry. The magic is in the technique, not the grocery list.
- Unsalted butter, softened (1 cup / 2 sticks) — Make sure it’s at room temperature. Cold butter won’t cream properly, and your fingers will spread too much in the oven. I always use Kerrygold for its rich flavor, but any good-quality butter works.
- Powdered sugar (1 cup) — This gives the cookies a tender, melt-in-your-mouth texture. Granulated sugar would make them too crunchy. Trust me on this one.
- Large egg (1) — Room temperature, please. It emulsifies better and creates a smoother dough.
- Vanilla extract (1 teaspoon) — Pure vanilla is best, but imitation works in a pinch.
- Almond extract (1/2 teaspoon) — This is the secret ingredient. It gives the cookies that subtle marzipan flavor that makes them taste like something special. Don’t skip it.
- All-purpose flour (2 1/4 cups) — Spoon and level your flour. Scooping directly from the bag packs it down and gives you dry, crumbly dough.
- Salt (1/4 teaspoon) — Balances the sweetness and enhances the buttery flavor.
- Green gel food coloring — Liquid food coloring won’t give you that eerie witchy green. Gel is concentrated and won’t mess with your dough’s texture. I use Americolor in “Leaf Green.”
- Whole blanched almond slivers (about 48 pieces) — These become the fingernails. Make sure they’re blanched (skin removed) for that pale, creepy nail look.
- Red gel food coloring or raspberry jam — For the “blood” at the base of the nails. A tiny dab goes a long way.
Substitution Guidance: Need a dairy-free option? Swap the butter with a high-quality vegan butter stick (not the spreadable kind in a tub). For a gluten-free version, use a 1:1 gluten-free flour blend with xanthan gum. The texture will be slightly more delicate, but they’ll still hold their shape. And if you’re out of almond extract, double the vanilla and add a pinch of nutmeg for warmth.
Equipment Needed
You don’t need anything fancy for these spooky witch finger cookie sticks. Here’s what I use:
- Electric mixer — A stand mixer with the paddle attachment is ideal, but a hand mixer works perfectly. You just need to cream the butter and sugar until light and fluffy.
- Large mixing bowl — One bowl is all you need. No need to dirty multiple dishes.
- Baking sheets — Two standard half-sheet pans. Line them with parchment paper or silicone baking mats.
- Offset spatula or butter knife — For shaping the knuckles and creating those creepy wrinkles.
- Small knife — A paring knife works best for scoring the knuckle lines.
- Toothpick or skewer — For adding texture and creating the cuticle lines around the almond nails.
- Pastry brush — For applying the egg wash. A silicone brush is easier to clean.
- Cooling rack — Essential for letting the cookies cool evenly without getting soggy bottoms.
If you don’t have an offset spatula, a butter knife works just fine. And if you’re short on baking sheets, you can bake in batches—just let the sheets cool completely between rounds so the dough doesn’t start melting before it hits the oven.
Preparation Method
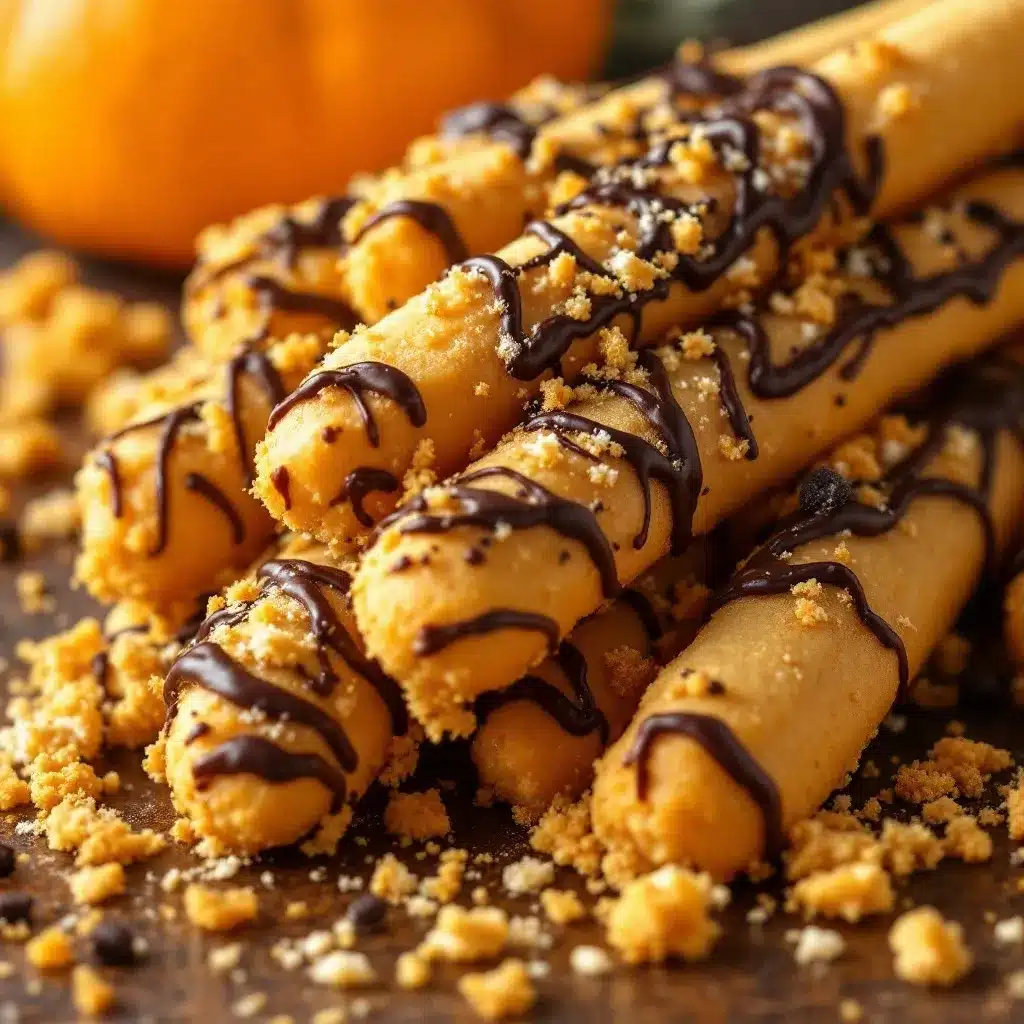
Let’s make some magic. Or mischief, depending on how you look at it.
- Preheat your oven to 350°F (175°C). Line two baking sheets with parchment paper or silicone mats. This is non-negotiable—the cookies will stick without them.
- Cream the butter and powdered sugar. In your large mixing bowl, beat the softened butter and powdered sugar together on medium speed until light, fluffy, and pale in color. This takes about 3 minutes. Scrape down the sides halfway through. You’re looking for a texture that’s almost like thick frosting.
- Add the wet ingredients. Beat in the egg, vanilla extract, and almond extract until fully combined. The mixture might look slightly curdled at this point—that’s normal. Don’t panic.
- Add the dry ingredients. In a separate small bowl, whisk together the flour and salt. Gradually add this to the wet mixture, mixing on low speed until just combined. Stop as soon as you don’t see any more streaks of flour. Overmixing will make your cookies tough.
- Add the green food coloring. Squeeze in about 1/2 teaspoon of green gel food coloring and mix on low until the color is evenly distributed. You want a pale, sickly green—not neon. Add more if needed, but go slowly. The color deepens slightly as the dough rests.
- Shape the fingers. Scoop about 1 tablespoon of dough and roll it into a log about 3 inches long and 1/2 inch thick. Place it on the prepared baking sheet. Gently taper one end to form the fingertip and make the other end slightly thicker to look like the base of the finger. Repeat with the remaining dough, spacing the fingers about 2 inches apart—they spread slightly.
- Create the knuckles. Use the back of a butter knife or an offset spatula to gently press 2-3 horizontal lines across each finger to create the knuckle joints. Don’t press too hard—you want indents, not cuts. Then use a toothpick to add tiny wrinkles around the knuckles and along the sides of the fingers.
- Add the fingernails. Press one almond sliver, pointed end first, into the tapered tip of each finger. Push it in about 1/4 inch so it looks like it’s growing out of the dough. Gently press the dough around the base of the almond to secure it.
- Add the “cuticle” detail. Use a toothpick to create a tiny crescent-shaped indent around the base of each almond nail. This small detail makes them look disturbingly realistic.
- Bake for 12-14 minutes. The cookies should be set but not browned—you don’t want them to look tan. The bottoms should be lightly golden. Rotate the pans halfway through for even baking.
- Cool completely. Let the cookies rest on the baking sheet for 5 minutes, then transfer them to a cooling rack. They firm up as they cool, so don’t try to move them too soon.
- Add the “blood”. Once the cookies are completely cool, use a toothpick to dab a tiny amount of red gel food coloring or raspberry jam at the base of each almond nail. Less is more—you want it to look like a small cuticle injury, not a crime scene.
Pro tip: If your dough gets too soft while shaping, pop the baking sheet in the fridge for 10 minutes. Cold dough holds its shape better in the oven.
Cooking Tips & Techniques
I’ve made these spooky witch finger cookie sticks more times than I’d like to admit, and I’ve learned a few things the hard way. Let me save you the trouble.
Don’t skip the almond extract. I know it’s tempting to just use vanilla, but the almond extract is what gives these cookies that hauntingly familiar flavor. It’s subtle, but without it, they’re just green sugar cookies. And that’s not nearly as fun.
Watch your oven temperature. Every oven runs differently. If your cookies are spreading too much and losing their finger shape, your oven might be running too cool. Invest in an oven thermometer—they’re cheap and they’ll save you a lot of frustration. I burned my first batch because I trusted my oven’s display. Spoiler: it was lying.
Keep your hands cool. Warm hands will soften the dough and make it sticky. If you’re struggling to shape the fingers, run your hands under cold water for a few seconds and dry them thoroughly. It makes a world of difference.
Imperfection is your friend. The first time I made these, I spent forever trying to make every finger look identical. They looked terrible—like alien sausages. The best batches are the ones where the fingers are slightly different sizes, the knuckles are uneven, and the nails are crooked. That’s what makes them look real. And real is scary.
Multitask like a pro. While one batch is baking, shape the next batch. But don’t leave the shaped dough sitting out too long—if it warms up, the fingers will spread. Pop them in the fridge while the first batch bakes.
Test one first. Bake a single finger as a test. If it spreads too much, add a tablespoon of flour to the remaining dough. If it cracks, add a teaspoon of milk. This little test saves you from ruining an entire batch.
Variations & Adaptations
These spooky witch finger cookie sticks are endlessly adaptable. Here are some of my favorite twists:
Chocolate Witch Fingers: Replace 1/4 cup of the flour with unsweetened cocoa powder. The chocolate version looks like they belong in a swamp witch’s kitchen. I made these for a Harry Potter-themed party, and they were gone in minutes.
Vegan Version: Use vegan butter sticks (not tub margarine) and replace the egg with a flax egg (1 tablespoon ground flaxseed mixed with 3 tablespoons water, let sit for 5 minutes). The texture is slightly more delicate, but they still hold their shape beautifully.
Gluten-Free Option: Swap the all-purpose flour with a 1:1 gluten-free baking flour blend. I’ve tested this with King Arthur Measure for Measure and it works great. Just be gentle when shaping—the dough is more fragile.
Spiced Version: Add 1 teaspoon of pumpkin pie spice or cinnamon to the dry ingredients. The warm spice notes contrast beautifully with the creepy green color. I call these “Mummy’s Spice Cookies.”
Bloody Nails Variation: Instead of red gel coloring, use a thin layer of strawberry jam or pomegranate molasses at the base of the nails. It gives a more organic, gory look that’s perfect for older kids and adults.
No-Almond Version: If you have a nut allergy in the house, skip the almond slivers and use a small sliver of dried apricot or a candy corn piece for the nail. Candy corn gives a surprisingly creepy orange nail look.
Serving & Storage Suggestions
These spooky witch finger cookie sticks are best served at room temperature, arranged on a platter like a severed hand display. I like to scatter a few loose almond slivers around the plate for that extra “something fell off” vibe.
Presentation tip: Arrange the fingers in a fan pattern on a black or dark purple platter. Sprinkle some crushed chocolate cookies around the base to look like dirt. Add a few plastic spiders for maximum creep factor.
Storage: Store the cookies in an airtight container at room temperature for up to 5 days. Layer them between sheets of parchment paper to prevent the almond nails from breaking off. Don’t refrigerate them—the moisture will make them soft and the red coloring will bleed.
Freezing: You can freeze the unbaked, shaped fingers for up to 3 months. Place them on a baking sheet in the freezer until solid, then transfer to a freezer bag. Bake straight from frozen, adding 2-3 minutes to the baking time. The almond nails might shift slightly during freezing, so you may need to press them back into place before baking.
Reheating: These cookies don’t really need reheating, but if you want that fresh-from-the-oven warmth, pop them in a 300°F oven for 3 minutes. Let them cool slightly before serving—the “blood” will be warm and gooey.
Flavor development: Interestingly, these cookies taste even better the next day. The almond extract mellows out and blends with the buttery shortbread base. I actually prefer them on day two, when the flavors have had time to settle.
Nutritional Information & Benefits
Let’s be real—these are Halloween cookies, not health food. But here’s what you’re working with per cookie (based on 24 fingers):
- Calories: 145
- Fat: 8g
- Carbohydrates: 17g
- Protein: 2g
- Sugar: 8g
Health highlights: The almonds on top provide a small dose of vitamin E and healthy fats. And since these cookies are made with butter rather than shortening, you’re getting real dairy fat instead of trans fats. The powdered sugar gives them a lighter texture than granulated sugar, so you’re using less sugar overall.
Dietary considerations: This recipe contains gluten, dairy, eggs, and tree nuts (almonds). For allergen-friendly versions, check the Variations section above. These cookies are naturally low in sodium and can be made vegan with simple substitutions.
My personal take: I don’t believe in demonizing treats. Halloween comes once a year, and these cookies are meant to be enjoyed. One or two with a cup of coffee or a glass of milk is perfectly fine. The key is balance—not deprivation.
Conclusion
These spooky witch finger cookie sticks are more than just a Halloween treat—they’re a conversation starter, a memory maker, and honestly, just a really good shortbread cookie in disguise. They look like they took hours of painstaking work, but the truth is, they come together in under an hour with ingredients you probably already have.
What I love most about this recipe is how forgiving it is. You don’t need to be a pastry chef to pull these off. In fact, the messier and more uneven they are, the better they look. That’s the beauty of Halloween baking—imperfection is the whole point.
I’d love to see your versions! Tag me when you make them, and tell me about your own kitchen mishaps. Did your fingers turn out looking like friendly aliens instead of witch fingers? Did the almond nails fall off mid-bake? Share it all—that’s what makes baking fun.
So go ahead, get your hands dirty, and make something delightfully creepy. Your Halloween dessert table will thank you.
Frequently Asked Questions
Can I make these cookies ahead of time?
Absolutely! You can bake them up to 3 days in advance and store them in an airtight container. Or freeze the shaped, unbaked dough for up to 3 months and bake fresh when you’re ready to serve.
Why are my cookies spreading too much?
This usually happens when the dough is too warm. Pop the shaped fingers in the fridge for 10-15 minutes before baking. Also, make sure your butter was softened but not melted when you started.
Can I use a different color for the cookies?
Of course! Purple, gray, or even pale flesh tones work great. Just swap the green gel food coloring for your preferred color. Purple fingers look especially witchy.
How do I keep the almond nails from falling off?
Press the almond sliver firmly into the dough and gently mold the dough around the base. If they’re still falling off, dip the almond in a tiny bit of beaten egg before pressing it into the dough—it acts like glue.
Can kids help make these cookies?
Yes, and they’ll love it! Kids are great at shaping the fingers and adding the knuckle marks. Just supervise the toothpick work and the oven handling. It’s a perfect Halloween baking activity for little monsters.
Pin This Recipe!

Spooky Witch Finger Cookie Sticks: Easy Halloween Recipe

These spooky witch finger cookie sticks are buttery shortbread cookies shaped like creepy witch fingers, complete with almond fingernails and a touch of ‘blood.’ They’re quick, easy, and perfect for Halloween parties.
- Prep Time: 20 minutes
- Cook Time: 14 minutes
- Total Time: 45 minutes
- Yield: 24 servings 1x
- Category: Dessert
- Cuisine: American
Ingredients
- 1 cup (2 sticks) unsalted butter, softened
- 1 cup powdered sugar
- 1 large egg, room temperature
- 1 teaspoon vanilla extract
- 1/2 teaspoon almond extract
- 2 1/4 cups all-purpose flour
- 1/4 teaspoon salt
- 1/2 teaspoon green gel food coloring (or more as needed)
- About 48 whole blanched almond slivers
- Red gel food coloring or raspberry jam (for the ‘blood’)
Instructions
- Preheat your oven to 350°F (175°C). Line two baking sheets with parchment paper or silicone mats.
- In a large mixing bowl, beat the softened butter and powdered sugar together on medium speed until light, fluffy, and pale in color, about 3 minutes. Scrape down the sides halfway through.
- Beat in the egg, vanilla extract, and almond extract until fully combined. The mixture might look slightly curdled—that’s normal.
- In a separate small bowl, whisk together the flour and salt. Gradually add this to the wet mixture, mixing on low speed until just combined. Do not overmix.
- Add about 1/2 teaspoon of green gel food coloring and mix on low until evenly distributed. Add more if needed for a pale, sickly green.
- Scoop about 1 tablespoon of dough and roll it into a log about 3 inches long and 1/2 inch thick. Place on the prepared baking sheet. Gently taper one end to form the fingertip and make the other end slightly thicker. Repeat with remaining dough, spacing fingers about 2 inches apart.
- Use the back of a butter knife or offset spatula to gently press 2-3 horizontal lines across each finger to create knuckle joints. Then use a toothpick to add tiny wrinkles around the knuckles and along the sides.
- Press one almond sliver, pointed end first, into the tapered tip of each finger, pushing it in about 1/4 inch. Gently press the dough around the base to secure it.
- Use a toothpick to create a tiny crescent-shaped indent around the base of each almond nail for the cuticle detail.
- Bake for 12-14 minutes, until set but not browned. Rotate pans halfway through. Let cookies rest on the baking sheet for 5 minutes, then transfer to a cooling rack to cool completely.
- Once completely cool, use a toothpick to dab a tiny amount of red gel food coloring or raspberry jam at the base of each almond nail.
Notes
If the dough gets too soft while shaping, pop the baking sheet in the fridge for 10 minutes. Cold dough holds its shape better in the oven. Imperfections make the cookies look more realistic—don’t stress about making them identical.
Nutrition
- Serving Size: 1 cookie
- Calories: 145
- Sugar: 8
- Sodium: 35
- Fat: 8
- Saturated Fat: 4.5
- Carbohydrates: 17
- Fiber: 0.5
- Protein: 2
Keywords: Halloween cookies, witch finger cookies, shortbread cookies, spooky treats, easy Halloween recipe