Love this? Save it for later!
Share the inspiration with your friends
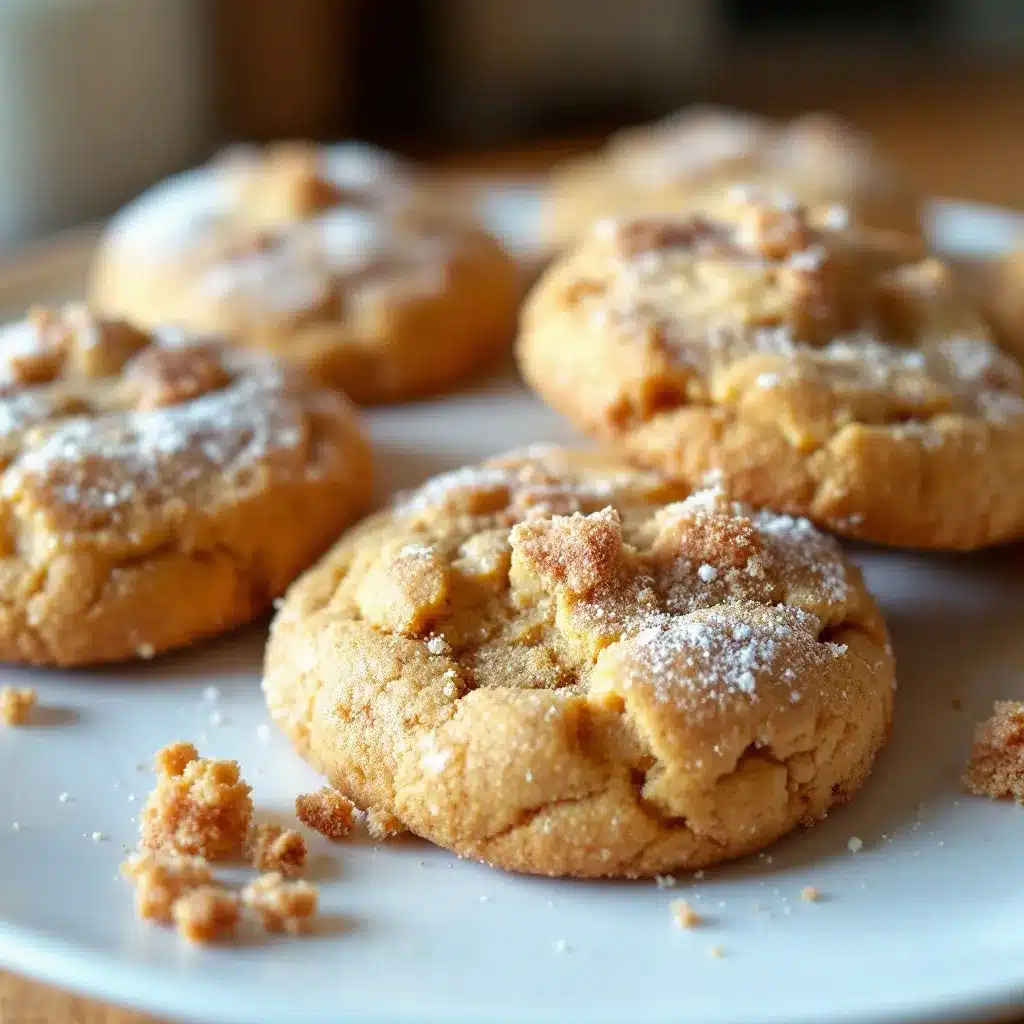
I figured pumpkin in a snickerdoodle would just make it taste like a basic sugar cookie with a little orange tint. It took about one bite for that assumption to crumble completely. The first batch came out of the oven looking unassuming—pale, pillowy, dusted with cinnamon sugar in a way that felt almost too simple. But then I broke one open. The texture was something else entirely. Not cakey, not dense, but that perfect middle ground where the cookie holds its shape but practically dissolves as soon as you bite into it. The pumpkin doesn’t scream at you either. It just hangs out in the background, adding moisture and a subtle earthiness that makes the cinnamon sugar feel more like a warm blanket than a topping.
Honestly, I wasn’t even trying to make a fall cookie. I had half a can of pumpkin left over from making pumpkin cream cheese muffins the day before, and I figured I’d experiment. You know how it goes—you start with one intention, and the kitchen decides otherwise. These cookies became the reason I now keep canned pumpkin in my pantry year-round. They’re soft without being fragile, sweet without being cloying, and they have that slight chew around the edges that makes you reach for another one before you’ve finished the first.
There’s something deeply satisfying about a cookie that doesn’t try too hard. It just shows up, does its job, and makes everyone happy. That’s exactly what these soft baked pumpkin snickerdoodle cookies do. They’re the kind of cookie you bake on a random Tuesday because you need a little something, and suddenly your whole kitchen smells like fall and everything feels a bit more manageable.
Why You’ll Love This Recipe
I’ve tested this recipe more times than I care to admit. The first few batches were too flat. Then they were too puffy. Then they were perfect—and I wrote down every detail so you don’t have to guess. Here’s what makes these cookies stand out from the hundreds of other pumpkin cookie recipes floating around.
- Perfectly Soft Texture: These cookies stay soft for days. The pumpkin adds moisture without making them gummy, and the combination of butter and oil gives them that bakery-style tenderness you usually only get from a professional kitchen.
- No Chilling Required: You read that right. No waiting for dough to firm up, no planning ahead. Mix, scoop, roll, bake. Done.
- Simple Pantry Ingredients: Everything you need is probably already in your kitchen. Pumpkin puree, basic baking staples, and cinnamon sugar. No weird specialty items.
- Perfect for Fall Baking: These cookies scream autumn without being overly seasonal. They work for Thanksgiving dessert tables, Halloween parties, or just a cozy afternoon snack.
- Kid-Approved and Adult-Devoured: My nephew called them “cloud cookies” and ate six before anyone noticed. My neighbor, who claims she doesn’t like pumpkin desserts, asked for the recipe.
- Freezer-Friendly: Bake a batch now, freeze half, and pull them out when you need an instant treat. They thaw beautifully.
What makes this recipe different from other pumpkin snickerdoodles is the texture science. Most pumpkin cookies turn out cakey because the pumpkin adds so much moisture that the structure collapses into something more muffin-like. I solved that by adjusting the fat ratio and adding a touch of cream of tartar, which gives snickerdoodles their signature tang and chew. The result is a cookie that tastes like a classic snickerdoodle but feels softer, warmer, and somehow more comforting. It’s the kind of cookie that makes you close your eyes after the first bite—not because it’s fancy, but because it just hits right.
What Ingredients You Will Need
This recipe uses simple, wholesome ingredients to deliver that perfect soft texture and warm cinnamon flavor. Most of these are pantry staples, which makes these cookies dangerously easy to whip up on a whim.
For the Cookie Dough
- Unsalted butter, softened (1/2 cup, 113g) — Adds richness and helps create that tender crumb. I use unsalted so I can control the salt level. Let it sit out for about 30 minutes before starting.
- Granulated sugar (3/4 cup, 150g) — Provides sweetness and helps with spreading. Don’t substitute brown sugar here; it changes the texture too much.
- Pumpkin puree (1/2 cup, 120g) — Not pumpkin pie filling! Make sure you grab 100% pure pumpkin puree. Libby’s is my go-to because it’s consistently thick and not watery. Pat the pumpkin with a paper towel if it looks extra wet.
- Large egg (1, room temperature) — Binds everything together. Cold egg will seize the butter, so let it sit out with the butter.
- Vanilla extract (1 teaspoon) — Enhances the warm spices. Use pure vanilla if you have it, but imitation works fine too.
- All-purpose flour (1 and 3/4 cups, 220g) — Gives structure. Spoon and level your flour—don’t scoop directly from the bag or you’ll end up with dry cookies.
- Cream of tartar (1 teaspoon) — The secret ingredient that gives snickerdoodles their signature tang and soft chew. Don’t skip this.
- Baking soda (1/2 teaspoon) — Helps with spreading and lift.
- Baking powder (1/2 teaspoon) — Adds a little extra puffiness.
- Salt (1/4 teaspoon) — Balances sweetness and enhances flavors.
- Ground cinnamon (1 teaspoon) — The backbone of the flavor profile.
- Ground nutmeg (1/4 teaspoon) — Adds warmth without overpowering. Freshly grated is lovely but pre-ground works perfectly.
- Ground cloves (1/8 teaspoon) — Just a pinch for depth. You can skip it if you don’t have it.
For the Cinnamon Sugar Coating
- Granulated sugar (1/4 cup, 50g) — Creates that crackly, sparkly exterior.
- Ground cinnamon (1 and 1/2 tablespoons) — Be generous here. This is what makes these cookies unmistakably snickerdoodle.
Ingredient Note: If you’re using a different brand of pumpkin puree, check the consistency. Some organic brands are thinner and more watery. If yours looks loose, spread it on a paper towel-lined plate for a few minutes to absorb excess moisture. This prevents flat, soggy cookies.
Equipment Needed
You don’t need anything fancy for these cookies. Here’s what I use every time:
- Large mixing bowl — For the wet ingredients. Glass or stainless steel works best.
- Medium mixing bowl — For the dry ingredients.
- Hand mixer or stand mixer — A hand mixer is fine; you’re not creaming butter for that long. A wooden spoon works too, but your arm will thank you for the mixer.
- Rubber spatula — For scraping down the bowl and folding in the dry ingredients.
- Cookie scoop (1.5 tablespoon size) — Ensures even-sized cookies that bake uniformly. I use a #40 scoop.
- Baking sheets — Two standard half-sheet pans. Avoid dark nonstick pans—they make cookies brown too quickly on the bottom.
- Parchment paper or silicone baking mat — Parchment paper is my preference because it’s disposable and gives consistent results.
- Cooling rack — Lets air circulate so the cookies don’t steam and get soggy.
- Small bowl — For the cinnamon sugar mixture.
If you don’t have cream of tartar, you can substitute 2 teaspoons of lemon juice or white vinegar mixed into the wet ingredients. But honestly, just buy cream of tartar—it’s cheap and lasts forever in your pantry. I’ve been using the same jar for two years and it’s still fine.
Preparation Method
Preheat your oven to 350°F (175°C). Line two baking sheets with parchment paper. This recipe makes about 24 cookies, so prepare your workspace accordingly.
-
Cream the butter and sugar. In a large bowl, beat the softened butter and granulated sugar together on medium speed until light and fluffy, about 2-3 minutes. Scrape down the sides of the bowl with a rubber spatula. The mixture should look pale and slightly increased in volume. Don’t rush this step—proper creaming creates air pockets that help the cookies rise.
-
Add the pumpkin, egg, and vanilla. Beat in the pumpkin puree, egg, and vanilla extract until fully combined. The mixture will look slightly curdled at this point—that’s normal. Pumpkin and butter don’t emulsify perfectly, but it all comes together in the oven. Scrape the bowl again.
-
Whisk the dry ingredients. In a separate medium bowl, whisk together the flour, cream of tartar, baking soda, baking powder, salt, cinnamon, nutmeg, and cloves. Whisking ensures everything is evenly distributed without overmixing later.
-
Combine wet and dry ingredients. Add the dry ingredients to the wet mixture in two additions, mixing on low speed after each addition until just combined. Stop as soon as you don’t see streaks of flour anymore. Overmixing develops gluten and makes the cookies tough. The dough will be soft and slightly sticky—that’s exactly what you want.
-
Make the cinnamon sugar coating. In a small bowl, stir together the 1/4 cup granulated sugar and 1 and 1/2 tablespoons cinnamon until well combined.
-
Scoop and roll. Using a 1.5-tablespoon cookie scoop, portion out the dough. Roll each portion into a smooth ball between your palms. The dough is sticky, so lightly wet your hands if needed. Drop each ball into the cinnamon sugar mixture and roll to coat completely. Place on the prepared baking sheets, spacing them about 2 inches apart. You’ll fit about 12 cookies per sheet.
-
Bake. Bake one sheet at a time in the center of the oven for 10-12 minutes. The cookies will look puffy, slightly cracked on top, and the edges will be set but the centers will still look soft and slightly underdone. That’s the sweet spot. If you wait until the centers look fully baked, they’ll be overdone. For softer cookies, bake 10 minutes. For slightly firmer cookies, go to 12 minutes.
-
Cool on the pan. Let the cookies rest on the baking sheet for 5 minutes. They’ll continue to set as they cool. After 5 minutes, transfer them to a wire rack to cool completely. The tops will develop that beautiful crinkled snickerdoodle look as they cool.
Pro tip: If your cookies spread too much, your butter was too soft or your pumpkin was too wet. Next time, chill the scooped dough balls for 15 minutes before baking. If they don’t spread enough, your flour was overmeasured or your butter wasn’t soft enough. Adjust accordingly.
Cooking Tips & Techniques
I learned most of these the hard way—through batches that looked like sad, flat pancakes or hockey pucks. Here’s what I wish someone had told me before I started testing pumpkin snickerdoodles.
Pat your pumpkin dry. This is the single most important tip for these cookies. Pumpkin puree contains a lot of water, and excess moisture leads to flat, gummy cookies. After measuring your pumpkin, gently press it between layers of paper towel to absorb some liquid. You’ll lose about a tablespoon of volume, but the texture improvement is dramatic.
Use room temperature ingredients. Cold butter doesn’t cream properly, and cold egg seizes the butter into lumps. Set everything out 30 minutes before you start. If you forgot, microwave the butter for 10 seconds at a time until soft but not melted, and place the egg in a bowl of warm water for 5 minutes.
Don’t overbake. I know it’s tempting to leave them in until they look fully set, but pumpkin cookies continue to bake from residual heat after they come out of the oven. Pull them when the edges are set and the centers look slightly underdone and matte, not shiny. The tops should have a few cracks but still look soft.
Rotate your baking sheet halfway through. Ovens have hot spots. Halfway through baking, spin the sheet 180 degrees for even browning. If you’re baking two sheets at once (which I don’t recommend—they bake unevenly), swap their positions too.
Use a light-colored baking sheet. Dark pans absorb more heat and can burn the bottoms of your cookies before the centers are done. If you only have dark pans, reduce the oven temperature by 25°F and check a minute earlier.
Let them cool properly. Those 5 minutes on the baking sheet are non-negotiable. The cookies are fragile straight out of the oven, and moving them too soon will break them. The cooling time also allows the centers to finish setting without overbaking.
I once forgot to add the cream of tartar and ended up with flat, sad cookies that tasted more like pumpkin sugar cookies than snickerdoodles. It was a sad day. Don’t be me—double-check your ingredients before you start mixing.
Variations & Adaptations
These cookies are forgiving enough to handle some tweaking. Here are a few variations I’ve tried and loved.
Gluten-Free Version: Substitute the all-purpose flour with a 1:1 gluten-free baking flour blend that contains xanthan gum. I’ve used Bob’s Red Mill 1:1 Baking Flour with great results. The cookies will be slightly more delicate, so handle them gently when transferring to the cooling rack.
Dairy-Free Version: Swap the butter with a high-quality vegan butter stick (not tub margarine). I use Earth Balance Buttery Sticks. The texture is nearly identical to the original. Make sure your pumpkin puree is also dairy-free—most are, but check labels.
Spiced Variation: Add 1/4 teaspoon of ground ginger and a pinch of cardamom to the dry ingredients. This gives the cookies a chai-like warmth that’s incredible with the cinnamon sugar coating. I made this version for a fall brunch and they disappeared in minutes.
Chocolate Chip Pumpkin Snickerdoodles: Fold in 1/2 cup of semi-sweet chocolate chips after combining the wet and dry ingredients. The chocolate adds a nice contrast to the warm spices. White chocolate chips also work beautifully here.
Maple Glaze Drizzle: Whisk together 1/2 cup powdered sugar, 1 tablespoon maple syrup, and 1-2 teaspoons milk until smooth. Drizzle over cooled cookies for an extra layer of sweetness. It makes them look fancy enough for a cookie exchange or holiday party.
Lower Sugar Option: Reduce the sugar in the dough to 1/2 cup. The cookies will be slightly less sweet but still delicious, especially with the cinnamon sugar coating. Don’t reduce the coating sugar—that’s what makes them snickerdoodles.
If you’re making these for a crowd with dietary restrictions, the gluten-free and dairy-free versions both hold up well. I’ve brought them to potlucks and no one could tell the difference.
Serving & Storage Suggestions
These cookies are best enjoyed slightly warm, when the centers are still soft and the cinnamon sugar coating is fragrant and slightly crackly. Let them cool for about 10 minutes after baking, then serve. They pair beautifully with a cup of hot coffee, a mug of spiced apple cider, or a glass of cold milk.
For presentation, arrange them on a rustic wooden board or a white platter. Dust with a little extra cinnamon sugar right before serving for that bakery-style finish. They also make excellent gifts—pack them in a tin or a cellophane bag tied with a ribbon.
Storage Instructions: Store baked cookies in an airtight container at room temperature for up to 5 days. Place a slice of bread in the container to keep them soft—the bread absorbs excess air and releases moisture. Replace the bread slice every other day. I’ve kept cookies fresh for a full week using this trick.
Freezer Instructions: You can freeze either the baked cookies or the unbaked dough. For baked cookies, arrange them in a single layer on a baking sheet and freeze until solid, then transfer to a freezer-safe bag or container. They’ll keep for up to 3 months. Thaw at room temperature for about 30 minutes. For unbaked dough, scoop and roll the dough balls, place them on a parchment-lined baking sheet, freeze until solid, then transfer to a freezer bag. Bake from frozen, adding 2-3 minutes to the baking time.
The flavors actually deepen after a day or two in the fridge. Something about the spices melding together makes the cookies taste even better on day two. If you can resist eating them all immediately, try storing some overnight and tasting the difference.
Nutritional Information & Benefits
Here’s the estimated nutritional breakdown per cookie (based on 24 cookies):
- Calories: 135
- Total Fat: 5g
- Saturated Fat: 3g
- Carbohydrates: 21g
- Sugar: 13g
- Fiber: 1g
- Protein: 2g
- Sodium: 75mg
These numbers are estimates and will vary based on your specific ingredients and portion sizes.
Pumpkin is packed with vitamin A (from beta-carotene), which supports eye health and immune function. It also provides fiber and potassium. The cinnamon in these cookies offers anti-inflammatory properties and may help regulate blood sugar levels. So while these are definitely a treat, they’re not completely empty calories. The cream of tartar adds a touch of potassium too.
This recipe is vegetarian and can easily be made gluten-free or dairy-free with the substitutions mentioned earlier. It contains wheat, dairy, and eggs in its standard form, so keep that in mind for allergen concerns.
I’m not here to tell you that cookies are health food. But I do think there’s something to be said for a dessert that makes you feel good while eating it—not just emotionally, but physically too. These cookies won’t weigh you down or leave you with that heavy, regretful feeling. They’re light, satisfying, and perfectly portioned.
Conclusion
These soft baked pumpkin snickerdoodle cookies are everything I want in a fall dessert. They’re easy enough for a weekday baking session, impressive enough for holiday gatherings, and comforting enough to become a staple in your recipe rotation. The texture is spot-on—soft, tender, with just enough chew around the edges. The cinnamon sugar coating gives them that classic snickerdoodle sparkle, while the pumpkin keeps them moist and flavorful without being overpowering.
What I love most about this recipe is how forgiving it is. You don’t need to be a pastry chef to nail these. No chilling, no complicated techniques, no specialty equipment. Just simple ingredients and a little patience. And the payoff? A batch of cookies that will make your kitchen smell like autumn and your family think you spent hours perfecting them.
I’d love to hear how these turn out for you. Have you tried any variations? Did you add chocolate chips or go classic? Drop a comment below and let me know—I read every single one. And if you share them on social media, tag me so I can see your beautiful bakes. Happy fall baking, friends.
Frequently Asked Questions
Can I use homemade pumpkin puree instead of canned?
Yes, but you’ll need to strain it well. Homemade pumpkin puree tends to be more watery than canned. After making your puree, place it in a fine-mesh strainer lined with cheesecloth and let it drain for at least an hour. Then pat it dry with paper towels before using. You want it to be as thick as possible.
Why did my cookies turn out flat?
Flat cookies usually mean too much moisture or not enough structure. The most common culprit is watery pumpkin puree. Make sure to pat your pumpkin dry before adding it. Also check that your butter wasn’t too soft or melted, and that you measured your flour correctly (spoon and level, don’t scoop). Chilling the dough balls for 15-20 minutes before baking can also help.
Can I make these cookies ahead of time?
Absolutely. You can prepare the dough up to 2 days ahead and store it in the refrigerator. Let it sit at room temperature for 10-15 minutes before scooping and baking, since cold dough is harder to work with. Baked cookies stay fresh for up to 5 days in an airtight container, and they freeze beautifully for up to 3 months.
Do I have to use cream of tartar?
Yes, for the authentic snickerdoodle texture and tang. Cream of tartar is what gives snickerdoodles their signature chew and slightly tangy flavor. Without it, you’ll end up with a regular pumpkin sugar cookie—still tasty, but not a true snickerdoodle. If you don’t have it, you can substitute 2 teaspoons of lemon juice or white vinegar mixed into the wet ingredients, but the texture won’t be quite the same.
Can I double this recipe?
Yes, this recipe doubles beautifully. Just make sure you have enough oven space or bake in batches. Don’t try to bake two sheets at once in the same oven—they’ll bake unevenly. If you double the recipe, you can also freeze half the dough for later. Scoop and roll the dough balls, freeze them on a baking sheet, then transfer to a freezer bag for easy future baking.
Pin This Recipe!
Soft Baked Pumpkin Snickerdoodle Cookies Easy Fall Dessert
These soft baked pumpkin snickerdoodle cookies are perfectly tender with a warm cinnamon sugar coating. Made with simple pantry ingredients and no chilling required, they’re an easy fall dessert that stays soft for days.
- Prep Time: 15 minutes
- Cook Time: 12 minutes
- Total Time: 27 minutes
- Yield: 24 cookies 1x
- Category: Dessert
- Cuisine: American
Ingredients
- 1/2 cup (113g) unsalted butter, softened
- 3/4 cup (150g) granulated sugar
- 1/2 cup (120g) pumpkin puree (not pumpkin pie filling)
- 1 large egg, room temperature
- 1 teaspoon vanilla extract
- 1 and 3/4 cups (220g) all-purpose flour
- 1 teaspoon cream of tartar
- 1/2 teaspoon baking soda
- 1/2 teaspoon baking powder
- 1/4 teaspoon salt
- 1 teaspoon ground cinnamon
- 1/4 teaspoon ground nutmeg
- 1/8 teaspoon ground cloves
- 1/4 cup (50g) granulated sugar (for coating)
- 1 and 1/2 tablespoons ground cinnamon (for coating)
Instructions
- Preheat oven to 350°F (175°C). Line two baking sheets with parchment paper.
- In a large bowl, beat softened butter and 3/4 cup granulated sugar together on medium speed until light and fluffy, about 2-3 minutes. Scrape down sides.
- Beat in pumpkin puree, egg, and vanilla extract until fully combined. Mixture may look slightly curdled.
- In a separate medium bowl, whisk together flour, cream of tartar, baking soda, baking powder, salt, 1 teaspoon cinnamon, nutmeg, and cloves.
- Add dry ingredients to wet mixture in two additions, mixing on low speed until just combined. Dough will be soft and slightly sticky.
- In a small bowl, stir together 1/4 cup granulated sugar and 1 and 1/2 tablespoons cinnamon for coating.
- Using a 1.5-tablespoon cookie scoop, portion dough and roll into smooth balls. Roll each ball in cinnamon sugar mixture to coat completely.
- Place coated dough balls on prepared baking sheets, spacing 2 inches apart. Bake one sheet at a time for 10-12 minutes, until edges are set and centers look soft and slightly underdone.
- Let cookies rest on baking sheet for 5 minutes, then transfer to a wire rack to cool completely.
Notes
Pat pumpkin puree dry with paper towels to remove excess moisture for best texture. Use room temperature ingredients. Don’t overbake; cookies continue to set as they cool. For flatter cookies, chill dough balls 15 minutes before baking. Store in airtight container at room temperature up to 5 days. Freeze baked cookies or unbaked dough balls up to 3 months.
Nutrition
- Serving Size: 1 cookie
- Calories: 135
- Sugar: 13
- Sodium: 75
- Fat: 5
- Saturated Fat: 3
- Carbohydrates: 21
- Fiber: 1
- Protein: 2
Keywords: pumpkin snickerdoodle, soft baked cookies, fall dessert, pumpkin cookies, snickerdoodle recipe, easy cookies, no chill cookies


