Love this? Save it for later!
Share the inspiration with your friends
Third batch in four days, and I finally stopped adding more oats. That was my problem, you see. I kept thinking, “More oats means more cookie,” which sounds logical until you pull a pan of dry, crumbly bars out of the oven and realize you’ve basically made animal feed with M&Ms. The first batch was too flat. The second batch was too sweet (I got carried away with the chocolate chips). But the third time? The third time I let the dough tell me what it needed—a little more butter, a little less flour, and just enough oats to hold everything together without turning into sawdust. These soft baked monster cookie bars are what came out of that obsessive spiral, and honestly? I haven’t made regular cookies since.
There’s something about pressing dough into a pan that feels less fussy than scooping individual cookies. No chilling, no rotating baking sheets, no wondering if the ones in the back are done while the ones in the front are still raw. Just press, bake, and wait for that golden edge to tell you it’s ready. These bars have that chewy-crisp thing happening at the edges—the best part of any cookie—but the centers stay soft and almost fudgy, like the inside of a really good bakery cookie that never made it to the display case.
I brought a batch to my neighbor, who called me thirty minutes later to ask if I’d left any for my own family. That’s when I knew this recipe was done. No more tweaking. No more second-guessing. Just butter, sugar, oats, peanut butter, and a ridiculous amount of M&Ms pressed into a pan and baked until the whole kitchen smells like a county fair.
Why You’ll Love This Recipe
Let me tell you why these monster cookie bars have earned a permanent spot in my baking rotation. I’ve tested this recipe more times than I care to admit, and each iteration taught me something new about what makes a bar cookie truly great.
- 30 Minutes Start to Finish : From mixing to slicing, you’re looking at half an hour. No chilling, no complicated steps, no waiting for butter to come to room temperature (though it helps).
- Pantry-Friendly Ingredients : Oats, peanut butter, M&Ms, butter, sugar, eggs—you probably have most of this stuff already. No specialty flours or obscure extracts required.
- Perfect for Parties and Lunchboxes : These bars travel well, slice cleanly, and don’t crumble into a million pieces like regular cookies do. I’ve packed them in lunchboxes, taken them to potlucks, and mailed them to friends without a single casualty.
- Crowd-Pleasing Flavor Combo : The peanut butter base with chocolate and candy-coated crunch is basically what happens when childhood cravings meet adult baking skills.
- Foolproof Texture : Soft centers, slightly crisp edges, and that satisfying chew from the oats. Every single time.
What makes these different from every other monster cookie recipe out there? It’s the ratio. I spent weeks dialing in the exact balance of oats to flour to peanut butter so the bars hold together without being dense or dry. The butter is melted, not creamed, which gives you that fudgy interior without extra effort. And I use a mix of old-fashioned oats and quick oats, which sounds fussy but creates a texture that’s both tender and substantial at the same time.
These are the kind of bars that make you close your eyes after the first bite. The kind that disappear from the pan before you’ve had a chance to have seconds. The kind that make people ask for the recipe without prompting.
What Ingredients You Will Need
This recipe uses simple, honest ingredients that work together to create something greater than the sum of their parts. Here’s what you’ll need and why each one matters.
- Unsalted butter, melted (1 cup / 2 sticks / 226g) : Melted butter gives these bars their soft, fudgy texture. If you use salted butter, reduce the added salt by half.
- Light brown sugar, packed (1 cup / 200g) : Brown sugar brings moisture and that subtle molasses flavor that makes monster cookies taste like comfort. Dark brown sugar works too, but the bars will be slightly darker and more caramel-like.
- Granulated sugar (½ cup / 100g) : White sugar helps the edges crisp up while keeping the centers soft. Don’t skip it—the combination of both sugars is key.
- Creamy peanut butter (1 cup / 250g) : Use the regular processed kind, not natural peanut butter that separates. Natural PB can make the bars greasy and crumbly. I prefer Jif or Skippy for consistent results.
- Large eggs (2, room temperature) : Room temperature eggs incorporate more evenly into the melted butter mixture. If you forgot to take them out ahead of time, place them in a bowl of warm water for 5 minutes.
- Vanilla extract (2 teaspoons) : Pure vanilla extract makes a difference here—the flavor cuts through the peanut butter and chocolate in a way imitation vanilla just can’t match.
- All-purpose flour (1½ cups / 190g) : Spoon and level your flour, don’t scoop directly from the bag. Too much flour makes dry, cakey bars instead of soft, chewy ones.
- Old-fashioned rolled oats (1 cup / 90g) : These give the bars structure and that classic monster cookie chew. Don’t substitute instant oats here—they’ll turn to mush.
- Quick oats (½ cup / 45g) : The quick oats break down more during baking, creating a tender crumb that balances the heartiness of the old-fashioned oats.
- Baking soda (1 teaspoon) : Helps the bars rise just enough without becoming puffy or cakey.
- Salt (½ teaspoon) : Salt balances the sweetness and enhances the peanut butter and chocolate flavors. Don’t skip it.
- M&Ms (1½ cups / 270g) : Regular milk chocolate M&Ms are classic, but peanut M&Ms or mini M&Ms work beautifully too. Reserve about ¼ cup to press into the top before baking for that picture-perfect look.
- Semi-sweet chocolate chips (½ cup / 85g) : The dark chocolate chips balance the sweetness of the M&Ms and add another layer of chocolate flavor. You can use all M&Ms if you prefer.
Ingredient Tips from My Kitchen : For the best texture, make sure your peanut butter is at room temperature before mixing. Cold peanut butter doesn’t incorporate smoothly into melted butter and can leave streaks in your dough. Also, if you’re using a natural peanut butter that’s been sitting in your pantry for months, give it a really good stir before measuring—the oil separation can throw off the fat content of the recipe.
Equipment Needed
You don’t need fancy equipment for these monster cookie bars, which is part of their charm. Here’s what you’ll need:
- 9×13-inch baking pan : This is the standard size for bar cookies. An 8×8 pan will give you thicker bars that need longer baking time (about 28-32 minutes).
- Parchment paper : Line your pan with parchment, leaving overhang on two sides. This creates “handles” that let you lift the entire slab of bars out for clean slicing. Trust me on this one.
- Large mixing bowl : Any big bowl will do. I use a glass mixing bowl because I can see when everything is fully incorporated.
- Whisk : For combining the wet ingredients smoothly.
- Rubber spatula : For folding in the oats, flour, and mix-ins without overmixing.
- Measuring cups and spoons : Accurate measurements matter in baking, especially with flour and oats.
- Kitchen scale (optional but recommended) : Weighing your ingredients ensures consistent results every time. I started weighing ingredients during my testing phase and never looked back.
Budget-Friendly Alternatives : No parchment paper? Grease the pan thoroughly with butter or non-stick spray, then dust with a light coating of flour. No whisk? A fork works fine. No rubber spatula? A wooden spoon will get the job done, just be gentle when folding.
Preparation Method
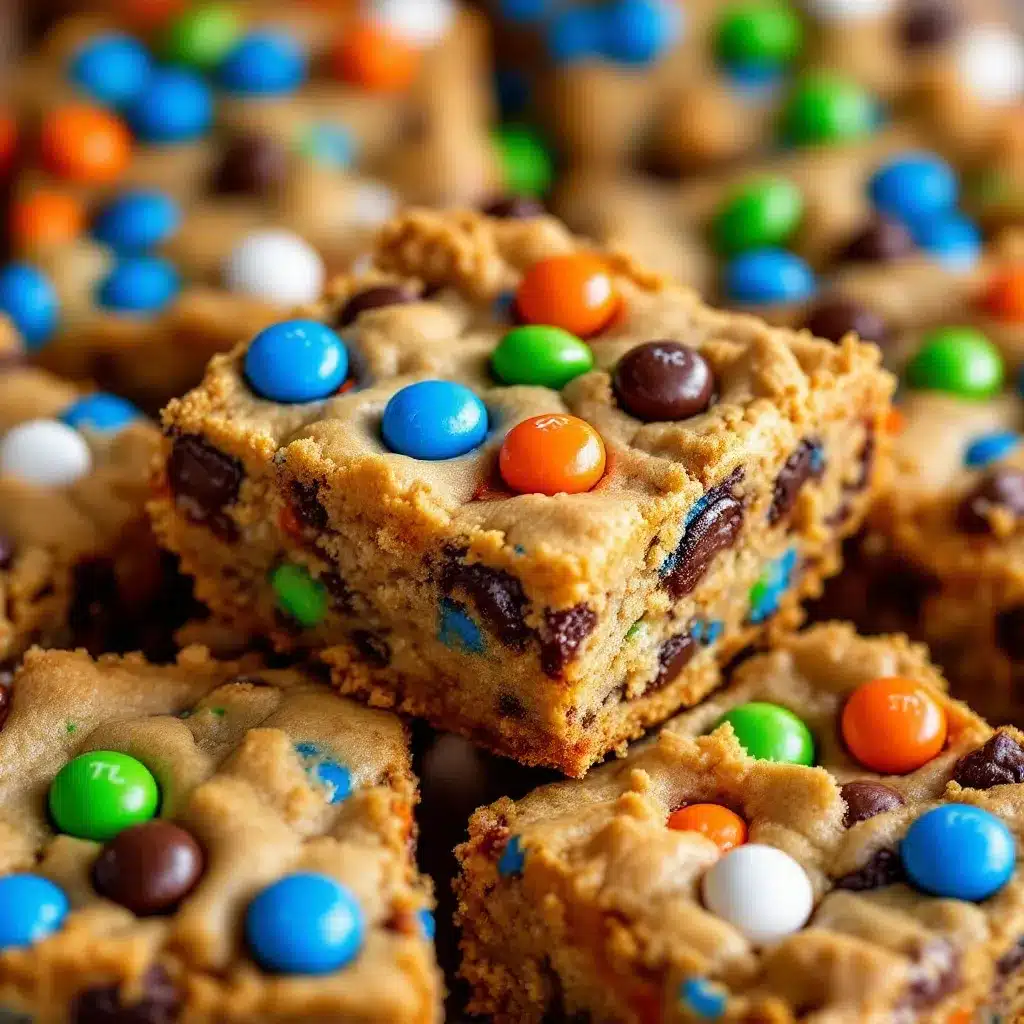
Let me walk you through this step by step. I’ve included every little detail I learned from my multiple rounds of testing, so you can skip straight to the good part.
Step 1: Preheat and Prepare Your Pan
Preheat your oven to 350°F (175°C). Line a 9×13-inch baking pan with parchment paper, leaving about 2 inches of overhang on the long sides. This overhang is your lifeline for lifting the finished bars out of the pan. Lightly spray the parchment with non-stick cooking spray for extra insurance.
Step 2: Mix the Wet Ingredients
In a large mixing bowl, combine 1 cup melted butter (slightly warm, not hot) with 1 cup packed light brown sugar and ½ cup granulated sugar. Whisk until smooth and well combined—about 30 seconds. The mixture should look like wet sand.
Add 1 cup creamy peanut butter and whisk until fully incorporated. The mixture will thicken up and become creamy. Add 2 room-temperature eggs and 2 teaspoons vanilla extract, then whisk until the batter is smooth and glossy. Don’t over-whisk at this stage—just until everything comes together.
Step 3: Combine the Dry Ingredients
In a separate bowl, whisk together 1½ cups all-purpose flour, 1 cup old-fashioned oats, ½ cup quick oats, 1 teaspoon baking soda, and ½ teaspoon salt. Whisking aerates the flour and distributes the leavening evenly, which means your bars will rise evenly without weird pockets.
Step 4: Fold Everything Together
Add the dry ingredients to the wet mixture in two additions, folding gently with a rubber spatula after each addition. Stop as soon as you no longer see streaks of flour. Overmixing at this stage develops gluten, which can make your bars tough instead of tender.
The dough will be thick and slightly sticky—that’s exactly what you want. If it seems too dry to hold together, add 1-2 tablespoons of milk. If it seems too wet and greasy, add 2 tablespoons of flour. But honestly, if you measured correctly, it should be perfect.
Step 5: Add the Mix-Ins
Fold in 1½ cups M&Ms and ½ cup semi-sweet chocolate chips. Reserve about ¼ cup of M&Ms for the top. Be gentle here—you want the candy pieces distributed evenly without crushing them.
Step 6: Press Into the Pan
Transfer the dough to your prepared pan. Using slightly damp hands (this prevents sticking), press the dough into an even layer. Press firmly into the corners and edges so the bars bake evenly. The dough should be about ¾ inch thick across the entire pan.
Press the reserved M&Ms into the top of the dough, spacing them evenly. This step is optional but makes the bars look gorgeous and ensures every bite has visible candy.
Step 7: Bake to Golden Perfection
Bake at 350°F (175°C) for 20-24 minutes. At 20 minutes, check for doneness: the edges should be golden brown and set, and the center should look slightly underdone—soft and puffy, not wet or jiggly. A toothpick inserted in the center should come out with a few moist crumbs attached, not raw batter.
Critical Tip : These bars continue baking in the pan after you pull them out. If they look perfectly done in the oven, they’ll be overdone by the time they cool. Pull them when the center still looks slightly soft and underbaked. Trust the process.
Step 8: Cool and Slice
Let the bars cool in the pan on a wire rack for at least 20 minutes. Then use the parchment overhang to lift the entire slab onto a cutting board. Let cool completely before slicing—about 1 hour total. Cutting warm bars will give you crumbly edges and melted M&Ms everywhere.
Use a sharp chef’s knife to slice into 24 bars (6 rows by 4 rows). For cleaner cuts, wipe the knife clean between slices.
Cooking Tips & Techniques
I learned these lessons the hard way so you don’t have to. Here are the things I wish someone had told me before my first batch.
Don’t Overbake : This is the number one mistake with bar cookies. The residual heat from the pan continues cooking the bars after they leave the oven. Pull them when the center looks slightly underdone—it will set as it cools. Overbaked monster cookie bars are dry and crumbly, and nobody wants that.
Room Temperature Ingredients Matter : Cold eggs can seize up your melted butter mixture, creating a lumpy dough that bakes unevenly. If you forget to take eggs out ahead of time, place them in a bowl of warm tap water for 5 minutes. Same goes for your peanut butter—cold PB doesn’t mix smoothly.
Press, Don’t Scoop : Unlike cookie dough, bar cookie dough needs to be pressed firmly into the pan. Use slightly damp hands or the bottom of a measuring cup to create an even layer. Uneven thickness means some bars will be overdone while others are underdone.
Parchment Paper is Non-Negotiable : I know it seems wasteful, but parchment paper with overhang makes these bars infinitely easier to handle. Without it, you’ll be digging crumbly pieces out of the pan with a spatula. Life is too short for that.
Let Them Cool Completely : I know the smell is intoxicating. I know you want a warm bar with a glass of milk. But cutting into these bars while they’re warm is a recipe for disaster. The M&Ms will smear, the bars will crumble, and you’ll be left with a pan of delicious but ugly scraps. Patience, my friend.
Variations & Adaptations
One of the best things about this recipe is how adaptable it is. Here are some variations I’ve tested and loved.
Peanut Butter Lovers Version : Swap the semi-sweet chocolate chips for peanut butter chips and use peanut M&Ms instead of regular ones. Add an extra ¼ cup peanut butter for an even more intense PB flavor. I made this version for my husband, and he ate half the pan in one sitting.
Gluten-Free Adaptation : Substitute the all-purpose flour with a 1:1 gluten-free baking flour blend (I like King Arthur Measure for Measure). Make sure your oats are certified gluten-free. The texture will be slightly more tender, but they’re still delicious. I tested this version for a friend with celiac disease, and she couldn’t tell the difference.
Holiday Monster Bars : Swap the regular M&Ms for seasonal colors—red and green for Christmas, pastels for Easter, orange and brown for Halloween. The recipe stays exactly the same, but the bars look festive and fun. I make these for every holiday party, and they’re always the first thing to disappear.
White Chocolate Macadamia Twist : Replace M&Ms with white chocolate chips and chopped macadamia nuts. Skip the semi-sweet chocolate chips. This version is less colorful but incredibly buttery and luxurious. It’s like a cookie bar version of those fancy white chocolate macadamia cookies from the mall bakery.
Trail Mix Bars : Use a mix of raisins, dried cranberries, chopped almonds, and dark chocolate chunks instead of M&Ms and chocolate chips. This version is slightly healthier (I said slightly) and has a nice sweet-and-salty thing going on. Great for hiking snacks or lunchbox treats.
Serving & Storage Suggestions
These monster cookie bars are incredibly versatile when it comes to serving. Here’s how to make the most of them.
Serving Temperature : Room temperature is ideal. The texture is soft and chewy, and the M&Ms have a satisfying snap. If you want a warm treat, microwave individual bars for 10-15 seconds—just enough to soften the chocolate without melting the candy coating.
Presentation Ideas : For parties, arrange bars on a platter with a dusting of powdered sugar or a drizzle of melted chocolate. For lunchboxes, wrap individual bars in plastic wrap or place them in reusable snack bags. For gift-giving, stack bars in a decorative tin lined with parchment paper.
What to Serve With Them : A cold glass of milk is the classic pairing, and for good reason—the creamy dairy balances the sweetness perfectly. Coffee or hot cocoa works beautifully too. For an indulgent dessert, serve warm bars with a scoop of vanilla ice cream and a drizzle of chocolate sauce.
Storage Instructions : Store bars in an airtight container at room temperature for up to 5 days. Layer them between sheets of parchment paper to prevent sticking. Do not refrigerate—the cold temperature makes the bars dry out and the M&Ms lose their snap.
Freezing Instructions : These bars freeze beautifully. Wrap the entire slab (or individual bars) tightly in plastic wrap, then in aluminum foil. Freeze for up to 3 months. To thaw, let them come to room temperature on the counter for about 30 minutes. You can also microwave frozen bars for 20-30 seconds for an instant treat.
Flavor Development : Honestly, these bars taste even better on day two. The flavors meld together overnight, and the texture becomes even more tender. If you can resist eating them all on day one, you’re in for a treat.
Nutritional Information & Benefits
Let’s be real—these are not health food. But they’re made with real ingredients, and there’s something to be said for that. Here’s the estimated nutritional breakdown per bar (based on 24 servings):
| Nutrient | Amount Per Bar |
|---|---|
| Calories | 285 |
| Total Fat | 16g |
| Saturated Fat | 7g |
| Cholesterol | 35mg |
| Sodium | 180mg |
| Total Carbohydrates | 33g |
| Dietary Fiber | 2g |
| Sugars | 21g |
| Protein | 5g |
Ingredient Benefits : Oats provide soluble fiber that supports heart health and keeps you feeling full longer. Peanut butter adds protein and healthy monounsaturated fats. Eggs contribute high-quality protein and essential vitamins like B12 and D.
Dietary Considerations : This recipe contains gluten, dairy, eggs, peanuts, and soy (from the M&Ms and chocolate chips). For a gluten-free version, see the variations section above. For a dairy-free version, use dairy-free chocolate chips and M&Ms (available at most grocery stores).
My Personal Take : I believe in balance. These bars are a treat, not a daily snack. But when you’re going to have a cookie, it should be a really good one. These bars deliver on flavor, texture, and satisfaction in a way that makes the indulgence worth it.
Conclusion
These soft baked monster cookie bars have become my go-to recipe for every occasion—birthday parties, potlucks, lazy Sunday afternoons, and those days when you just need something sweet. They’re forgiving enough for beginner bakers and satisfying enough for experienced ones.
The best part? You can customize them endlessly. Use your favorite candy, swap in different chips, add nuts or dried fruit. The base recipe is solid, but it’s also a canvas for your creativity. I’ve made these bars more times than I can count, and they never get old.
If you make these monster cookie bars, I’d love to hear about it. Leave a comment below and let me know how they turned out. Did you try a variation? Did your family devour them as fast as mine did? Share your photos and tag me on social media—I love seeing your creations.
Happy baking, friends. May your bars be soft, your M&Ms colorful, and your kitchen smell like pure joy.
Frequently Asked Questions
Can I use natural peanut butter in this recipe?
I don’t recommend it. Natural peanut butter has a different fat content and can separate during baking, resulting in greasy, crumbly bars. Stick with processed peanut butter like Jif or Skippy for the best texture and consistency.
Can I make these bars gluten-free?
Yes! Substitute the all-purpose flour with a 1:1 gluten-free baking flour blend and use certified gluten-free oats. The texture will be slightly more tender, but they’re still delicious. I’ve tested this swap multiple times with great results.
Why did my bars turn out dry and crumbly?
Two most likely culprits: overbaking or too much flour. Pull the bars when the center still looks slightly underdone—they continue baking as they cool. And make sure you’re measuring your flour correctly by spooning it into the measuring cup and leveling it off, rather than scooping directly from the bag.
Can I freeze these monster cookie bars?
Absolutely. Wrap the entire slab or individual bars tightly in plastic wrap, then in aluminum foil. Freeze for up to 3 months. Thaw at room temperature for about 30 minutes, or microwave individual bars for 20-30 seconds for a warm treat.
How do I get clean, neat slices?
Let the bars cool completely before slicing—at least 1 hour. Use a sharp chef’s knife and wipe it clean between each cut. For the cleanest edges, you can refrigerate the slab for 15 minutes before slicing, but let the bars come back to room temperature before serving.
Pin This Recipe!
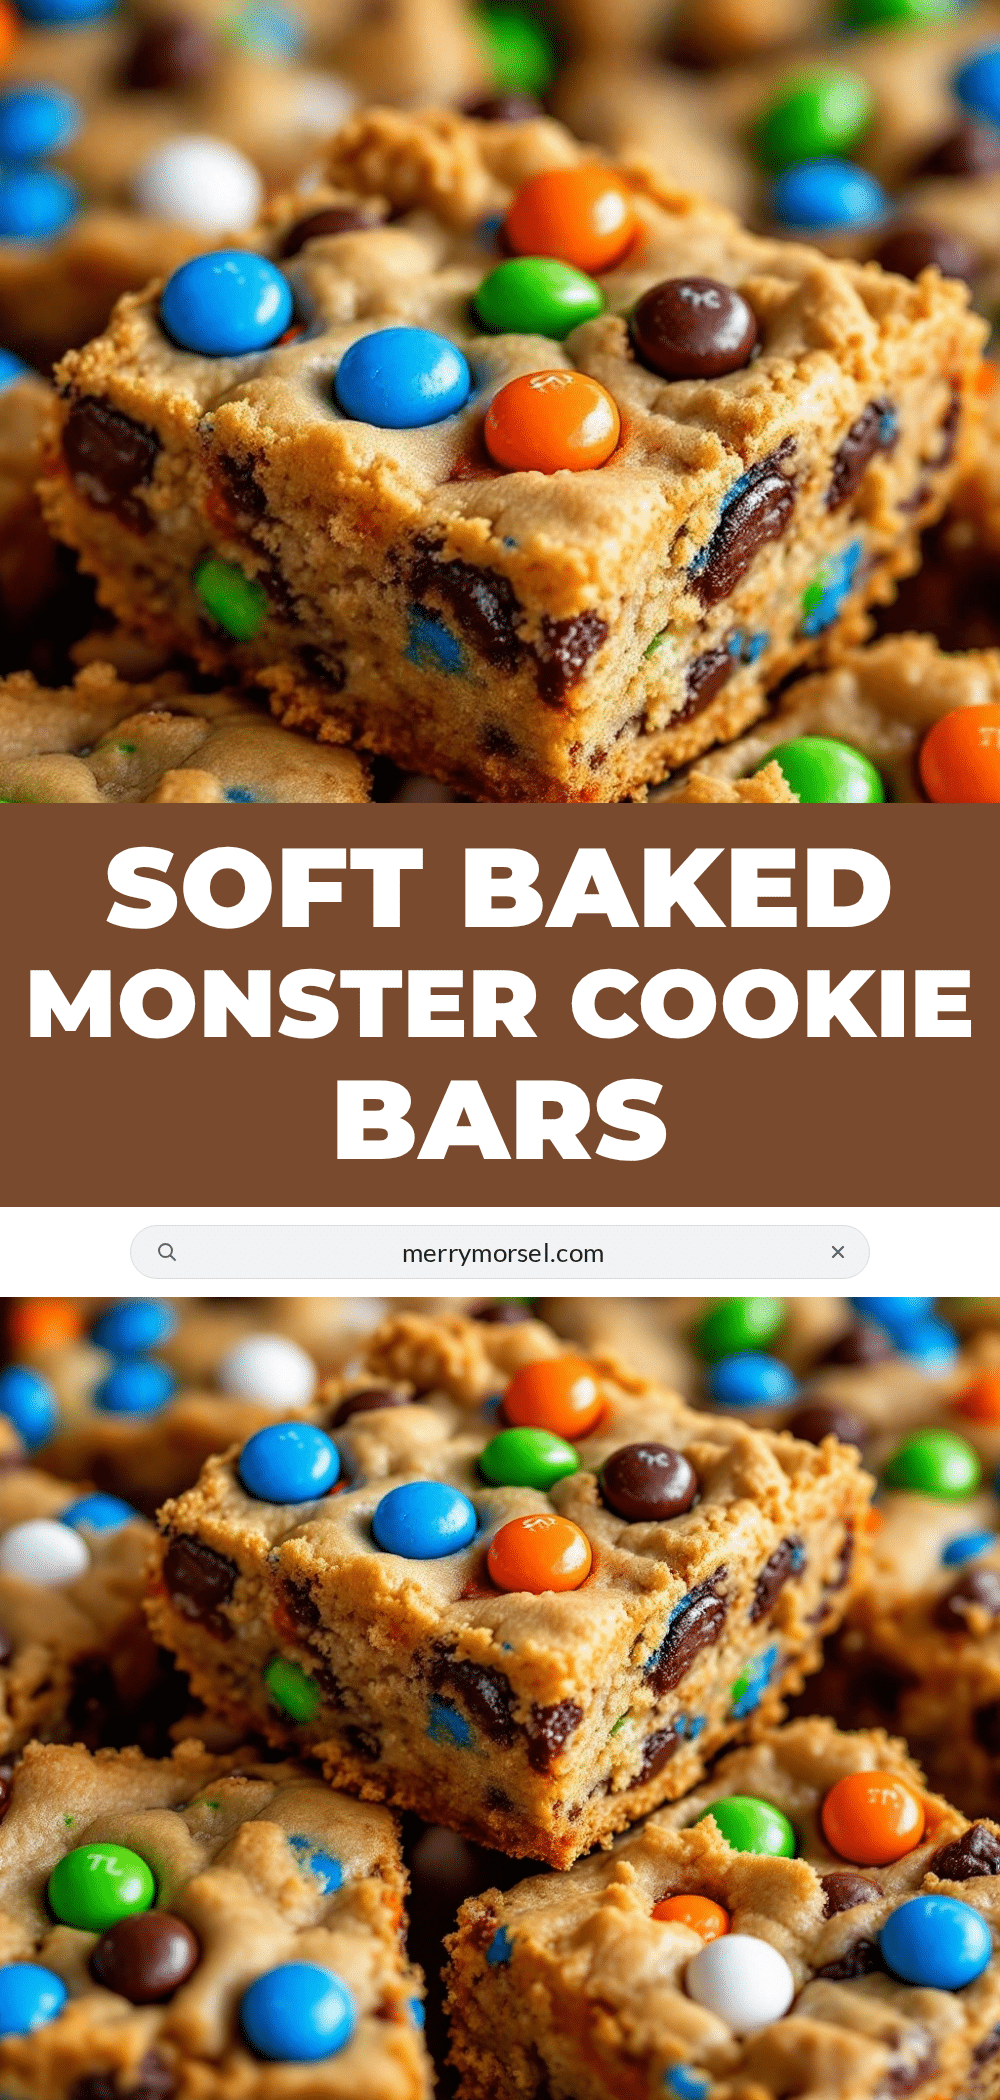
Soft Baked Monster Cookie Bars with M&Ms: Easy 30-Min Recipe
These soft baked monster cookie bars are packed with peanut butter, oats, M&Ms, and chocolate chips. Ready in 30 minutes with no chilling required, they have chewy edges and fudgy centers—perfect for parties, lunchboxes, or a quick sweet treat.
- Prep Time: 10 minutes
- Cook Time: 22 minutes
- Total Time: 32 minutes
- Yield: 24 bars 1x
- Category: Dessert
- Cuisine: American
Ingredients
- 1 cup (2 sticks / 226g) unsalted butter, melted
- 1 cup (200g) light brown sugar, packed
- ½ cup (100g) granulated sugar
- 1 cup (250g) creamy peanut butter (processed, not natural)
- 2 large eggs, room temperature
- 2 teaspoons vanilla extract
- 1½ cups (190g) all-purpose flour
- 1 cup (90g) old-fashioned rolled oats
- ½ cup (45g) quick oats
- 1 teaspoon baking soda
- ½ teaspoon salt
- 1½ cups (270g) M&Ms (plus ¼ cup reserved for topping)
- ½ cup (85g) semi-sweet chocolate chips
Instructions
- Preheat oven to 350°F (175°C). Line a 9×13-inch baking pan with parchment paper, leaving 2 inches overhang on the long sides. Lightly spray with non-stick cooking spray.
- In a large bowl, whisk together melted butter, brown sugar, and granulated sugar until smooth (about 30 seconds).
- Add peanut butter and whisk until fully incorporated. Add eggs and vanilla extract, whisk until smooth and glossy.
- In a separate bowl, whisk together flour, old-fashioned oats, quick oats, baking soda, and salt.
- Add dry ingredients to wet mixture in two additions, folding gently with a rubber spatula until just combined. Do not overmix.
- Fold in 1½ cups M&Ms and semi-sweet chocolate chips. Reserve ¼ cup M&Ms for topping.
- Transfer dough to prepared pan. Using slightly damp hands, press dough into an even layer (about ¾ inch thick). Press reserved M&Ms into top.
- Bake for 20-24 minutes, until edges are golden and center looks slightly underdone (soft and puffy, not wet). A toothpick should come out with moist crumbs.
- Cool in pan on a wire rack for 20 minutes. Use parchment overhang to lift slab onto cutting board. Cool completely (about 1 hour) before slicing into 24 bars.
Notes
Don’t overbake—bars continue baking in the pan after removal. Pull when center looks slightly underdone. Use processed peanut butter (not natural) for best texture. For gluten-free, use 1:1 gluten-free flour blend and certified gluten-free oats. Store in airtight container at room temperature for up to 5 days. Freeze for up to 3 months.
Nutrition
- Serving Size: 1 bar
- Calories: 285
- Sugar: 21
- Sodium: 180
- Fat: 16
- Saturated Fat: 7
- Carbohydrates: 33
- Fiber: 2
- Protein: 5
Keywords: monster cookie bars, M&M bars, soft baked cookie bars, peanut butter oatmeal bars, easy dessert recipe, 30-minute recipe, bar cookies