Love this? Save it for later!
Share the inspiration with your friends
This was supposed to be a simple weeknight casserole, the kind you throw together when you’re too tired to think. I had grabbed a can of green chiles, some tortillas, and a block of cheese, planning to make the same old enchilada casserole my family had eaten a hundred times. But the grocery store had other plans. They were roasting Hatch chiles in a giant drum out front, and the smell—that deep, smoky, almost sweet scent—pulled me in like a cartoon character floating on a smell cloud. I bought a whole bag, not really knowing what I’d do with them.
Back home, I realized my mistake pretty quickly. I had no recipe, no plan, and a pile of chiles that needed to be peeled and seeded. My kitchen looked like a scene from a cooking show gone wrong, with blackened skins and tiny seeds everywhere. I was already running late, and the dog was whining for his walk. Honestly, I almost tossed the whole bag in the freezer and grabbed the canned stuff. But I had already roasted them, so I figured, let’s just see what happens. I threw them into the filling with some smoked paprika and a little cumin, not expecting much.
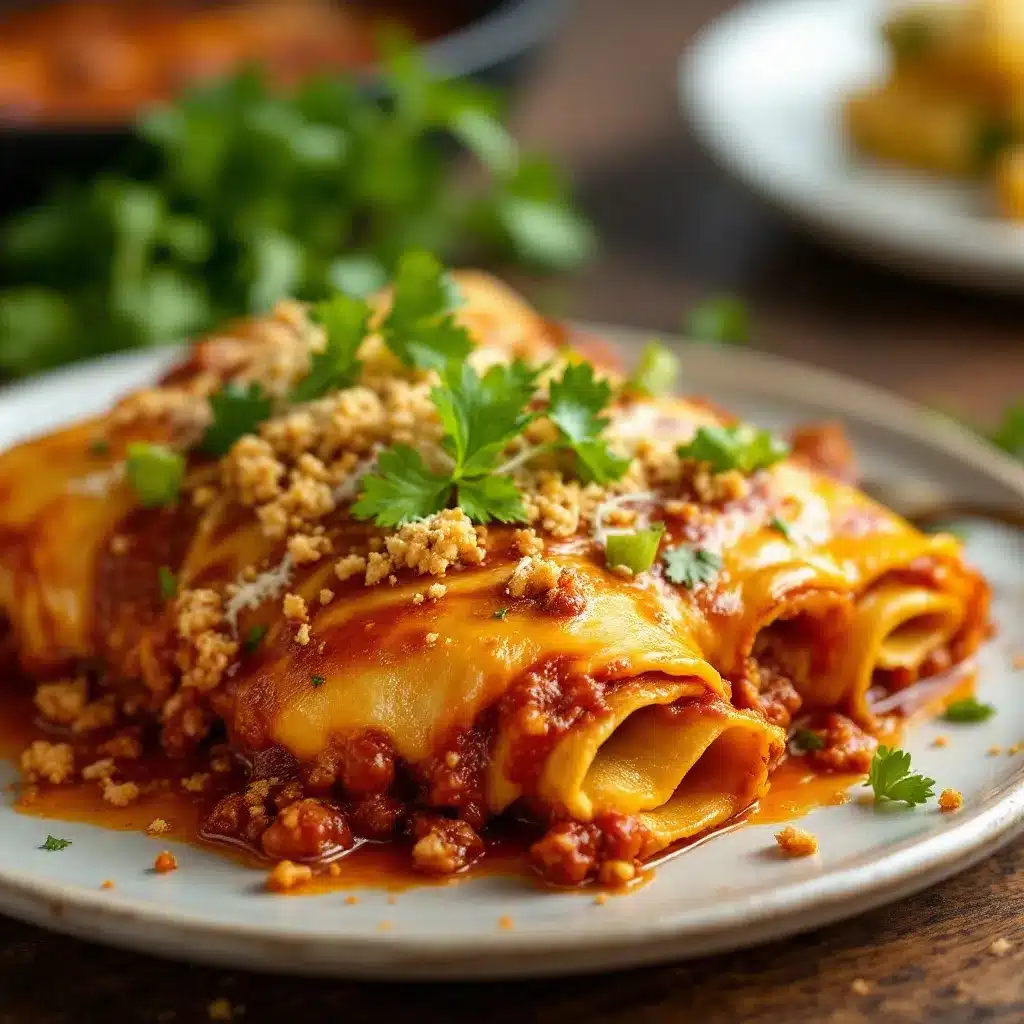
What came out of the oven was nothing like the plan—and better. That first bite had this unexpected depth, a real campfire taste that the canned chiles just can’t touch. The smoky flavor hung around in a way that felt cozy and exciting at the same time. I mean, I sat there, fork halfway to my mouth, just staring at the pan. Maybe you’ve been there, where a happy accident in the kitchen turns into something you want to make forever. That’s how these Smoky Roasted Hatch Chili Enchiladas came to be, and honestly, I keep making them because they remind me that sometimes the best dishes come from a little chaos.
Why You’ll Love This Recipe
These enchiladas aren’t just another dinner option. They’re the kind of meal that makes you look forward to leftovers the next day. I’ve tested this recipe about five times now, tweaking the sauce and the roasting time until it felt just right. Here’s why I think you’ll absolutely love it:
- Quick & Easy: Comes together in under 45 minutes, perfect for a busy weeknight when you need something satisfying without the fuss.
- Simple Ingredients: No fancy grocery trips needed. You likely already have the tortillas, cheese, and spices in your kitchen.
- Perfect for a Cozy Dinner: Great for a chilly evening, a casual get-together, or even a fun taco Tuesday twist.
- Crowd-Pleaser: My picky-eater neighbor, who usually turns up her nose at anything green, asked for the recipe. That’s a win in my book.
- Unbelievably Delicious: The smoky, roasted flavor of the Hatch chiles combined with the creamy cheese and tangy sauce is next-level comfort food.
What makes this recipe different from the rest? It’s the roasting step. Most enchilada recipes use canned chiles, which are fine, but they lack that deep, complex smokiness. By roasting your own Hatch chiles, you unlock a flavor that’s sweet, earthy, and a little bit spicy. It’s not just another version of enchiladas—it’s my best version. This recipe is the kind that makes you close your eyes after the first bite. It’s comfort food reimagined—a little healthier, a lot faster, but with the same soul-soothing satisfaction. Perfect for impressing guests without stress, or turning a simple Tuesday into something memorable.
What Ingredients You Will Need
This recipe uses simple, wholesome ingredients to deliver bold flavor and satisfying texture without the fuss. Most of these are pantry staples, but the star of the show is definitely the fresh Hatch chiles. If you can’t find them, don’t worry—I’ve got a substitution for you below.
For the Filling
- Hatch chiles, fresh (about 6 medium chiles, or 1 ½ cups roasted and chopped) – Look for chiles that are firm and have a bit of give. The skin should be smooth. If Hatch chiles aren’t in season, you can use Anaheim or Poblano peppers, but the flavor will be milder.
- Cooked chicken, shredded (about 2 cups) – I recommend using rotisserie chicken for convenience. It’s a real time-saver.
- Yellow onion, diced (1 medium) – Adds a sweet, savory base to the filling.
- Garlic cloves, minced (3 cloves) – Because everything is better with garlic.
- Cream cheese, softened (4 ounces) – This is my secret ingredient for a creamy, dreamy filling. (Use dairy-free cream cheese if needed.)
- Smoked paprika (1 teaspoon) – This is what gives the enchiladas that campfire taste. I’m a big fan of the McCormick brand for its bold flavor.
- Ground cumin (1 teaspoon) – Adds warmth and earthiness.
- Salt and black pepper (to taste)
For the Sauce
- Butter, unsalted (2 tablespoons) – (Use vegan butter for a dairy-free option.)
- All-purpose flour (2 tablespoons) – This helps thicken the sauce. A gluten-free flour blend works fine here.
- Chicken or vegetable broth (2 cups) – Low-sodium is best so you can control the salt level.
- Tomato paste (2 tablespoons) – Adds richness and color.
- Smoked paprika (1 teaspoon) – I told you, this stuff is gold.
- Chili powder (1 teaspoon) – For that classic enchilada flavor.
- Sour cream (¼ cup) – This makes the sauce creamy and slightly tangy. (Use dairy-free sour cream if needed.)
For Assembling
- Corn or flour tortillas (8-10, 6-inch) – Corn tortillas are traditional and hold up better. I prefer Mission brand corn tortillas for their texture.
- Shredded cheese, like Monterey Jack or a Mexican blend (2 cups) – Use a good melting cheese. I like Sargento for its consistent quality.
- Fresh cilantro, chopped (for garnish)
- Green onions, sliced (for garnish)
Equipment Needed
You don’t need a lot of fancy gear for this recipe, which is part of why I love it. Here’s what you’ll need:
- Baking sheet – For roasting the chiles. Any rimmed baking sheet works.
- 9×13-inch baking dish – This is the perfect size for rolling up the enchiladas. If you don’t have one, you can use two smaller dishes.
- Large skillet – For making the sauce and sautéing the filling. A non-stick or cast-iron skillet works great.
- Mixing bowls – A couple of medium bowls for prepping ingredients.
- Tongs – Helpful for handling the hot chiles after roasting.
- Plastic wrap or a bowl – For steaming the chiles so the skins slip off easily.
- Chef’s knife and cutting board – For all that dicing and chopping.
If you don’t have a baking sheet, you can roast the chiles directly on a gas stove burner using tongs, turning them until the skin is blackened. It’s a little more hands-on, but it works just as well. I’ve done it that way when my baking sheet was already dirty from something else—no judgment here.
Preparation Method
Let’s get cooking! Follow these steps, and you’ll have a pan of smoky, cheesy goodness in no time.
- Roast the Hatch chiles. Preheat your broiler to high. Place the chiles on a baking sheet and broil for 5-7 minutes, turning once or twice, until the skins are blackened and blistered. Don’t walk away—they can burn quickly. Once they’re done, transfer them to a bowl and cover with plastic wrap. Let them steam for 10 minutes. This makes the skins slip right off.
- Prep the chiles. After steaming, peel off the blackened skins. It’s okay if a few bits remain. Cut off the stems, slice the chiles open, and scrape out the seeds. If you want less heat, remove the white membranes too. Chop the chiles into small pieces and set aside.
- Make the filling. In a large skillet over medium heat, add a drizzle of oil. Sauté the diced onion for 3-4 minutes until soft. Add the minced garlic and cook for another 30 seconds until fragrant. Reduce the heat to low and stir in the cream cheese until it’s melted and smooth. Add the shredded chicken, chopped Hatch chiles, smoked paprika, cumin, salt, and pepper. Mix well and cook for 2 minutes. Taste it—you want it to be savory and slightly smoky. Adjust the seasoning if needed.
- Make the sauce. In the same skillet (wipe it out if you want, but I don’t bother), melt the butter over medium heat. Whisk in the flour and cook for 1 minute, stirring constantly. Slowly pour in the broth while whisking to prevent lumps. Add the tomato paste, smoked paprika, and chili powder. Bring to a simmer, then reduce the heat and let it thicken for 3-4 minutes. Stir in the sour cream until smooth. The sauce should be creamy and a little thick, not watery.
- Preheat the oven. Set your oven to 375°F (190°C).
- Assemble the enchiladas. Spread a thin layer of the sauce on the bottom of your 9×13-inch baking dish. Take a tortilla, place about 2-3 tablespoons of the filling in the center, and sprinkle a little cheese on top. Roll it up tightly and place it seam-side down in the dish. Repeat with the remaining tortillas and filling.
- Top and bake. Pour the remaining sauce over the rolled enchiladas, making sure to cover the ends so they don’t dry out. Sprinkle the remaining cheese on top. Bake for 20-25 minutes, until the cheese is bubbly and golden. The edges of the tortillas should be a little crispy.
- Garnish and serve. Let the enchiladas rest for 5 minutes before serving. Top with fresh cilantro and sliced green onions. Serve hot!
Cooking Tips & Techniques
I’ve made these enchiladas about a dozen times now, and I’ve learned a few things the hard way. Here are my best tips for getting it right every time.
- Don’t skip the steaming step. I once tried to peel the chiles without steaming them, and it was a disaster. The skins stuck like glue, and I ended up with a pile of shredded chile mush. Steaming them makes the skins slide off like magic.
- Use warm tortillas. Cold corn tortillas crack when you try to roll them. Warm them in the microwave for 20-30 seconds, or in a dry skillet for a few seconds on each side. This makes them pliable and easy to work with.
- Double the sauce. Honestly, you can never have too much sauce. I often make a double batch and freeze half for later. It’s great on tacos, eggs, or even as a dip.
- Watch the broiler. The first time I roasted chiles, I got distracted and ended up with charcoal. Set a timer and keep an eye on them. They blacken fast.
- Make ahead. You can assemble the enchiladas a day in advance. Just cover the dish and refrigerate. When you’re ready to bake, add about 10 minutes to the cooking time.
Variations & Adaptations
This recipe is super flexible. Here are a few ways to switch it up based on what you have or what you’re craving.
- Vegetarian Version: Skip the chicken and use black beans, corn, and sautéed mushrooms instead. The smoky chiles and creamy sauce are hearty enough to stand on their own.
- Spicy Kick: If you like heat, add a diced jalapeño to the filling or use hot Hatch chiles instead of mild. You can also sprinkle some red pepper flakes on top before baking.
- Dairy-Free: Use dairy-free cream cheese, sour cream, and cheese. I’ve tried this with Violife brand cheese, and it melts beautifully.
- Different Protein: Swap the chicken for shredded pork, ground beef, or even tofu crumbles. I once made it with leftover carnitas, and it was incredible.
- Green Sauce: If you’re not a fan of the red sauce, use a store-bought green enchilada sauce. Just add a little extra smoked paprika to keep that smoky flavor.
Serving & Storage Suggestions
These enchiladas are best served hot, straight out of the oven. I like to serve them with a side of Mexican rice, refried beans, or a simple green salad. A dollop of sour cream and a squeeze of lime juice on top really brightens up the flavors. For drinks, a cold Mexican beer or a tart margarita pairs perfectly.
For storage, let the enchiladas cool completely, then cover the dish tightly with foil or plastic wrap. They’ll keep in the refrigerator for up to 4 days. To reheat, pop them in a 350°F oven for 15-20 minutes, or microwave individual portions for 1-2 minutes. The flavors actually get better after a day or two, as the sauce soaks into the tortillas.
You can also freeze the assembled, unbaked enchiladas. Wrap the dish in a layer of plastic wrap and then foil. Freeze for up to 3 months. To bake, thaw overnight in the fridge, then bake as directed, adding 10-15 minutes.
Nutritional Information & Benefits
Here’s an estimated nutritional breakdown per serving (based on 8 servings):
| Nutrient | Amount |
|---|---|
| Calories | 385 |
| Protein | 28g |
| Fat | 18g |
| Carbohydrates | 28g |
| Fiber | 4g |
| Sugar | 6g |
Hatch chiles are a great source of vitamin C and antioxidants. They also contain capsaicin, which can help boost metabolism. This meal is high in protein from the chicken and cheese, making it filling and satisfying. For a lighter option, use low-fat cheese and sour cream. This recipe is naturally gluten-free if you use corn tortillas and a gluten-free flour blend for the sauce.
Frequently Asked Questions
Can I use canned Hatch chiles instead of fresh?
Yes, you can! If fresh Hatch chiles aren’t in season, use two 4-ounce cans of roasted Hatch chiles. Just drain them well before adding to the filling. The flavor won’t be as smoky, but it’ll still be delicious.
How do I make the enchiladas less spicy?
To reduce the heat, remove all the seeds and white membranes from the chiles after roasting. You can also use milder chiles like Anaheim or Poblano. If you’re still worried, serve with a dollop of sour cream to cool things down.
Can I make this recipe in advance?
Absolutely! Assemble the enchiladas up to 24 hours in advance and keep them covered in the fridge. When you’re ready to bake, add about 10 minutes to the cooking time. They’re perfect for meal prep.
What’s the best cheese for these enchiladas?
Monterey Jack is my go-to because it melts beautifully and has a mild flavor that doesn’t overpower the chiles. A Mexican blend or even cheddar works great too. Avoid pre-shredded cheese if you can—it doesn’t melt as smoothly.
Can I freeze the leftovers?
Yes! Let the enchiladas cool completely, then portion them into airtight containers. They’ll keep in the freezer for up to 3 months. Thaw overnight in the fridge and reheat in the oven for best results.
Conclusion
These Smoky Roasted Hatch Chili Enchiladas are more than just a dinner recipe—they’re a reminder that sometimes the best things come from a little bit of chaos and a whole lot of curiosity. The smoky, roasted flavor of the chiles paired with the creamy filling and tangy sauce is something you have to taste to believe. I love how forgiving this recipe is, how you can tweak it based on what’s in your fridge, and how it always delivers a meal that feels special without a ton of effort.
I really hope you give these a try, whether you’re a seasoned cook or just starting out. Don’t be afraid to make them your own—add more spice, swap the protein, or double the sauce. When you do, come back and let me know how they turned out! Leave a comment below or tag me in your photos on Pinterest. I’d love to see your smoky, cheesy creations. Happy cooking, friend!
Pin This Recipe!
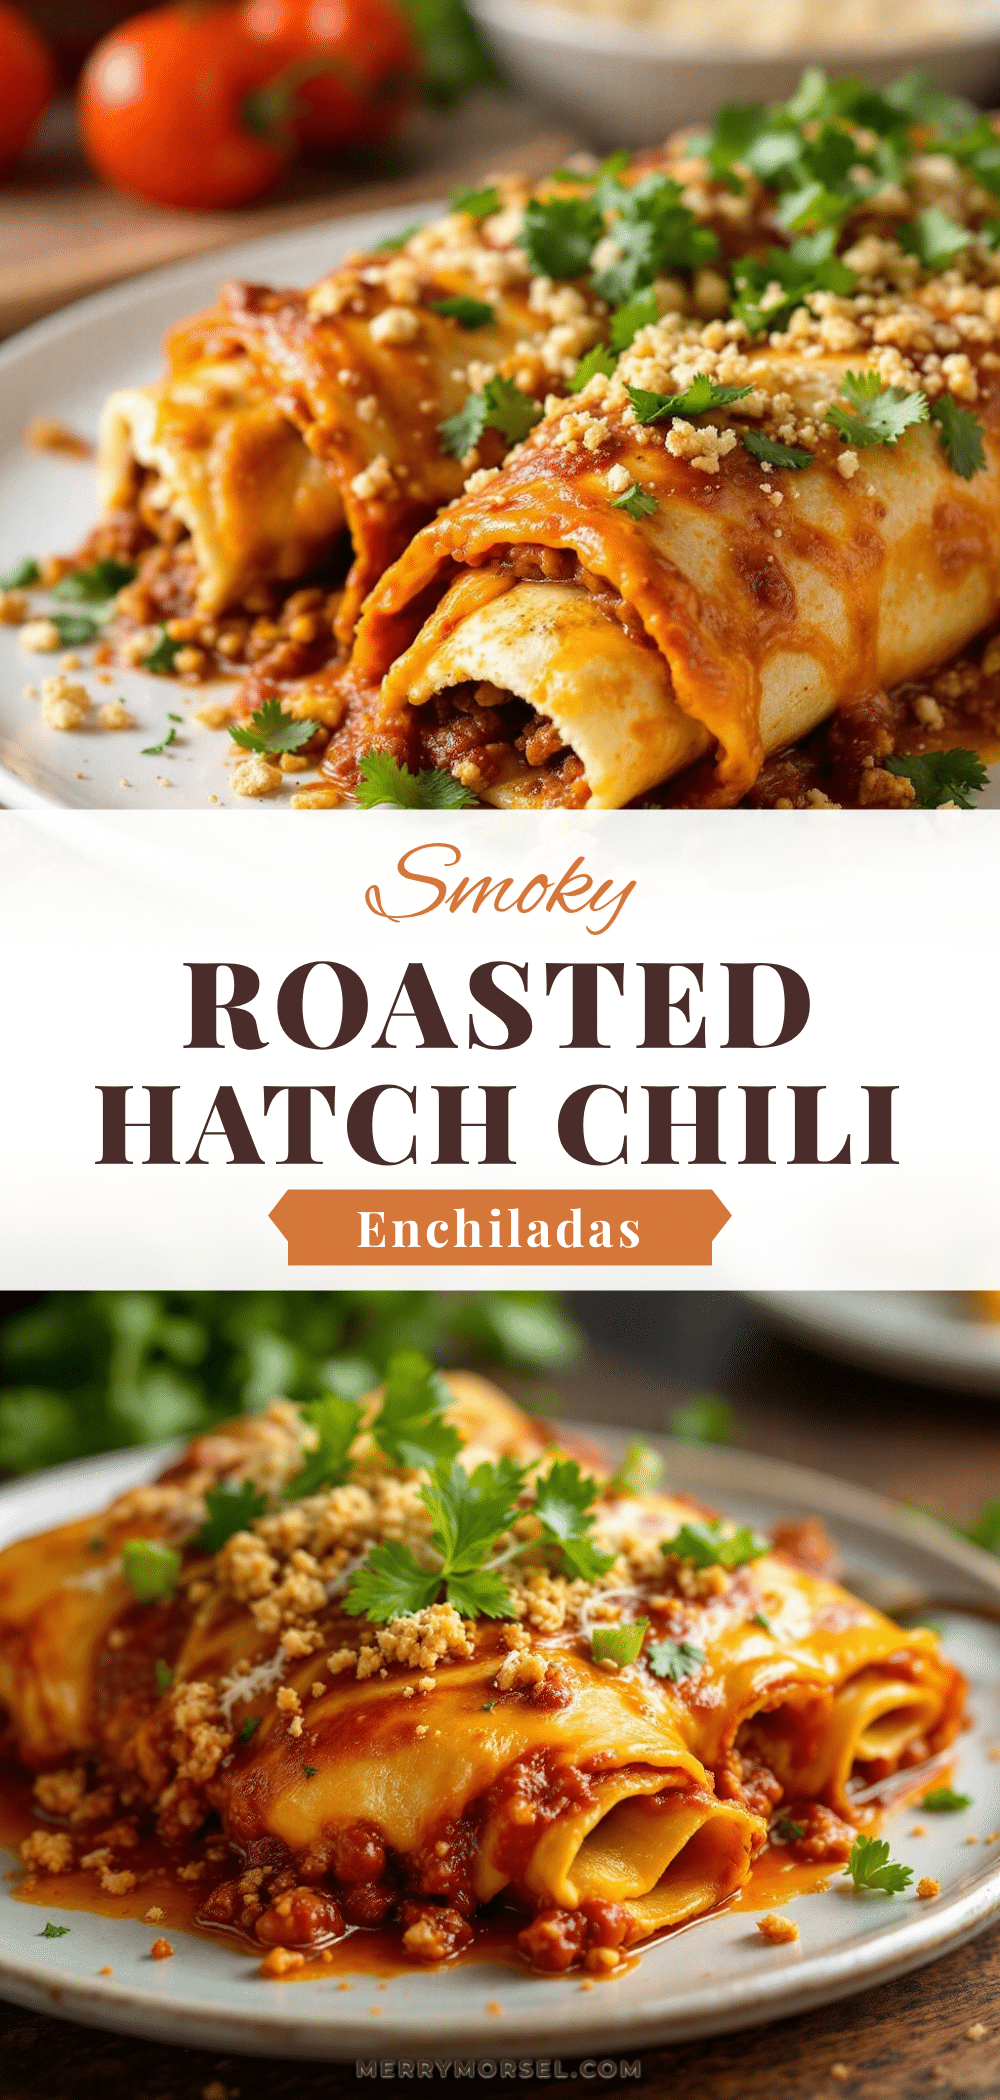
Smoky Roasted Hatch Chili Enchiladas: Best Easy Dinner
These smoky roasted Hatch chili enchiladas are a quick and easy weeknight dinner, featuring a creamy filling and a tangy sauce with deep, campfire flavor. Perfect for a cozy meal that’s sure to become a family favorite.
- Prep Time: 15 minutes
- Cook Time: 30 minutes
- Total Time: 45 minutes
- Yield: 8 servings 1x
- Category: Main Course
- Cuisine: Mexican
Ingredients
- 6 medium fresh Hatch chiles (or 1 ½ cups roasted and chopped)
- 2 cups cooked chicken, shredded
- 1 medium yellow onion, diced
- 3 cloves garlic, minced
- 4 ounces cream cheese, softened
- 1 teaspoon smoked paprika
- 1 teaspoon ground cumin
- Salt and black pepper to taste
- 2 tablespoons unsalted butter
- 2 tablespoons all-purpose flour
- 2 cups chicken or vegetable broth (low-sodium)
- 2 tablespoons tomato paste
- 1 teaspoon smoked paprika
- 1 teaspoon chili powder
- ¼ cup sour cream
- 8–10 corn or flour tortillas (6-inch)
- 2 cups shredded Monterey Jack or Mexican blend cheese
- Fresh cilantro, chopped (for garnish)
- Green onions, sliced (for garnish)
Instructions
- Roast the Hatch chiles: Preheat broiler to high. Place chiles on a baking sheet and broil for 5-7 minutes, turning once or twice, until skins are blackened and blistered. Transfer to a bowl, cover with plastic wrap, and let steam for 10 minutes.
- Prep the chiles: After steaming, peel off blackened skins. Cut off stems, slice open, and scrape out seeds. Chop chiles into small pieces and set aside.
- Make the filling: In a large skillet over medium heat, add a drizzle of oil. Sauté diced onion for 3-4 minutes until soft. Add minced garlic and cook for 30 seconds. Reduce heat to low, stir in cream cheese until melted and smooth. Add shredded chicken, chopped Hatch chiles, smoked paprika, cumin, salt, and pepper. Mix well and cook for 2 minutes. Adjust seasoning to taste.
- Make the sauce: In the same skillet, melt butter over medium heat. Whisk in flour and cook for 1 minute, stirring constantly. Slowly pour in broth while whisking to prevent lumps. Add tomato paste, smoked paprika, and chili powder. Bring to a simmer, then reduce heat and let thicken for 3-4 minutes. Stir in sour cream until smooth.
- Preheat oven to 375°F (190°C).
- Assemble the enchiladas: Spread a thin layer of sauce on the bottom of a 9×13-inch baking dish. Place 2-3 tablespoons of filling in the center of each tortilla, sprinkle with a little cheese, roll tightly, and place seam-side down in the dish.
- Top and bake: Pour remaining sauce over the rolled enchiladas, covering ends. Sprinkle remaining cheese on top. Bake for 20-25 minutes until cheese is bubbly and golden.
- Garnish and serve: Let enchiladas rest for 5 minutes. Top with fresh cilantro and sliced green onions. Serve hot.
Notes
For less heat, remove seeds and white membranes from chiles. Warm tortillas before rolling to prevent cracking. Double the sauce for extra coverage. Assemble up to 24 hours in advance and refrigerate; add 10 minutes to baking time.
Nutrition
- Serving Size: 1 enchilada
- Calories: 385
- Sugar: 6
- Sodium: 650
- Fat: 18
- Saturated Fat: 9
- Carbohydrates: 28
- Fiber: 4
- Protein: 28
Keywords: Hatch chile enchiladas, smoky enchiladas, easy dinner, weeknight meal, chicken enchiladas, roasted chiles


