Love this? Save it for later!
Share the inspiration with your friends
“I never thought I’d pull off an ombre buttercream sheet cake without a turntable,” I confessed to my friend Lisa one Saturday afternoon. She looked skeptical, but honestly, I was too. The summer I decided to bake a birthday cake for my niece’s classroom party, I realized my fancy turntable was nowhere to be found—probably still packed away from our last kitchen remodel. With a deadline and a craving to try something colorful and fun, I had to get creative.
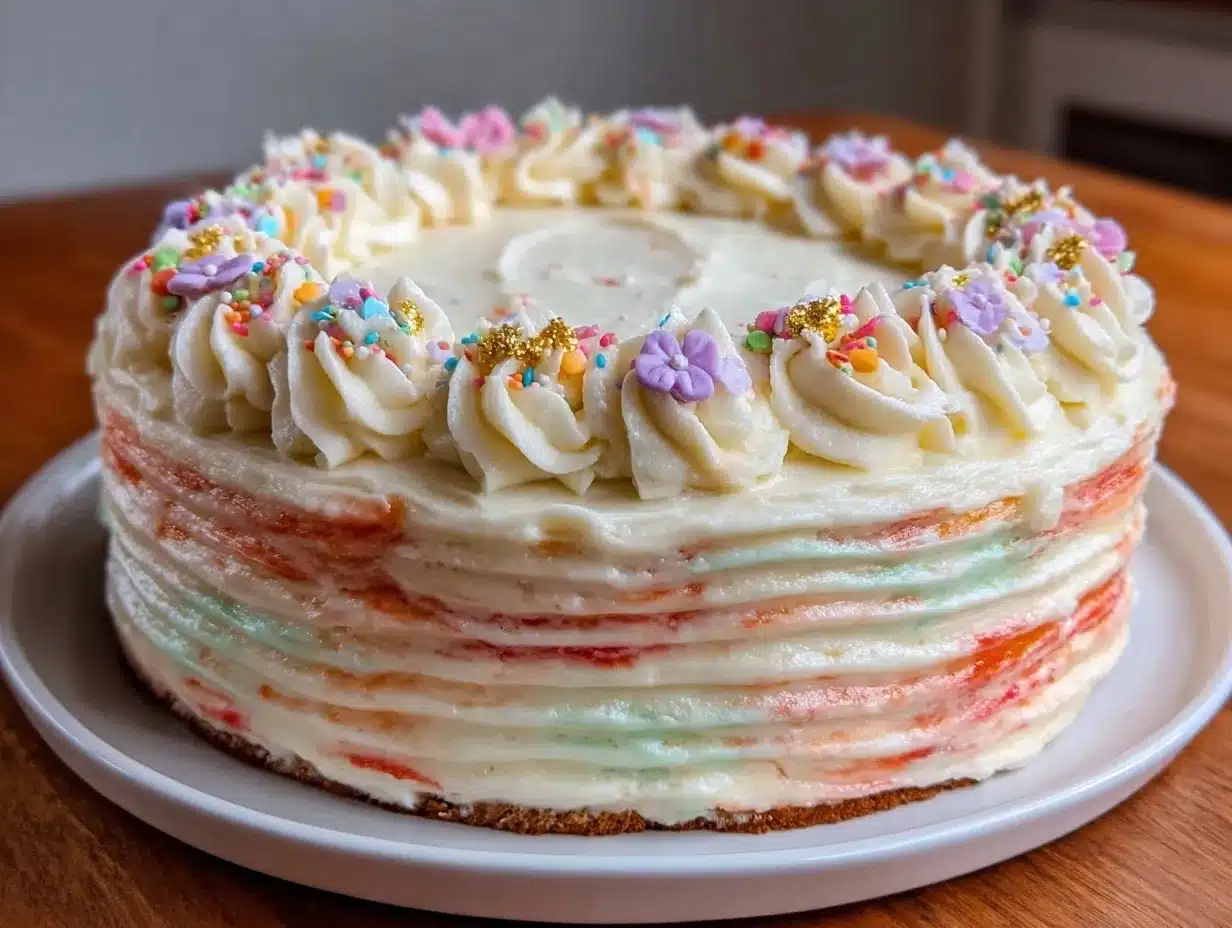
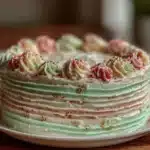
The sizzle of butter melting in my mixer and the soft hum of the oven became my soundtrack that day. I grabbed my trusty offset spatula, some food coloring, and a sheet cake pan that had seen better days (I might have dropped it once or twice). Between messy hands and a few smudged frosting attempts, I managed to create the perfect class colors ombre buttercream sheet cake, layering shades from soft pastel pinks to deep, rich reds. It wasn’t flawless—there was a smudge right on the corner, and yes, the kitchen looked like a frosting warzone—but the kids loved it, and that’s what mattered.
Maybe you’ve been there—dreaming of a stunning cake but missing the fancy tools. Let me tell you, this recipe is for anyone who wants a show-stopping ombre cake without fussing over a turntable or complicated equipment. It stayed with me not just because it tasted incredible but because it reminded me how sometimes, simplicity and a bit of patience can create the most memorable moments.
Why You’ll Love This Recipe
- Quick & Easy: Comes together in under 90 minutes, perfect when you’re juggling life, school runs, or last-minute celebrations.
- Simple Ingredients: No need for specialty items; you likely have all the basics at home for this buttercream sheet cake.
- Perfect for Classroom Parties: Bright, fun colors that kids adore and adults appreciate for their smooth texture and balanced sweetness.
- Crowd-Pleaser: The buttercream is rich yet light, and the ombre effect always sparks compliments and smiles.
- Unbelievably Delicious: The classic vanilla cake base and creamy buttercream combine for a comforting taste that feels both nostalgic and fresh.
This recipe isn’t just another ombre cake—it’s designed to be approachable for home bakers without a turntable. Instead of stressing over fancy tools, I perfected a layering and smoothing technique that anyone can master. The secret lies in the buttercream’s consistency and layering the colors carefully to create a seamless gradient effect. I remember trying to blend the colors too quickly the first time, and it ended up muddy. Patience truly is the key here.
Whether you’re aiming for a birthday centerpiece or a cheerful dessert for a school event, this buttercream sheet cake brings the joy of color and flavor without the hassle. It’s a little celebration on a tray, and honestly, who doesn’t need a bit of that?
What Ingredients You Will Need
This recipe uses straightforward, pantry-friendly ingredients to give you that classic, creamy buttercream and moist vanilla cake base. The colors come alive with just a few drops of gel food coloring—no artificial mess or weird textures.
- For the Cake:
- All-purpose flour, 2 ½ cups (315 grams) – for structure and softness
- Baking powder, 2 ½ teaspoons – helps the cake rise beautifully
- Salt, ½ teaspoon – balances flavors
- Unsalted butter, 1 cup (226 grams), softened – I trust Land O Lakes for consistent creaminess
- Granulated sugar, 1 ¾ cups (350 grams) – sweetness without graininess
- Large eggs, 4, room temperature – adds richness and moisture
- Pure vanilla extract, 1 tablespoon – for that classic vanilla flavor
- Whole milk, 1 cup (240 ml), room temperature – keeps the crumb tender
- For the Buttercream:
- Unsalted butter, 1 ½ cups (340 grams), softened – the base for smooth, creamy frosting
- Powdered sugar, 5 cups (600 grams), sifted – for that light, fluffy texture
- Pure vanilla extract, 2 teaspoons – enhances sweetness naturally
- Heavy cream or whole milk, 2-4 tablespoons (30-60 ml) – adjust for spreading consistency
- Gel food coloring in class colors (e.g., pinks, reds, blues) – these give vibrant, clean hues without thinning the frosting
Feel free to swap whole milk for almond or oat milk if needed, but I recommend the heavy cream for the buttercream’s silky finish. When choosing gel colors, brands like AmeriColor or Wilton offer strong, reliable pigments that won’t water down your buttercream.
Equipment Needed
- 9×13 inch (23×33 cm) sheet cake pan – I use a non-stick metal pan for even baking and easy release
- Electric mixer (stand or hand) – a stand mixer helps but a handheld mixer works just fine
- Offset spatula – essential for smooth frosting application without a turntable
- Rubber spatula – for scraping the bowl clean and mixing
- Mixing bowls – multiple sizes help with separating buttercream colors
- Measuring cups and spoons – accuracy matters, especially for baking powder and salt
- Bench scraper or straight edge knife – optional but helpful for smoothing edges
If you don’t have an offset spatula, a butter knife or small flat spatula can do the job, but the offset design really makes smoothing easier. For budget-friendly options, I found that basic metal pans bake more evenly than glass, and mixing bowls with non-slip bottoms prevent spills, which you’ll appreciate when frosting gets messy (trust me!).
Preparation Method
- Preheat the oven to 350°F (175°C). Grease and lightly flour your 9×13 inch sheet cake pan or line it with parchment paper for easy removal. This step takes about 10 minutes.
- Mix dry ingredients. In a medium bowl, whisk together 2 ½ cups (315 g) all-purpose flour, 2 ½ teaspoons baking powder, and ½ teaspoon salt. Set aside.
- Cream butter and sugar. In a large bowl, beat 1 cup (226 g) softened unsalted butter with 1 ¾ cups (350 g) granulated sugar on medium speed until light and fluffy, about 3-4 minutes. Don’t rush this; it’s the key to a tender crumb.
- Add eggs and vanilla. Beat in 4 large eggs, one at a time, ensuring each is fully incorporated before adding the next. Stir in 1 tablespoon pure vanilla extract.
- Alternate adding dry ingredients and milk. Reduce mixer speed to low. Add the dry ingredients in three parts, alternating with 1 cup (240 ml) whole milk, beginning and ending with the dry mix. Mix just until combined—overmixing will make the cake tough.
- Pour batter into the prepared pan. Smooth the top evenly using a spatula. Tap the pan gently on the counter to release any air bubbles. Bake for 35-40 minutes or until a toothpick inserted in the center comes out clean.
- Cool completely. Let the cake cool in the pan for 15 minutes, then transfer to a wire rack to cool fully before frosting. This step is crucial because warm cake will melt your buttercream.
- Prepare the buttercream. Beat 1 ½ cups (340 g) softened unsalted butter on medium speed until creamy, about 2 minutes. Gradually add 5 cups (600 g) sifted powdered sugar, beating on low speed to avoid a sugar cloud. Add 2 teaspoons vanilla and 2-4 tablespoons (30-60 ml) heavy cream or milk to reach spreadable consistency.
- Divide and color the buttercream. Separate the frosting into 4-5 bowls, depending on how many ombre layers you want. Gradually add gel food coloring to each bowl, starting with the lightest color and increasing intensity for each bowl. Remember, a little goes a long way!
- Frost the cake without a turntable. Starting with the darkest color, spread a horizontal strip of buttercream along the bottom edge of the cake. Clean your spatula, then add the next lighter color in a strip above. Continue layering the colors upward. Use an offset spatula held at a slight angle to gently smooth between color bands, dragging excess frosting upward. Don’t worry about perfection; the key is gentle, patient strokes. Use a bench scraper or a flat edge held steady to smooth the sides if needed.
- Finish and chill. Once smooth, refrigerate the cake for 20-30 minutes to set the buttercream. This helps the layers hold their shape when slicing.
Pro tip: If you find the buttercream too soft while frosting, pop it in the fridge for 10 minutes to firm up but not harden. I learned this after a frosting mishap that left me scraping off half the cake mid-way. Also, wipe your spatula clean between smoothing steps to avoid color bleeding.
Cooking Tips & Techniques
Buttercream consistency is king when creating that perfect ombre look without a turntable. If it’s too stiff, it won’t spread smoothly; too soft, and colors will blend too much. I recommend starting with a stiffer frosting and adding cream sparingly.
Layer your colors gradually—rushing the blending smudges the gradient. Patience and light, upward strokes with your offset spatula mimic the spinning effect of a turntable. Trust me, it works wonders once you get the hang of it.
Another thing I learned the hard way: chilling the cake before frosting can make the crumb fragile. Let it cool completely at room temperature but don’t refrigerate first. Also, using gel colors instead of liquid prevents thinning your frosting.
When smoothing edges, a bench scraper can be your best friend. Hold it steady and scrape gently from bottom to top. It’s a bit like icing yoga—slow, deliberate moves win every time.
Multitasking tip: While the cake bakes, prep your buttercream colors. It saves time and lets you focus on layering once the cake is cool.
Variations & Adaptations
- Dietary Swap: Use gluten-free all-purpose flour blend for a gluten-free cake. I’ve tried this with Bob’s Red Mill and the texture is surprisingly close to the original.
- Flavor Twist: Add lemon zest and a teaspoon of lemon extract to the batter and buttercream for a bright, citrusy version that freshens up the classic vanilla base.
- Seasonal Colors: Swap the classic class colors for seasonal palettes—think soft pastels for spring or warm oranges and browns for fall. It’s a fun way to customize without changing the technique.
- Alternative Frosting: Try cream cheese frosting for a tangier finish. Just keep in mind it’s softer, so chilling is even more important before spreading.
Personally, I once made this ombre cake with a berry purée swirl in the buttercream for a berry-themed party. It was a bit messier but added a lovely natural color and flavor boost.
Serving & Storage Suggestions
Serve this ombre buttercream sheet cake at room temperature for the best texture and flavor. Cold cake tends to mute the buttercream’s richness, and warm cake risks melting the frosting.
This cake pairs beautifully with a light cup of tea or a simple glass of milk. For celebrations, a scoop of vanilla ice cream on the side feels indulgent but balanced.
Store leftovers in an airtight container in the refrigerator for up to 4 days. Before serving again, let slices sit at room temperature for 30 minutes to soften the buttercream. The flavors actually mellow and become more harmonious after a day or two, so sometimes waiting pays off.
For longer storage, the unfrosted cake layers freeze well wrapped tightly in plastic wrap and foil. Thaw overnight in the fridge before frosting.
Nutritional Information & Benefits
One generous slice (about 1/12th of the cake) contains approximately 350-400 calories, mainly from fats and sugars in the butter and buttercream. The all-purpose flour and eggs provide some protein and carbs for energy.
This recipe can be adapted for gluten-free diets by swapping the flour, and you can adjust sweetness by reducing sugar slightly if desired. Using high-quality butter and real vanilla extract boosts flavor without artificial additives.
While this cake is a treat, the homemade ingredients mean you avoid preservatives and unnecessary fillers common in store-bought desserts. I always feel better sharing something homemade like this with family and friends.
Conclusion
This perfect class colors ombre buttercream sheet cake without a turntable proves you don’t need fancy gadgets to make something stunning. It’s approachable, colorful, and downright delicious—ideal for those moments when you want to impress but keep it simple.
Feel free to customize the colors, flavors, or textures to match your own style and occasion. Honestly, the best part is watching the smiles when you cut into those vibrant layers, knowing you made it all with your own hands (and a bit of patience!).
If you try this recipe, I’d love to hear how it turns out or any twists you add. Share your stories and photos—I’m always excited to see your baking adventures!
Go ahead and bring a little color and sweetness into your kitchen today. You’ve got this!
FAQs
Can I make this ombre buttercream sheet cake without gel food coloring?
You can use liquid food coloring, but gel colors are better because they provide vibrant hues without thinning the buttercream. If you have only liquid colors, use them sparingly.
How do I fix buttercream that’s too soft or too stiff?
If too soft, chill the buttercream in the fridge for 10-15 minutes, then whip again. If too stiff, add a teaspoon of cream or milk at a time while beating until spreadable.
Is it necessary to chill the cake before frosting?
The cake should be completely cooled at room temperature before frosting. Chilling the cake before frosting can make the crumb fragile and cause crumbs in your buttercream.
Can I prepare this cake a day ahead?
Yes! Bake the cake and let it cool completely. Wrap tightly and store at room temperature. Make the buttercream and assemble the next day for freshest results.
What’s the best way to store leftover frosted cake?
Keep it in an airtight container in the fridge for up to 4 days. Let it come to room temperature before serving for the best texture and flavor.
Pin This Recipe!
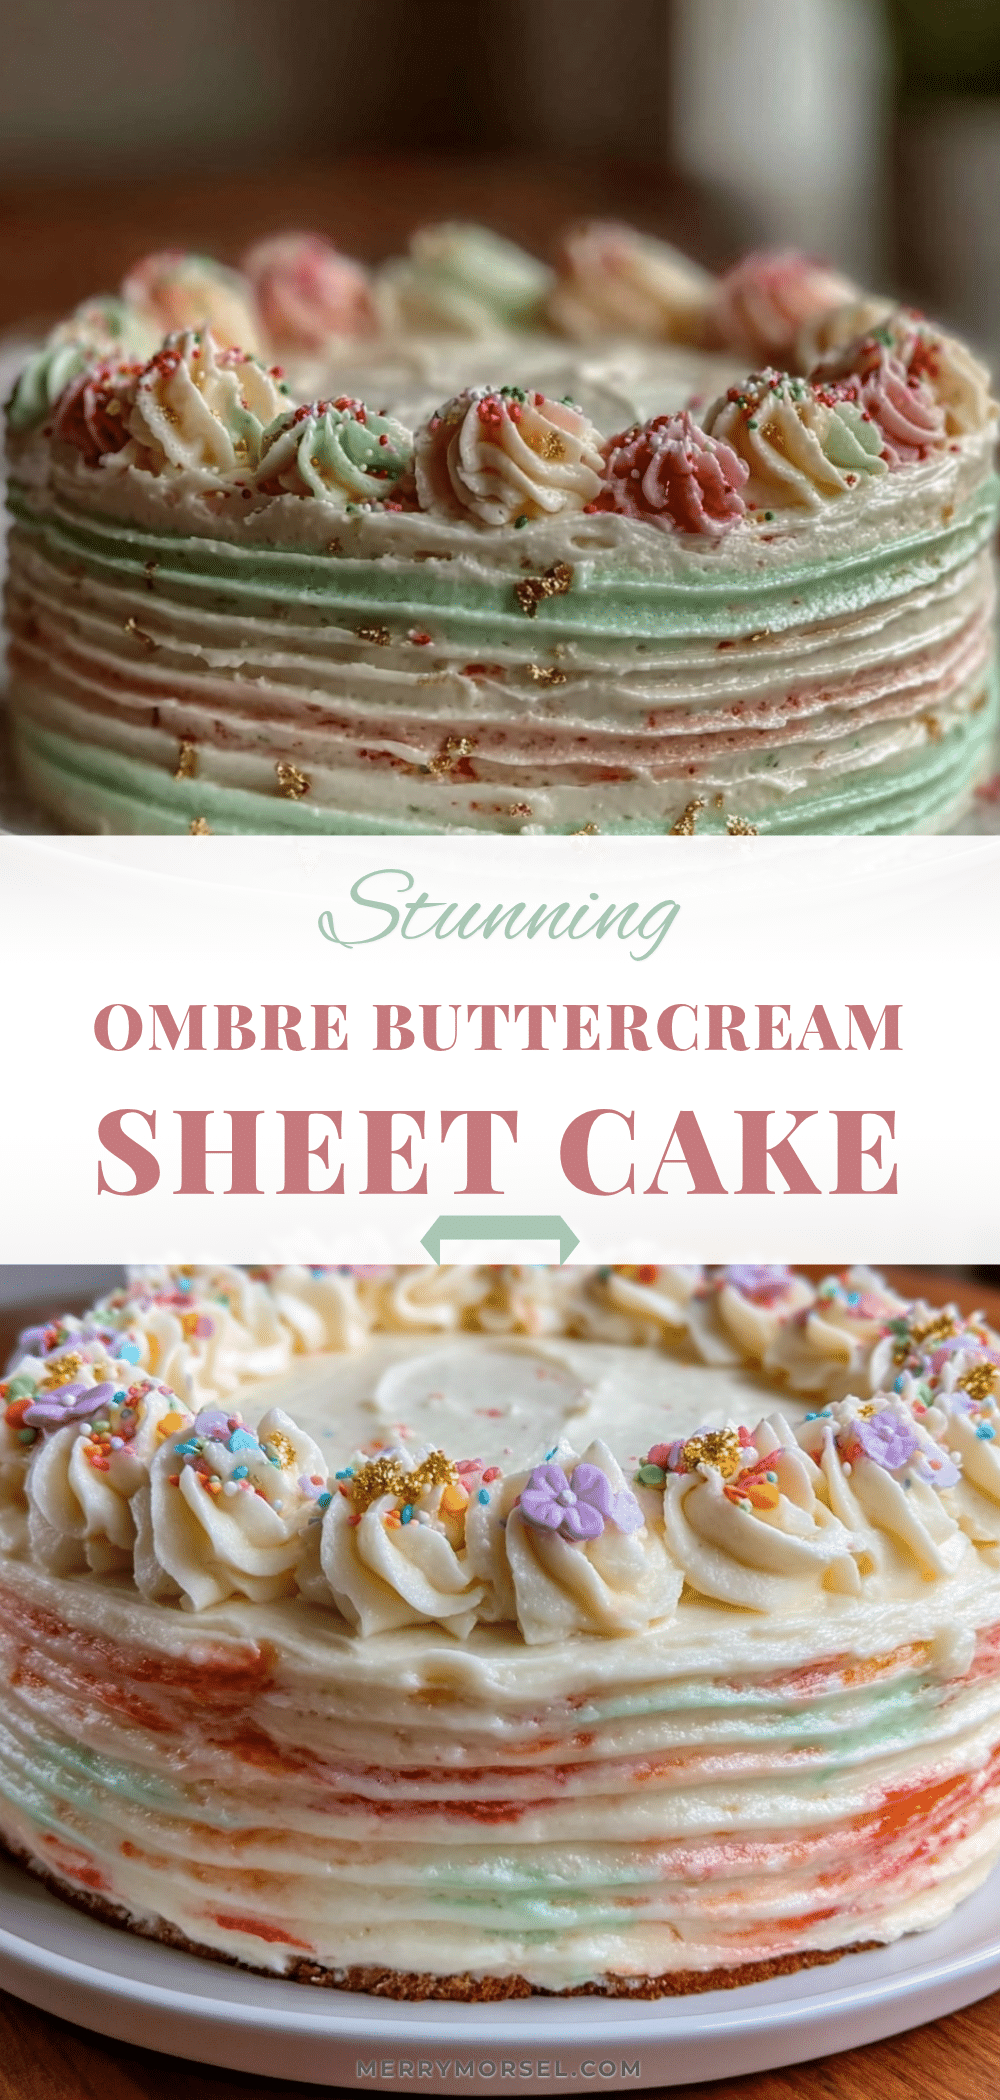
Perfect Class Colors Ombre Buttercream Sheet Cake Easy Step-by-Step Without Turntable
A colorful and fun ombre buttercream sheet cake made without a turntable, perfect for classroom parties and celebrations. This recipe is approachable for home bakers and features a moist vanilla cake base with creamy, vibrant buttercream layers.
- Prep Time: 20 minutes
- Cook Time: 40 minutes
- Total Time: 1 hour
- Yield: 12 servings 1x
- Category: Dessert
- Cuisine: American
Ingredients
- 2 ½ cups (315 grams) all-purpose flour
- 2 ½ teaspoons baking powder
- ½ teaspoon salt
- 1 cup (226 grams) unsalted butter, softened
- 1 ¾ cups (350 grams) granulated sugar
- 4 large eggs, room temperature
- 1 tablespoon pure vanilla extract
- 1 cup (240 ml) whole milk, room temperature
- 1 ½ cups (340 grams) unsalted butter, softened (for buttercream)
- 5 cups (600 grams) powdered sugar, sifted
- 2 teaspoons pure vanilla extract (for buttercream)
- 2–4 tablespoons (30–60 ml) heavy cream or whole milk (for buttercream)
- Gel food coloring in class colors (e.g., pinks, reds, blues)
Instructions
- Preheat the oven to 350°F (175°C). Grease and lightly flour a 9×13 inch sheet cake pan or line it with parchment paper.
- In a medium bowl, whisk together the flour, baking powder, and salt. Set aside.
- In a large bowl, beat the softened butter and granulated sugar on medium speed until light and fluffy, about 3-4 minutes.
- Beat in the eggs one at a time, ensuring each is fully incorporated before adding the next. Stir in the vanilla extract.
- Reduce mixer speed to low. Add the dry ingredients in three parts, alternating with the milk, beginning and ending with the dry mix. Mix just until combined.
- Pour batter into the prepared pan and smooth the top evenly. Tap the pan gently to release air bubbles.
- Bake for 35-40 minutes or until a toothpick inserted in the center comes out clean.
- Let the cake cool in the pan for 15 minutes, then transfer to a wire rack to cool completely before frosting.
- Beat the softened butter for the buttercream on medium speed until creamy, about 2 minutes.
- Gradually add the sifted powdered sugar, beating on low speed to avoid a sugar cloud.
- Add vanilla extract and heavy cream or milk to reach a spreadable consistency.
- Divide the buttercream into 4-5 bowls and add gel food coloring to each, starting with the lightest color and increasing intensity.
- Starting with the darkest color, spread a horizontal strip of buttercream along the bottom edge of the cake.
- Clean the spatula and add the next lighter color in a strip above. Continue layering colors upward.
- Use an offset spatula held at a slight angle to gently smooth between color bands, dragging excess frosting upward.
- Optionally, use a bench scraper or flat edge to smooth the sides gently.
- Refrigerate the cake for 20-30 minutes to set the buttercream before slicing.
Notes
Buttercream consistency is key: too stiff won’t spread smoothly, too soft will blend colors too much. Chill buttercream if too soft. Let cake cool completely before frosting to avoid melting buttercream. Use gel food coloring for vibrant colors without thinning frosting. Clean spatula between color layers to prevent bleeding.
Nutrition
- Serving Size: 1 slice (1/12th of c
- Calories: 375
- Sugar: 35
- Sodium: 220
- Fat: 22
- Saturated Fat: 13
- Carbohydrates: 45
- Fiber: 0.5
- Protein: 4
Keywords: ombre cake, buttercream cake, sheet cake, classroom party cake, vanilla cake, no turntable cake, colorful cake, easy cake recipe