Love this? Save it for later!
Share the inspiration with your friends
The way the black layer clings to the orange — that sharp, clean line between them — that’s the whole point of these Easy Orange and Black Layered Halloween Jello Cups. I made them for our neighborhood potluck last October, and honestly, I spent the first five minutes just staring at the cups lined up on my counter. It sounds ridiculous, but there’s something deeply satisfying about getting two colors to sit perfectly still without bleeding into each other.
I’m not a patient person in the kitchen. I rush through prep, I skip steps, and I definitely don’t do anything that requires a timer unless it’s absolutely necessary. But this recipe? It forces you to slow down for about ten minutes, and then it does the rest of the work in the fridge. You just pour, wait, pour again, and suddenly you have these little cups that look like they belong at a fancy Halloween party, not your kitchen counter at midnight.
The kids at the potluck went wild for them, obviously. But what surprised me was how many adults asked for the recipe. It’s one of those things that looks impressive but takes almost no real effort — my favorite kind of dessert, honestly. And if you’ve ever tried making layered jello before and ended up with a sad, muddy mess, I promise this version is foolproof.
Why You’ll Love This Recipe
Let me tell you why these Easy Orange and Black Layered Halloween Jello Cups have become my go-to for fall gatherings. First off, they look like you spent hours on them when really, the active prep time is about fifteen minutes. That’s it. The rest is just fridge time, which is basically free labor.
- Quick & Easy: Comes together in under 20 minutes of active work. Perfect for busy weeknights or last-minute Halloween party prep.
- Simple Ingredients: You only need three main ingredients — orange jello, black jello, and sweetened condensed milk. No fancy grocery trips required.
- Perfect for Halloween: Great for classroom parties, potlucks, trunk-or-treat events, or just a fun after-school snack that matches the season.
- Crowd-Pleaser: Kids love the colors and adults appreciate the nostalgic jello vibe. I’ve never brought these anywhere without someone asking for the recipe.
- Unbelievably Delicious: The creamy middle layer balances the bright, fruity jello perfectly. It’s not too sweet, not too tart — just right.
What makes this recipe different from the dozens of other Halloween jello recipes out there? It’s the technique. Most recipes rush the layers and end up with bleeding colors. I figured out the exact timing and temperature that gives you those crisp, clean lines. Plus, using sweetened condensed milk instead of plain milk or cream creates a thicker, creamier middle layer that holds its shape better. This isn’t just another version — it’s the version that actually works the first time.
This recipe is the kind that makes you close your eyes after the first bite. It’s nostalgic but elevated — familiar jello flavors with a creamy twist that feels special. Perfect for impressing guests without stress, or turning a simple Halloween snack into something memorable.
What Ingredients You Will Need
This recipe uses simple, pantry-friendly ingredients to create something that looks way more complicated than it actually is. Here’s what you’ll need:
- 1 box (3 oz) orange gelatin — I prefer Jell-O brand for consistent results, but any store brand works fine. The orange flavor gives that classic Halloween vibe.
- 1 box (3 oz) black cherry or berry blue gelatin — Black cherry is my go-to because it has a deeper flavor that contrasts nicely with the orange. Berry blue works too if you want a slightly different color combo.
- 1 can (14 oz) sweetened condensed milk — This is the secret to the creamy middle layer. Don’t substitute with regular milk or cream — the condensed milk gives the right thickness and sweetness.
- 2 cups boiling water — Divided between the two jello flavors. Use freshly boiled water for best dissolving results.
- 1 cup cold water — Divided between the two jello flavors. You can use ice water to speed up the setting process.
- 1 cup cold water for the creamy layer — Mixed with the sweetened condensed milk and unflavored gelatin.
- 1 packet (1/4 oz) unflavored gelatin — This helps the creamy layer set firmly enough to hold the jello layers apart. I use Knox brand.
For the jello layers, I recommend using a brand you trust. I’ve tried generic store brands and they work fine, but Jell-O gives the most vibrant colors. The black cherry flavor from Jell-O is especially good — it has that slightly tart edge that balances the sweet creamy layer. For the unflavored gelatin, Knox is widely available and reliable. If you’re using a different brand, just check the package instructions to make sure the bloom strength is similar.
One thing I learned the hard way: don’t try to use sugar-free jello for this recipe. It doesn’t set as firmly, and the layers will bleed into each other. Stick with regular jello for those crisp, clean lines. Also, make sure your sweetened condensed milk is fresh — if it’s been sitting in the pantry for a year, it might have crystallized and won’t mix smoothly.
Equipment Needed
You don’t need anything fancy for these Easy Orange and Black Layered Halloween Jello Cups. Here’s what you’ll need:
- 6 to 8 small clear cups — I use 5-ounce plastic cups from the party supply store. Clear cups are essential so you can see the layers. You can also use small glass jars or ramekins.
- 2 medium mixing bowls — One for each jello flavor. Glass or heatproof plastic works best since you’ll be adding boiling water.
- 1 small bowl — For the creamy layer mixture.
- Measuring cups — For hot and cold water measurements.
- Whisk or fork — For stirring the jello until completely dissolved.
- Liquid measuring cup — For easy pouring into the cups.
- Refrigerator space — You’ll need a flat spot in the fridge where the cups can sit undisturbed for at least 4 hours.
If you don’t have clear cups, small mason jars work beautifully. I’ve also used shot glasses for a fun party version — just reduce the amounts accordingly. The key is using something transparent so the layers show off. I bought a pack of 50 plastic cups at the dollar store for like three bucks, and they’ve lasted me through multiple Halloween seasons.
Preparation Method
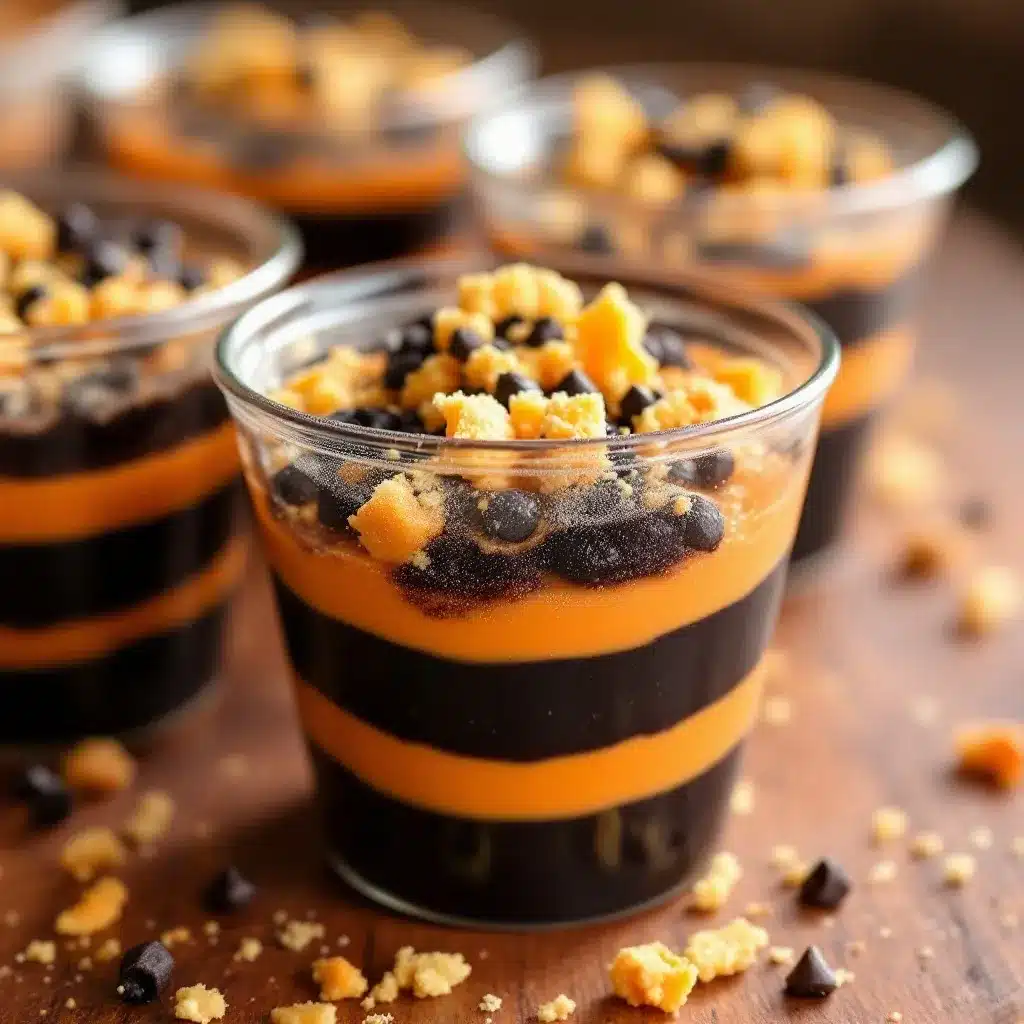
Alright, let’s make these Easy Orange and Black Layered Halloween Jello Cups. I’ll walk you through each step so you don’t end up with a muddy mess like I did the first time.
- Prepare the orange jello layer: In a medium bowl, empty the orange gelatin packet. Add 1 cup of boiling water and stir for about 2 minutes until the powder is completely dissolved. Then stir in 1/2 cup of cold water. Set aside to cool slightly — about 5 minutes. It should be warm but not hot to the touch.
- Pour the first orange layer: Divide the orange jello evenly among your cups. Fill each cup about 1/3 full. You want the layer to be thick enough to see, but leave room for the other two layers. Place the cups in the refrigerator and let them set for about 45 minutes to 1 hour. The jello should be firm to the touch — not jiggly, but solid enough that if you tilt the cup, it doesn’t move.
- Prepare the creamy layer: In a small bowl, sprinkle the unflavored gelatin over 1/4 cup of cold water. Let it sit for about 5 minutes — it will look like a thick, rubbery blob. That’s normal. Then add 1/4 cup of boiling water and stir until the gelatin is completely dissolved. In a separate bowl, whisk together the sweetened condensed milk and the remaining 3/4 cup of cold water. Pour the dissolved gelatin mixture into the condensed milk mixture and stir until well combined.
- Pour the creamy layer: Once the orange layer is set, gently spoon or pour the creamy mixture over it. Fill each cup about 2/3 full now. Be gentle — you don’t want to disturb the orange layer. Return the cups to the fridge for another 45 minutes to 1 hour until the creamy layer is firm.
- Prepare the black jello layer: While the creamy layer sets, prepare the black cherry gelatin. In a medium bowl, empty the black cherry gelatin packet. Add 1 cup of boiling water and stir for 2 minutes until dissolved. Stir in 1/2 cup of cold water. Let it cool to room temperature — about 10 minutes. If it’s too warm, it will melt the creamy layer underneath.
- Pour the final black layer: Once the creamy layer is firm, carefully pour the black jello over it. Fill each cup to the top. Return to the refrigerator and let them set for at least 4 hours, preferably overnight. The longer they set, the cleaner the layers will be.
- Serve: Once fully set, these cups are ready to serve straight from the fridge. They’ll hold their shape for a few hours at room temperature, but I recommend keeping them chilled until serving time. The layers will start to soften after about 2 hours out of the fridge.
A few notes from my trial-and-error experience: The waiting time between layers is non-negotiable. I tried rushing it once and ended up with orange and black swirled together in a sad, Halloween-colored mess. Also, make sure each layer is truly firm before adding the next. Press gently on the surface with your finger — if it feels tacky or liquidy underneath, wait longer. Patience is the only hard part of this recipe, I promise.
Cooking Tips & Techniques
After making these Easy Orange and Black Layered Halloween Jello Cups about a dozen times (seriously, my family is sick of them), I’ve picked up a few tricks that make the process smoother.
Temperature matters more than you think. The biggest mistake people make is pouring warm jello over a partially set layer. The warm liquid melts the layer underneath, and suddenly you’ve got a gradient instead of a clean line. Let each batch of jello cool to room temperature before pouring. I usually set my timer for 10 minutes and walk away. If the bowl feels warm to the touch, it’s not ready yet.
Use a spoon to pour. Instead of pouring directly from the measuring cup, use a spoon to gently ladle the jello over the creamy layer. This minimizes splashing and keeps the layers clean. I learned this after my first attempt looked like a Jackson Pollock painting.
Don’t skip the unflavored gelatin. I know it’s an extra step, but the creamy layer needs that extra structure to hold up against the jello layers. Without it, the creamy layer stays soft and the jello layers will bleed into it. Trust me on this one — I tried skipping it and regretted it.
Plan ahead for timing. Each layer needs about 45 minutes to set, plus cooling time for the jello. That’s about 3 hours total for the whole process, with most of it being inactive fridge time. I usually start these in the afternoon and let them set overnight. They’re ready by morning, and I don’t have to stress about timing on party day.
One failure I’ll never forget: The first time I made these, I used black cherry jello that was too warm and it completely melted the creamy layer. I ended up with a cup of orange and black swirled goo that looked more like a science experiment than a dessert. My kids thought it was hilarious, but I learned my lesson. Now I’m obsessive about temperature, and it pays off every time.
Variations & Adaptations
These Easy Orange and Black Layered Halloween Jello Cups are pretty forgiving when it comes to variations. Here are a few ways to switch things up:
- Different color combos: Swap the orange for lime green and the black for purple for a more witchy vibe. Or use strawberry red and black for a vampire theme. The technique stays the same — just change the flavors.
- Dairy-free version: Use full-fat coconut milk instead of sweetened condensed milk. You’ll need to add extra unflavored gelatin (about 2 teaspoons) to help it set. The texture is slightly different — a bit softer — but it still works. I’ve tested this for a friend with dairy allergies and it turned out pretty good.
- Add-ins: Before pouring the creamy layer, drop a few blackberries or orange segments into each cup. They’ll float in the creamy layer and add a fun texture. I tried this with pomegranate seeds once and it looked gorgeous — like little jewels suspended in the cream.
- Boozy version for adults: Replace half the cold water in the jello layers with vodka or rum. The alcohol will prevent the jello from setting as firmly, so you’ll need to add extra unflavored gelatin (about 1 teaspoon per layer). This version is more of a jello shot, so serve it in smaller cups.
- Layer order swap: Start with black on the bottom, then creamy, then orange on top. It looks totally different but tastes the same. I did this for a Halloween party where I wanted the cups to look like little witches’ hats — black base, white middle, orange top.
My personal favorite variation is the one with blackberries in the creamy layer. The tartness of the berries cuts through the sweetness of the condensed milk, and the dark purple color blends beautifully with the black jello on top. Plus, it adds a little something unexpected that makes people go, “Wait, what’s in here?”
Serving & Storage Suggestions
These Easy Orange and Black Layered Halloween Jello Cups are best served cold, straight from the fridge. The layers hold their shape best when chilled, and the flavors are more pronounced at cooler temperatures. I like to take them out about 10 minutes before serving — just enough time to take the chill off without compromising the structure.
For presentation, arrange the cups on a platter or tray. If you’re feeling fancy, add a small Halloween-themed pick or a dollop of whipped cream on top. I’ve also topped them with a few black sprinkles or a tiny candy eyeball for extra fun. For a party, label each cup with a small flag or sticker — especially if you’re making multiple flavors.
Storage: These cups will keep in the refrigerator for up to 5 days. Cover them with plastic wrap or a lid to prevent them from absorbing fridge odors. The layers will stay clean for the first 2-3 days, but after that, you might notice some slight bleeding at the edges. They’re still perfectly edible — just not as photogenic.
Freezing: I don’t recommend freezing these. The texture gets weird and icy, and the layers separate when thawed. If you need to make them ahead, stick with fridge storage. They actually taste better after a day or two — the flavors meld together and the texture gets even creamier.
Reheating: These are meant to be served cold, so no reheating needed. If you’ve stored them in the fridge, just pull them out and serve. If they’ve been sitting out for a while and the layers have softened, pop them back in the fridge for 30 minutes to firm up again.
One thing I love about this recipe is how the flavors develop overnight. The orange and black cherry notes mellow out and blend with the creamy layer in a way that’s really satisfying. I always make these a day ahead for parties — they’re better that way, and it’s one less thing to worry about on the day of the event.
Nutritional Information & Benefits
Let’s be real — these Easy Orange and Black Layered Halloween Jello Cups are a treat, not a health food. But here’s the estimated nutritional breakdown per serving (based on 8 servings using regular jello and sweetened condensed milk):
- Calories: Approximately 180-200 per cup
- Total Fat: 4-5g
- Saturated Fat: 3g
- Carbohydrates: 35-40g
- Sugar: 32-36g
- Protein: 4-5g
- Calcium: 10-12% of daily value (from the condensed milk)
The main nutritional benefit here is the calcium from the sweetened condensed milk. It’s not a huge amount, but every little bit counts. The jello itself is mostly sugar and gelatin, so there’s not much nutritional value there. But honestly, these are a fun treat for a holiday — not something you’re eating every day.
Dietary considerations: These cups are not gluten-free (jello is usually gluten-free, but check the label). They contain dairy from the sweetened condensed milk. For a lower-sugar version, you can use sugar-free jello, but as I mentioned earlier, the texture won’t be as firm. I’ve tried it and the layers bled more, so if you go that route, plan to serve them the same day.
From a wellness perspective, I see these as a fun, occasional treat that brings joy to a Halloween celebration. They’re not something you’d eat for breakfast, but they’re perfect for a party where you want something visually impressive without spending hours in the kitchen. Life’s about balance, right?
Conclusion
These Easy Orange and Black Layered Halloween Jello Cups are the kind of recipe that makes you look like a kitchen wizard without actually being one. They’re simple enough for a beginner, impressive enough for a party, and delicious enough that everyone will ask for seconds. Plus, the clean, crisp layers are just so satisfying to look at — I never get tired of that moment when you pour the final layer and see those three perfect stripes.
I love that this recipe gives you room to play. Swap the colors, add some fruit, make it boozy — whatever fits your vibe. The basic technique is solid, and once you’ve got it down, you can adapt it for any holiday or occasion. Think red, white, and blue for the Fourth of July, or green and gold for St. Patrick’s Day. The possibilities are endless.
If you make these Easy Orange and Black Layered Halloween Jello Cups, I’d love to hear how they turned out. Drop a comment below with your favorite variation, or share a photo of your cups on social media. Don’t forget to tag me so I can see your creations. And if you run into any issues, just ask — I’ve made every mistake possible with this recipe, so I can probably help you avoid them. Happy Halloween, and happy layering!
Frequently Asked Questions
Can I use sugar-free jello for this recipe?
You can, but I don’t recommend it. Sugar-free jello doesn’t set as firmly as regular jello, so the layers are more likely to bleed into each other. If you do use it, plan to serve the cups the same day and expect slightly softer layers.
How long do these jello cups need to set?
Each layer needs about 45 minutes to 1 hour in the fridge, plus cooling time for the jello. Total inactive time is about 3-4 hours. I usually make them the night before and let them set overnight for the cleanest layers.
Can I make these without the creamy layer?
Sure. Just use two layers of jello instead of three. Pour the orange layer, let it set, then pour the black layer on top. It’s simpler but not as visually striking. The creamy layer really makes these cups special.
What if my layers bleed into each other?
This usually happens when the jello is too warm when you pour it, or when the layer underneath isn’t fully set. Make sure each layer is firm to the touch before adding the next, and let the jello cool to room temperature before pouring. If it still bleeds, don’t stress — it’ll still taste good.
Can I use different cup sizes?
Absolutely. Shot glasses make fun mini versions, and larger cups work for bigger portions. Just adjust the amounts accordingly. For shot glasses, you’ll get about 12-16 servings from the same batch. For larger cups, you might only get 4-6.
Pin This Recipe!
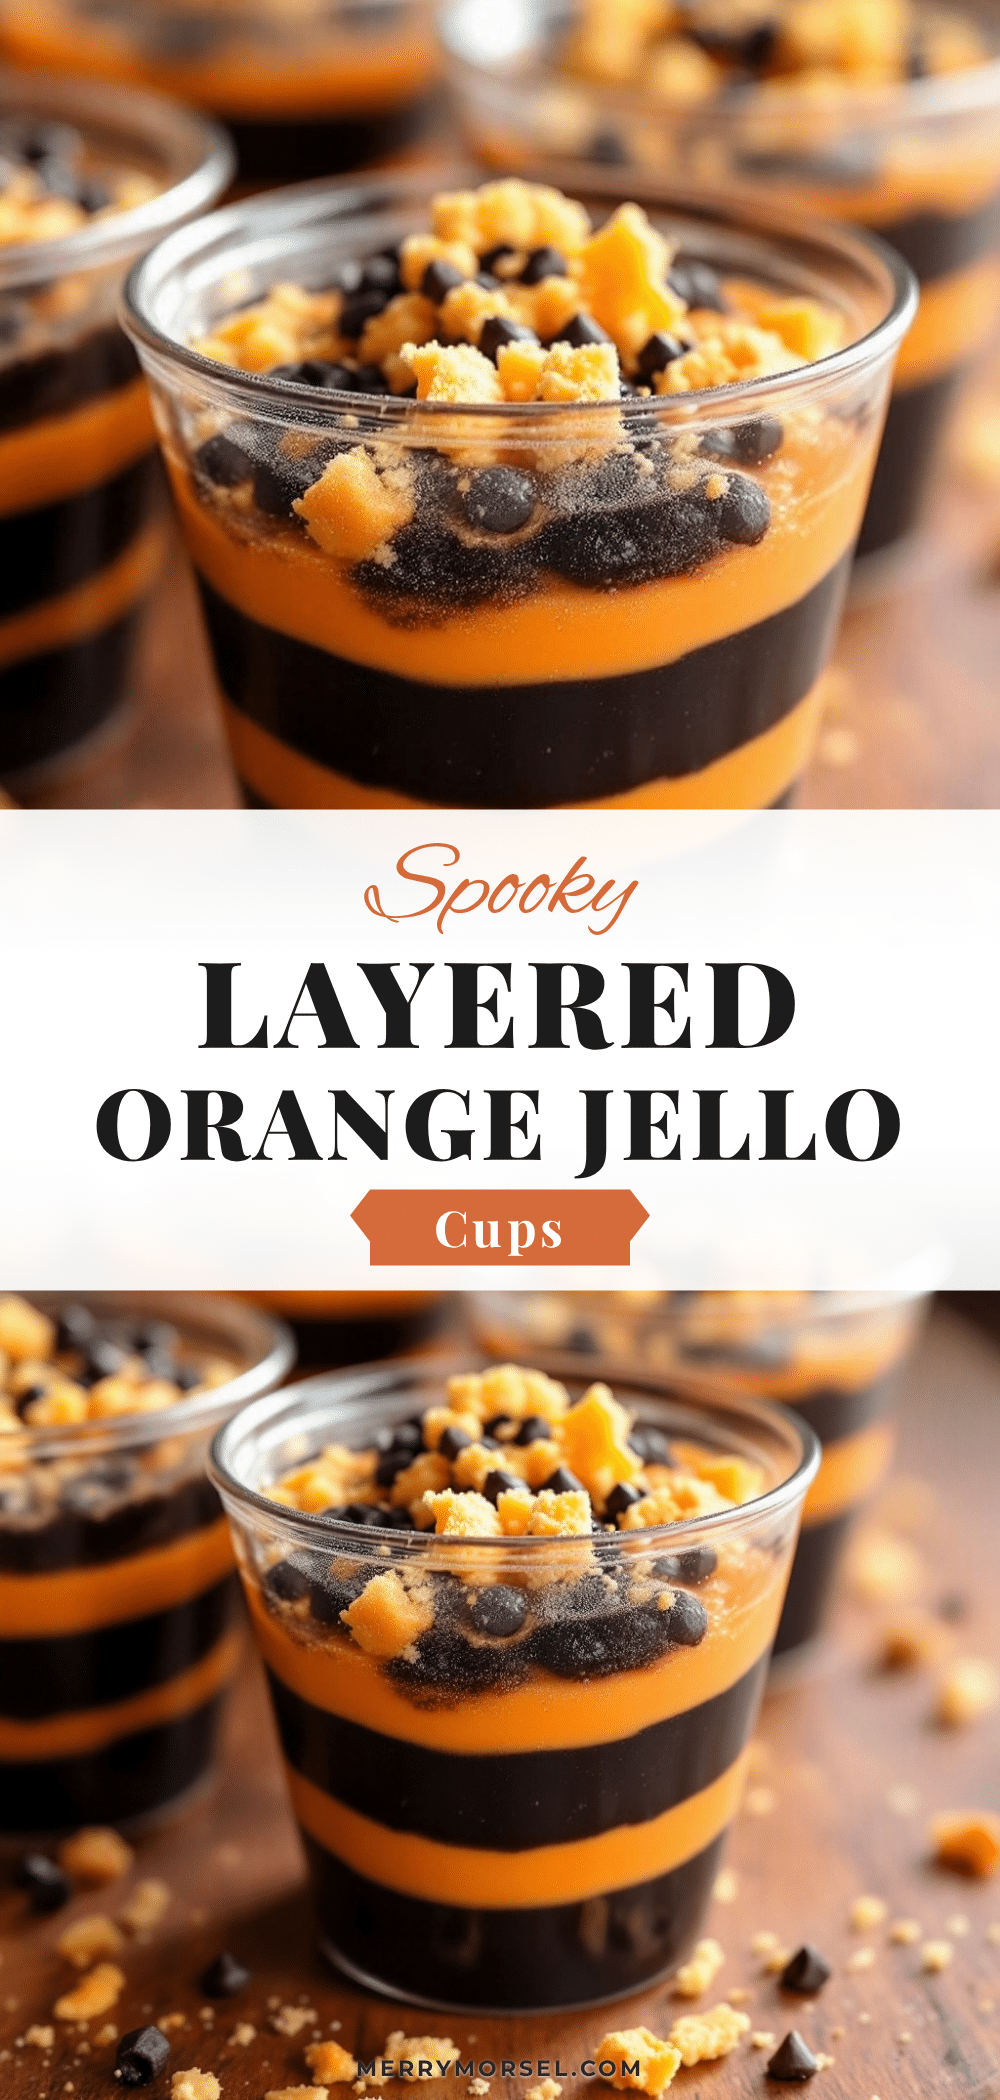
Easy Orange Black Layered Halloween Jello Cups
These Easy Orange and Black Layered Halloween Jello Cups are a visually stunning, foolproof dessert that requires only 15 minutes of active prep. With crisp, clean layers of orange and black jello separated by a creamy sweetened condensed milk center, they’re the perfect treat for Halloween parties, potlucks, or any fall gathering.
- Prep Time: 15 minutes
- Cook Time: 0 minutes
- Total Time: 4 hours 15 minutes (includes setting time)
- Yield: 8 servings 1x
- Category: Dessert
- Cuisine: American
Ingredients
- 1 box (3 oz) orange gelatin
- 1 box (3 oz) black cherry or berry blue gelatin
- 1 can (14 oz) sweetened condensed milk
- 2 cups boiling water, divided
- 1 cup cold water, divided
- 1 cup cold water for the creamy layer
- 1 packet (1/4 oz) unflavored gelatin
Instructions
- Prepare the orange jello layer: In a medium bowl, empty the orange gelatin packet. Add 1 cup of boiling water and stir for about 2 minutes until the powder is completely dissolved. Then stir in 1/2 cup of cold water. Set aside to cool slightly — about 5 minutes. It should be warm but not hot to the touch.
- Pour the first orange layer: Divide the orange jello evenly among your cups. Fill each cup about 1/3 full. Place the cups in the refrigerator and let them set for about 45 minutes to 1 hour. The jello should be firm to the touch — not jiggly, but solid enough that if you tilt the cup, it doesn’t move.
- Prepare the creamy layer: In a small bowl, sprinkle the unflavored gelatin over 1/4 cup of cold water. Let it sit for about 5 minutes — it will look like a thick, rubbery blob. Then add 1/4 cup of boiling water and stir until the gelatin is completely dissolved. In a separate bowl, whisk together the sweetened condensed milk and the remaining 3/4 cup of cold water. Pour the dissolved gelatin mixture into the condensed milk mixture and stir until well combined.
- Pour the creamy layer: Once the orange layer is set, gently spoon or pour the creamy mixture over it. Fill each cup about 2/3 full now. Be gentle — you don’t want to disturb the orange layer. Return the cups to the fridge for another 45 minutes to 1 hour until the creamy layer is firm.
- Prepare the black jello layer: While the creamy layer sets, prepare the black cherry gelatin. In a medium bowl, empty the black cherry gelatin packet. Add 1 cup of boiling water and stir for 2 minutes until dissolved. Stir in 1/2 cup of cold water. Let it cool to room temperature — about 10 minutes. If it’s too warm, it will melt the creamy layer underneath.
- Pour the final black layer: Once the creamy layer is firm, carefully pour the black jello over it. Fill each cup to the top. Return to the refrigerator and let them set for at least 4 hours, preferably overnight. The longer they set, the cleaner the layers will be.
- Serve: Once fully set, these cups are ready to serve straight from the fridge. They’ll hold their shape for a few hours at room temperature, but I recommend keeping them chilled until serving time.
Notes
The waiting time between layers is non-negotiable. Make sure each layer is truly firm before adding the next. Let each batch of jello cool to room temperature before pouring to prevent bleeding. Use a spoon to pour the jello gently to minimize splashing. Don’t skip the unflavored gelatin in the creamy layer—it provides necessary structure. Plan ahead: start in the afternoon and let set overnight for best results.
Nutrition
- Serving Size: 1 cup
- Calories: 190
- Sugar: 34
- Sodium: 120
- Fat: 4.5
- Saturated Fat: 3
- Carbohydrates: 38
- Protein: 4.5
Keywords: Halloween jello cups, layered jello, orange and black jello, Halloween dessert, easy jello recipe, jello cups, Halloween party dessert


