Love this? Save it for later!
Share the inspiration with your friends
Introduction
There used to be a dive bar on the corner of 5th and Elm called The Rusty Nail that made the most insane crispy jalapeño rings. When they closed down three summers ago—turned into a kombucha café, of all things—I honestly felt a little lost. I mean, those rings were the whole reason we went there. After nine tries—some burnt, some soggy, one that literally fell apart in the oil—I finally cracked the code.
Here’s the thing. I’m not usually one to get obsessed over a bar snack. But these weren’t just any jalapeño rings. They were this perfect combination of shatteringly crispy on the outside and still with a bit of a kick on the inside. The secret? Canned jalapeños. I know, I know—it sounds weird. But trust me on this one. The brine gives them this tangy depth that fresh jalapeños just can’t match.
Maybe you’ve been there. You find that one perfect snack somewhere unexpected, and then poof—it’s gone forever. That’s why I had to figure this out. After months of experimenting in my tiny kitchen (and making my apartment smell like a fryer for way too long), I finally nailed it. And honestly? These might be even better than the originals. Let me show you how to make them.
Why You’ll Love This Recipe
Let’s be real for a second. Canned jalapeños don’t usually get a lot of love in the cooking world. But here’s why this recipe will change your mind:
- Quick & Easy : From start to finish, you’re looking at about 20 minutes. Perfect for game day, movie night, or when that salty-crunchy craving hits out of nowhere.
- Simple Ingredients : You probably have most of this stuff in your pantry right now. No fancy grocery store runs required.
- Perfect for Parties : These disappear faster than anything else on the snack table. I’ve seen people fight over the last ring.
- Crowd-Pleaser : Even folks who say they don’t like spicy food end up reaching for seconds. The heat level is just right—enough to notice but not enough to scare anyone off.
- Unbelievably Crispy : The cornmeal in the batter creates this craggy, crunchy coating that stays crispy even after they cool down a bit. No sad, soggy rings here.
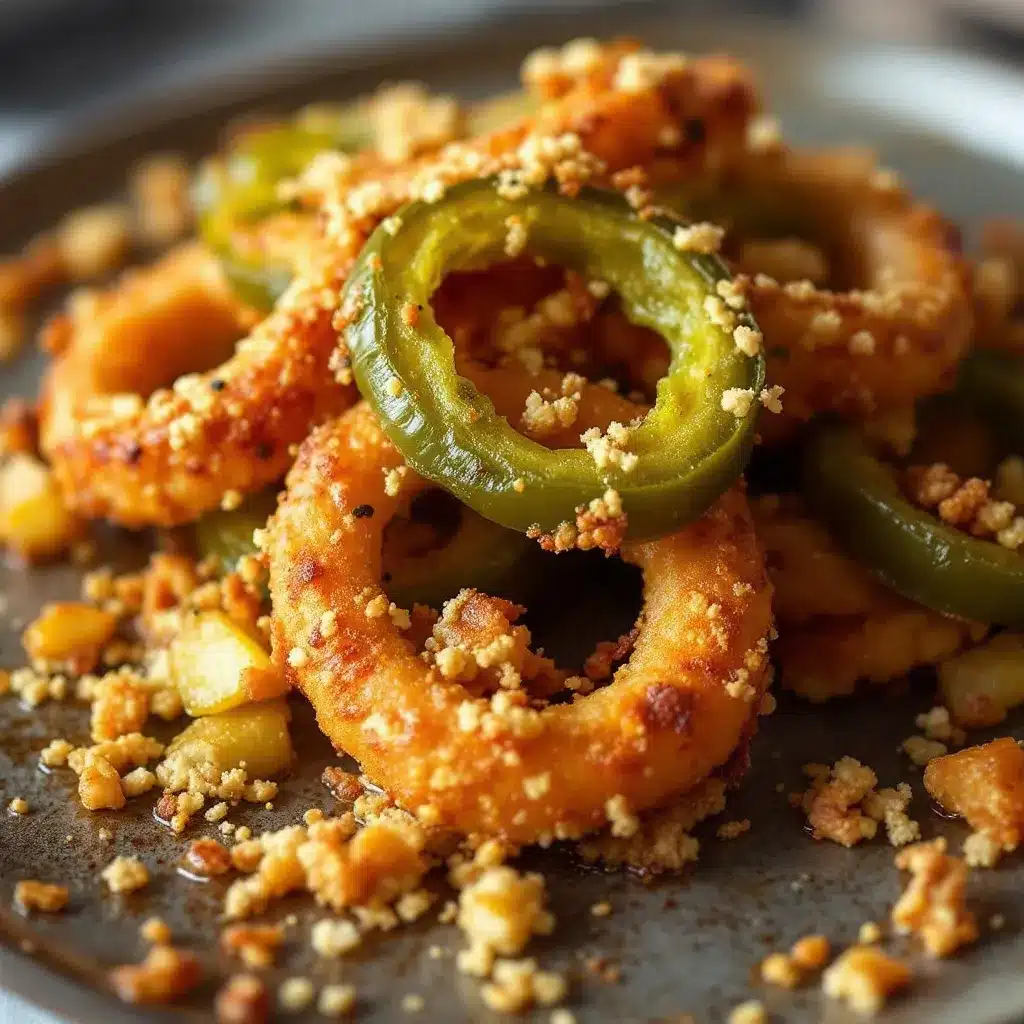
What makes this recipe different from every other jalapeño ring recipe out there? It’s the double-dredge technique I figured out after way too many failed batches. First a soak in buttermilk, then a seasoned flour-cornmeal mix, then back in the wet, then back in the dry. It sounds like extra work, but that second coating is what gives you that thick, shatteringly crispy crust that stays put. Plus, using canned jalapeños means you get consistent heat and that subtle pickled tang that fresh ones just don’t have.
This is the kind of recipe that makes you close your eyes after the first bite. It’s comfort food at its finest—crispy, spicy, salty, and completely satisfying. Perfect for impressing guests without any stress, or just treating yourself on a Tuesday night.
What Ingredients You Will Need
This recipe uses simple, everyday ingredients to create something truly special. The magic happens when these basic pantry staples come together in just the right way.
- Canned jalapeño slices (2 cans, 7 oz each) — Look for whole slices, not diced. I prefer La Costeña brand for their consistent heat and firm texture. Drain them well but save 2 tablespoons of the brine for the batter.
- All-purpose flour (1 cup) — Regular white flour works perfectly here. No need for anything fancy.
- Yellow cornmeal (½ cup) — This is the secret to that extra-crispy texture. Don’t skip it or substitute with cornstarch.
- Buttermilk (¾ cup) — The acidity tenderizes the coating and helps the flour stick. No buttermilk? Add a tablespoon of lemon juice to regular milk and let it sit for 5 minutes.
- Large eggs (2) — Room temperature works best for a smooth batter.
- Jalapeño brine (2 tablespoons) — Reserved from the can. This little addition gives the batter a subtle tangy kick.
- Garlic powder (1 teaspoon) — Adds savory depth without being overpowering.
- Onion powder (1 teaspoon) — Because everything’s better with a little onion.
- Smoked paprika (½ teaspoon) — Adds a subtle smokiness that complements the heat beautifully.
- Cayenne pepper (¼ teaspoon) — Optional, but recommended if you want extra heat.
- Salt (1 teaspoon, plus more for finishing) — Use fine sea salt for the batter and flaky salt for sprinkling right after frying.
- Black pepper (½ teaspoon) — Freshly ground is best.
- Neutral oil for frying (about 4 cups) — Vegetable, canola, or peanut oil work great. You need enough for about 2 inches of depth in your pot.
For the dipping sauce (optional but highly recommended):
- Sour cream (½ cup) — Full-fat gives the best texture.
- Lime juice (1 tablespoon) — Fresh squeezed only.
- Hot sauce (1 teaspoon) — Whatever you have on hand. I like Cholula for this.
- Salt (a pinch)
Equipment Needed
You don’t need a lot of fancy gear for this recipe, which is part of why I love it. Here’s what you’ll need:
- Heavy-bottomed pot or Dutch oven — Something that holds heat evenly. My go-to is a 5-quart Dutch oven, but any deep, heavy pot works.
- Deep-fry thermometer — This is non-negotiable. Guessing the oil temperature is how you end up with either burnt or greasy rings. I’ve learned this the hard way more than once.
- Two shallow bowls — For the wet and dry mixtures. Pie plates work perfectly.
- Slotted spoon or spider strainer — For getting the rings out of the hot oil safely.
- Paper towels — For draining. Or a wire rack set over a baking sheet if you want them extra crispy.
- Cooling rack — Optional but helpful. Letting them drain on a rack instead of paper towels keeps the bottoms from getting soggy.
- Measuring cups and spoons — Standard baking stuff.
- Whisk — For mixing the batter smooth.
If you don’t have a deep-fry thermometer, you can test the oil by dropping a tiny bit of batter in. If it sizzles and floats to the top immediately, you’re good. If it sinks and sits there, the oil needs to be hotter. But honestly, the thermometer is worth the ten bucks.
Preparation Method
Alright, let’s get cooking. This process moves pretty fast once you start, so read through everything first before you turn on the stove.
- Drain the jalapeños — Open both cans and pour the jalapeños into a colander. Reserve 2 tablespoons of the brine and set it aside. Let the jalapeños drain for about 10 minutes. Pat them dry gently with paper towels. This step is crucial—too much moisture and the coating won’t stick.
- Make the dipping sauce — While the jalapeños drain, whisk together the sour cream, lime juice, hot sauce, and a pinch of salt in a small bowl. Cover and stick it in the fridge. The flavors meld together while you fry.
- Set up your dredging station — Grab two shallow bowls. In the first bowl, whisk together the flour, cornmeal, garlic powder, onion powder, smoked paprika, cayenne (if using), salt, and black pepper. In the second bowl, whisk together the buttermilk, eggs, and the reserved jalapeño brine until smooth.
- Heat the oil — Pour about 2 inches of oil into your heavy pot. Heat it over medium-high heat until it reaches 350°F (175°C). This usually takes about 8-10 minutes. Don’t walk away—oil heats up fast and can overshoot the temperature.
- First dredge — Take a handful of drained jalapeño rings and drop them into the dry flour mixture. Toss them around with your fingers until each ring is completely coated. Shake off any excess flour.
- Wet bath — Transfer the floured rings to the buttermilk mixture. Use a fork to turn them over and make sure they’re fully coated. Let the excess drip off for a second or two.
- Second dredge — Drop the wet rings back into the dry flour mixture. Toss them again until they’re completely coated. You should see a thick, craggy coating forming. This double-dredge is what gives you that shatteringly crispy crust.
- Fry in batches — Carefully drop the coated rings into the hot oil, one at a time, without overcrowding. I usually fry about 8-10 rings at a time. Fry for 2-3 minutes, turning once halfway through, until they’re golden brown and crispy. The oil temperature will drop a bit when you add the rings, which is normal.
- Drain and season — Use your slotted spoon to transfer the fried rings to a paper towel-lined plate or wire rack. Sprinkle immediately with a little flaky salt while they’re still hot. This is important—the salt sticks better when they’re fresh out of the oil.
- Repeat — Let the oil come back up to 350°F between batches. This usually takes about 2 minutes. Continue with the remaining jalapeño rings.
- Serve immediately — These are best eaten within 10 minutes of frying. Serve with the cooling lime sour cream dip and maybe some extra hot sauce on the side.
A few things to watch for: If your coating is falling off in the oil, the jalapeños were too wet. Pat them drier next time. If the rings are greasy, your oil wasn’t hot enough. If they’re burning on the outside but still pale, your oil was too hot. That thermometer really does make a difference.
Cooking Tips & Techniques
After nine attempts and more than a few sad, soggy rings, I’ve learned a thing or two. Let me save you the trouble.
The double-dredge is non-negotiable. I know it seems like extra work, but that second coating is what creates the thick, crunchy crust that actually stays on the jalapeño. The first time I tried skipping it, I ended up with a pan of naked jalapeños floating in a mess of fried batter crumbs. Not my finest moment.
Keep your oil temperature steady. This is probably the most important thing. If the oil drops below 325°F, the rings absorb oil like little sponges and get greasy. If it goes above 375°F, the coating burns before the inside cooks. I keep a thermometer clipped to my pot and adjust the heat as needed between batches.
Don’t crowd the pot. I know you want to get these done fast, but adding too many rings at once drops the oil temperature too much. Work in small batches and give each ring some room to swim around. Your patience will be rewarded with perfectly crispy rings.
Let the coated rings rest for a minute. After the second dredge, let the rings sit on a plate for about 60 seconds before frying. This gives the coating time to adhere properly. I learned this trick from a fried chicken recipe, and it works just as well here.
Use your hands. Forks and tongs just don’t work as well for the dredging process. Your fingers can feel when the coating is even and can gently press the flour mixture into the wet batter. Just wash your hands thoroughly between steps.
Season immediately. That moment right after they come out of the oil is the only time salt will really stick to the coating. Sprinkle it on while they’re still glistening with oil. I keep a small bowl of flaky salt right next to my draining station.
Variations & Adaptations
Once you’ve mastered the basic recipe, there’s plenty of room to play around. Here are some variations I’ve tried and loved:
Extra Spicy Version — Add an extra ½ teaspoon of cayenne to the flour mixture and a teaspoon of your favorite hot sauce to the buttermilk batter. You can also mix some crushed red pepper flakes into the dry coating for little bursts of heat in every bite.
Gluten-Free Adaptation — Substitute the all-purpose flour with a 1:1 gluten-free flour blend and use gluten-free cornmeal. I’ve had good results with Bob’s Red Mill brand. The texture is slightly less crispy but still really satisfying.
Air Fryer Version — Spray the coated rings generously with cooking spray and arrange them in a single layer in the air fryer basket. Cook at 375°F for 8-10 minutes, flipping halfway through. They won’t be quite as crispy as the deep-fried version, but they’re still darn good and much lighter.
Smoky Chipotle Twist — Replace the smoked paprika with chipotle powder and add a teaspoon of adobo sauce from a can of chipotles to the buttermilk mixture. The smoky heat is incredible.
Herb and Cheese Coating — Add 2 tablespoons of finely grated Parmesan cheese and 1 teaspoon of dried oregano to the flour mixture. The cheese crisps up beautifully and adds a savory umami flavor that pairs perfectly with the spicy jalapeños.
Bacon-Wrapped Jalapeño Rings — For the ultimate indulgence, wrap each drained jalapeño ring with a half-slice of bacon before dredging and frying. Secure with a toothpick if needed. These are dangerously good.
Serving & Storage Suggestions
These rings are best served hot and fresh, right after frying. The texture really is at its peak within the first 10 minutes. But I know that’s not always realistic, so here’s how to handle leftovers.
Serve immediately — Arrange the hot rings on a platter with the lime sour cream dip in the center. A sprinkle of fresh cilantro or a few lime wedges on the side makes for a beautiful presentation. They’re perfect alongside burgers, tacos, or just as a snack with cold beer.
Storage — If you have leftovers (which honestly doesn’t happen often in my house), let them cool completely and store them in an airtight container in the refrigerator for up to 2 days. Don’t stack them too high or the ones on the bottom will get crushed.
Reheating — The air fryer is your best friend here. Reheat at 375°F for 3-4 minutes until they’re hot and crispy again. You can also reheat them in a 400°F oven on a wire rack for about 5-7 minutes. The microwave will make them soggy, so avoid that if you can.
Freezing — You can freeze the uncooked, breaded rings on a baking sheet until solid, then transfer them to a freezer bag. Fry them directly from frozen, adding an extra minute or so to the cooking time. I do this sometimes when I find canned jalapeños on sale.
Flavor development — The dipping sauce actually gets better after sitting in the fridge for an hour or two. The flavors meld together and mellow out. Make it ahead of time if you can.
Nutritional Information & Benefits
Let’s be honest—these are fried jalapeño rings, not a health food. But here’s what you should know:
Estimated nutritional values per serving (about 6 rings with dip): Calories: 285, Fat: 18g, Carbohydrates: 26g, Protein: 6g, Fiber: 2g, Sodium: 480mg. These numbers will vary depending on how much oil gets absorbed and the exact ingredients you use.
The good stuff — Jalapeños are actually pretty nutritious. They’re rich in vitamin C, vitamin B6, and vitamin A. The capsaicin that gives them their heat has been linked to boosting metabolism and reducing inflammation. Plus, the buttermilk adds calcium and probiotics (if you use real cultured buttermilk).
Dietary considerations — This recipe contains gluten, dairy, and eggs. For a gluten-free version, see the variations section above. For a dairy-free version, use almond milk mixed with lemon juice instead of buttermilk and skip the sour cream dip. The texture won’t be quite the same, but it’ll still be tasty.
My take — I don’t make these every day, but I don’t feel guilty about them either. They’re a treat, and treats are part of a balanced life. If you’re watching your calories, the air fryer version cuts the fat significantly without sacrificing too much of the crunch.
Conclusion
Here’s the thing about these crispy spicy canned jalapeño rings—they’re proof that you don’t need fancy ingredients or complicated techniques to make something truly special. A couple of cans of jalapeños, some pantry staples, and a little patience are all it takes to recreate that bar snack magic in your own kitchen.
I still miss The Rusty Nail sometimes. But honestly? These rings have become their own thing. They’re not a copy of what I used to order—they’re better. And they come with the satisfaction of knowing I figured it out myself, one failed batch at a time.
Now I want to hear from you. Have you ever tried making jalapeño rings at home? Did you discover any tricks along the way? Drop a comment below and let me know how yours turned out. And if you come up with a killer variation, I’d love to hear about that too. Happy frying, friends!
Frequently Asked Questions
Can I use fresh jalapeños instead of canned?
You can, but the texture and flavor will be different. Fresh jalapeños are firmer and have a brighter, grassier heat. Canned jalapeños are softer and have that tangy pickled flavor that makes these rings unique. If you use fresh, slice them into ¼-inch rounds and pickle them quickly in vinegar and salt for an hour before breading.
Why did my coating fall off in the oil?
This usually happens for one of three reasons: the jalapeños were too wet, the oil wasn’t hot enough, or you skipped the rest time after dredging. Make sure to pat the jalapeños really dry before starting, keep your oil at 350°F, and let the coated rings sit for a minute before frying.
How do I make these less spicy?
Remove the seeds from the jalapeño slices before breading. Most of the heat is concentrated in the seeds and membranes. You can also use mild pickled jalapeños if you can find them. The buttermilk in the batter also helps mellow out some of the heat.
Can I make these in advance for a party?
You can bread them up to a few hours ahead and keep them in the refrigerator on a baking sheet. Fry them just before serving for the best texture. If you need to make them completely ahead, reheat them in the air fryer or oven—never the microwave.
What else can I fry with this batter?
This double-dredge batter works great on onion rings, pickle chips, zucchini slices, and even chicken tenders. The cornmeal gives everything a wonderful crunchy texture. Just adjust the cooking time based on what you’re frying.
Pin This Recipe!
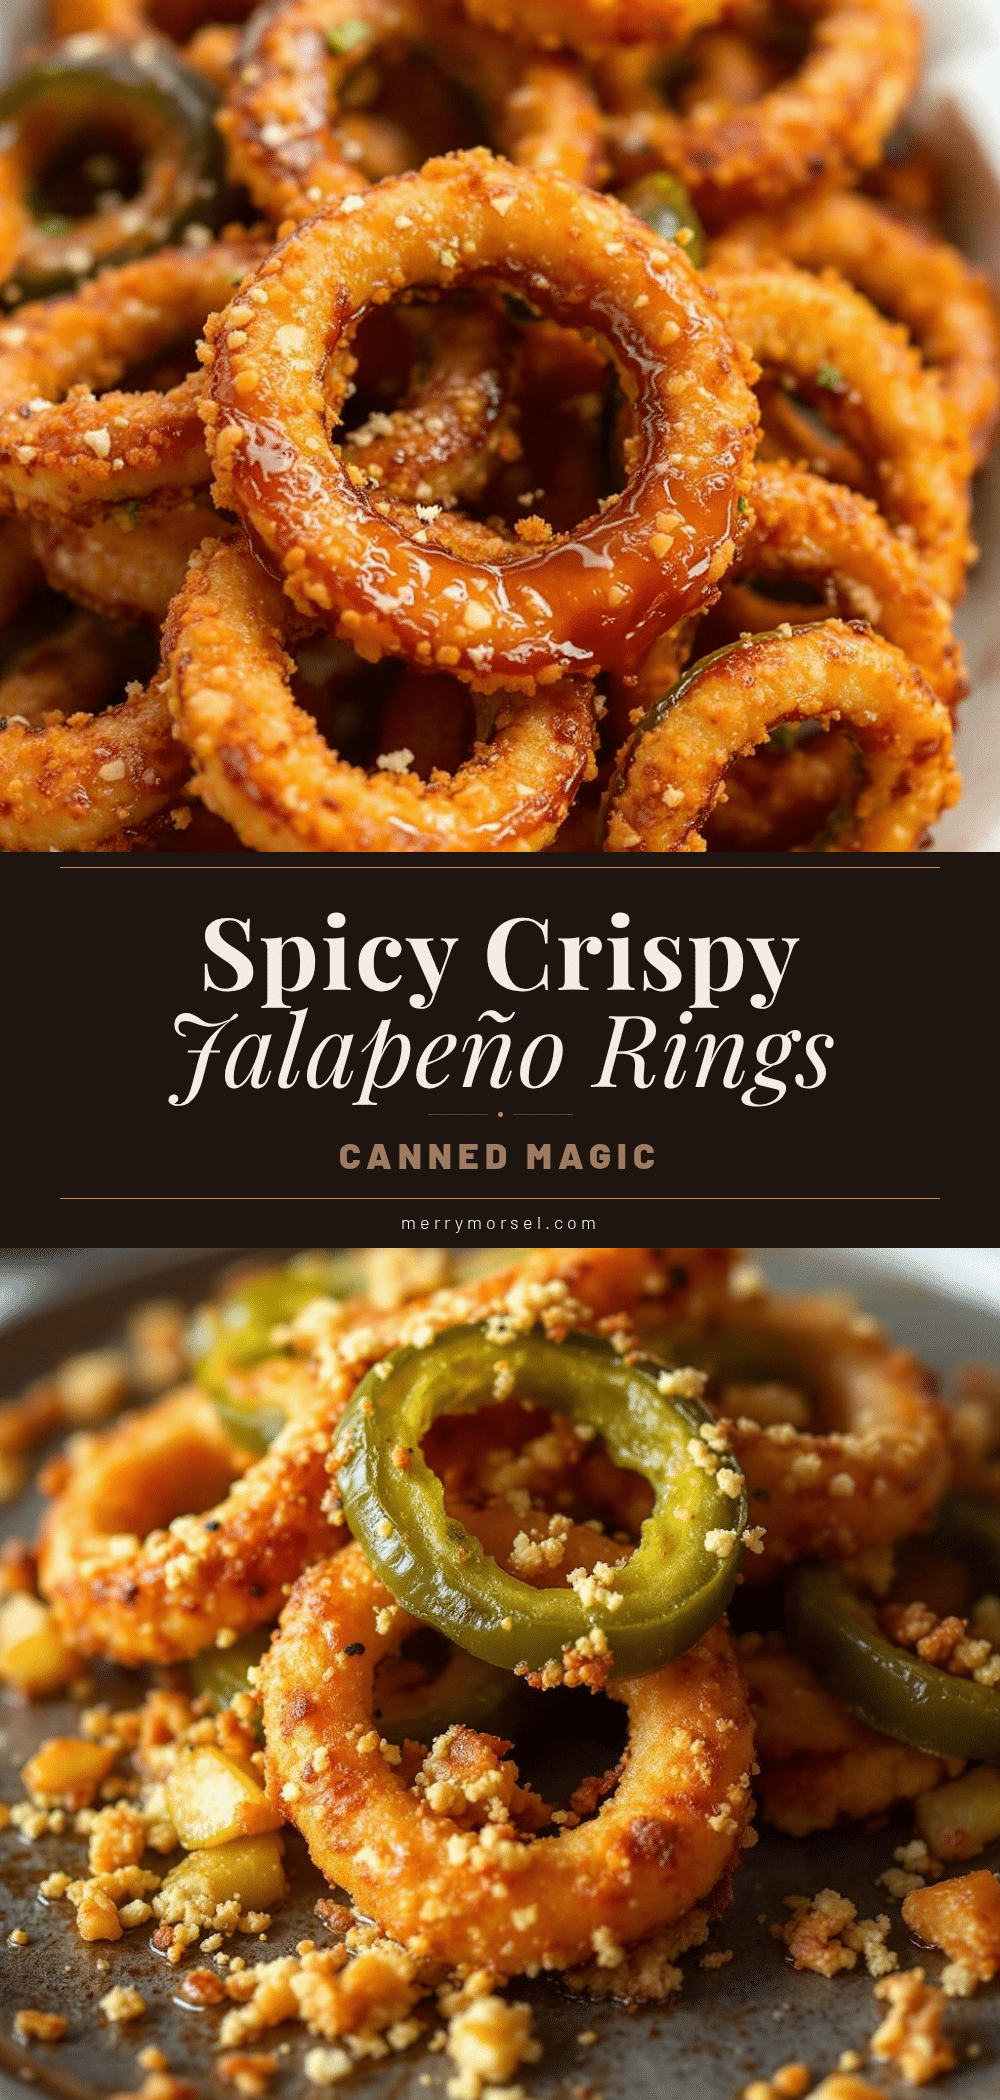
Crispy Spicy Canned Jalapeño Rings Recipe: Easy Homemade
These crispy, spicy jalapeño rings use canned jalapeños for a tangy depth and a double-dredge technique for a shatteringly crunchy coating. Ready in about 20 minutes, they’re the perfect bar snack or party appetizer.
- Prep Time: 10 minutes
- Cook Time: 10 minutes
- Total Time: 20 minutes
- Yield: 4 servings 1x
- Category: Appetizer
- Cuisine: American
Ingredients
- 2 cans (7 oz each) canned jalapeño slices (whole slices, not diced)
- 1 cup all-purpose flour
- ½ cup yellow cornmeal
- ¾ cup buttermilk
- 2 large eggs, room temperature
- 2 tablespoons reserved jalapeño brine
- 1 teaspoon garlic powder
- 1 teaspoon onion powder
- ½ teaspoon smoked paprika
- ¼ teaspoon cayenne pepper (optional)
- 1 teaspoon fine sea salt (plus more for finishing)
- ½ teaspoon freshly ground black pepper
- About 4 cups neutral oil for frying (vegetable, canola, or peanut)
- For the dipping sauce:
- ½ cup sour cream (full-fat)
- 1 tablespoon fresh lime juice
- 1 teaspoon hot sauce (e.g., Cholula)
- A pinch of salt
Instructions
- Drain the jalapeños: Open both cans and pour into a colander. Reserve 2 tablespoons of the brine and set aside. Let drain for about 10 minutes, then pat dry gently with paper towels.
- Make the dipping sauce: In a small bowl, whisk together sour cream, lime juice, hot sauce, and a pinch of salt. Cover and refrigerate.
- Set up dredging station: In a shallow bowl, whisk together flour, cornmeal, garlic powder, onion powder, smoked paprika, cayenne (if using), salt, and black pepper. In another shallow bowl, whisk together buttermilk, eggs, and reserved jalapeño brine until smooth.
- Heat the oil: Pour about 2 inches of oil into a heavy-bottomed pot or Dutch oven. Heat over medium-high heat to 350°F (175°C), about 8-10 minutes.
- First dredge: Take a handful of drained jalapeño rings and toss them in the dry flour mixture until completely coated. Shake off excess.
- Wet bath: Transfer floured rings to the buttermilk mixture, turning to coat fully. Let excess drip off.
- Second dredge: Return wet rings to the dry mixture and toss again until thickly coated. This double-dredge creates a crispy crust.
- Fry in batches: Carefully drop coated rings into hot oil, one at a time, without overcrowding (about 8-10 rings per batch). Fry for 2-3 minutes, turning once, until golden brown and crispy.
- Drain and season: Transfer fried rings to a paper towel-lined plate or wire rack. Sprinkle immediately with flaky salt while hot.
- Repeat: Let oil return to 350°F between batches. Continue with remaining rings.
- Serve immediately: Best within 10 minutes of frying. Serve with lime sour cream dip and extra hot sauce.
Notes
The double-dredge is essential for a thick, crunchy crust. Keep oil temperature steady at 350°F to avoid greasy or burnt rings. Pat jalapeños very dry to prevent coating from falling off. Season immediately after frying for best salt adhesion. For best texture, serve within 10 minutes. Leftovers can be reheated in an air fryer at 375°F for 3-4 minutes.
Nutrition
- Serving Size: About 6 rings with d
- Calories: 285
- Sugar: 3
- Sodium: 480
- Fat: 18
- Saturated Fat: 4
- Carbohydrates: 26
- Fiber: 2
- Protein: 6
Keywords: crispy jalapeño rings, canned jalapeño rings, spicy appetizer, fried jalapeño rings, bar snack, game day snack


