Love this? Save it for later!
Share the inspiration with your friends
“It was the kind of July afternoon when the sun hangs just right, and the neighborhood buzzes with the scent of barbecue and fresh-cut grass,” I remember thinking as I rummaged through my fridge, realizing I forgot to plan a dessert for the upcoming cookout. Honestly, I felt that familiar pinch of panic—because you know that feeling when everyone expects something sweet, but you’ve got nothing ready? Well, that’s when this creamy no-bake patriotic cheesecake cups recipe was born.
I wasn’t aiming for anything fancy. I just wanted something quick, cool, and festive for the 4th of July gathering next door. The inspiration came unexpectedly while chatting with my neighbor, Lisa, who casually mentioned how she loved simple desserts that still looked like a celebration on a plate. So I grabbed a few ingredients, mixed them up, and layered them in clear cups with a sprinkle of stars and stripes – well, red, white, and blue berries, really.
There was a little mess—some cream cheese spilled on the counter (classic me)—and the blender gave out a weird noise halfway through, but hey, it worked! When I finally handed out those cups, the smiles and second-helpings made me realize this simple, no-bake dessert was a keeper. The creamy texture, tangy sweetness, and patriotic colors made it perfect for easy cookouts, especially when you don’t want to turn on the oven or fuss with fancy plating.
Maybe you’ve been there too: last-minute dessert scramble with a backyard full of hungry friends. This recipe stays with me because it’s the kind of treat that feels like a little celebration in every bite, no stress attached. Let me tell you, it’s become my go-to for any summer get-together—and I think you’ll love it just as much.
Why You’ll Love This Recipe
Having tested this creamy no-bake patriotic cheesecake cups recipe more times than I can count, I can confidently say it’s a winner for several reasons:
- Quick & Easy: Comes together in under 20 minutes—perfect for busy weeknights or last-minute cookout desserts.
- Simple Ingredients: No fancy or hard-to-find items; you probably have most of these in your pantry or fridge already.
- Perfect for 4th of July and Summer Cookouts: The red, white, and blue colors make it festive without extra effort.
- Crowd-Pleaser: Kids love it, adults rave about it, and it’s a refreshing change from heavier desserts.
- Unbelievably Delicious: The creamy, tangy cheesecake filling paired with a crunchy graham base and fresh berries just hits the spot every time.
This isn’t your typical no-bake cheesecake. What sets this recipe apart is the balance—it’s light, not overly sweet, and the texture is just right because of a little trick I learned: whipping the cream cheese with a touch of vanilla and lemon zest before folding in the whipped cream. It adds subtle brightness and a dreamy silkiness that makes you close your eyes with the first bite.
Honestly, it’s the kind of dessert that turns a simple cookout into something memorable without the fuss or heat of baking. And I love that it’s flexible—you can swap in your favorite berries or even add a drizzle of chocolate for a twist. Trust me, once you make these cheesecake cups, they’ll become a staple at your summer celebrations.
What Ingredients You Will Need
This creamy no-bake patriotic cheesecake cups recipe uses straightforward ingredients that come together to create a fresh, flavorful dessert. Each component plays a role: the crust provides crunch, the filling is smooth and tangy, and the toppings bring color and a burst of freshness.
- For the Crust:
- 1 ½ cups graham cracker crumbs (I prefer Honey Maid for that perfect texture)
- 5 tablespoons unsalted butter, melted (adds richness and helps bind crumbs)
- 2 tablespoons granulated sugar (balances the butter’s richness)
- For the Cheesecake Filling:
- 8 oz cream cheese, softened (room temperature for easy mixing)
- ½ cup powdered sugar (sifted to avoid lumps)
- 1 teaspoon vanilla extract (real vanilla makes a difference here)
- 1 teaspoon lemon zest (brightens and lifts the flavor)
- 1 cup heavy whipping cream, cold (for that fluffy, airy texture)
- For the Topping:
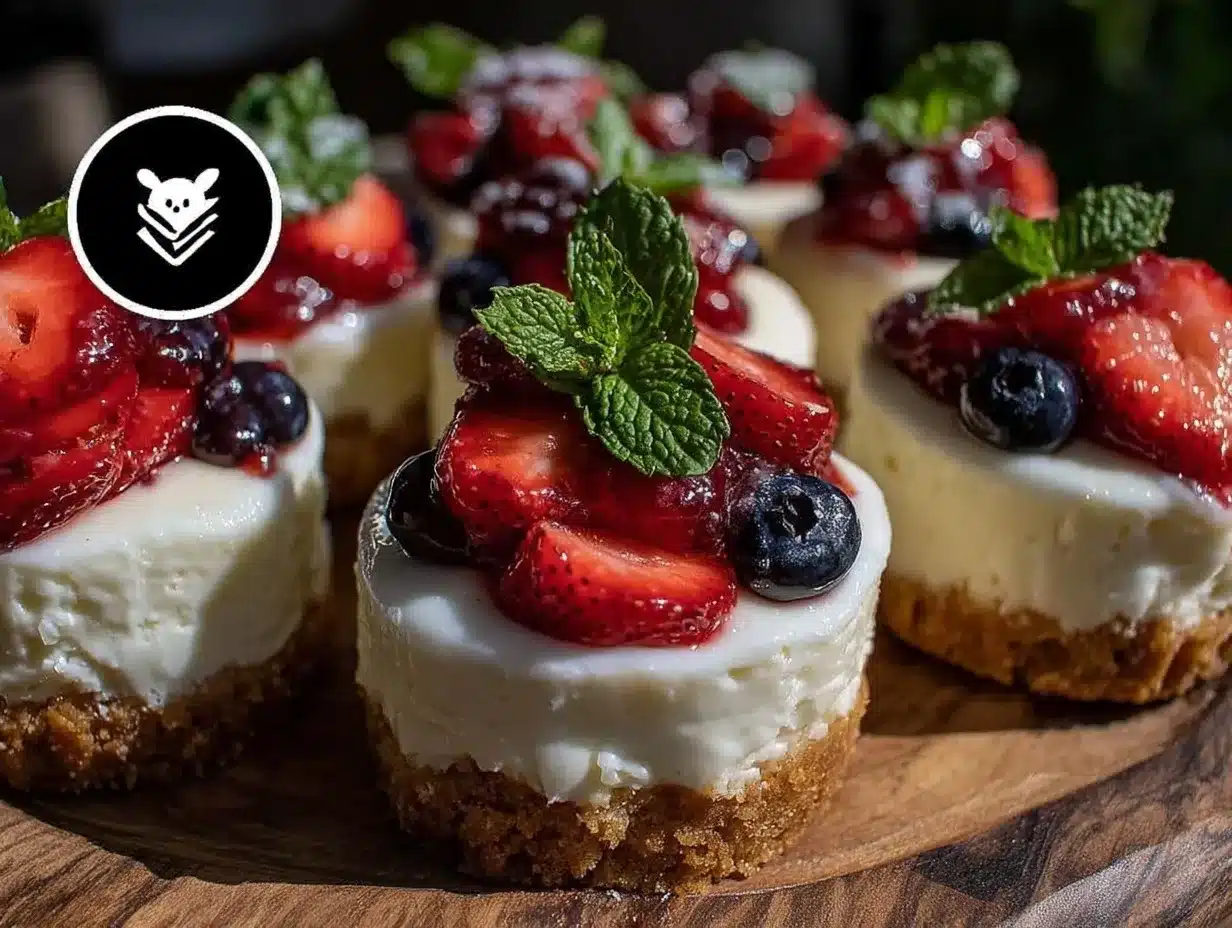
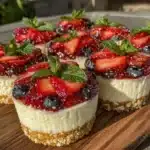
- 1 cup fresh strawberries, sliced (red for that patriotic pop)
- 1 cup fresh blueberries (blue and juicy!)
- Optional: fresh mint leaves for garnish (adds a nice aroma and color contrast)
If you want to switch things up, you can swap the graham crackers for gluten-free cookies or use coconut oil instead of butter for a dairy-free crust. For a lighter version, Greek yogurt can replace some cream cheese, but honestly, the full cream cheese version is where that creamy magic happens.
Equipment Needed
- Mixing bowls – I usually use glass or stainless steel for easy cleanup.
- Electric mixer or hand mixer – essential for whipping the cream cheese and cream smoothly. If you don’t have one, a sturdy whisk and some arm power can work but expect a bit more elbow grease.
- Measuring cups and spoons – accuracy makes a big difference in texture and sweetness.
- Spoons or spatulas – for folding and scraping the bowl sides.
- Clear plastic or glass cups (about 6-8 oz size) – these showcase the patriotic layers beautifully, but small mason jars or dessert glasses work too.
- Optional: zester or fine grater for the lemon zest.
Pro tip: I keep a dedicated handheld mixer just for desserts because it’s less bulky and easier to clean. If you’re on a budget, a simple whisk can do the job, just be patient when whipping the cream.
Preparation Method
- Make the Crust: In a medium bowl, combine 1 ½ cups graham cracker crumbs, 5 tablespoons melted unsalted butter, and 2 tablespoons granulated sugar. Mix well until the crumbs are evenly coated and resemble wet sand. This should take about 3 minutes. If the mixture feels dry, add a tiny splash of melted butter.
- Assemble the Base Layer: Spoon about 2 tablespoons of the crumb mixture into each cup. Use the back of a spoon or the bottom of a small glass to gently press the crumbs down, packing them firmly—this helps the crust hold together. Set these cups in the fridge while you prepare the filling, about 10 minutes. This step helps avoid soggy crusts.
- Prepare the Cheesecake Filling: In a large bowl, beat the softened cream cheese with ½ cup powdered sugar, 1 teaspoon vanilla extract, and 1 teaspoon lemon zest using an electric mixer on medium speed until smooth and creamy—about 2 to 3 minutes. Scrape down the bowl sides once or twice to get an even consistency.
- Whip the Cream: In a separate cold bowl, whip 1 cup of heavy whipping cream until stiff peaks form. This usually takes about 3 to 5 minutes on medium-high speed. Watch closely; overwhipping can turn it grainy.
- Combine Filling and Whipped Cream: Gently fold the whipped cream into the cream cheese mixture using a spatula. Fold carefully to keep the mixture light and airy—this step gives that dreamy texture. This should take about 2 minutes. Avoid overmixing or you’ll lose the fluffiness.
- Fill the Cups: Spoon the cheesecake filling over the chilled crust in each cup, filling nearly to the top. Smooth the surface with the back of a spoon or an offset spatula for a clean look.
- Chill to Set: Refrigerate the assembled cups for at least 2 hours (or overnight if possible). This helps the filling firm up and flavors to meld.
- Add the Toppings: Just before serving, layer sliced strawberries and blueberries on top of each cup. Arrange the berries to showcase the red, white (the creamy filling), and blue theme beautifully. Garnish with fresh mint leaves if desired.
Note: If you find the filling too thick to spoon easily, let it sit at room temperature for 5 minutes and give it a gentle stir. Also, if making ahead, don’t add the berries until serving time to keep them fresh.
Cooking Tips & Techniques
Making these creamy no-bake cheesecake cups turned me into a little dessert detective. Here’s what I learned the hard way:
- Softened Cream Cheese is Key: If it’s too cold, lumps will sneak into your filling. Let it sit on the counter for 30 minutes or zap in short bursts in the microwave (watch carefully!).
- Whip Your Cream Just Right: Underwhipped cream? The filling will be dense. Overwhipped? You risk turning it grainy or into butter. Stop as soon as stiff peaks form.
- Folding is Gentle Work: Think of folding like tucking a baby in bed—slow, careful, and loving. This keeps the air in and the texture light.
- Chill is Your Friend: Don’t skip the refrigeration step; it helps the flavors marry and the texture firm up nicely.
- Keep Berries Fresh: Add them last minute to avoid sogginess or color bleeding into the cheesecake.
- Make Ahead: You can prep the crust and filling a day before. Store covered in the fridge and assemble toppings when ready.
Trust me, these little pointers will save you from the usual cheesecake mishaps and make your cookout dessert the star of the table.
Variations & Adaptations
This recipe is pretty flexible, so you can tweak it to suit your taste or dietary needs:
- Berry Swap: Use raspberries or blackberries if you want a different flavor profile or to add more color variety.
- Gluten-Free Option: Swap graham cracker crumbs for gluten-free cookies or almond flour mixed with a bit of melted butter.
- Dairy-Free Version: Use dairy-free cream cheese (like Kite Hill) and coconut cream whipped to stiff peaks instead of heavy cream.
- Chocolate Twist: Add 2 tablespoons of cocoa powder to the filling for a chocolate cheesecake cup or sprinkle mini chocolate chips on top.
- Personal Favorite: I once tried adding a layer of crushed pineapple between crust and filling—total game-changer for a tropical vibe that my family loved.
Feel free to play around with layers and flavors. After all, cookouts are the perfect chance to get creative without stress.
Serving & Storage Suggestions
Serve these cheesecake cups chilled, straight from the fridge. They’re perfect as handheld desserts at cookouts, picnics, or casual summer parties. For presentation, clear cups really show off the layers, but even simple jars create a rustic charm.
Pair these with a light iced tea, sparkling lemonade, or a fruity sangria for a refreshing combo. They also go well alongside crispy garlic chicken or fresh salads to round out a summer meal.
Store leftovers covered tightly in the fridge for up to 3 days. The crust might soften a bit over time but the flavor actually deepens. If you want to prep in advance, keep the toppings separate and add just before serving.
To reheat (if you must), only warm slightly at room temperature for 10-15 minutes—don’t microwave or the texture will suffer.
Nutritional Information & Benefits
Each creamy no-bake patriotic cheesecake cup (about one serving) roughly contains:
| Calories | 280-320 |
|---|---|
| Fat | 20g |
| Carbohydrates | 22g |
| Protein | 4g |
The cream cheese provides a good source of calcium and protein, while the fresh berries deliver antioxidants and vitamin C. Using fresh fruit also adds fiber and natural sweetness, which helps keep the sugar content moderate.
This dessert can fit nicely into a balanced diet, especially if you opt for reduced-fat cream cheese or swap sugar for natural sweeteners. Just keep in mind the dairy and gluten content if you’re serving guests with allergies.
Conclusion
When it comes to easy, crowd-pleasing desserts for summer cookouts, these creamy no-bake patriotic cheesecake cups tick all the boxes. They’re quick, require no oven, look festive, and taste like a little bite of summer joy. Plus, the recipe’s flexibility means you can make it your own every time.
I keep coming back to this recipe because it’s just right—rich but light, sweet but fresh, and always a hit with friends and family. I hope you give it a try and find your own little moments of joy with it too.
If you whip these up, drop a comment below sharing your favorite berry combos or any fun twists you tried! And hey, if you ever want another easy dessert idea, you might enjoy my take on a no-bake lemon blueberry bars that are just as refreshing.
Happy cooking and happy 4th of July!
FAQs About Creamy No-Bake Patriotic Cheesecake Cups
Can I make these cheesecake cups ahead of time?
Yes! Prepare the crust and filling up to 24 hours in advance, keep covered in the fridge, and add fresh berries just before serving for best freshness.
What if I don’t have heavy whipping cream?
You can substitute with whipped coconut cream for a dairy-free option, but the texture will be slightly different—still tasty though!
Can I use frozen berries instead of fresh?
Frozen berries work in a pinch, but thaw and drain them well to avoid adding extra liquid to the cheesecake cups.
How do I get the cream cheese smooth without lumps?
Make sure the cream cheese is fully softened before mixing. Beat it thoroughly with a mixer or whisk until creamy and smooth before adding other ingredients.
Are these cheesecake cups suitable for gluten-free diets?
They can be! Use gluten-free graham cracker crumbs or substitute the crust with almond flour mixed with melted butter for a gluten-free crust option.
Pin This Recipe!
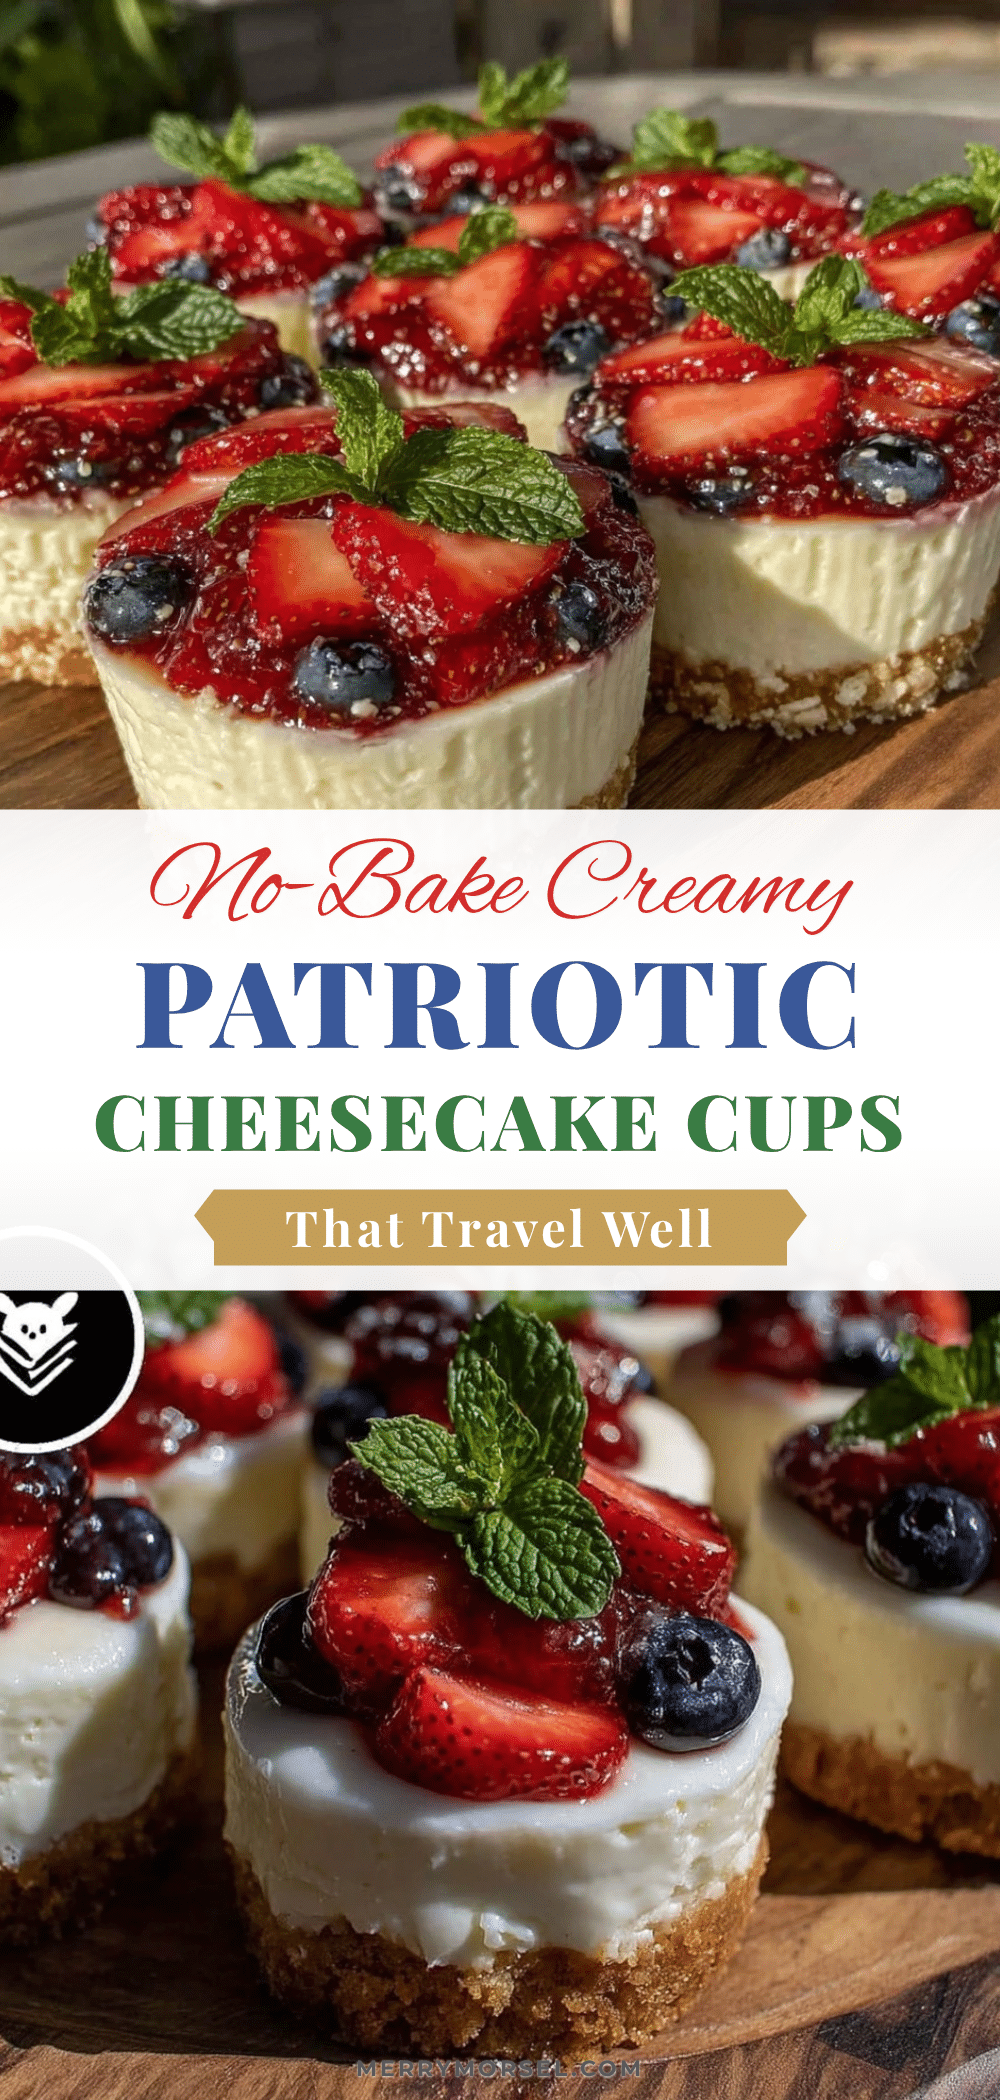
Creamy No-Bake Patriotic Cheesecake Cups
A quick and easy no-bake cheesecake dessert featuring a crunchy graham cracker crust, creamy tangy filling, and fresh red, white, and blue berries—perfect for 4th of July cookouts.
- Prep Time: 15 minutes
- Cook Time: 0 minutes
- Total Time: 2 hours 15 minutes
- Yield: 6 servings 1x
- Category: Dessert
- Cuisine: American
Ingredients
- 1 ½ cups graham cracker crumbs
- 5 tablespoons unsalted butter, melted
- 2 tablespoons granulated sugar
- 8 oz cream cheese, softened
- ½ cup powdered sugar
- 1 teaspoon vanilla extract
- 1 teaspoon lemon zest
- 1 cup heavy whipping cream, cold
- 1 cup fresh strawberries, sliced
- 1 cup fresh blueberries
- Optional: fresh mint leaves for garnish
Instructions
- In a medium bowl, combine graham cracker crumbs, melted butter, and granulated sugar. Mix until crumbs are evenly coated and resemble wet sand. Add a tiny splash of melted butter if mixture feels dry.
- Spoon about 2 tablespoons of the crumb mixture into each cup. Press crumbs down firmly using the back of a spoon or bottom of a small glass. Refrigerate cups for about 10 minutes.
- In a large bowl, beat softened cream cheese with powdered sugar, vanilla extract, and lemon zest using an electric mixer on medium speed until smooth and creamy, about 2 to 3 minutes. Scrape down bowl sides as needed.
- In a separate cold bowl, whip heavy cream until stiff peaks form, about 3 to 5 minutes on medium-high speed.
- Gently fold whipped cream into the cream cheese mixture using a spatula, folding carefully to keep mixture light and airy.
- Spoon cheesecake filling over chilled crust in each cup, filling nearly to the top. Smooth the surface.
- Refrigerate assembled cups for at least 2 hours or overnight to set.
- Just before serving, top each cup with sliced strawberries and blueberries. Garnish with fresh mint leaves if desired.
Notes
Softened cream cheese is key to avoid lumps. Whip cream to stiff peaks but avoid overwhipping. Fold whipped cream gently to keep filling light and airy. Chill cups for at least 2 hours to set. Add berries just before serving to keep fresh and avoid sogginess. Can prepare crust and filling a day ahead and store covered in fridge.
Nutrition
- Serving Size: One cheesecake cup (
- Calories: 300
- Sugar: 15
- Sodium: 150
- Fat: 20
- Saturated Fat: 12
- Carbohydrates: 22
- Fiber: 2
- Protein: 4
Keywords: no-bake cheesecake, patriotic dessert, 4th of July dessert, cheesecake cups, easy summer dessert, berry cheesecake