Love this? Save it for later!
Share the inspiration with your friends
That smell. The one that hits you before you even open the kitchen door — nutty, warm, almost like toasted caramel — still takes me straight to my grandmother’s tiny apartment in Chicago. I was maybe nine, standing on a wobbly stool, watching her swirl a stick of butter in a dented stainless steel pan. She never explained what she was doing. She just said, “Wait until it smells like heaven, then you’ll know.” I didn’t understand then that she was browning butter. I just knew those cookies were different. They were chewy in the middle, crisp at the edges, and tasted like something you couldn’t quite name. It took me years to realize that unnamed thing was brown butter. And honestly? I’ve never made chocolate chip cookies any other way since.
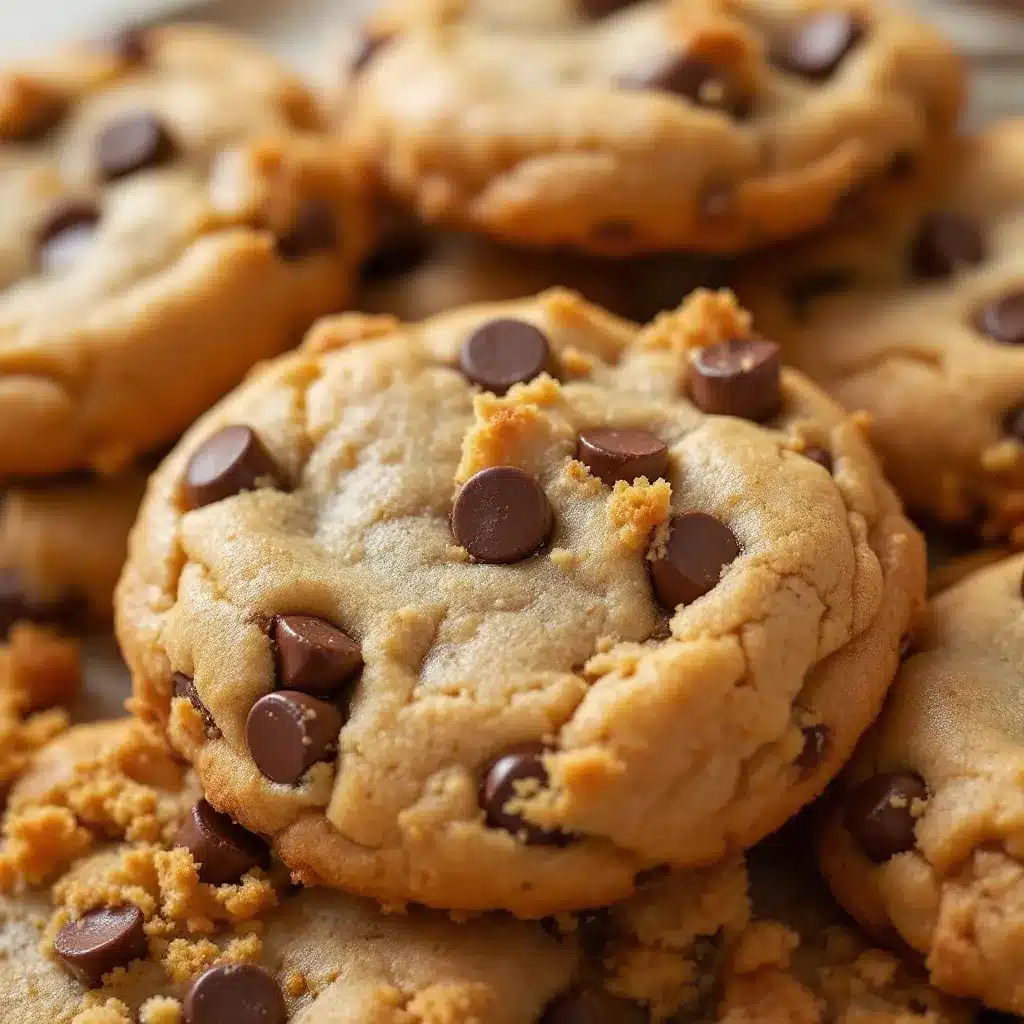
This recipe for chewy brown butter chocolate chip cookies is the result of dozens of batches — some too flat, some too cakey, a few that crumbled into sad little piles. But this one? This one finally nailed it. The brown butter adds a deep, almost toffee-like richness that regular butter just can’t touch. And the texture — soft, dense, and perfectly chewy — stays that way for days. If you’ve been searching for a cookie that tastes like a bakery made it but comes together in your own kitchen, this is it.
These cookies have become my go-to for everything. Potlucks, lazy Sunday afternoons, late-night cravings when the world feels heavy. They’re the kind of cookie you make when you want to feel like you’ve got it all figured out — even if you don’t.
Why You’ll Love This Recipe
I’ve tested this recipe more times than I care to admit. Some batches turned out like hockey pucks. Others spread into thin, crispy discs. But this version? It’s the one I keep coming back to, and here’s why:
- Quick & Easy: From start to finish, these cookies take about 30 minutes. No complicated techniques, no fancy equipment. Just good, honest baking.
- Simple Ingredients: You probably already have everything in your pantry. Butter, sugar, eggs, flour, chocolate chips. The only “special” step is browning the butter, and I promise it’s easier than it sounds.
- Perfect for Any Occasion: These cookies are equally at home at a holiday cookie swap, a casual weeknight dessert, or a bake sale. They’re the crowd-pleaser that disappears fast.
- Crowd-Pleaser: I’ve brought these to parties, family gatherings, and office potlucks. Every single time, someone asks for the recipe. Kids love them. Adults sneak extras. They’re that good.
- Unbelievably Delicious: The brown butter gives these cookies a nutty, caramelized depth that regular chocolate chip cookies just don’t have. It’s subtle but unmistakable — and completely addictive.
What makes this recipe different from the rest? It’s the technique. Browning the butter adds a layer of flavor you can’t get from just creaming butter and sugar. And the combination of melted brown butter with a slightly higher flour-to-fat ratio gives you that perfect chewy texture. No flat, greasy cookies here. Just soft, dense, bakery-style cookies that stay tender for days.
Honestly, this recipe is the kind that makes you close your eyes after the first bite. It’s comfort food reimagined — familiar but elevated, simple but special. Perfect for impressing guests without stress, or turning a regular Tuesday into something memorable.
What Ingredients You Will Need
This recipe uses simple, wholesome ingredients that come together to create something truly special. The magic is in the technique, not the grocery list. Here’s what you’ll need:
For the Cookies
- 1 cup (226g) unsalted butter — Use good-quality butter here. I prefer Kerrygold or Plugrà for the best flavor. The browning process concentrates the milk solids, so better butter really shines.
- 1 cup (200g) packed light brown sugar — Brown sugar adds moisture and that deep, molasses-like sweetness. It’s essential for chewiness.
- 1/2 cup (100g) granulated sugar — White sugar helps with spreading and gives the cookies a slightly crisp edge.
- 2 large eggs, room temperature — Room temperature eggs incorporate more evenly into the batter. If you’re in a hurry, place them in a bowl of warm water for 5 minutes.
- 2 teaspoons vanilla extract — Pure vanilla extract is worth the splurge. It enhances the brown butter notes beautifully.
- 2 1/4 cups (280g) all-purpose flour — Spoon and level your flour for accuracy. Scooping directly from the bag can pack in too much flour, making cookies dry.
- 1 teaspoon baking soda — This helps the cookies spread just the right amount.
- 1/2 teaspoon salt — A little salt balances the sweetness and brings out the brown butter flavor. I use fine sea salt.
- 1 1/2 cups (270g) semi-sweet chocolate chips — I like Ghirardelli or Guittard for consistent melting. You can also chop a high-quality chocolate bar for bigger puddles of chocolate.
- Flaky sea salt, for finishing (optional but highly recommended) — A sprinkle of Maldon salt on top right out of the oven takes these cookies to another level.
Ingredient Tips & Substitutions
- If you only have salted butter, reduce the added salt to 1/4 teaspoon. The browning process will still work fine.
- For a deeper flavor, try using dark brown sugar instead of light. The cookies will be slightly more molasses-forward and even chewier.
- Out of vanilla extract? A pinch of cinnamon or a splash of bourbon can add warmth in a pinch.
- For a dairy-free version, use a high-quality vegan butter. Just note that browning may not work as well — skip the browning step and use it melted instead.
- You can swap semi-sweet chips for milk chocolate, dark chocolate, or even white chocolate chips. Each gives a slightly different personality to the cookie.
Equipment Needed
You don’t need a professional kitchen to make these cookies. Here’s what I use:
- A light-colored saucepan or skillet — This is key for browning butter. A dark pan makes it hard to see the color change, and you might burn the butter. I use a stainless steel saucepan.
- Large mixing bowl — Any bowl will do, but a wide one makes mixing easier.
- Whisk — For combining the butter and sugars.
- Rubber spatula — For folding in the chocolate chips and scraping down the sides.
- Baking sheets — I prefer light-colored aluminum sheets for even baking. Dark sheets can cause the bottoms to brown too quickly.
- Parchment paper or silicone baking mat — Parchment is my go-to. It prevents sticking and makes cleanup a breeze.
- Cookie scoop (about 1.5 tablespoons) — A scoop ensures evenly sized cookies that bake uniformly. If you don’t have one, use two spoons.
- Cooling rack — Letting cookies cool on a rack prevents soggy bottoms.
If you don’t have a light-colored pan, just keep a close eye on the butter. It will go from golden to burnt fast. And a cookie scoop is totally optional — I’ve used a tablespoon for years and it works fine.
Preparation Method
Let’s get baking. This method is straightforward, but pay attention to the details — they make all the difference.
- Brown the butter. Place the butter in a light-colored saucepan over medium heat. Stir occasionally with a rubber spatula or wooden spoon. The butter will melt, foam, and then start to crackle. After a few minutes, the foam will subside, and you’ll see tiny brown specks forming at the bottom of the pan. This is the milk solids toasting. Swirl the pan gently and keep stirring until the butter turns a deep amber color and smells nutty — like toasted hazelnuts. This takes about 5-7 minutes. Immediately pour the browned butter into a heat-safe bowl (including all those brown bits) and let it cool for 10-15 minutes. Don’t skip the cooling step, or the heat will cook your eggs.
- Mix the wet ingredients. In a large bowl, whisk together the cooled brown butter, brown sugar, and granulated sugar until well combined. It will look like wet sand. Add the eggs and vanilla extract, and whisk vigorously for about 1 minute until the mixture is smooth, glossy, and slightly thickened. This step helps create that chewy texture.
- Combine the dry ingredients. In a separate bowl, whisk together the flour, baking soda, and salt. Make sure the baking soda is evenly distributed — no clumps.
- Fold in the dry ingredients. Add the flour mixture to the wet ingredients. Use a rubber spatula to fold gently until just combined. A few streaks of flour are okay. Overmixing will develop gluten and make the cookies tough.
- Add the chocolate chips. Fold in the chocolate chips until evenly distributed. The dough will be thick and slightly sticky — that’s perfect.
- Chill the dough (optional but recommended). For the best texture, cover the bowl and refrigerate the dough for at least 30 minutes, or up to 72 hours. Chilling solidifies the butter, which prevents the cookies from spreading too much and deepens the flavor. If you’re in a hurry, you can bake immediately — the cookies will just be slightly thinner.
- Preheat the oven. While the dough chills, preheat your oven to 350°F (175°C). Line two baking sheets with parchment paper.
- Scoop the dough. Use a cookie scoop or tablespoon to portion the dough into balls about 1.5 tablespoons each (roughly 30g). Place them 2 inches apart on the prepared baking sheets. For bakery-style cookies, slightly flatten the tops with your palm.
- Bake. Bake for 10-12 minutes, or until the edges are golden brown and the centers look slightly underdone and puffy. The cookies will continue to set as they cool. For softer, chewier cookies, pull them at 10 minutes. For slightly crisper edges, go to 12 minutes.
- Cool. Let the cookies cool on the baking sheet for 5 minutes. The residual heat will finish the baking process. Then transfer them to a wire rack to cool completely. If using flaky sea salt, sprinkle it on top while the cookies are still warm.
Sensory cue: When the cookies come out of the oven, they should be golden around the edges with pale, slightly puffed centers. The smell will be overwhelmingly nutty and sweet — that’s how you know they’re perfect.
Cooking Tips & Techniques
I’ve made plenty of mistakes with these cookies, so you don’t have to. Here’s what I’ve learned:
- Don’t rush the browning. I once tried to brown butter on high heat to save time. It went from golden to burnt in seconds. Keep the heat at medium and stir constantly. The butter will foam, then quiet down — that’s when you need to watch closely.
- Use a light-colored pan. This is non-negotiable. A dark pan makes it nearly impossible to see the color change. I learned this the hard way after three burnt batches.
- Room temperature eggs matter. Cold eggs can seize the brown butter, creating a greasy dough. Let them sit out for 20 minutes, or warm them in a bowl of water for 5 minutes.
- Chill the dough if you can. I know it’s tempting to skip this step, but chilling for even 30 minutes makes a huge difference. The cookies spread less, have a better texture, and the flavor deepens as the brown butter melds with the sugar.
- Measure flour correctly. Scooping flour directly from the bag can pack in up to 25% more flour. Always spoon it into your measuring cup and level it off with a knife.
- Bake one sheet at a time. If you crowd the oven, the cookies won’t bake evenly. Place the baking sheet on the center rack for the best results.
One time, I forgot to add the baking soda. The cookies came out flat and dense — edible, but not great. Double-check your ingredients before mixing. It’s a small step that saves a lot of disappointment.
Variations & Adaptations
These cookies are endlessly adaptable. Here are a few ways I’ve played with the recipe:
- Double Chocolate Chip: Swap 1/4 cup of the flour for 1/4 cup of unsweetened cocoa powder. Use dark chocolate chips. The result is a rich, fudgy cookie that tastes like a brownie.
- Nutty Brown Butter: Add 1/2 cup of toasted pecans or walnuts along with the chocolate chips. Toast the nuts in the same pan after browning the butter — it saves time and adds extra flavor.
- Sea Salt & Caramel: Press a soft caramel candy into the center of each dough ball before baking. Sprinkle with flaky sea salt. The caramel melts into gooey pockets of sweetness.
- Gluten-Free: Substitute the all-purpose flour with a 1:1 gluten-free baking flour blend. I’ve used Bob’s Red Mill with great results. The texture will be slightly more tender but still chewy.
- Vegan: Use vegan butter (skip the browning step and melt it instead) and a flax egg (1 tablespoon ground flaxseed + 3 tablespoons water, let sit for 5 minutes). The cookies will be slightly less chewy but still delicious.
- Peanut Butter Swirl: Drop small spoonfuls of peanut butter onto the dough balls before baking. Swirl lightly with a toothpick. The salty peanut butter pairs beautifully with the brown butter.
My personal favorite variation? Adding a handful of toffee bits and a sprinkle of smoked sea salt. The toffee gets crispy in the oven, and the smoky salt balances the sweetness. It’s dangerously good.
Serving & Storage Suggestions
These cookies are best served warm, when the chocolate is still melty and the edges are crisp. But they’re also fantastic at room temperature — honestly, I’ve eaten them straight from the fridge and loved them.
Serving: Arrange the cookies on a platter with a glass of cold milk or a hot cup of coffee. They’re perfect for dessert, an afternoon snack, or even breakfast (no judgment here). For a special treat, sandwich two cookies with a scoop of vanilla ice cream for the ultimate ice cream sandwich.
Storage: Store baked cookies in an airtight container at room temperature for up to 5 days. To keep them chewy, add a slice of bread to the container — the bread absorbs excess moisture and the cookies stay soft. Replace the bread every day or two.
Freezing: You can freeze both the dough and the baked cookies. For the dough, scoop into balls, place on a baking sheet, and freeze until solid. Transfer to a freezer bag and store for up to 3 months. Bake directly from frozen, adding 1-2 minutes to the baking time. For baked cookies, freeze in a single layer on a baking sheet, then transfer to a freezer bag. Thaw at room temperature for 15 minutes before serving.
Reheating: Pop a cookie in the microwave for 10-15 seconds for that just-baked warmth. Or place on a baking sheet in a 300°F (150°C) oven for 5 minutes.
The flavors actually deepen after a day or two. The brown butter notes become more pronounced, and the texture stays perfectly chewy. If you can resist eating them all on day one, day two is even better.
Nutritional Information & Benefits
Let’s be real — these are cookies, not health food. But they do have a few redeeming qualities. Here’s the estimated nutritional breakdown per cookie (based on 24 cookies):
| Nutrient | Amount per Cookie |
|---|---|
| Calories | 185 |
| Total Fat | 10g |
| Saturated Fat | 6g |
| Cholesterol | 35mg |
| Sodium | 95mg |
| Total Carbohydrates | 24g |
| Dietary Fiber | 1g |
| Sugars | 16g |
| Protein | 2g |
Health Benefits: Brown butter contains conjugated linoleic acid (CLA), which has been linked to some health benefits. Dark chocolate is rich in antioxidants and may support heart health. And the eggs provide a good source of protein. But let’s be honest — these cookies are about joy, not nutrition.
Dietary Considerations: This recipe contains gluten, dairy, and eggs. For gluten-free or vegan options, check the variations section above. The cookies are nut-free as written (unless you add nuts), but always check labels for potential cross-contamination.
I believe in balance. Enjoy these cookies as a treat, savor every bite, and don’t feel guilty about it. Life’s too short for bad cookies — or guilt over good ones.
Conclusion
These chewy brown butter chocolate chip cookies are everything I want in a cookie — deeply flavorful, perfectly textured, and surprisingly easy to make. The brown butter adds a layer of complexity that makes them taste like you spent hours in the kitchen, even though they come together in under an hour.
I love that this recipe is forgiving enough for beginners but impressive enough for experienced bakers. You can customize it a hundred different ways, and it will still turn out great. Whether you’re baking for a crowd or just treating yourself, these cookies deliver.
So go ahead — brown that butter, fold in those chocolate chips, and bake a batch. I promise you won’t regret it. And when you take that first bite and the nutty, caramelized flavor hits you? That’s the moment you’ll understand why I never make chocolate chip cookies any other way.
If you try this recipe, let me know in the comments! I’d love to hear how they turned out, what variations you tried, or if you have any questions. And if you’re looking for more sweet treats, check out these perfect chocolate chip pumpkin bread with cream cheese swirl or these perfect pumpkin cream cheese muffins for more fall-inspired desserts. Happy baking!
Frequently Asked Questions
Can I use salted butter instead of unsalted?
Yes, you can. Just reduce the added salt in the recipe to 1/4 teaspoon. The browning process works the same with salted butter, but the salt content can vary between brands, so taste the dough before baking if you’re unsure.
Why did my cookies turn out flat?
Flat cookies usually mean the butter was too warm when mixed, or the dough wasn’t chilled long enough. Make sure the brown butter is cooled to room temperature before adding the eggs. Chilling the dough for at least 30 minutes also helps prevent spreading.
Can I freeze the cookie dough?
Absolutely! Scoop the dough into balls, place them on a baking sheet, and freeze until solid. Transfer to a freezer bag and store for up to 3 months. Bake directly from frozen, adding 1-2 minutes to the baking time.
How do I get perfectly chewy cookies every time?
The secret is in the technique. Use brown sugar for moisture, don’t overmix the dough, and slightly underbake the cookies. Pull them from the oven when the edges are golden but the centers still look slightly underdone. They’ll continue to set as they cool.
Can I make these cookies without browning the butter?
You can, but they won’t have the same nutty, caramelized flavor. If you skip the browning step, use melted butter (cooled slightly) instead. The texture will still be good, but the flavor will be more like a classic chocolate chip cookie.
Pin This Recipe!
Chewy Brown Butter Chocolate Chip Cookies – Best Easy Recipe

These chewy brown butter chocolate chip cookies are deeply flavorful, perfectly textured, and surprisingly easy to make. The brown butter adds a nutty, caramelized depth that makes them taste like a bakery treat.
- Prep Time: 15 minutes
- Cook Time: 12 minutes
- Total Time: 30 minutes (plus optional chilling time)
- Yield: 24 cookies 1x
- Category: Dessert
- Cuisine: American
Ingredients
- 1 cup (226g) unsalted butter
- 1 cup (200g) packed light brown sugar
- 1/2 cup (100g) granulated sugar
- 2 large eggs, room temperature
- 2 teaspoons vanilla extract
- 2 1/4 cups (280g) all-purpose flour
- 1 teaspoon baking soda
- 1/2 teaspoon salt
- 1 1/2 cups (270g) semi-sweet chocolate chips
- Flaky sea salt, for finishing (optional)
Instructions
- Brown the butter: Place the butter in a light-colored saucepan over medium heat. Stir occasionally until the butter melts, foams, and then turns a deep amber color with a nutty aroma (about 5-7 minutes). Immediately pour into a heat-safe bowl and let cool for 10-15 minutes.
- Mix the wet ingredients: In a large bowl, whisk together the cooled brown butter, brown sugar, and granulated sugar until well combined. Add the eggs and vanilla extract, and whisk vigorously for about 1 minute until smooth, glossy, and slightly thickened.
- Combine the dry ingredients: In a separate bowl, whisk together the flour, baking soda, and salt.
- Fold in the dry ingredients: Add the flour mixture to the wet ingredients. Use a rubber spatula to fold gently until just combined (a few streaks of flour are okay).
- Add the chocolate chips: Fold in the chocolate chips until evenly distributed. The dough will be thick and slightly sticky.
- Chill the dough (optional but recommended): Cover the bowl and refrigerate for at least 30 minutes, or up to 72 hours.
- Preheat the oven to 350°F (175°C). Line two baking sheets with parchment paper.
- Scoop the dough: Use a cookie scoop or tablespoon to portion the dough into balls about 1.5 tablespoons each (roughly 30g). Place them 2 inches apart on the prepared baking sheets. Slightly flatten the tops with your palm.
- Bake for 10-12 minutes, until the edges are golden brown and the centers look slightly underdone and puffy.
- Cool: Let the cookies cool on the baking sheet for 5 minutes, then transfer to a wire rack to cool completely. If using flaky sea salt, sprinkle on top while still warm.
Notes
For best results, chill the dough for at least 30 minutes. Use a light-colored pan for browning butter to avoid burning. Room temperature eggs are important to prevent the brown butter from seizing. Store cookies in an airtight container at room temperature for up to 5 days; add a slice of bread to keep them chewy.
Nutrition
- Serving Size: 1 cookie
- Calories: 185
- Sugar: 16
- Sodium: 95
- Fat: 10
- Saturated Fat: 6
- Carbohydrates: 24
- Fiber: 1
- Protein: 2
Keywords: brown butter chocolate chip cookies, chewy cookies, easy cookie recipe, homemade cookies, chocolate chip cookies


