Love this? Save it for later!
Share the inspiration with your friends
October had barely started when my youngest asked, with that particular kind of pleading voice reserved only for Halloween, if we could eat something that looked like a monster. Not a monster-shaped cookie, not a monster cupcake—an actual dinner that stared back at you from the plate. I laughed at first, but the idea stuck. It sat there in the back of my mind while I unpacked groceries, while I stared at a pile of orange bell peppers I had grabbed on a whim.
That is how these Spooky Jack-o-Lantern Stuffed Bell Peppers were born. Honestly, they started as a joke, a late-night experiment after the kids had gone to bed. I carved a tiny face into a pepper, stuffed it with rice and seasoned meat, and baked it just to see if the face would hold. It did. And when I pulled that tray out of the oven, with the pepper grinning up at me all golden and slightly charred around the edges, I knew I had stumbled onto something. Not just a dinner, but a moment. The kind of silly, memorable dinner that makes October feel like a holiday.
There is a quiet magic in making food that makes people pause and smile before they take a bite. This recipe is not fancy. It does not require special equipment or complicated techniques. But it does require a sharp knife, a little patience while carving, and a willingness to let dinner be a little ridiculous. And honestly, that is exactly what makes it so good. These peppers have become our go-to Halloween week dinner, the one my kids request every year as soon as the first jack-o-lantern appears on the porch.
Why You’ll Love This Recipe
I have tested this recipe more times than I care to admit, tweaking the filling ratios and the carving technique until every single pepper came out looking like a proper little pumpkin. Here is why I think you will love it too.
- Fun for the Whole Family: This is the kind of dinner that gets kids excited about eating vegetables. My nephew, who normally pushes bell peppers to the side of his plate, ate two of these because they were “scary.”
- Simple Ingredients: You probably already have most of what you need in your pantry and fridge. No weird specialty items, no trips to three different stores.
- Customizable Filling: The filling is a blank canvas. Use ground beef, turkey, chicken, or even a hearty plant-based crumble. It works with whatever you have.
- Make-Ahead Friendly: You can prep these peppers a day in advance, store them in the fridge, and bake them right before dinner. Perfect for busy Halloween weeknights.
- Naturally Gluten-Free: As written, this recipe uses rice and is completely gluten-free. Just double-check your seasoning blends if you are sensitive.
I have made these for Halloween parties, for a quiet dinner at home, and even for a playdate where the kids insisted on “scary food.” They disappear every single time. There is something about eating a dinner that looks back at you that makes people happy. It is comfort food with a sense of humor.
What Ingredients You Will Need
This recipe uses simple, wholesome ingredients that come together to create something that looks far more complicated than it actually is. The magic is all in the carving.
- 4 large orange bell peppers: You want peppers that are squat and round, not tall and pointy. Look for ones that sit flat on their own. Orange works best for the pumpkin look, but you can use red or yellow in a pinch. (Green peppers taste fine but do not give that classic pumpkin color.)
- 1 pound ground beef (85/20): I prefer 85/20 for stuffed peppers because the fat keeps the filling moist. You can use ground turkey or chicken, just add a tablespoon of olive oil to the pan to prevent dryness.
- 1 cup cooked white or brown rice: Leftover rice works beautifully here. If you are starting from scratch, cook your rice ahead of time and let it cool. About 1/3 cup of uncooked rice yields 1 cup cooked.
- 1 small yellow onion, diced: About 1/2 cup. Onion adds sweetness and depth to the filling. I have made these without onion in a pinch, and they were still good, but not as flavorful.
- 2 cloves garlic, minced: Fresh garlic is best. Do not use the jarred stuff for this recipe, the flavor is noticeably different.
- 1 can (14.5 ounces) diced tomatoes, drained: Fire-roasted diced tomatoes add a subtle smoky flavor that works perfectly here. Regular diced tomatoes are fine too.
- 1 teaspoon Italian seasoning: A blend of dried oregano, basil, rosemary, and thyme. If you do not have Italian seasoning, use 1/2 teaspoon dried oregano and 1/2 teaspoon dried basil.
- 1/2 teaspoon smoked paprika: This is key. Smoked paprika gives the filling a warmth that regular paprika just cannot match. It also deepens the color.
- 1/2 teaspoon salt: I use fine sea salt. Adjust to taste depending on your salt preference and the saltiness of your other ingredients.
- 1/4 teaspoon black pepper: Freshly ground is always better, but pre-ground works in a pinch.
- 1 cup shredded mozzarella cheese: For the topping. You can use cheddar, Monterey Jack, or a Mexican blend. I have even used crumbled feta on top, and it was fantastic.
- 2 tablespoons olive oil: For sautéing the onion and garlic. Avocado oil works too.
- Fresh parsley or chives for garnish (optional): A little green on top makes the orange peppers pop even more.
Equipment Needed
You do not need much for this recipe, which is part of its charm. Here is what you will want to have on hand.
- Sharp paring knife: This is the most important tool. A small, sharp knife gives you control for carving the jack-o-lantern faces. I use a 3.5-inch paring knife, nothing fancy.
- Cutting board: A stable cutting board makes carving safer and easier. I prefer wood or bamboo because they do not dull my knives as quickly.
- Large skillet: For cooking the filling. A 12-inch skillet works well. Nonstick or stainless steel both work fine.
- Baking dish: A 9×13-inch baking dish is perfect. You want something that holds the peppers snugly so they do not tip over during baking.
- Small spoon or melon baller: For scooping out the seeds and membranes from inside the peppers. A regular teaspoon works, but a melon baller is oddly satisfying for this job.
- Aluminum foil: For covering the peppers during the first part of baking. This keeps them from drying out and helps the filling heat through evenly.
If you do not have a baking dish, a cast iron skillet works beautifully. I have also made these in a disposable aluminum pan for a potluck, and they turned out great. Do not overthink the equipment.
Preparation Method
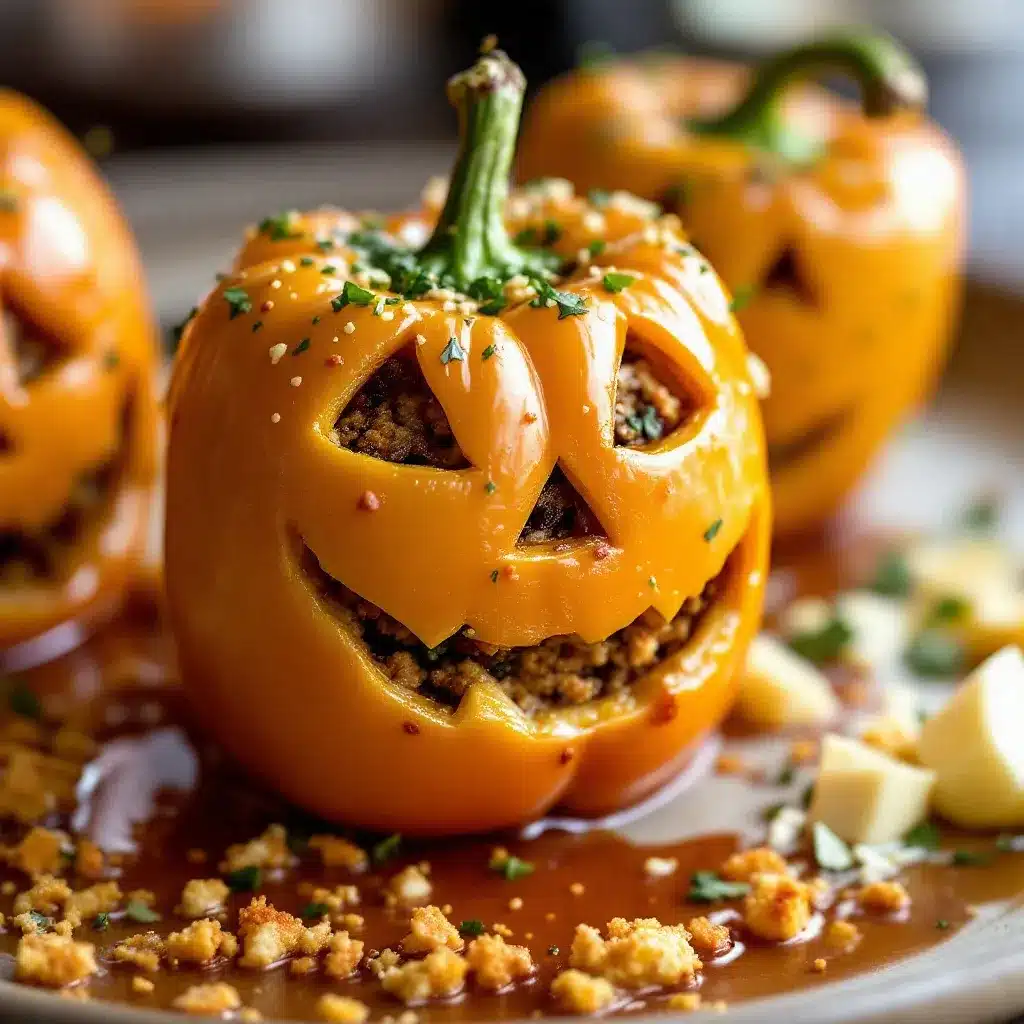
Take your time with the carving step. That is where the personality comes in. Here is how to bring these little guys to life.
- Preheat your oven to 375°F (190°C). While the oven heats, get your peppers ready. Wash and dry each pepper. Using your sharp paring knife, cut the top off each pepper about 1/2 inch from the stem. Set the tops aside, you will need them later for the “lid” of your jack-o-lantern.
- Scoop out the seeds and white membranes from inside each pepper. Use your fingers or a small spoon. Rinse the inside of the peppers with cold water and pat them dry with a paper towel. This step is important because excess moisture can make the peppers steam instead of roast.
- Now for the fun part—carving the faces. Using your paring knife, carefully cut small triangles for eyes and a zigzag or curved line for the mouth. Start small. You can always make the holes bigger, but you cannot undo a cut. I like to give each pepper a different expression—one happy, one grumpy, one surprised. It makes the platter look alive. Be gentle; the pepper walls are thin and can tear if you are too aggressive.
- Heat the olive oil in your large skillet over medium heat. Add the diced onion and cook for 3 to 4 minutes, until it becomes translucent and starts to soften. Stir occasionally so it does not burn. Add the minced garlic and cook for another 30 seconds, just until fragrant. Do not let the garlic brown, it will turn bitter.
- Add the ground beef to the skillet. Break it apart with a wooden spoon or spatula. Cook for 5 to 7 minutes, until the beef is browned and no longer pink. Drain off any excess fat if there is more than a tablespoon. I usually leave a little in the pan for flavor.
- Stir in the cooked rice, drained diced tomatoes, Italian seasoning, smoked paprika, salt, and black pepper. Mix everything together until well combined. Let the filling cook for 2 to 3 minutes, stirring occasionally, so the flavors meld. Taste the filling and adjust the seasoning if needed. It should be savory and slightly smoky.
- Remove the skillet from heat. Let the filling cool for about 5 minutes. This step is important because if you stuff the peppers while the filling is piping hot, the pepper walls can soften too much before they even hit the oven.
- Spoon the filling into each carved pepper. Pack it gently but firmly. Do not overstuff, you want the filling to be level with the top of the pepper, not mounded. Place the filled peppers in your baking dish, standing upright. If they wobble, you can trim a thin slice off the bottom to make them sit flat, just be careful not to cut through.
- Place the pepper tops (the lids) back on each pepper. This keeps the filling moist during baking. Cover the baking dish tightly with aluminum foil. Bake for 25 minutes.
- After 25 minutes, remove the foil and the pepper tops. Sprinkle the shredded mozzarella cheese over the top of each pepper, letting some fall into the carved face holes if you want a “glowing” effect. Return the dish to the oven, uncovered, and bake for another 10 to 15 minutes, until the cheese is melted and bubbly and the peppers are tender but still hold their shape.
- Let the peppers rest for 5 minutes before serving. This allows the filling to set and the peppers to cool slightly so nobody burns their mouth on the first bite. Garnish with fresh parsley or chives if you are feeling fancy.
Cooking Tips & Techniques
I have made these peppers enough times to know exactly where things can go wrong. Here are the lessons I learned the hard way so you do not have to.
Choose your peppers wisely. Not all bell peppers are created equal. Look for peppers that are squat, round, and have a flat bottom. Tall, narrow peppers tip over in the baking dish and spill their filling everywhere. I learned this the first time I made these, and it was a mess. Also, check for soft spots or blemishes. A pepper with a weak spot will tear when you try to carve it.
Carve with confidence but caution. The pepper walls are thin, usually about 1/4 inch thick. If you try to saw back and forth with a dull knife, you will crush the pepper. Use a sharp, small knife and make clean, decisive cuts. I like to insert the knife at a slight angle so the cut piece pops out easily. For the mouth, I cut a small slit first and then work my way around the shape.
Do not skip the pre-bake cover. Baking the peppers covered with foil for the first 25 minutes is non-negotiable. Without the foil, the exposed parts of the pepper dry out and the filling can become crusty before the pepper is fully tender. The foil traps steam and gently cooks everything through.
Watch the cheese. If you add the cheese too early, it can burn before the peppers are done. If you add it too late, it will not melt properly. The sweet spot is adding it after the covered bake, then letting it melt and bubble during the final uncovered bake. Keep an eye on it during the last 5 minutes. Every oven runs a little differently.
Let them rest. I know it is tempting to serve these immediately, especially when the kids are gathered around the table with excited faces. But the filling needs a few minutes to settle. If you cut into a pepper right out of the oven, the filling will spill out and the structure will collapse. Five minutes of patience makes a huge difference.
Variations & Adaptations
One of the best things about this recipe is how easy it is to adapt. Here are some variations I have tried and loved.
Vegetarian Version: Swap the ground beef for one can of black beans (drained and rinsed) or 1 1/2 cups of cooked lentils. Add an extra 1/2 cup of rice to bulk up the filling. I have also used crumbled plant-based meat alternatives, and they work beautifully. Just cook them the same way you would ground beef.
Spicy Kick: If you like heat, add 1/2 teaspoon of red pepper flakes or a diced jalapeño to the filling along with the onion. You can also use pepper jack cheese instead of mozzarella for the topping. My husband loves this version and always requests it for game day. Speaking of game day, if you love stuffed peppers as much as I do, you should try our best game day football-shaped stuffed bell peppers for another fun twist on the classic.
Mexican-Inspired Filling: Replace the Italian seasoning with 1 teaspoon of cumin and 1/2 teaspoon of chili powder. Use a can of Rotel (diced tomatoes with green chiles) instead of plain diced tomatoes. Top with a blend of cheddar and Monterey Jack cheese. Serve with a dollop of sour cream and a sprinkle of fresh cilantro. This version disappears fast at parties.
Low-Carb Option: Skip the rice entirely and replace it with 1 cup of riced cauliflower. Sauté the cauliflower rice in the skillet for 2 to 3 minutes before adding it to the beef mixture. The texture is slightly different, but the flavor is still fantastic. My sister, who follows a low-carb diet, says this is her favorite version.
Kid-Friendly Mini Peppers: Use mini bell peppers (the ones that come in a bag) and carve tiny faces into them. Reduce the baking time to 15 minutes covered and 8 minutes uncovered. These are perfect for little hands and make a great lunchbox surprise. If you are looking for more fun lunchbox ideas, our easy turkey and cheese pinwheel roll-ups for lunchboxes are always a hit with the kids.
Serving & Storage Suggestions
These peppers are best served warm, straight out of the oven, when the cheese is still gooey and the peppers are tender but not mushy. I like to arrange them on a large platter with the carved faces facing outward so everyone can see their expressions. It makes the table feel festive.
What to serve with them: A simple green salad with a tangy vinaigrette balances the richness of the filling. I also love serving these with a side of Mexican street corn or roasted broccoli. For a heartier meal, pair them with warm tortillas and a bowl of black beans. If you are hosting a Halloween party, these peppers look amazing next to a platter of easy mummy hot dogs for a fully themed spread.
Storage: Leftover stuffed peppers keep well in the refrigerator for up to 4 days. Store them in an airtight container. The peppers will soften over time, but the flavor actually gets better as the filling and pepper meld together overnight.
Reheating: The best way to reheat these is in the oven at 350°F (175°C) for about 15 minutes, covered with foil. This restores some of the texture without drying them out. You can also reheat them in the microwave, but the peppers will be softer. If you are in a rush, microwave on high for 1 to 2 minutes per pepper.
Freezing: These peppers freeze beautifully. Assemble the peppers completely (including the cheese) but do not bake them. Wrap each pepper individually in plastic wrap, then place them in a freezer-safe bag. They will keep for up to 3 months. To bake from frozen, place the unwrapped peppers in a baking dish, cover with foil, and bake at 375°F (190°C) for 45 minutes. Remove the foil for the last 10 minutes to let the cheese brown.
Nutritional Information & Benefits
Here is the approximate nutritional breakdown for one stuffed pepper (using ground beef and mozzarella). Values are estimates and will vary based on your specific ingredients.
- Calories: 385
- Protein: 28g
- Fat: 18g
- Carbohydrates: 24g
- Fiber: 4g
- Sugar: 8g
- Sodium: 680mg
Bell peppers are an excellent source of vitamin C, with one orange pepper providing more than 100% of your daily needs. They are also rich in vitamin A, which supports eye health and immune function. The rice provides sustained energy, while the protein from the beef and cheese keeps you full and satisfied. This is a balanced meal that happens to look like a Halloween decoration.
If you are watching your sodium intake, you can use no-salt-added diced tomatoes and reduce the added salt in the filling. The smoked paprika and Italian seasoning provide plenty of flavor even with less salt.
Conclusion
These Spooky Jack-o-Lantern Stuffed Bell Peppers have become a non-negotiable part of our October traditions. They are the dinner that makes my kids laugh, that makes them pause to admire their food before they eat it, that turns a regular Tuesday into something worth remembering. And that is really what I love about them. They are not just a recipe. They are a little moment of joy in the middle of a busy week.
I hope you make these for your family, for your friends, or just for yourself because you deserve a dinner that makes you smile. Carve the faces however you want. Make them silly, make them scary, make them look like your grumpy neighbor. There are no rules. And when you make them, I would love to hear about it. Leave a comment below and tell me what faces your peppers made. Share a photo if you are feeling bold. Tag me so I can see your creations.
Go ahead. Give your dinner a personality. It is more fun than it has any right to be.
Frequently Asked Questions
Can I use a different type of meat?
Absolutely. Ground turkey, chicken, pork, or even lamb all work beautifully in this recipe. Just adjust the cooking time slightly if you are using a leaner meat, and add a tablespoon of olive oil to keep the filling moist. For a plant-based version, crumbled tofu or tempeh are also great options.
How do I keep the peppers from tipping over in the baking dish?
Choose peppers with flat bottoms, and if they still wobble, trim a very thin slice off the bottom with your knife. Be careful not to cut through the pepper. You can also nestle them close together in the baking dish so they support each other. If all else fails, use a muffin tin to hold each pepper upright.
Can I make these peppers ahead of time for a party?
Yes. Assemble the peppers completely, including the cheese, but do not bake them. Cover the baking dish with plastic wrap and refrigerate for up to 24 hours. When you are ready to bake, add an extra 5 to 10 minutes to the covered baking time to account for the cold filling.
What if my pepper tears while I am carving the face?
Do not panic. Small tears can be patched with a piece of raw pepper pressed into the gap. The cheese topping will cover most imperfections anyway. If the tear is large, you can use a toothpick to hold the piece in place during baking. Just remember to remove the toothpick before serving.
Can I use pre-shredded cheese?
You can, but I recommend shredding your own. Pre-shredded cheese is coated with anti-caking agents that prevent it from melting as smoothly. Freshly shredded mozzarella melts into a beautiful, gooey blanket that looks and tastes much better. It takes an extra 30 seconds and makes a noticeable difference.
Pin This Recipe!
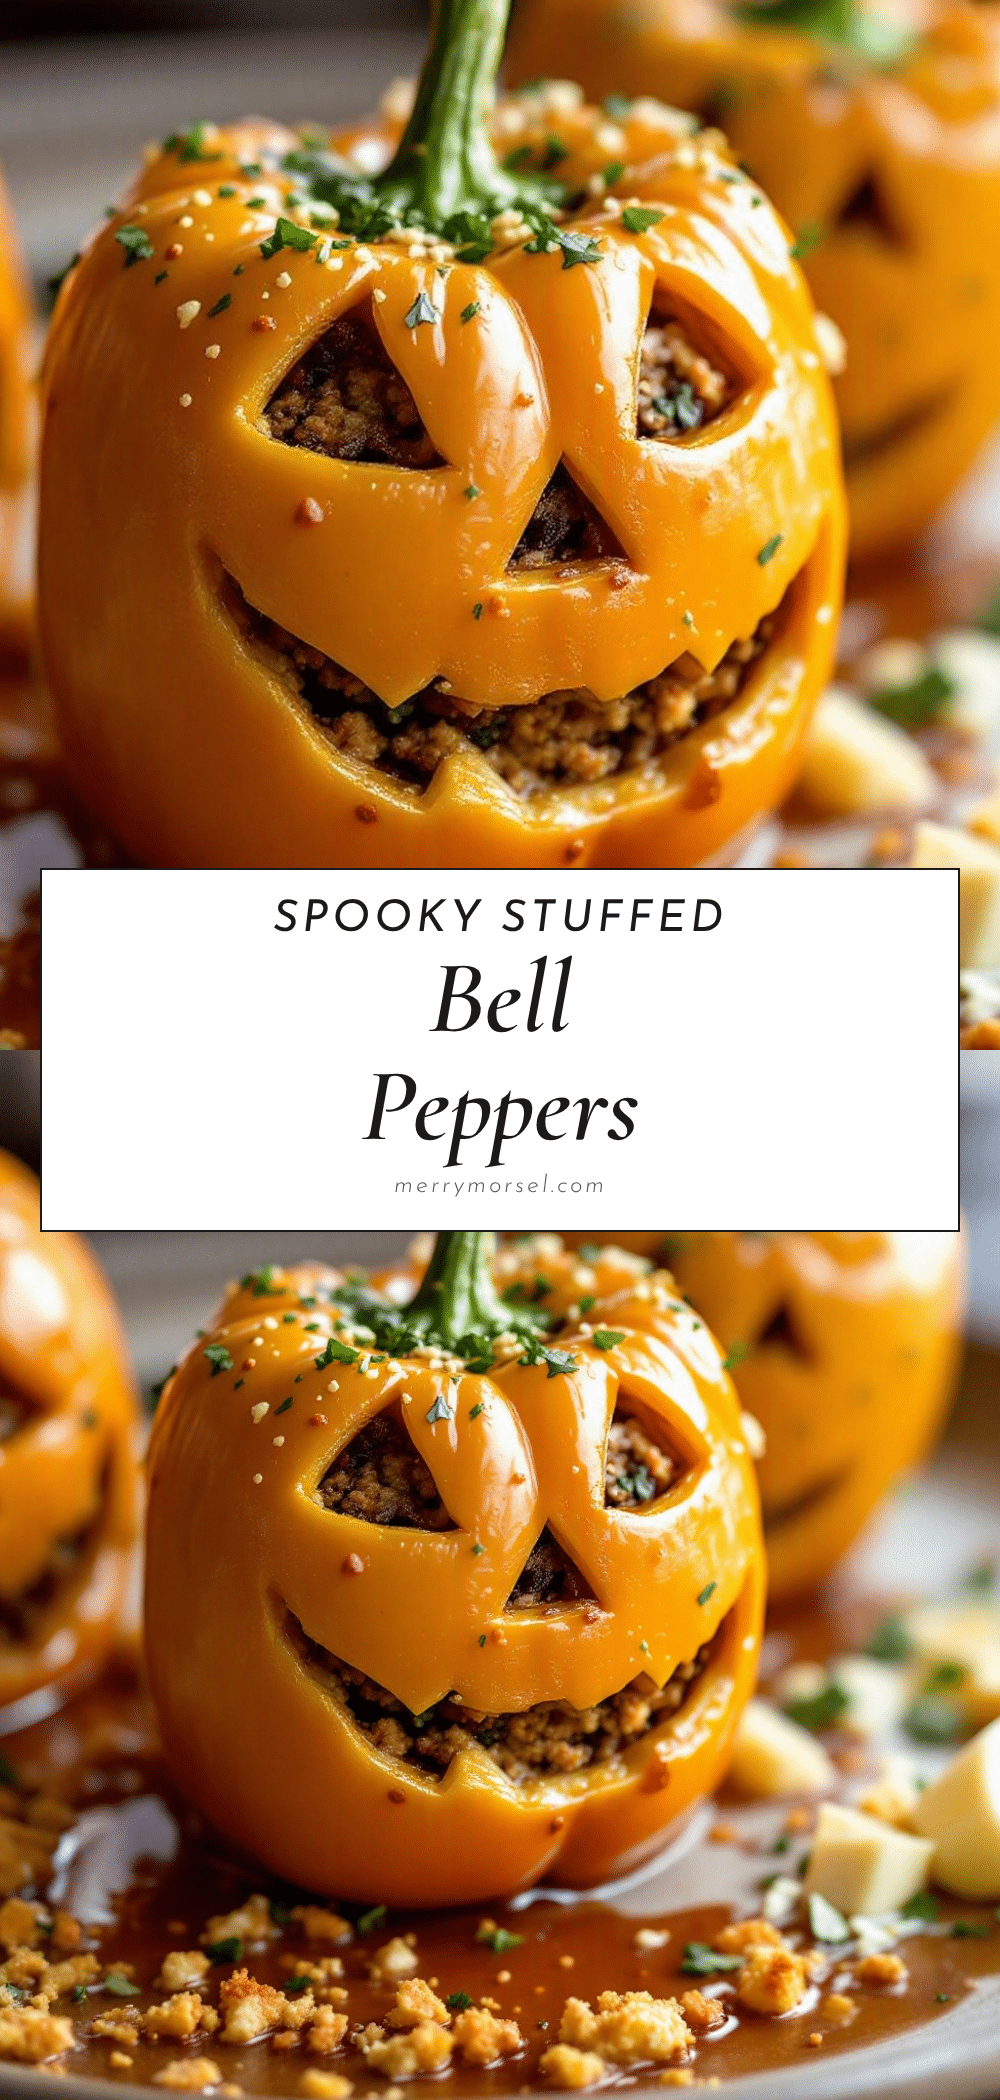
Spooky Jack-o-Lantern Stuffed Bell Peppers: Easy Halloween Dinner

These Spooky Jack-o-Lantern Stuffed Bell Peppers are a fun and memorable Halloween dinner that gets kids excited about eating vegetables. Carved orange bell peppers are filled with a savory mixture of ground beef, rice, and tomatoes, then baked with melted cheese for a festive and delicious meal.
- Prep Time: 20 minutes
- Cook Time: 40 minutes
- Total Time: 1 hour
- Yield: 4 servings 1x
- Category: Main Course
- Cuisine: American
Ingredients
- 4 large orange bell peppers
- 1 pound ground beef (85/20)
- 1 cup cooked white or brown rice
- 1 small yellow onion, diced (about 1/2 cup)
- 2 cloves garlic, minced
- 1 can (14.5 ounces) diced tomatoes, drained
- 1 teaspoon Italian seasoning
- 1/2 teaspoon smoked paprika
- 1/2 teaspoon salt
- 1/4 teaspoon black pepper
- 1 cup shredded mozzarella cheese
- 2 tablespoons olive oil
- Fresh parsley or chives for garnish (optional)
Instructions
- Preheat your oven to 375°F (190°C). Wash and dry each pepper. Using a sharp paring knife, cut the top off each pepper about 1/2 inch from the stem. Set the tops aside.
- Scoop out the seeds and white membranes from inside each pepper. Rinse the inside of the peppers with cold water and pat them dry with a paper towel.
- Using your paring knife, carefully cut small triangles for eyes and a zigzag or curved line for the mouth. Start small and be gentle.
- Heat the olive oil in a large skillet over medium heat. Add the diced onion and cook for 3 to 4 minutes, until translucent. Add the minced garlic and cook for another 30 seconds, until fragrant.
- Add the ground beef to the skillet. Break it apart and cook for 5 to 7 minutes, until browned and no longer pink. Drain off any excess fat.
- Stir in the cooked rice, drained diced tomatoes, Italian seasoning, smoked paprika, salt, and black pepper. Cook for 2 to 3 minutes, stirring occasionally. Taste and adjust seasoning if needed.
- Remove the skillet from heat and let the filling cool for about 5 minutes.
- Spoon the filling into each carved pepper, packing gently but firmly. Place the filled peppers in a 9×13-inch baking dish, standing upright.
- Place the pepper tops back on each pepper. Cover the baking dish tightly with aluminum foil. Bake for 25 minutes.
- After 25 minutes, remove the foil and the pepper tops. Sprinkle the shredded mozzarella cheese over the top of each pepper. Return to the oven, uncovered, and bake for another 10 to 15 minutes, until the cheese is melted and bubbly and the peppers are tender.
- Let the peppers rest for 5 minutes before serving. Garnish with fresh parsley or chives if desired.
Notes
Choose squat, round peppers with flat bottoms for stability. Carve with a sharp knife and make clean cuts. Do not skip the pre-bake cover with foil. Let peppers rest for 5 minutes before serving to allow filling to set.
Nutrition
- Serving Size: 1 stuffed pepper
- Calories: 385
- Sugar: 8
- Sodium: 680
- Fat: 18
- Carbohydrates: 24
- Fiber: 4
- Protein: 28
Keywords: Halloween dinner, stuffed bell peppers, jack-o-lantern peppers, fun dinner for kids, gluten-free dinner