Love this? Save it for later!
Share the inspiration with your friends
I want roasted delicata squash that’s actually crispy on the edges, not just soft and sad. And I want it now, before the squash I bought last week turns into a science experiment in the fridge. The problem is most recipes treat delicata like it’s fragile, roasting it low and slow until it’s tender but flabby. That’s fine for soup, I guess, but not what I’m craving tonight. I want caramelized edges that shatter when you bite them, a sticky maple glaze that clings to every ridge, and that earthy sweetness of the squash playing off something salty and warm. So I cranked the oven as high as it would go, sliced the squash thin, and crossed my fingers. Twenty-eight minutes later I had a sheet pan full of golden, crispy-edged rings that made me forget I was eating a vegetable. This is that recipe.
I honestly didn’t plan on developing a new side dish. I just had one lonely delicata squash sitting on my counter, a bottle of maple syrup from last fall, and a craving for something that felt like comfort food but wasn’t heavy. You know how it is sometimes, you just want to eat something that makes you feel taken care of without spending an hour in the kitchen. This Crispy Maple Glazed Delicata Squash recipe is exactly that kind of side dish. It’s fast, it’s forgiving, and it turns a simple winter squash into something you’ll want to make on repeat. (I’ve made it three times this week, no regrets.)
The thing that surprised me most? How the texture changes depending on how you slice it. Thicker rounds stay more tender inside with just a hint of crispiness on the edges. Thin half-moons get almost chip-like, with those lacy caramelized bits that make you pick at the pan before it even hits the table. Either way works, but I’ll tell you which method I prefer later. For now, just trust me that this recipe is worth the tiny bit of effort it takes.
Why You’ll Love This Recipe
I’ve tested this recipe more times than I care to admit, tweaking oven temperatures, slice thicknesses, and glaze ratios until everything clicked. Here’s why I think you’ll love it as much as I do:
- Quick & Easy: From prep to plate in about 30 minutes. No marinating, no complicated techniques, no waiting around. This is the kind of side dish you can throw together while your main course finishes cooking.
- Simple Ingredients: You need exactly five main ingredients plus salt and pepper. Maple syrup, olive oil, delicata squash, and a pinch of cayenne if you want a little heat. That’s it. No fancy grocery store trips required.
- Perfect for Fall Gatherings: This squash is gorgeous on a Thanksgiving table, but it’s also great for weekday dinners. It’s fancy enough to impress guests but simple enough for a Tuesday night.
- Crowd-Pleaser: I’ve served this to people who swore they didn’t like squash. Every single one of them asked for seconds. The crispy edges and sweet-savory glaze win over even the pickiest eaters.
- Unbelievably Delicious: The texture is what sets this apart. Most roasted squash recipes give you soft, tender pieces. This one delivers actual crispy edges with a tender interior, all coated in a sticky maple glaze that caramelizes beautifully in the hot oven.
What makes this recipe different from all the other roasted squash recipes out there? It’s the combination of high heat, thin slices, and a maple glaze that’s applied at just the right moment. The glaze doesn’t just sit on top of the squash—it bakes into the edges, creating those crispy, caramelized bits that make this dish unforgettable. I’ve tried roasting squash every way imaginable, and this method consistently gives the best texture. It’s not just another version of roasted squash. It’s the version you’ll keep coming back to.
Honestly, this recipe is the kind that makes you close your eyes after the first bite. It’s comfort food that happens to be a vegetable—healthier than you expect, but with the same soul-soothing satisfaction. Perfect for impressing dinner guests without any stress, or turning a simple weeknight meal into something memorable.
What Ingredients You Will Need
This recipe uses simple, wholesome ingredients that work together to create something truly special. Most of these are pantry staples, especially if you cook seasonally in the fall and winter. Here’s what you’ll need:
For the Squash
- 2 medium delicata squash (about 1.5 to 2 pounds total) — Look for squash that feels heavy for its size with firm, unblemished skin. The skin should be bright yellow with green stripes. Avoid any squash with soft spots or wrinkled skin. Delicata is unique because the skin is thin and tender enough to eat, which means no peeling required. (Major time saver!)
- 2 tablespoons olive oil — Use a good quality extra virgin olive oil for the best flavor. You can also use avocado oil if you prefer a more neutral taste. The oil helps the squash crisp up and carries the flavors of the other ingredients.
- 1 teaspoon kosher salt — I prefer Diamond Crystal kosher salt for its consistent texture. If using table salt, reduce to ½ teaspoon. Salt is crucial here—it balances the sweetness of the maple syrup and brings out the natural flavor of the squash.
- ½ teaspoon black pepper — Freshly ground is always better. The pepper adds a subtle warmth that complements the maple and squash beautifully.
For the Maple Glaze
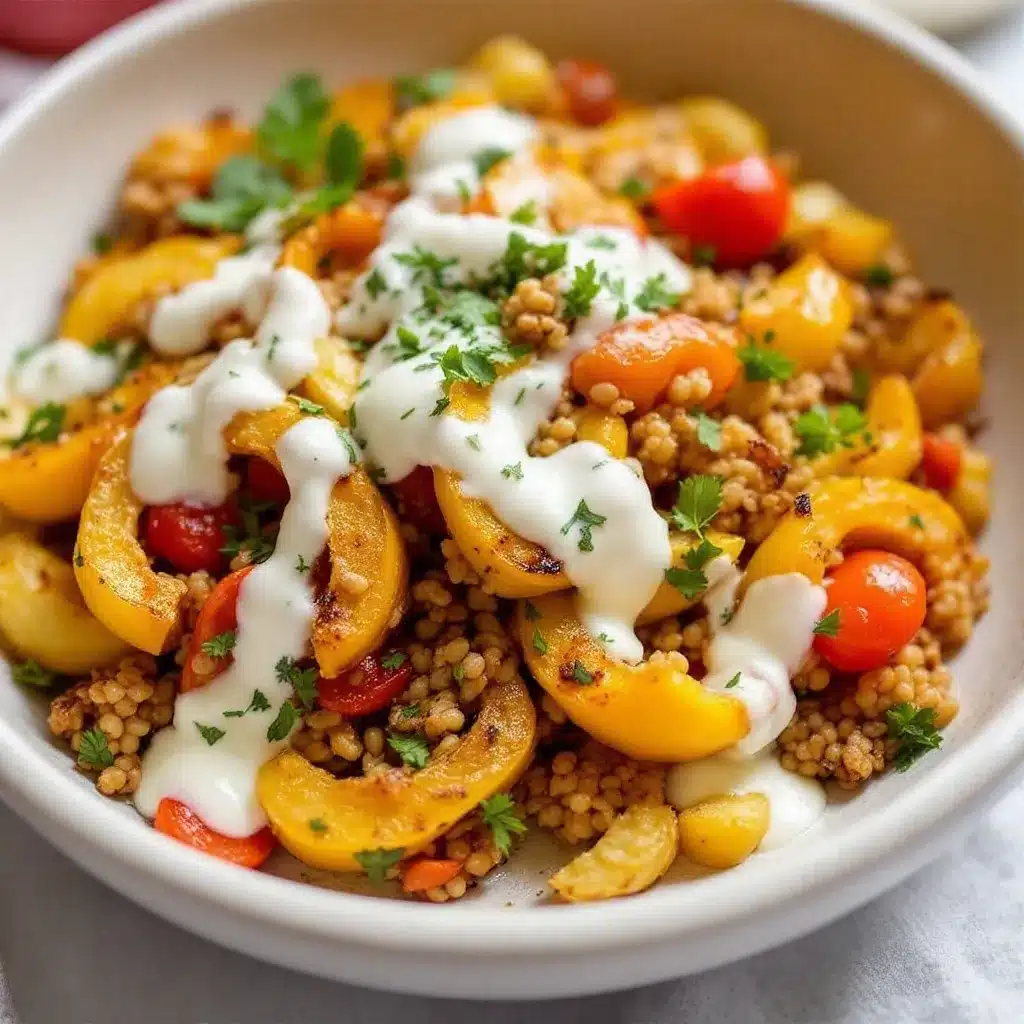
- 3 tablespoons pure maple syrup — Please use real maple syrup, not pancake syrup. Grade A dark amber works great here. The maple syrup is what creates that sticky, caramelized coating on the squash. (I personally use Maple Grove Farms or Coaticook for consistent results.)
- 1 tablespoon unsalted butter — Melted. The butter adds richness and helps the glaze cling to the squash. You can substitute with vegan butter or coconut oil for a dairy-free version.
- ¼ teaspoon cayenne pepper (optional) — This is my secret ingredient. Just a tiny pinch adds warmth without making the dish spicy. It balances the sweetness and adds a subtle depth that makes people wonder what’s different. Feel free to omit if you prefer a purely sweet version.
- Pinch of flaky sea salt (for finishing) — I like Maldon sea salt flakes for their delicate crunch and clean flavor. A sprinkle right before serving makes a noticeable difference.
Ingredient Selection Tips
Choosing the right delicata squash matters more than you might think. Look for squash that’s firm all over with bright, vibrant skin. The squash should feel heavy for its size, which indicates it’s fresh and full of moisture. Avoid any squash that has soft spots, bruises, or wrinkled skin—those are signs of age and will result in mealy, watery roasted squash.
For the maple syrup, I recommend going with a darker grade if you can find it. Darker maple syrup has a more intense maple flavor that stands up well to high heat roasting. Lighter syrups can get lost in the caramelization process. If you only have light syrup, that’s fine too, just know the maple flavor will be more subtle.
Substitution Guidance
If you can’t find delicata squash, you can substitute with acorn squash or kabocha squash. Just note that both have thicker skins, so you’ll need to peel them first. For acorn squash, slice into wedges rather than rings for the best texture. If you’re looking for a sugar-free option, try using a sugar-free maple-flavored syrup or simply omit the maple glaze and roast the squash with olive oil, salt, and pepper for a savory version.
For a vegan version, substitute the butter with coconut oil or a vegan butter alternative. The texture will be slightly different but still delicious. And if you’re avoiding nightshades, simply skip the cayenne pepper—the recipe works beautifully without it.
Equipment Needed
You don’t need much for this recipe, which is one of the reasons I love it. Here’s what you’ll need:
- Large baking sheet (18×13 inches or similar) — A rimmed baking sheet is ideal to catch any glaze drips. I recommend using a heavy-duty sheet pan for even heat distribution. Avoid non-stick pans if possible, as they don’t promote browning as well as bare aluminum or stainless steel.
- Parchment paper or silicone baking mat — This makes cleanup a breeze and prevents the maple glaze from sticking to the pan. Silicone mats work great, but parchment paper is easier to dispose of if the glaze gets too sticky.
- Sharp chef’s knife — A good knife makes slicing the squash much easier. Delicata squash is soft enough that a sharp knife glides right through it. A dull knife will struggle and increase the risk of slipping.
- Cutting board — Any sturdy cutting board will work. I prefer wood or bamboo for stability.
- Small bowl — For mixing the maple glaze.
- Measuring spoons — For accurate measurements. Eyeballing the maple syrup and salt can lead to inconsistent results.
- Spatula or tongs — For flipping the squash halfway through roasting. Tongs give you more control, but a thin metal spatula works too.
If you don’t have a silicone baking mat, parchment paper is your best friend here. The maple glaze can get sticky and hard to clean off bare baking sheets. I learned this the hard way after spending twenty minutes scrubbing a pan. (Not my finest moment.) Parchment paper is cheap and makes cleanup almost instant.
For a budget-friendly option, you can use a standard half-sheet pan from any grocery store. They’re usually under $15 and work perfectly. Just avoid thin, flimsy pans that warp in the oven—they cause uneven cooking and burnt spots.
Preparation Method
Let me walk you through this step by step. I’ve included all the little details I wish someone had told me the first time I made this.
Step 1: Preheat the Oven
Preheat your oven to 425°F (220°C). This high temperature is crucial for getting those crispy edges. Don’t be tempted to lower the temperature—you need the heat to caramelize the maple glaze quickly before the squash turns to mush. If your oven runs hot, check the squash a few minutes early to prevent burning.
Step 2: Prepare the Squash
Wash the delicata squash thoroughly under running water. The skin is edible, so you want it clean. Pat dry with a clean kitchen towel. Using a sharp chef’s knife, trim off both ends of each squash (about ¼ inch from each end). Discard the ends.
Now, cut the squash in half lengthwise. Use a spoon to scoop out the seeds and stringy pulp from the center. Don’t worry about getting every last seed—a few leftover seeds are fine and actually roast up nicely. If you want to save the seeds, rinse them clean and roast them separately with a little salt for a crunchy snack.
Place each squash half cut-side down on your cutting board and slice into ½-inch thick half-moons. I’ve tried thicker slices (¾ inch) and thinner slices (¼ inch), and ½ inch is the sweet spot. Thicker slices don’t get crispy enough on the edges, and thinner slices can burn before the squash is tender. Consistency matters here—try to keep all slices the same thickness so they cook evenly.
Step 3: Toss with Oil and Seasonings
Place the squash slices in a large bowl. Drizzle with 2 tablespoons olive oil, then sprinkle with 1 teaspoon kosher salt and ½ teaspoon black pepper. Use your hands to toss everything together until every piece is evenly coated. Don’t skip this step—the oil helps the squash crisp up and the salt seasons it from the inside out.
Step 4: Arrange on Baking Sheet
Line your baking sheet with parchment paper or a silicone mat. Arrange the squash slices in a single layer with a little space between each piece. Overcrowding the pan will cause the squash to steam instead of roast, and you’ll end up with soggy edges instead of crispy ones. If your squash doesn’t fit in a single layer, use two baking sheets or roast in batches.
Here’s a tip I learned from experience: place the squash slices cut-side down on the pan. This exposes more surface area to the hot pan, which means more caramelization and crispiness. The flat edge gets beautifully browned while the curved top stays tender.
Step 5: Roast for 15 Minutes
Place the baking sheet on the middle rack of your preheated oven. Roast for 15 minutes without disturbing. Set a timer—it’s easy to get distracted and forget. During this time, the squash will start to soften and the edges will begin to brown.
Step 6: Make the Maple Glaze
While the squash roasts, prepare the maple glaze. In a small bowl, combine 3 tablespoons pure maple syrup, 1 tablespoon melted unsalted butter, and ¼ teaspoon cayenne pepper (if using). Whisk together until smooth. The butter should be melted but not hot—you don’t want to cook the maple syrup. Set the glaze aside near the stove so it’s ready when you need it.
Step 7: Flip and Glaze
After 15 minutes, remove the baking sheet from the oven. Use tongs or a spatula to carefully flip each piece of squash. They should be starting to brown on the bottom. Drizzle or brush the maple glaze evenly over all the squash pieces. Try to get some glaze on the flat edges—that’s where the best caramelization happens.
Don’t pour all the glaze in one spot. Drizzle it evenly across the pan, then use a brush or the back of a spoon to spread it if needed. You want every piece to get a thin coating of glaze.
Step 8: Roast for Another 10-13 Minutes
Return the baking sheet to the oven and roast for another 10 to 13 minutes. Watch carefully during the last few minutes—the maple glaze can go from perfectly caramelized to burnt very quickly. You’re looking for deep golden-brown edges with some darker caramelized spots. The squash should be tender when pierced with a fork but still hold its shape.
If you want extra crispy edges, you can turn on the broiler for the last 1-2 minutes. Watch it like a hawk—broilers vary wildly in intensity, and you don’t want to burn the glaze. I’ve done this successfully many times, but I’ve also had a few batches that went from beautiful to black in thirty seconds flat. (Proceed with caution.)
Step 9: Finish and Serve
Remove the baking sheet from the oven. Immediately sprinkle the roasted squash with flaky sea salt—just a pinch over the top. The salt balances the sweetness and adds a pleasant crunch. Let the squash rest on the pan for 2-3 minutes before transferring to a serving platter. This resting time allows the glaze to set slightly, making the squash easier to handle.
Serve warm, garnished with fresh herbs if desired. Fresh thyme or sage leaves complement the maple flavor beautifully. A sprinkle of toasted pecans or walnuts adds nice crunch if you’re feeling extra fancy.
Cooking Tips & Techniques
I’ve made this recipe at least a dozen times, and I’ve learned a few things along the way. Here are my best tips for getting perfect results every time:
Don’t skip the salt. I know it sounds basic, but properly seasoning the squash before roasting makes a huge difference. The salt draws out a tiny bit of moisture, which helps the edges crisp up, and it enhances the natural sweetness of the squash. Under-salted squash tastes flat, no matter how good the glaze is.
Use a hot pan. If you want extra crispy edges, preheat your baking sheet in the oven for 5 minutes before adding the squash. The hot pan creates an immediate sear on the cut sides, giving you those deep caramelized edges faster. Just be careful when adding the squash—the pan will be very hot.
Watch the glaze carefully. The maple syrup-butter combination is delicious, but it burns easily. Keep an eye on the squash during the final roasting minutes. If you see the glaze starting to darken too quickly, remove the pan from the oven immediately. Burnt maple syrup tastes bitter and unpleasant.
Don’t overcrowd the pan. I cannot stress this enough. Crowding the pan traps steam, which softens the squash and prevents caramelization. If your squash doesn’t fit in a single layer with space between pieces, use two pans. The extra few minutes of cleanup are worth it for the texture.
Flip carefully. After the first 15 minutes, the squash will be tender but still holding its shape. Use a thin spatula or tongs to flip each piece gently. If you’re aggressive, you might break the slices. (I’ve definitely lost a few pieces this way.)
My biggest failure? The first time I made this, I used way too much maple syrup in the glaze. The squash turned out sticky and overly sweet, and the excess syrup pooled on the pan and burned. Lesson learned: a thin coating is all you need. The glaze should complement the squash, not drown it.
Variations & Adaptations
One of the best things about this recipe is how adaptable it is. Here are some variations I’ve tried and loved:
Savory Herb Version
Skip the maple glaze and toss the roasted squash with fresh herbs instead. After roasting, sprinkle with chopped fresh thyme, rosemary, and a squeeze of lemon juice. Add a sprinkle of grated Parmesan cheese if you’re feeling indulgent. This version is perfect alongside roasted chicken or grilled steak.
Spicy Maple Version
If you like heat, increase the cayenne pepper to ½ teaspoon or add a pinch of red pepper flakes to the glaze. The heat balances beautifully with the sweet maple syrup. I’ve also tried adding a tiny pinch of smoked paprika for a deeper, smokier flavor profile. This variation is amazing with honey garlic chicken thighs or pulled pork.
Balsamic Glaze Version
Replace the maple syrup with balsamic glaze for a tangy, savory twist. The balsamic caramelizes beautifully and pairs well with the earthy sweetness of the squash. Add a sprinkle of fresh basil or parsley before serving. This version is elegant enough for dinner parties and pairs wonderfully with garlic butter herb crusted salmon.
Dietary Adaptations
For a vegan version, substitute the butter with coconut oil or vegan butter. The texture will be slightly different but still delicious. For a gluten-free version, this recipe is naturally gluten-free—just double-check your maple syrup label to ensure it’s certified gluten-free. For a low-sugar version, reduce the maple syrup to 1 tablespoon or use a sugar-free maple-flavored syrup. The squash will be less caramelized but still tasty.
Different Squash Options
If you can’t find delicata, try this recipe with acorn squash (peeled and cut into wedges), butternut squash (cut into ½-inch cubes), or kabocha squash (peeled and sliced). Each variety will have a slightly different texture and sweetness level, but the basic method works beautifully for all of them.
Serving & Storage Suggestions
This crispy maple glazed delicata squash is incredibly versatile. Here’s how to serve and store it:
Serving Suggestions
Serve the squash warm, ideally within 10 minutes of coming out of the oven. The crispy edges are at their best right after roasting. Arrange the slices on a platter in a single layer or slightly overlapping for a beautiful presentation. Sprinkle with fresh herbs like thyme, sage, or parsley for a pop of color and freshness.
This squash pairs beautifully with:
- Roasted meats: It’s perfect alongside roasted chicken, turkey, pork chops, or beef tenderloin. The sweetness of the maple glaze complements savory meats beautifully. Try it with crispy air fryer pork chops for a complete fall-inspired meal.
- Grain bowls: Add the squash to a bowl with quinoa, roasted chickpeas, arugula, and a tahini dressing for a hearty vegetarian meal.
- Salads: Let the squash cool slightly, then add it to a bed of mixed greens with dried cranberries, goat cheese, and candied pecans. Drizzle with a simple balsamic vinaigrette.
- Holiday table: This squash is a showstopper on Thanksgiving or Christmas tables. It’s colorful, flavorful, and naturally gluten-free, so it accommodates many dietary needs.
Storage Instructions
Store leftover squash in an airtight container in the refrigerator for up to 4 days. The squash will soften as it sits, and the crispy edges will lose their crunch. That’s okay—it’s still delicious, just different.
To reheat, spread the squash on a baking sheet and warm in a 375°F (190°C) oven for 5-7 minutes. This helps restore some of the crispiness. Avoid microwaving, as it makes the squash soggy and rubbery. If you’re in a hurry, you can use an air fryer at 350°F for 3-4 minutes.
I don’t recommend freezing this dish. The texture of the squash changes significantly after freezing and thawing, becoming watery and mushy. If you have a large amount of leftover squash, consider repurposing it into a soup or puree instead of freezing it as-is.
The flavors actually develop nicely overnight. The maple glaze soaks into the squash, making it even more flavorful the next day. It’s great cold straight from the fridge as a snack, or warmed up as a side dish for lunch.
Nutritional Information & Benefits
Here’s the estimated nutritional breakdown for one serving (about ⅙ of the recipe):
| Nutrient | Amount |
|---|---|
| Calories | 145 |
| Total Fat | 7g |
| Saturated Fat | 2g |
| Cholesterol | 5mg |
| Sodium | 390mg |
| Total Carbohydrates | 21g |
| Dietary Fiber | 3g |
| Sugars | 11g |
| Protein | 2g |
| Vitamin A | 120% DV |
| Vitamin C | 25% DV |
| Potassium | 10% DV |
Delicata squash is a nutritional powerhouse. It’s packed with vitamin A (in the form of beta-carotene), which supports eye health and immune function. It’s also a good source of vitamin C, which helps with collagen production and immune support. The squash provides dietary fiber, which aids digestion and helps you feel full longer.
This recipe is naturally gluten-free and can be made vegan with a simple butter substitution. It’s also nut-free and egg-free, making it suitable for many dietary restrictions. The maple syrup provides natural sweetness without refined sugar, though it’s still a sugar source, so enjoy in moderation if you’re watching your sugar intake.
From a wellness perspective, this is the kind of side dish that feels indulgent but is actually quite good for you. The olive oil provides healthy monounsaturated fats, and the squash is loaded with antioxidants. It’s a win-win in my book.
Conclusion
This Crispy Maple Glazed Delicata Squash has become my go-to fall side dish for good reason. It’s quick enough for a busy weeknight, fancy enough for a holiday table, and so delicious that even people who think they don’t like squash ask for seconds. The combination of crispy caramelized edges, tender squash, and sweet-savory maple glaze is honestly irresistible.
I hope you’ll try this recipe and make it your own. Maybe you’ll add extra cayenne for heat, or swap in fresh herbs for a savory twist. Maybe you’ll serve it alongside your favorite roasted chicken or toss it into a grain bowl for lunch. However you make it, I think you’ll love how something so simple can taste so special.
If you make this recipe, I’d love to hear about it! Leave a comment below and let me know how it turned out. Did you try any variations? What did you serve it with? Your feedback helps me create better recipes, and I genuinely love hearing about your kitchen adventures. Happy cooking, friends!
Frequently Asked Questions
Can I eat the skin of delicata squash?
Yes! That’s one of the best things about delicata squash. The skin is thin, tender, and completely edible when roasted. No peeling required, which saves you time and adds texture to the finished dish. Just make sure to wash the squash thoroughly before cooking to remove any dirt or residue.
Can I make this recipe ahead of time?
You can prep the squash up to a day in advance. Slice the squash, remove the seeds, and store the slices in an airtight container in the refrigerator. When you’re ready to cook, toss with oil and seasonings and roast as directed. The roasted squash is best served fresh, but leftovers can be reheated in the oven for 5-7 minutes.
Can I use a different type of squash?
Absolutely! Acorn squash, butternut squash, and kabocha squash all work well with this recipe. Just note that these varieties have thicker skins, so you’ll need to peel them before slicing. Adjust the roasting time as needed—thicker squash may need a few extra minutes in the oven.
Why isn’t my squash getting crispy?
Several factors could be at play. First, make sure your oven is fully preheated to 425°F. Second, don’t overcrowd the pan—the squash needs space to roast, not steam. Third, make sure the squash is dry before adding oil. Excess moisture on the surface can prevent caramelization. Finally, check that you’re using enough oil—the oil helps conduct heat and promotes browning.
Can I make this recipe without maple syrup?
Yes! For a savory version, simply skip the maple glaze and roast the squash with olive oil, salt, and pepper. You can also use honey, agave nectar, or brown sugar as a substitute for maple syrup. Each will give a slightly different flavor profile, but all will work beautifully.
Pin This Recipe!
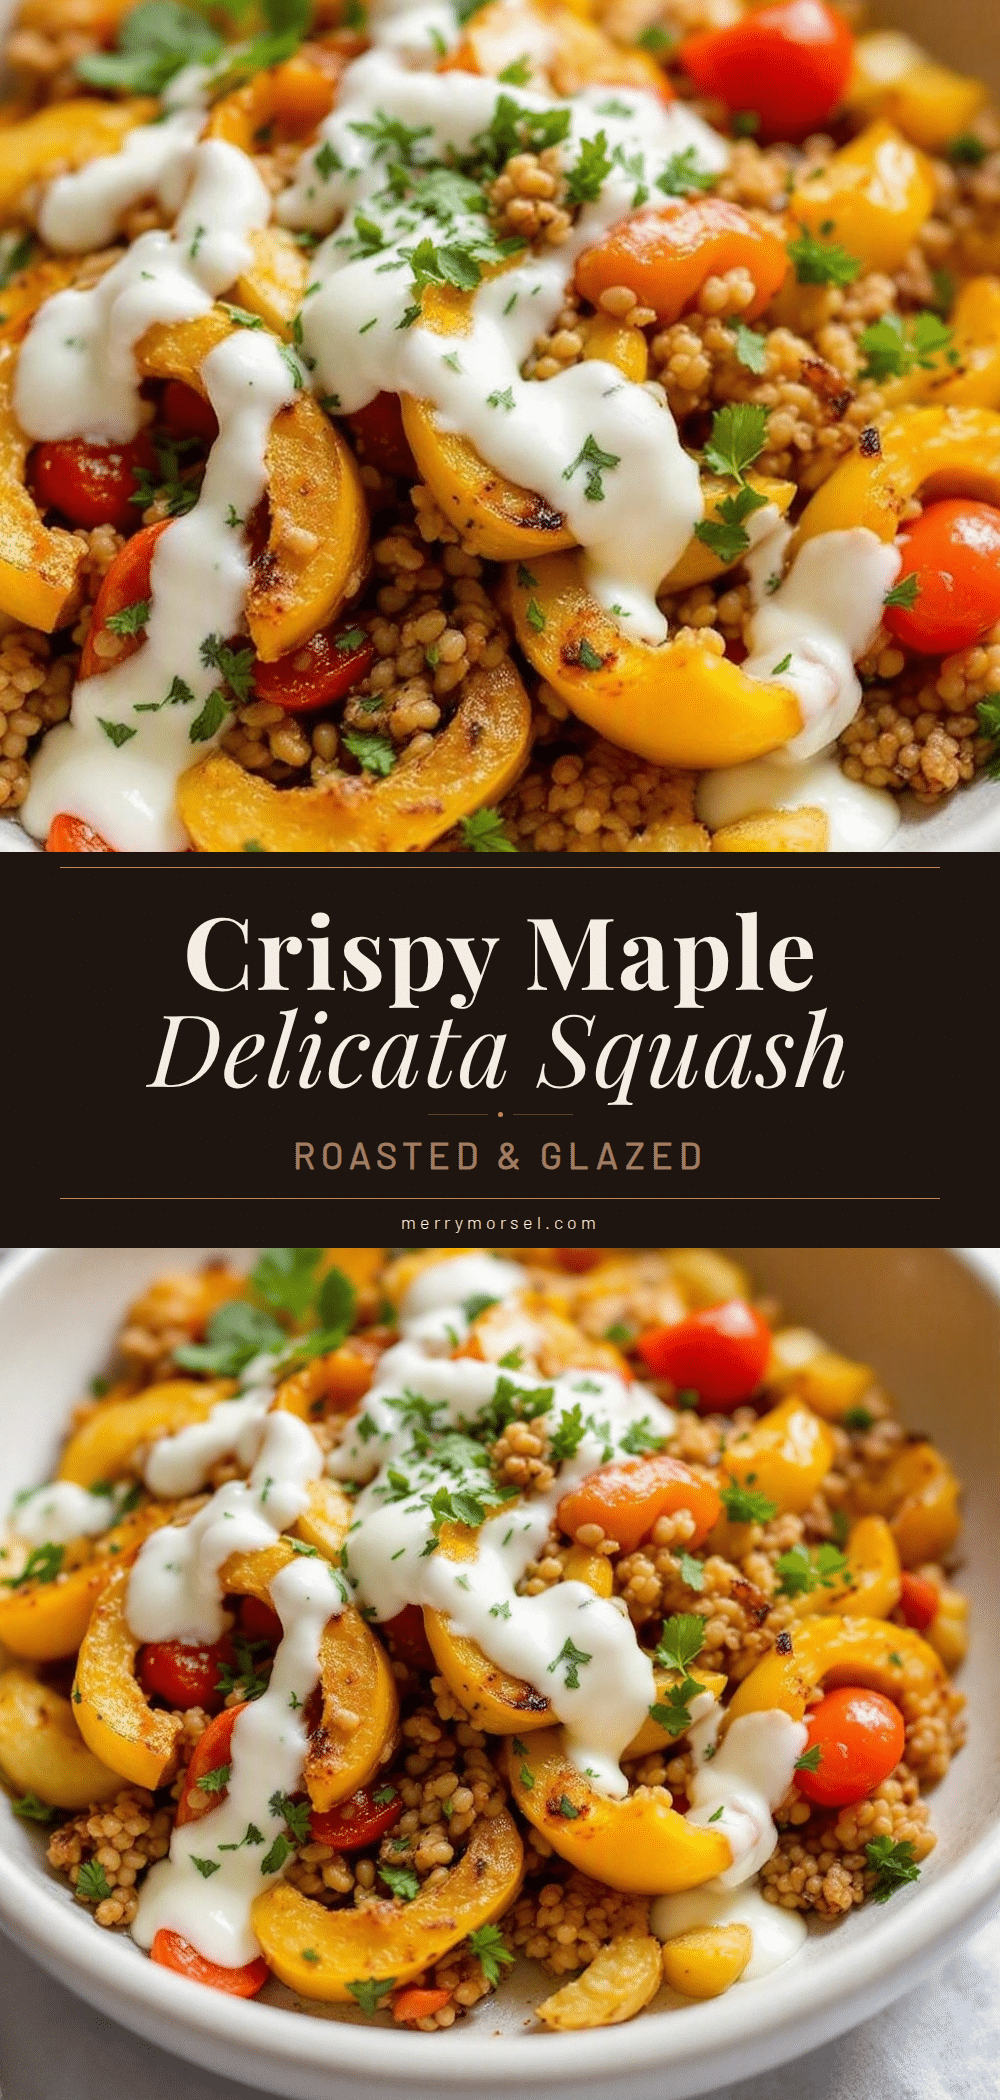
Crispy Maple Glazed Delicata Squash: Easy 30-Minute Side

Crispy-edged roasted delicata squash with a sticky maple glaze that caramelizes beautifully in a hot oven. This quick and easy side dish is ready in about 30 minutes and turns simple winter squash into something unforgettable.
- Prep Time: 10 minutes
- Cook Time: 25-28 minutes
- Total Time: 35-38 minutes
- Yield: 4 servings 1x
- Category: Side Dish
- Cuisine: American
Ingredients
- 2 medium delicata squash (about 1.5 to 2 pounds total)
- 2 tablespoons olive oil
- 1 teaspoon kosher salt
- ½ teaspoon black pepper
- 3 tablespoons pure maple syrup
- 1 tablespoon unsalted butter, melted
- ¼ teaspoon cayenne pepper (optional)
- Pinch of flaky sea salt (for finishing)
Instructions
- Preheat oven to 425°F (220°C).
- Wash delicata squash thoroughly, pat dry, trim off ends, cut in half lengthwise, and scoop out seeds. Slice into ½-inch thick half-moons.
- In a large bowl, toss squash slices with olive oil, kosher salt, and black pepper until evenly coated.
- Arrange squash in a single layer on a parchment-lined baking sheet, cut-side down, with space between pieces.
- Roast for 15 minutes without disturbing.
- While squash roasts, prepare maple glaze: In a small bowl, whisk together maple syrup, melted butter, and cayenne pepper (if using).
- After 15 minutes, remove baking sheet from oven, flip each piece of squash, and drizzle or brush maple glaze evenly over all pieces.
- Return to oven and roast for another 10-13 minutes, until deep golden-brown and caramelized. Watch carefully to prevent burning.
- Remove from oven, immediately sprinkle with flaky sea salt, and let rest on pan for 2-3 minutes before serving. Serve warm.
Notes
For extra crispy edges, preheat the baking sheet in the oven for 5 minutes before adding the squash. Watch the glaze carefully during the final roasting minutes as it can burn quickly. For a vegan version, substitute butter with coconut oil or vegan butter. Leftovers can be stored in an airtight container in the refrigerator for up to 4 days and reheated in a 375°F oven for 5-7 minutes.
Nutrition
- Serving Size: 1 serving (about ⅙ o
- Calories: 145
- Sugar: 11
- Sodium: 390
- Fat: 7
- Saturated Fat: 2
- Carbohydrates: 21
- Fiber: 3
- Protein: 2
Keywords: delicata squash, maple glazed squash, crispy roasted squash, easy fall side dish, 30-minute side, vegetarian side dish, gluten-free side dish


