Love this? Save it for later!
Share the inspiration with your friends
“Hey, can you whip up a cake for Saturday? Something fun but cheap?” My friend’s text popped up just as I was juggling dinner and work emails. Honestly, I was skeptical. A colorful graduation cake under $9 sounded too good to be true—especially when you want it to look like a party centerpiece, not a sad last-minute scramble.
But then I remembered this recipe I’d been tweaking over a few weeks—mostly because I kept making it just for myself (hey, sometimes a solo late-night baker strikes gold). It’s bright, cheerful, and surprisingly wallet-friendly. The best part? I didn’t have to buy fancy ingredients or spend hours decorating. Just simple pantry staples and a few tricks I picked up from baking those fudgy centers in my favorite brown butter blondies.
That weekend, the cake got a round of applause from my friend’s whole family. It was colorful enough to catch everyone’s eye, moist enough to disappear quickly, and light enough that no one felt guilty indulging. I still smile thinking about how something so easy and inexpensive became the highlight of the celebration. Sometimes, the simplest cakes carry the biggest memories.
This cake stuck with me because it’s not just about the colors or the budget—it’s about making a moment feel special without stress. If you’ve ever felt the pressure of last-minute party prep but wanted something joyful and affordable, this recipe might just be your new best friend.
Why You’ll Love This Easy Colorful Graduation Cake Recipe Under $9
After making this graduation cake more times than I can count, I’m confident it’s a keeper for any celebration where fun and frugality matter. Here’s why this recipe stands out:
- Quick & Easy: Ready in under 45 minutes, so you’re not stuck in the kitchen all day.
- Simple Ingredients: Uses basic pantry staples—no last-minute runs to specialty stores.
- Perfect for Celebrations: Whether it’s a graduation, birthday, or casual get-together, the colorful layers bring instant joy.
- Crowd-Pleaser: Kids and adults alike love the light, fluffy texture and vibrant appearance.
- Unbelievably Delicious: Moist crumb and just the right sweetness without being over the top.
What really makes this cake different? It’s the layering technique—no complicated piping or frosting gymnastics. The colors come from natural food colorings that don’t taste fake, and I use a simple whipped frosting that keeps the cake light. Plus, this recipe is budget-friendly without feeling cheap—something I haven’t found in other colorful cakes I’ve tried. Honestly, it’s the kind of cake that makes you pause for a second and savor the moment.
For me, it’s the perfect balance of celebration and comfort, something you can throw together on a busy weeknight or weekend without the stress. If you’ve enjoyed colorful desserts like the dorm room graduation cookie cake, this recipe will fit right into your party lineup.
What Ingredients You Will Need
This recipe keeps things straightforward, using accessible ingredients that come together to create a bright, fluffy cake with a smooth, creamy frosting. Here’s what you’ll grab from your pantry and fridge:
- For the Cake Batter:
- All-purpose flour – 2 ½ cups (315g), sifted for lighter texture
- Granulated sugar – 1 ¾ cups (350g), for just the right sweetness
- Baking powder – 2 ½ teaspoons, to help the cake rise evenly
- Baking soda – ½ teaspoon, boosts lift and tenderness
- Salt – ½ teaspoon, balances flavors
- Unsalted butter – ½ cup (113g), melted and cooled (I prefer Kerrygold for richness)
- Buttermilk – 1 cup (240ml), room temperature (or milk + 1 tbsp lemon juice as a substitute)
- Large eggs – 3, room temperature (helps with smooth batter)
- Vanilla extract – 2 teaspoons, for classic warmth
- Gel food coloring – red, blue, yellow (or your school colors), a few drops per color (gel works best for vibrant hues without watering down the batter)
- For the Frosting:
- Powdered sugar – 3 cups (360g), sifted to avoid lumps
- Unsalted butter – ¾ cup (170g), softened (room temperature is key!)
- Heavy cream – 3 to 4 tablespoons (45–60ml), to reach perfect spreadability
- Vanilla extract – 1 teaspoon
- Pinch of salt, to balance sweetness
If you want to swap out the butter for a dairy-free option, I’ve had good luck with a plant-based stick butter alternative. And for a gluten-free twist, try an all-purpose gluten-free blend, but note the texture might be a tad different. During summer, I like to add fresh berries on top for a seasonal pop, but the cake shines just as well on its own.
Equipment Needed
Not much is required here, which is part of why this recipe is so approachable:
- Two 8-inch (20 cm) round cake pans – non-stick or lined with parchment paper works well
- Mixing bowls – one large for batter, one medium for frosting
- Electric hand mixer or stand mixer – for smooth, lump-free frosting and easy batter mixing
- Measuring cups and spoons – accuracy matters especially when baking
- Rubber spatula – for scraping bowls clean
- Cooling rack – to let cakes cool evenly and avoid sogginess
If you don’t have round pans, a square 9×9-inch pan can substitute; just adjust the baking time slightly. For frosting, a simple offset spatula or butter knife works fine for spreading—no fancy piping tools needed. I keep an old towel handy for wiping off frosting smudges; trust me, it saves time and frustration.
Preparation Method
- Preheat the oven to 350°F (175°C). Grease and flour your two 8-inch pans or line them with parchment paper. This helps the cakes release easily.
- Mix dry ingredients: In a large bowl, whisk together the sifted flour, sugar, baking powder, baking soda, and salt. This ensures even distribution of leavening.
- Combine wet ingredients: In another bowl, whisk the melted butter (cooled), buttermilk, eggs, and vanilla extract until smooth. Make sure the butter isn’t hot or it will scramble the eggs.
- Make the batter: Slowly add the wet ingredients to the dry, stirring gently with a spatula until just combined. Don’t overmix—some lumps are okay. The batter should be thick but pourable.
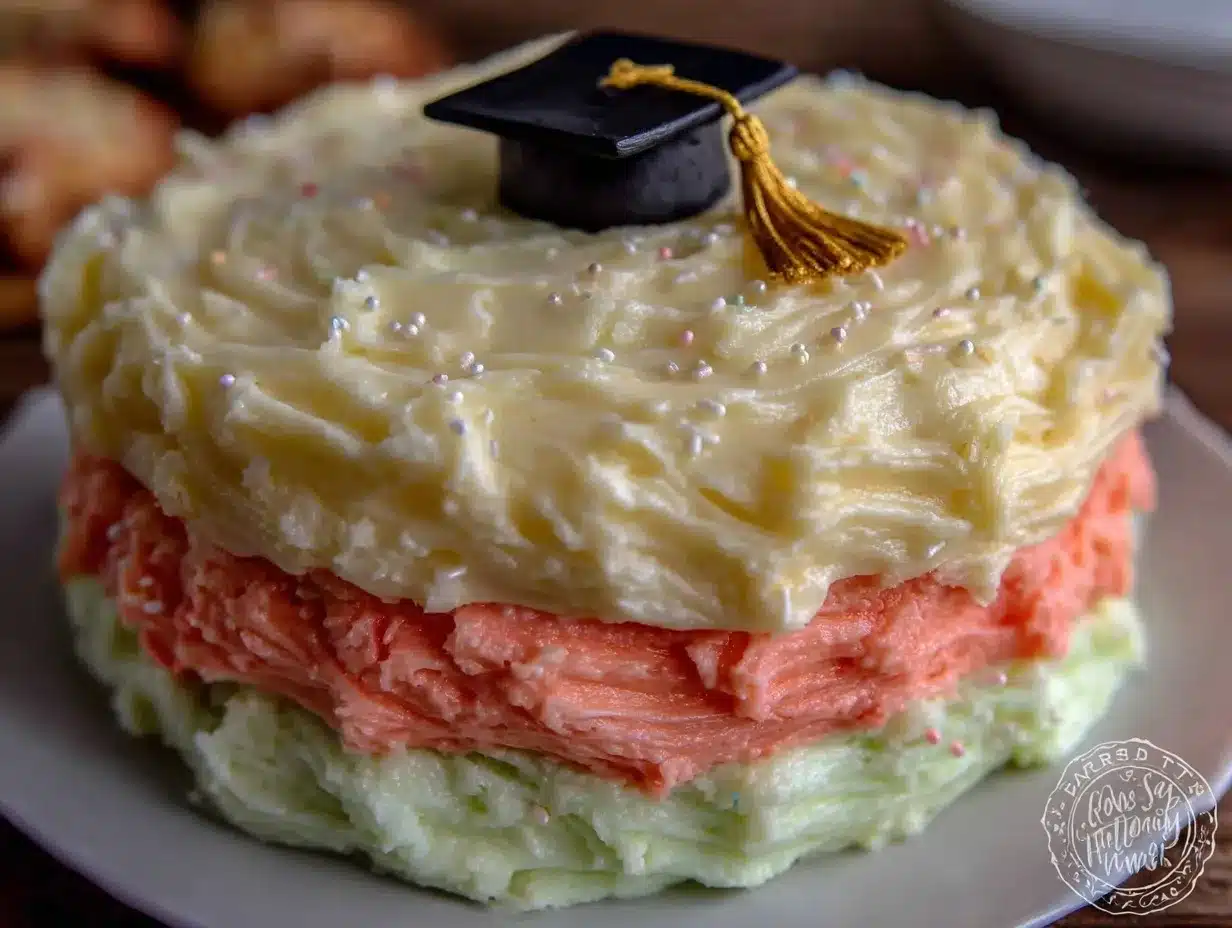
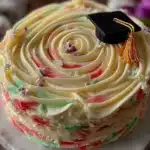
- Divide and color the batter: Scoop the batter evenly into three small bowls. Add a few drops of gel food coloring to each bowl and fold gently until the colors are vibrant. I usually do red, blue, and yellow for a classic graduation palette.
- Layer the colors: Pour each colored batter in alternating layers into the prepared pans—red first, then blue, then yellow. Don’t swirl; we want distinct layers that pop once baked.
- Bake: Place pans in the oven and bake for 30-35 minutes, or until a toothpick inserted in the center comes out clean. Watch the last 5 minutes carefully to avoid overbaking, which dries the cake.
- Cool: Let the cakes cool in the pans for 10 minutes, then transfer to a cooling rack to cool completely. Frosting a warm cake is a recipe for a melty mess.
- Prepare the frosting: Beat softened butter with an electric mixer until creamy (about 2-3 minutes). Gradually add powdered sugar, beating on low first to avoid a sugar cloud. Add vanilla, salt, and heavy cream, then increase speed to medium-high until fluffy and spreadable. Adjust cream quantity if too thick or thin.
- Assemble the cake: Place one cake layer on your serving plate. Spread a generous layer of frosting. Top with second cake layer and repeat. Finish by covering the entire cake with a thin crumb coat, chill 15 minutes, then apply a final smooth coat.
- Optional decoration: Sprinkle with colored sugar or edible glitter if desired. No fancy piping needed—the colorful layers do all the talking.
Tip: If you want an extra moist crumb, brush each layer lightly with simple syrup before frosting. I learned this trick when making a layered ombre buttercream sheet cake, and it really keeps things from drying out.
Cooking Tips & Techniques
Getting this colorful graduation cake just right means paying attention to a few key details I’ve learned the hard way:
- Don’t rush the batter mixing: Overmixing develops gluten and makes the cake dense. Fold gently until ingredients just come together.
- Use gel food coloring: Liquid colors can thin the batter and dull the vibrancy. Gel packs more punch with less moisture.
- Room temperature ingredients: Eggs and buttermilk at room temp blend better, yielding a smoother batter and even rise.
- Layer carefully: Pour colors slowly to keep layers neat. If you overlap too much, colors will bleed and look muddy.
- Frosting consistency: If your buttercream feels too soft, pop it in the fridge for 10 minutes before spreading. Too stiff? Beat in a splash more cream.
- Timing matters: Cool cakes completely before frosting. I once tried frosting straight out of the oven—it was a sticky, sad disaster.
Honestly, I’ve had my share of color disasters and crumbly cakes, but patience and these tips helped me get the balance just right. If you want a foolproof celebratory dessert, this recipe is a great place to start.
Variations & Adaptations
One of the best things about this recipe is its flexibility. Here are some ways to make it your own:
- Dairy-Free Version: Swap butter for coconut oil or vegan margarine, and use almond or oat milk with a splash of lemon juice in place of buttermilk.
- Flavor Twists: Add lemon zest to the batter for a bright citrus note or a teaspoon of almond extract instead of vanilla for a different aroma.
- Seasonal Colors: In fall, try deep orange, burgundy, and gold gel colors. For a winter grad, icy blue, silver (edible glitter), and white layers make a frosty statement.
- Mini Cakes or Cupcakes: Pour colored batter into cupcake liners for easy individual portions. Adjust baking time to about 18-20 minutes.
- Extra Texture: Fold in mini chocolate chips or chopped nuts for a surprise crunch.
Personally, I once swapped the frosting with a whipped cream cheese version for a tangier finish. It was a hit at a friend’s party and felt a little less sweet, which balanced the colorful layers nicely.
Serving & Storage Suggestions
This cake shines best at room temperature, about 30 minutes after removing from the fridge. The frosting softens and the layers’ colors brighten. Serve slices on simple white plates to let the colors pop.
Pair with fresh berries, a cup of coffee, or a sparkling lemonade for a festive touch. For a heartier celebration, I’ve found it goes well alongside easy savory dishes like the creamy pasta in this creamy sun-dried tomato chicken pasta.
Store leftovers in an airtight container in the refrigerator for up to 4 days. If you want to freeze, wrap the cake tightly in plastic wrap and foil, then freeze for up to 3 months. Thaw overnight in the fridge and bring to room temperature before serving.
Reheating isn’t necessary, but you can warm a slice gently in the microwave for 10-15 seconds if you prefer a softer texture. The flavors actually deepen a bit after a day or two, so if you want to prep ahead, this cake holds up nicely.
Nutritional Information & Benefits
A single slice of this colorful graduation cake (about 1/12 of the whole cake) contains roughly:
| Calories | Fat | Carbohydrates | Protein | Sugar |
|---|---|---|---|---|
| 320 | 14g | 45g | 4g | 28g |
While this cake is a treat, the use of buttermilk adds a bit of calcium and protein, and the eggs provide essential nutrients. Choosing unsalted butter and controlling sugar levels help keep it balanced.
This recipe is naturally gluten-based, but swapping to gluten-free flour blends works well for those with sensitivities. For a lower-sugar version, you can reduce the sugar by ¼ cup (50g) without losing much moisture.
From a wellness perspective, it’s a reminder that celebrations deserve a sweet moment and that indulgence can be part of a balanced lifestyle.
Conclusion
This easy colorful graduation cake under $9 is proof that you don’t need a huge budget or fancy skills to create something festive and delicious. It’s become my go-to when I want a joyful cake that looks like a celebration but feels relaxed and approachable.
Feel free to change up the colors, try new frosting flavors, or even transform it into cupcakes for a crowd. I keep coming back to this recipe because it’s reliable, bright, and brings smiles every single time.
Give it a try and let the colors and flavors remind you that sometimes, the best memories are made with simple ingredients and a little creativity. I’d love to hear how you customize it or what celebrations you serve it at—drop a comment or share your tips!
FAQs About the Easy Colorful Graduation Cake
Can I make this cake ahead of time?
Absolutely! You can bake the layers a day or two in advance and store them wrapped tightly at room temperature or in the fridge. Just assemble and frost the day of your event for the freshest look.
What if I don’t have buttermilk?
No worries! Use regular milk with 1 tablespoon of lemon juice or white vinegar added. Let it sit for 5 minutes to thicken before using as a buttermilk substitute.
Can I use natural food coloring instead of gels?
Natural colorings like beet juice or turmeric can work but may affect flavor and won’t be as vibrant. Gel colors are best for bright, distinct layers with minimal taste impact.
How do I prevent the cake from drying out?
Be careful not to overbake—start checking at 30 minutes. Brushing layers with simple syrup before frosting also helps lock in moisture.
Is this recipe suitable for beginners?
Definitely! The steps are straightforward with no tricky piping or decorations, making it perfect for novice bakers looking to impress without stress.
Pin This Recipe!
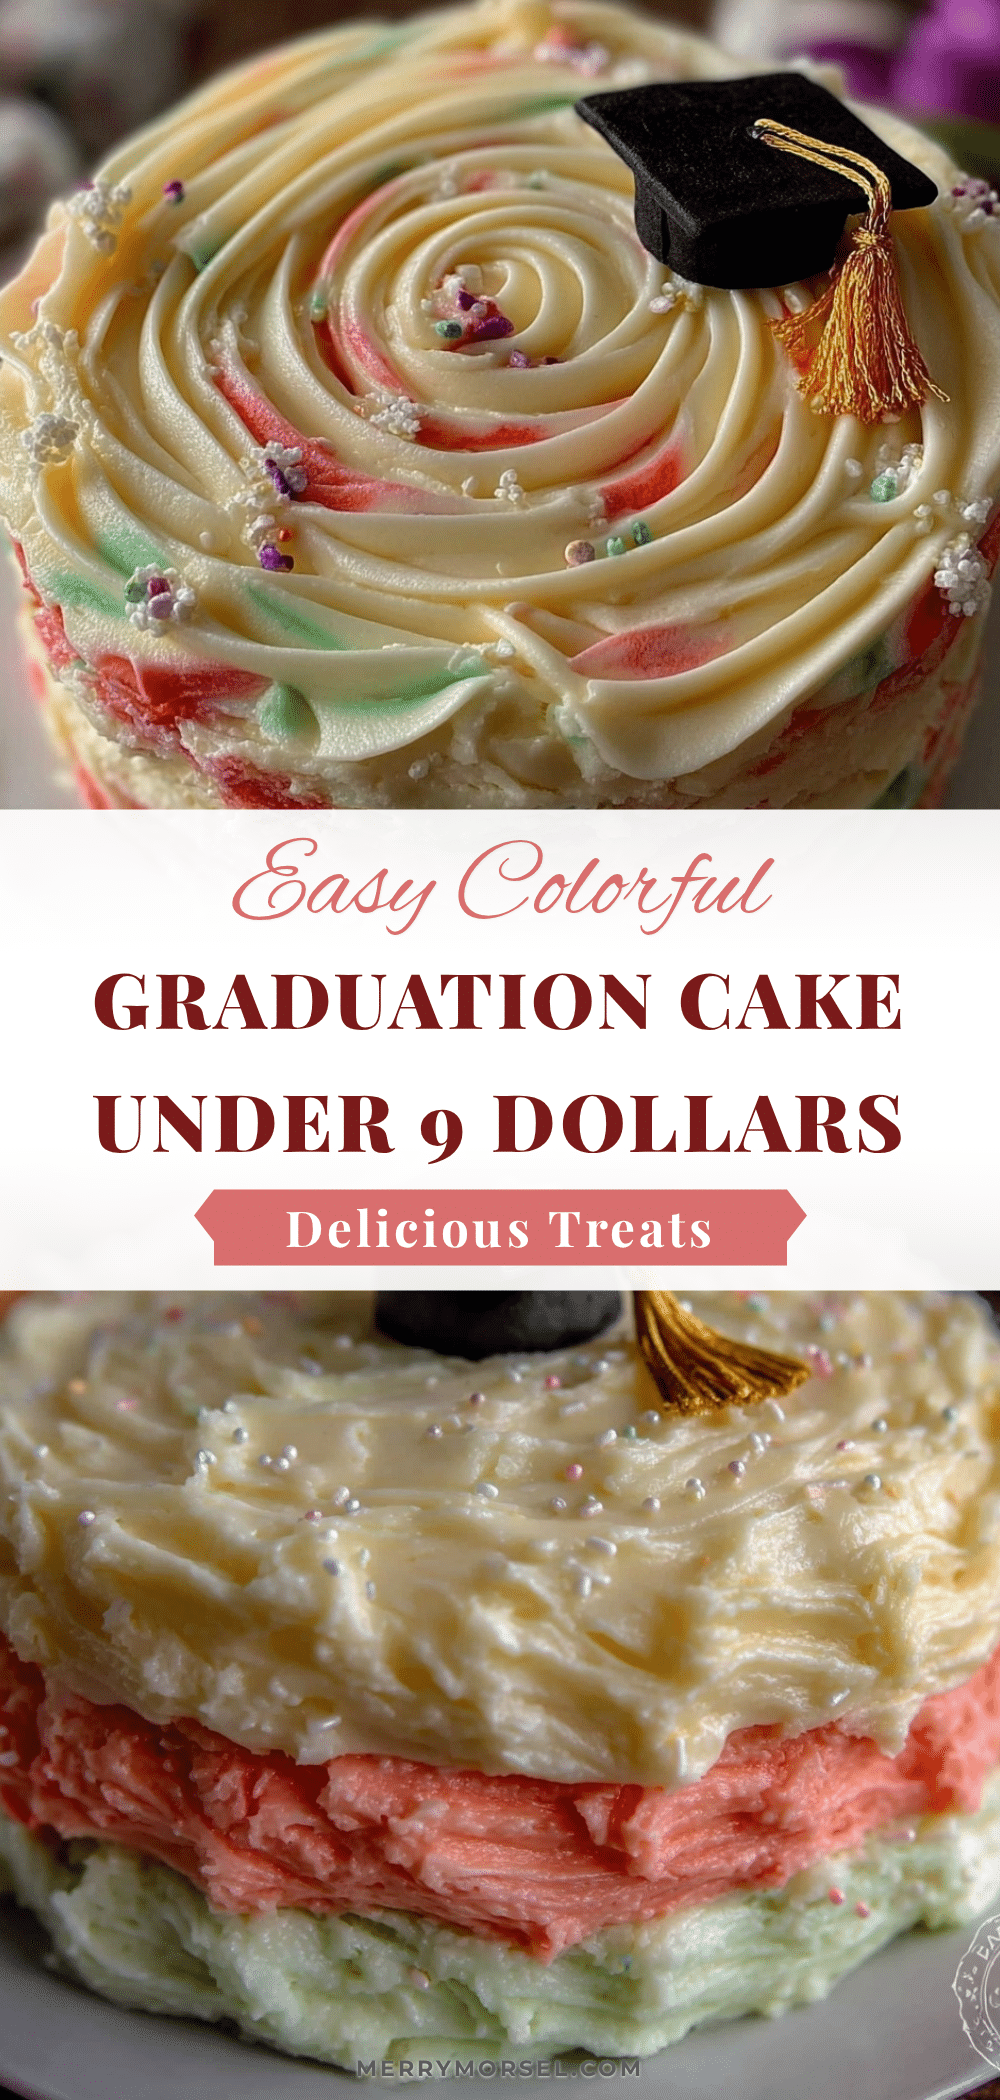
Easy Colorful Graduation Cake Recipe Under 9 Dollars Perfect for Celebrations
A bright, cheerful, and wallet-friendly colorful graduation cake that is quick and easy to make, perfect for celebrations and crowd-pleasing with simple pantry staples.
- Prep Time: 15 minutes
- Cook Time: 30-35 minutes
- Total Time: 45 minutes
- Yield: 12 servings
- Category: Dessert
- Cuisine: American
Ingredients
- All-purpose flour – 2 ½ cups (315g), sifted
- Granulated sugar – 1 ¾ cups (350g)
- Baking powder – 2 ½ teaspoons
- Baking soda – ½ teaspoon
- Salt – ½ teaspoon
- Unsalted butter – ½ cup (113g), melted and cooled
- Buttermilk – 1 cup (240ml), room temperature (or milk + 1 tbsp lemon juice)
- Large eggs – 3, room temperature
- Vanilla extract – 2 teaspoons
- Gel food coloring – red, blue, yellow (a few drops per color)
- Powdered sugar – 3 cups (360g), sifted
- Unsalted butter – ¾ cup (170g), softened
- Heavy cream – 3 to 4 tablespoons (45–60ml)
- Vanilla extract – 1 teaspoon
- Pinch of salt
Instructions
- Preheat the oven to 350°F (175°C). Grease and flour two 8-inch pans or line with parchment paper.
- In a large bowl, whisk together sifted flour, sugar, baking powder, baking soda, and salt.
- In another bowl, whisk melted and cooled butter, buttermilk, eggs, and vanilla extract until smooth.
- Slowly add wet ingredients to dry ingredients, stirring gently until just combined. Do not overmix.
- Divide batter evenly into three small bowls. Add a few drops of gel food coloring to each and fold gently.
- Pour colored batter in alternating layers into prepared pans: red first, then blue, then yellow. Do not swirl.
- Bake for 30-35 minutes or until a toothpick inserted in the center comes out clean.
- Cool cakes in pans for 10 minutes, then transfer to a cooling rack to cool completely.
- Beat softened butter with an electric mixer until creamy (2-3 minutes). Gradually add powdered sugar on low speed.
- Add vanilla, salt, and heavy cream; increase speed to medium-high until fluffy and spreadable. Adjust cream as needed.
- Place one cake layer on serving plate, spread a generous layer of frosting, top with second layer and repeat.
- Cover entire cake with a thin crumb coat, chill 15 minutes, then apply a final smooth coat.
- Optional: Sprinkle with colored sugar or edible glitter for decoration.
Notes
Use gel food coloring for vibrant layers without watering down the batter. Avoid overmixing the batter to keep the cake light. Cool cakes completely before frosting to prevent melting. For extra moist layers, brush with simple syrup before frosting. Butter can be substituted with plant-based alternatives for dairy-free version. Gluten-free flour blends can be used but texture may vary.
Nutrition
- Serving Size: 1 slice (1/12 of cak
- Calories: 320
- Sugar: 28
- Fat: 14
- Carbohydrates: 45
- Protein: 4
Keywords: graduation cake, colorful cake, easy cake recipe, budget-friendly cake, celebration cake, layered cake, simple frosting