Love this? Save it for later!
Share the inspiration with your friends
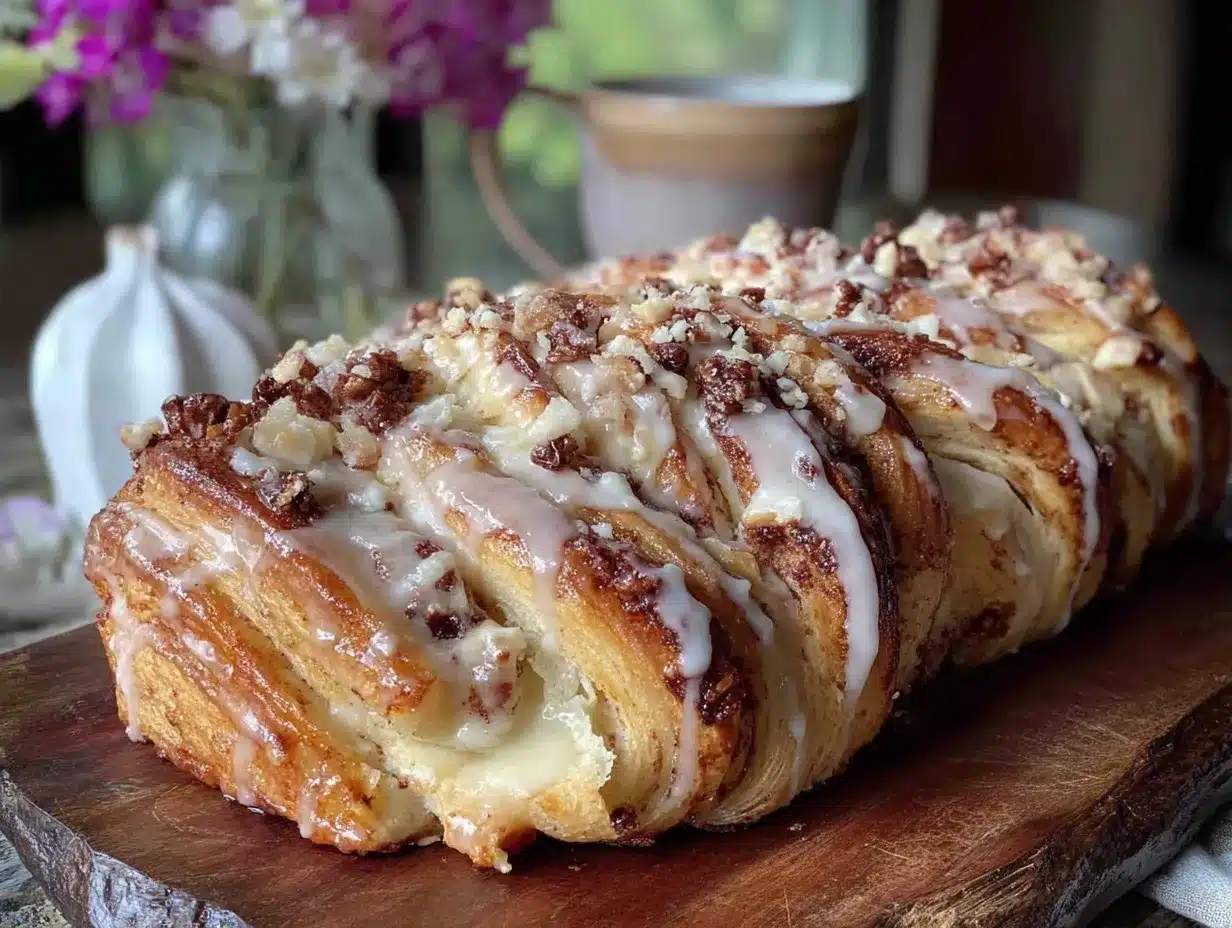
“You won’t believe how simple this is,” my friend Jamie said as she slid a golden braid of cream cheese Danish across the table. It was a lazy Sunday morning, and honestly, I was expecting some complicated pastry that would take ages and leave me with a messy kitchen. But nope—this Easy Overnight Cream Cheese Danish Braid was the total opposite. I mean, who knew you could prep something so impressive the night before and then just pop it in the oven in the morning? I remember the way the sweet aroma filled the kitchen, the flaky layers practically melting in my mouth, and the tangy cream cheese center that felt like a little hug for my taste buds.
Jamie swore it was her go-to recipe when she had friends over for brunch or when she just wanted a no-fuss, fancy-feeling treat. I was skeptical at first—because, let’s face it, making a Danish braid sounds like a serious project—but after the first bite, I was hooked. This recipe isn’t just about convenience or taste; it’s about those moments when you want to feel a bit fancy without the stress. Maybe you’ve been there, staring at the clock wondering if you should order breakfast or make something yourself. Well, this Danish braid is the answer. It’s straightforward, doesn’t require any special skills, and honestly, it’s the kind of recipe that stays with you because it tastes like you spent hours in the kitchen, even though you didn’t.
So, let me tell you about why this easy overnight cream cheese Danish braid quickly became one of my favorite brunch recipes—and why you might just find yourself making it on repeat, too.
Why You’ll Love This Recipe
This Easy Overnight Cream Cheese Danish Braid isn’t just any pastry—it’s a game changer for anyone who loves a sweet, flaky brunch treat without the usual fuss. I’ve tried several versions over the years, and this one stands out because it’s both simple and impressive. Here’s why you’re going to love it:
- Quick & Easy: You prep it the night before in about 15 minutes, then just bake it fresh in the morning—perfect for busy weekends or when you want to wake up to something special.
- Simple Ingredients: No need for exotic items here. Most are pantry staples like cream cheese, puff pastry, eggs, and a bit of sugar. I usually keep Philadelphia cream cheese on hand because it’s smooth and reliable.
- Perfect for Brunch: Whether you’re hosting friends or just treating yourself, this Danish braid feels fancy without the stress.
- Crowd-Pleaser: I’ve brought this to potlucks and family breakfasts, and it always disappears fast—kids and adults alike can’t get enough.
- Unbelievably Delicious: The flaky, buttery puff pastry combined with the creamy, slightly tangy filling is just next-level comfort food.
What sets this recipe apart is the overnight rest—the dough soaks in the cream cheese filling’s flavor, and by morning, the braid is bursting with flavor and texture. Honestly, it’s the kind of recipe that makes you close your eyes after the first bite and smile. It’s a little indulgent, a little nostalgic, and totally worth the wait.
What Ingredients You Will Need
This recipe uses simple, wholesome ingredients to deliver bold flavor and satisfying texture without the fuss. Most of what you’ll need is probably already in your fridge or pantry, making it easy to whip up on a whim.
- For the Danish Braid:
- Frozen puff pastry sheets (2 sheets, thawed) – I prefer Pepperidge Farm for its consistent flakiness
- Cream cheese (8 oz / 225 g), softened – full-fat gives the best richness
- Granulated sugar (1/3 cup / 65 g) – balances the tang of the cream cheese
- Vanilla extract (1 tsp) – adds warmth and depth
- Large egg (1), beaten – for the egg wash to get that golden crust
- Powdered sugar (1 cup / 120 g) – for the glaze
- Milk or heavy cream (2-3 tbsp) – to thin the glaze
- Fresh lemon zest (optional, 1 tsp) – adds a bright, fresh note
Feel free to swap the vanilla extract with almond extract for a different flavor profile. If you want a dairy-free option, you can try a plant-based cream cheese and coconut milk for the glaze, but the texture won’t be quite the same. In summer, I like to add fresh berries on top right after baking, which makes it even more special.
Equipment Needed
- Baking sheet – a rimmed one to catch any glaze drips
- Parchment paper or silicone baking mat – for easy cleanup and to prevent sticking
- Mixing bowl – to combine cream cheese filling
- Whisk or fork – for beating the egg and mixing the glaze
- Sharp knife or pizza cutter – to slice the pastry for braiding
- Measuring cups and spoons – precision matters for the best results
If you don’t have a pizza cutter, a sharp chef’s knife works just fine. I once tried using kitchen scissors for the braid strips—it worked in a pinch but was messier. For budget-friendly options, parchment paper is a must for a no-fuss cleanup, and you can find affordable silicone mats that last forever, too. Keeping your knife sharp makes slicing the pastry safer and cleaner, which honestly saves a little heartache in the kitchen.
Preparation Method
- Prepare the cream cheese filling: In a mixing bowl, combine 8 oz (225 g) softened cream cheese, 1/3 cup (65 g) granulated sugar, and 1 tsp vanilla extract. Beat together until smooth and creamy, about 2-3 minutes. If you want a hint of brightness, add 1 tsp finely grated lemon zest here.
- Roll out the puff pastry: On a lightly floured surface, unfold one thawed puff pastry sheet into a rectangle approximately 12×9 inches (30×23 cm). If the dough feels sticky, sprinkle a little flour on top and your rolling pin.
- Spread the filling: Spoon the cream cheese mixture down the center third of the pastry, leaving about 1 inch (2.5 cm) of space on the top and bottom edges.
- Cut the braid strips: Using a sharp knife or pizza cutter, make diagonal cuts about 1 inch (2.5 cm) apart on both sides of the filling, cutting towards the cream cheese but not through it. You should have about 6-8 strips on each side.
- Braid the dough: Fold the strips over the filling, alternating sides to create a braid pattern. Gently press the ends to seal. Don’t worry if it’s not perfect; the rustic look adds charm.
- Repeat with the second puff pastry sheet: Prepare the second braid the same way if you want a larger Danish or more servings.
- Apply egg wash: Brush the top of the braid with the beaten egg to get a shiny, golden crust. This step makes a huge difference in the final look.
- Refrigerate overnight: Place the prepared braid(s) on a parchment-lined baking sheet, cover loosely with plastic wrap, and refrigerate overnight. This resting time helps the flavors meld and makes morning baking a breeze.
- Bake in the morning: Preheat the oven to 375°F (190°C). Bake the braid for 25-30 minutes or until puffed and golden brown. You’ll see the cream cheese filling slightly bubbling—that’s your signal it’s done.
- Make the glaze: While the braid cools for 10 minutes, whisk together 1 cup (120 g) powdered sugar with 2-3 tbsp milk or heavy cream until smooth. Drizzle over the braid once it’s slightly cooled.
- Serve and enjoy: Slice and serve warm or at room temperature. The flaky layers and creamy center are best fresh but still delicious later.
Pro tip: If your puff pastry seems too soft to cut neatly, pop it in the fridge for 10 minutes before slicing. Also, watch the baking time closely—the braid can go from golden to overly browned quickly.
Cooking Tips & Techniques
Making an Easy Overnight Cream Cheese Danish Braid sounds fancy, but a few tricks make all the difference. First, keep your cream cheese softened but not melted—that way, it blends smoothly without becoming runny. I once tried using cold cream cheese, and the filling was lumpy and hard to spread.
When cutting the braid strips, be gentle and keep them even in width; uneven strips can cause the braid to cook unevenly. If you find the dough sticking to your knife, dust the blade with a little flour between cuts.
Egg wash is your best friend here. It’s the secret to that stunning golden sheen that makes this braid look bakery-worthy. Don’t skip this step, even if you’re in a hurry.
If you’re baking multiple braids, rotate the baking sheet halfway through to ensure even cooking—ovens can have hot spots. Also, keep an eye on the edges; if they brown too fast, tent with foil after 20 minutes.
Finally, patience is key! Let the braid cool a bit before drizzling the glaze, or it will melt away. I learned this the hard way after a messy first attempt where the glaze disappeared into the pastry instead of sitting prettily on top.
Variations & Adaptations
This Danish braid is wonderfully flexible. Here are a few ways to switch things up:
- Flavor variations: Add fresh fruit like raspberries or blueberries into the cream cheese filling for a burst of tartness. Alternatively, mix in a spoonful of jam or preserves for a fruity twist.
- Dietary adaptations: Use gluten-free puff pastry if you have gluten sensitivities. I recommend brands like Schär for decent texture. For a lower sugar option, reduce the granulated sugar in the filling and use a sugar substitute in the glaze.
- Seasonal twists: In fall, sprinkle cinnamon and nutmeg into the cream cheese filling for warm spices. You can also swap lemon zest for orange zest for a citrusy punch.
- Cooking method: If you prefer, bake individual Danish braids in muffin tins for personal servings—adjust baking time to about 20 minutes.
- Personal favorite: One time, I added a thin layer of almond paste under the cream cheese filling for a rich, nutty flavor that my brunch guests couldn’t stop talking about.
Serving & Storage Suggestions
This Easy Overnight Cream Cheese Danish Braid tastes best warm or at room temperature. Serve it on its own or with a side of fresh fruit or a hot cup of coffee or tea. I often pair it with scrambled eggs or a light salad when making brunch at home.
To store, wrap leftovers tightly in plastic wrap or place in an airtight container. It keeps well in the refrigerator for up to 3 days. For longer storage, you can freeze the unbaked braid before the overnight rest—wrap it tightly and freeze for up to 2 months. Thaw in the fridge overnight before baking.
Reheat slices in a toaster oven or conventional oven at 350°F (175°C) for 5-7 minutes to bring back the flaky texture. Microwaving works but can make the pastry soggy.
Flavors tend to deepen after a day, so if you can resist, letting it sit for a few hours really brings out the cream cheese’s tang and the pastry’s buttery notes.
Nutritional Information & Benefits
Each serving of this Danish braid provides a satisfying balance of carbs, fats, and protein, making it a filling option for brunch. Cream cheese offers a good source of calcium and protein, while puff pastry delivers the buttery, flaky texture that makes this dish so irresistible.
Estimated nutrition per serving (1/8 of the braid): approximately 320 calories, 18g fat, 30g carbohydrates, and 5g protein. This recipe is not low-calorie but is perfect for an occasional indulgence.
For those with dietary restrictions, gluten-free puff pastry can be used, and almond or coconut-based cream cheeses offer dairy-free options. This recipe contains dairy, eggs, and gluten, so keep that in mind for allergen-sensitive guests.
From a wellness perspective, I appreciate that this recipe uses real, simple ingredients without preservatives or artificial flavors—sometimes, good food is just about quality basics done right.
Conclusion
If you’re looking for a brunch recipe that feels impressive without the stress, this Easy Overnight Cream Cheese Danish Braid is a winner. It’s the kind of dish that turns an ordinary morning into a special occasion with flaky layers, creamy filling, and a sweet glaze you can prep ahead of time.
Feel free to tweak the flavors to suit your taste or dietary needs. I love this recipe because it’s forgiving, delicious, and somehow always makes me feel just a little bit fancy—without hours in the kitchen. Give it a try and let me know how it turns out; I’m always excited to hear your twists and experiences!
Now, go on—treat yourself to a little morning magic. Your brunch table will thank you.
FAQs
Can I make this Danish braid gluten-free?
Yes! Substitute regular puff pastry with a gluten-free version, like the ones from Schär. Keep in mind texture might be slightly different, but it still tastes great.
How long can I refrigerate the braid before baking?
You can refrigerate the prepared braid overnight for up to 24 hours before baking. Just make sure it’s covered loosely with plastic wrap to prevent drying out.
Can I add fruit to the filling?
Absolutely! Fresh berries, chopped apples, or even a spoonful of jam mixed into the cream cheese filling work beautifully and add a nice fruity flavor.
What if I don’t have cream cheese?
Cream cheese is key for the creamy texture and tangy flavor, but you can try mascarpone or ricotta as alternatives, though the taste and consistency will change slightly.
How do I store leftover Danish braid?
Store leftovers in an airtight container in the fridge for up to 3 days. Reheat in the oven or toaster oven to keep the pastry flaky.
Pin This Recipe!
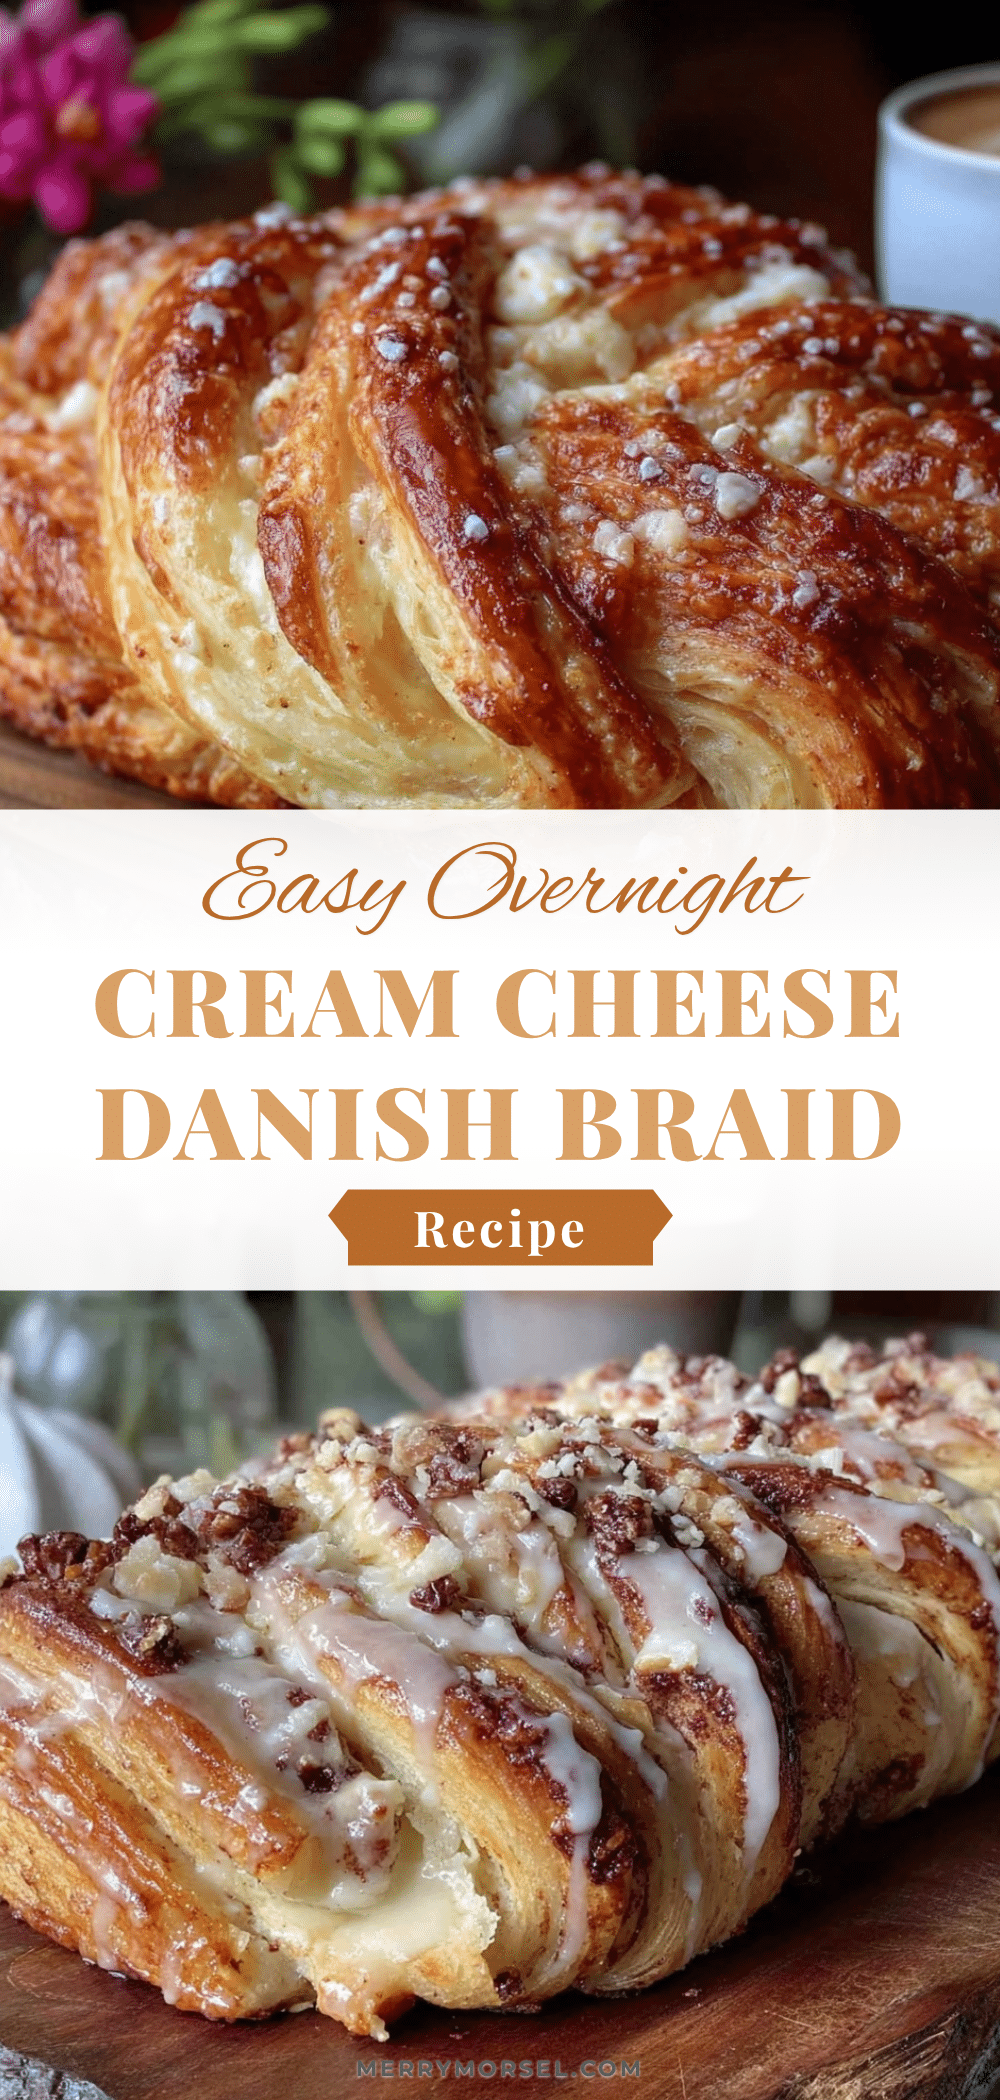
Easy Overnight Cream Cheese Danish Braid Recipe Perfect for Brunch

A simple and impressive cream cheese Danish braid that you prep overnight and bake fresh in the morning, perfect for a stress-free brunch with flaky layers and a tangy cream cheese center.
- Prep Time: 15 minutes
- Cook Time: 25-30 minutes
- Total Time: Overnight plus 40-45 minutes
- Yield: 8 servings 1x
- Category: Brunch
- Cuisine: American
Ingredients
- 2 sheets frozen puff pastry, thawed (preferably Pepperidge Farm)
- 8 oz (225 g) cream cheese, softened (full-fat recommended)
- 1/3 cup (65 g) granulated sugar
- 1 tsp vanilla extract
- 1 large egg, beaten (for egg wash)
- 1 cup (120 g) powdered sugar (for glaze)
- 2–3 tbsp milk or heavy cream (to thin glaze)
- 1 tsp fresh lemon zest (optional)
Instructions
- In a mixing bowl, combine softened cream cheese, granulated sugar, and vanilla extract. Beat until smooth and creamy, about 2-3 minutes. Add lemon zest if using.
- On a lightly floured surface, unfold one thawed puff pastry sheet into a 12×9 inch rectangle. Sprinkle flour if dough is sticky.
- Spread the cream cheese mixture down the center third of the pastry, leaving about 1 inch space on top and bottom edges.
- Using a sharp knife or pizza cutter, make diagonal cuts about 1 inch apart on both sides of the filling, cutting towards but not through the cream cheese, creating 6-8 strips per side.
- Fold the strips over the filling alternately to create a braid pattern. Press ends to seal.
- Repeat the process with the second puff pastry sheet if making a larger Danish or more servings.
- Brush the top of the braid with beaten egg for a golden crust.
- Place the braid(s) on a parchment-lined baking sheet, cover loosely with plastic wrap, and refrigerate overnight.
- Preheat oven to 375°F (190°C). Bake the braid for 25-30 minutes until puffed and golden brown with bubbling cream cheese filling.
- While the braid cools for 10 minutes, whisk powdered sugar with milk or cream until smooth to make glaze.
- Drizzle glaze over the slightly cooled braid. Slice and serve warm or at room temperature.
Notes
Keep cream cheese softened but not melted for smooth filling. Chill puff pastry if too soft before cutting. Use egg wash for a golden crust. Rotate baking sheet halfway if baking multiple braids. Tent with foil if edges brown too fast. Let braid cool before glazing to prevent glaze from melting into pastry.
Nutrition
- Serving Size: 1/8 of the Danish br
- Calories: 320
- Fat: 18
- Carbohydrates: 30
- Protein: 5
Keywords: cream cheese Danish, Danish braid, brunch recipe, puff pastry, easy pastry, overnight recipe, cream cheese filling, sweet pastry