Love this? Save it for later!
Share the inspiration with your friends
My friend Carla watched me fumbling with a piping bag, trying to make a rosette that looked more like a sad pile of mashed potatoes than anything edible. She didn’t say anything at first. Then she reached over, gently took the bag from my hands, and said, “You’re overthinking it. Let the frosting do the work.”
Carla is a Virgo through and through—organized, detail-oriented, and annoyingly good at everything she tries. When her birthday rolled around, I knew I had to make something that matched her energy. Something precise but not fussy. Something that looked like it took hours but honestly came together in an afternoon. That’s how these Perfect Star Sign Cupcakes for Virgo Birthday Celebrations were born. I mean, I messed up the first batch completely—forgot the vanilla extract and ended up with cupcakes that tasted like sweetened flour. But the second batch? Let me tell you, it was pure magic.
These cupcakes aren’t just about looking pretty. They’re about capturing that Virgo essence—the attention to detail, the love for things done right, the quiet satisfaction of a job well done. Maybe you’ve been there, staring at a Pinterest board full of flawless cupcakes and thinking, “I could never.” Honestly, you can. These star sign cupcakes are designed to be forgiving, adaptable, and genuinely delicious. They’re the kind of treat that makes you close your eyes after the first bite and forget about the mess in the kitchen. And honestly, that’s why I keep making them. Not just for birthdays, but for those days when you need a little reminder that you can create something beautiful without losing your mind.
Why You’ll Love This Recipe
I’ve tested this recipe more times than I care to admit—through burnt batches, lopsided cupcakes, and frosting that refused to cooperate. What I landed on is a foolproof method that even beginner bakers can nail on the first try. Here’s why these star sign cupcakes stand out from the crowd:
- Quick & Easy: From start to finish, you’re looking at about 45 minutes. Perfect for last-minute birthday surprises or when you promised to bring dessert and completely forgot until the night before.
- Simple Ingredients: No fancy grocery store runs. Butter, sugar, flour, eggs, and a few pantry staples are all you need. I bet you have most of them right now.
- Perfect for Virgo Birthdays: The star decoration is subtle enough for an elegant celebration but fun enough to feel festive. It matches that Virgo aesthetic—classy without being over the top.
- Crowd-Pleaser: I brought these to a potluck once, and someone asked for the recipe before they even finished eating. Kids love the stars, adults love the flavor. It’s a win-win.
- Unbelievably Delicious: The texture is what gets me every time. Light, fluffy, with a crumb that practically melts in your mouth. And the frosting? Silky smooth with just the right amount of sweetness.
What makes these different from other cupcake recipes is the technique. I use a reverse-creaming method that gives you a more tender crumb without overmixing. Plus, the frosting includes a tiny pinch of salt that balances the sweetness perfectly. It’s not just another vanilla cupcake—it’s the best version I’ve ever made. And honestly, it’s the kind of recipe that makes you feel like a pro baker even if you’re just starting out.
These cupcakes aren’t just good. They’re the kind that makes you take a photo before you eat one. The kind that makes your friends text you later saying, “Hey, can you make those for my birthday too?” And honestly, that’s the best compliment a baker can get.
What Ingredients You Will Need
This recipe uses simple, wholesome ingredients to deliver bold flavor and satisfying texture without the fuss. Most of these are pantry staples, so you probably won’t need to make a special trip to the store.
For the Cupcakes
- 1 ½ cups (190g) all-purpose flour – I prefer King Arthur Flour for consistent results, but any brand works fine. Spoon and level your flour for the most accurate measurement.
- 1 cup (200g) granulated sugar – Regular white sugar gives the best texture. Don’t substitute with brown sugar here unless you want a denser cupcake.
- ½ cup (113g) unsalted butter, softened to room temperature – This is important. Cold butter won’t cream properly. Leave it out for about 30 minutes before starting.
- 2 large eggs, room temperature – Cold eggs can seize the batter. If you forgot to take them out, place them in a bowl of warm water for 5 minutes.
- ½ cup (120ml) whole milk, room temperature – Whole milk gives the richest flavor. You can use 2% in a pinch, but avoid skim milk.
- 1 ½ teaspoons vanilla extract – Pure vanilla extract makes a noticeable difference. I’ve tried imitation vanilla, and honestly, it’s just not the same.
- 1 ½ teaspoons baking powder – Make sure it’s fresh. Old baking powder won’t give you that nice rise.
- ¼ teaspoon salt – Just enough to enhance the other flavors without making the cupcakes taste salty.
For the Buttercream Frosting
- 1 cup (226g) unsalted butter, softened – Use the good stuff. Margarine or spreads won’t whip up the same way.
- 3 ½ cups (420g) powdered sugar, sifted – Sifting is non-negotiable here. Lumps in your frosting are no fun.
- 2-3 tablespoons heavy cream – Adjust based on your desired consistency. Start with 2 tablespoons and add more if needed.
- 1 teaspoon vanilla extract – Again, pure vanilla is worth it.
- Pinch of salt – Trust me on this. It cuts the sweetness and makes the frosting taste more balanced.
- Food coloring (optional) – For that Virgo star aesthetic, I like using a tiny drop of purple or blue gel food coloring. A little goes a long way.
- Star sprinkles or edible glitter – For decorating. Wilton makes great star sprinkles that hold their shape.
For the Star Decorations (Optional but Recommended)
- Yellow or gold sanding sugar – Gives the stars a beautiful shimmer.
- Small star-shaped cookie cutter – About 1 inch in size works perfectly.
- Fondant or gum paste – If you want to make your own star toppers. Store-bought is fine too.
I always recommend using room temperature ingredients for the best results. Cold ingredients don’t emulsify properly, which can lead to dense, heavy cupcakes. And if you’re using food coloring, gel-based colors are much better than liquid ones—they’re more concentrated and won’t thin out your frosting.
Equipment Needed
You don’t need a professional bakery setup for these star sign cupcakes. Here’s what I use and what you can substitute if you’re working with a basic kitchen:
- 12-cup muffin tin – Standard size works best. If you only have a 6-cup tin, just bake in batches.
- Cupcake liners – I prefer parchment paper liners because they peel off easily. Foil liners are fine too, but they can stick sometimes.
- Electric mixer – A stand mixer is ideal, but a hand mixer works perfectly. I actually used a hand mixer for years before upgrading.
- Mixing bowls – At least two medium-sized bowls. Glass or metal is better than plastic for holding temperatures steady.
- Measuring cups and spoons – Accurate measurements are crucial for baking. I use dry measuring cups for dry ingredients and liquid measuring cups for wet.
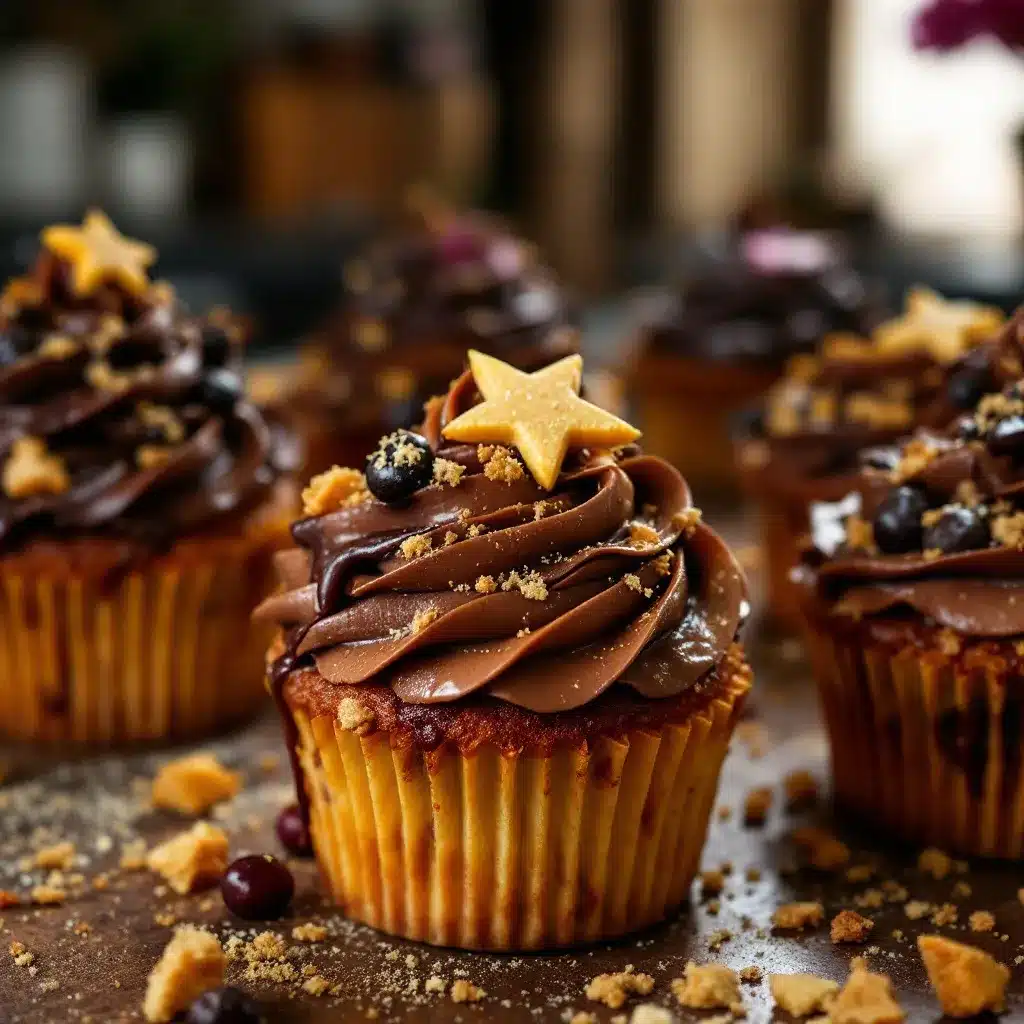
- Piping bag with star tip – A Wilton 1M tip gives beautiful rosettes. If you don’t have a piping bag, a zip-top bag with the corner snipped off works in a pinch.
- Cooling rack – Wire racks allow air to circulate so your cupcakes cool evenly. If you don’t have one, you can use a clean kitchen towel on the counter.
- Small star cookie cutter – For the fondant decorations. I found mine at a local craft store for under $5.
- Offset spatula – Makes frosting application much smoother. A butter knife works, but an offset spatula is worth the investment if you bake often.
One tip I learned the hard way: always grease your muffin tin even if you’re using liners. Sometimes liners stick, and a little spray ensures they peel off cleanly. And if you’re using a hand mixer, keep an eye on the batter—it’s easier to overmix than with a stand mixer.
Preparation Method
Step 1: Preheat and Prep
Preheat your oven to 350°F (175°C). Line your muffin tin with cupcake liners and set aside. This step seems obvious, but I’ve definitely forgotten to preheat and ended up waiting around with batter sitting on the counter.
Step 2: Combine Dry Ingredients
In a medium bowl, whisk together the flour, baking powder, and salt. Whisking aerates the flour and ensures the leavening agent is evenly distributed. Set this aside for now.
Step 3: Cream Butter and Sugar
In a large mixing bowl, beat the softened butter and granulated sugar together on medium speed until light and fluffy. This takes about 3-4 minutes. You’re looking for a pale yellow color and a texture that resembles wet sand. Scrape down the sides of the bowl halfway through.
Step 4: Add Eggs and Vanilla
Add the eggs one at a time, beating well after each addition. Then add the vanilla extract and mix until combined. The batter might look slightly curdled at this point—that’s normal. Don’t panic.
Step 5: Alternate Dry and Wet Ingredients
With the mixer on low speed, add the flour mixture in three additions, alternating with the milk. Start and end with the flour mixture. Mix just until combined—overmixing at this stage will make your cupcakes tough. I usually stop the mixer when I still see a few streaks of flour and finish by folding with a spatula.
Step 6: Fill the Liners
Divide the batter evenly among the 12 cupcake liners. I use a cookie scoop for this—it gives you perfectly even portions and less mess. Fill each liner about ⅔ full. Don’t overfill, or your cupcakes will mushroom over the edges.
Step 7: Bake
Bake for 18-20 minutes, or until a toothpick inserted into the center comes out clean or with a few moist crumbs. The tops should be golden and spring back when lightly touched. Let them cool in the pan for 5 minutes, then transfer to a wire rack to cool completely.
Step 8: Make the Frosting
While the cupcakes cool, make the buttercream. Beat the softened butter on medium speed until smooth and creamy, about 2 minutes. Gradually add the sifted powdered sugar, one cup at a time, beating on low speed until incorporated. Add the vanilla extract and salt, then beat on medium-high speed for 3-4 minutes until light and fluffy. Add heavy cream one tablespoon at a time until you reach your desired consistency. If you’re using food coloring, add it now and mix until evenly distributed.
Step 9: Decorate
Once the cupcakes are completely cool, pipe the frosting using a star tip. I like to start from the outside and work my way in, creating a rosette pattern. Top with star sprinkles or a fondant star. To make fondant stars, roll out fondant to about ⅛ inch thickness, cut with a star cookie cutter, and brush lightly with edible glitter or sanding sugar.
A quick note: don’t frost warm cupcakes. The frosting will melt and slide right off. I learned this the hard way when I was in a hurry for a party. Trust me, waiting those extra 20 minutes is worth it.
Cooking Tips & Techniques
After making these star sign cupcakes more times than I can count, I’ve picked up a few tricks that make the process smoother and the results more consistent.
Room temperature ingredients matter more than you think. I used to skip this step because I was impatient. But cold butter doesn’t cream properly, and cold eggs can cause the batter to separate. If you’re short on time, cut your butter into small cubes and let it sit for 15 minutes. For eggs, place them in a bowl of warm water for 5 minutes.
Don’t overmix the batter. This is probably the most common mistake I see. Once you add the flour, mix just until it disappears. Overmixing develops gluten, which makes cupcakes tough and dense. A few lumps are fine—they’ll bake out.
Use an ice cream scoop for even portions. This changed my baking game completely. Not only does it give you perfectly even cupcakes, but it also reduces mess. No more dripping batter across the counter.
Test for doneness the right way. A toothpick inserted in the center should come out with a few moist crumbs, not wet batter. If it comes out clean, you’ve overbaked them slightly. The tops should spring back when lightly touched.
Let cupcakes cool completely before frosting. I know I said this already, but it’s worth repeating. Even slightly warm cupcakes will turn your beautiful buttercream into a puddle. Patience pays off here.
Toast your sprinkles for extra flavor. This is a trick I picked up from a pastry chef friend. Spread star sprinkles on a baking sheet and toast them at 300°F for 2-3 minutes. It brings out a nutty flavor that complements the vanilla beautifully.
Variations & Adaptations
One of the best things about this recipe is how easily it adapts. Here are some variations I’ve tried and loved:
Gluten-Free Version
Substitute the all-purpose flour with a 1:1 gluten-free baking flour blend. I’ve had great results with Bob’s Red Mill. Add an extra tablespoon of milk to compensate for the denser texture. The cupcakes won’t be quite as fluffy, but they’re still delicious.
Dairy-Free Version
Use vegan butter and substitute the milk with almond milk or oat milk. For the frosting, use vegan butter and a dairy-free cream alternative. I’ve found that oat milk gives the best texture—it’s creamier than almond milk.
Chocolate Star Sign Cupcakes
Replace ¼ cup of the flour with unsweetened cocoa powder. Add an extra tablespoon of milk to balance the dryness. The chocolate version pairs beautifully with a vanilla buttercream and star sprinkles.
Lemon Virgo Cupcakes
Add 2 tablespoons of fresh lemon zest to the batter and replace the vanilla extract with lemon extract. For the frosting, add a teaspoon of lemon juice and a pinch of lemon zest. The bright citrus flavor is perfect for spring birthdays.
Mini Cupcake Version
Use a mini muffin tin and bake for 10-12 minutes instead of 18-20. This yields about 24 mini cupcakes. They’re perfect for parties where guests might want to try multiple flavors.
I personally love the lemon variation for summer birthdays. There’s something about the combination of bright citrus and sweet frosting that feels so celebratory. Plus, the yellow color matches the star theme perfectly.
Serving & Storage Suggestions
These star sign cupcakes are best served at room temperature. If you’ve refrigerated them, let them sit out for about 30 minutes before serving. The buttercream softens and becomes silky, and the cake texture improves.
For presentation, I like to arrange them on a white cake stand or a wooden board. The contrast makes the star decorations pop. If you’re serving them at a party, consider adding a small sign that says “Virgo Birthday Cupcakes” for that extra personal touch.
These cupcakes pair beautifully with a cup of coffee or a glass of cold milk. For an adult gathering, they go surprisingly well with a light Prosecco or a vanilla-flavored cocktail. The sweetness of the cupcakes balances the acidity of the wine.
Storage: Store unfrosted cupcakes in an airtight container at room temperature for up to 3 days. Frosted cupcakes should be refrigerated in an airtight container for up to 5 days. The frosting acts as a seal, keeping the cupcakes moist.
Freezing: You can freeze unfrosted cupcakes for up to 3 months. Wrap each one individually in plastic wrap, then place them in a freezer-safe bag. Thaw at room temperature before frosting. Frosted cupcakes can also be frozen, but the texture of the buttercream might change slightly.
Reheating: If you prefer your cupcakes slightly warm, microwave them for 10-15 seconds. This works best with unfrosted cupcakes. For frosted ones, let them come to room temperature naturally.
One thing I’ve noticed is that these cupcakes actually taste better the next day. The flavors have time to meld, and the texture becomes even more tender. So don’t stress about making them fresh the day of your event—they’ll be just as good, if not better.
Nutritional Information & Benefits
Let’s be real—these are cupcakes, not health food. But that doesn’t mean they can’t have some redeeming qualities. Here’s the estimated nutritional breakdown for one cupcake with frosting:
- Calories: Approximately 380
- Fat: 18g
- Carbohydrates: 52g
- Protein: 3g
- Sugar: 38g
Now, here’s the thing: using real butter and whole milk means you’re getting some actual nutrients. Butter contains vitamin A and healthy fats that support brain function. Eggs provide protein and choline, which is important for memory. And yes, there’s sugar, but it’s a birthday treat—not an everyday snack.
If you’re looking to make these a bit lighter, you can reduce the sugar in the frosting by using a sugar-free powdered sugar alternative. I’ve tried it, and while the texture isn’t quite as silky, it still tastes great. You can also cut the frosting amount in half if you prefer a lighter topping.
For those with dietary restrictions, the gluten-free and dairy-free variations mentioned earlier work well. Just keep in mind that the nutritional values will change with substitutions.
Honestly, I believe in enjoying treats in moderation. These cupcakes are meant to be a celebration—a moment of joy on a special day. So go ahead, have one (or two). Your taste buds will thank you.
Conclusion
These Perfect Star Sign Cupcakes for Virgo Birthday Celebrations are more than just a dessert. They’re a way to show someone you care enough to make something special. Whether you’re celebrating a Virgo birthday, a star-themed party, or just a Tuesday that needs a little sparkle, these cupcakes deliver.
What I love most about this recipe is how forgiving it is. You don’t need to be a professional baker to get beautiful results. The star decorations add a touch of elegance without requiring hours of practice. And the flavor? It’s classic, comforting, and universally loved.
I encourage you to make these your own. Try the lemon variation for a summer party. Add a sprinkle of edible glitter for extra glam. Swap the star toppers for zodiac symbols if you’re feeling creative. The beauty of baking is that every batch is a little different, and that’s what makes it special.
So go ahead, preheat your oven, and give these a try. And when you do, I’d love to hear how they turned out. Drop a comment below, share a photo, or tell me about your own variations. Happy baking, and happy birthday to all the Virgos out there!
Frequently Asked Questions
Can I make these cupcakes ahead of time?
Absolutely! You can bake the cupcakes up to 3 days in advance and store them unfrosted in an airtight container. Frost them the day you plan to serve for the best presentation. The unfrosted cupcakes also freeze beautifully for up to 3 months.
What if I don’t have a star cookie cutter?
No problem! You can use star-shaped sprinkles, edible glitter, or even arrange silver dragees in a star pattern on top of the frosting. Alternatively, pipe small stars directly onto the cupcakes using a star tip and colored frosting.
Can I use a different frosting?
Of course! While buttercream is classic, cream cheese frosting works beautifully with these cupcakes. You could also use a chocolate ganache or a simple glaze. Just keep in mind that the consistency might be different, so adjust your decorating technique accordingly.
How do I know when the cupcakes are done baking?
Insert a toothpick into the center of a cupcake. If it comes out with a few moist crumbs, they’re done. If it comes out wet, bake for another 2-3 minutes. The tops should also spring back when lightly touched, and the edges should be lightly golden.
Can I double this recipe?
Yes, this recipe doubles beautifully. Just make sure you have enough muffin tins or bake in batches. If you’re using a stand mixer, the batter might be too much for a 5-quart mixer, so you may need to mix in batches or use a large bowl and a hand mixer.
Pin This Recipe!
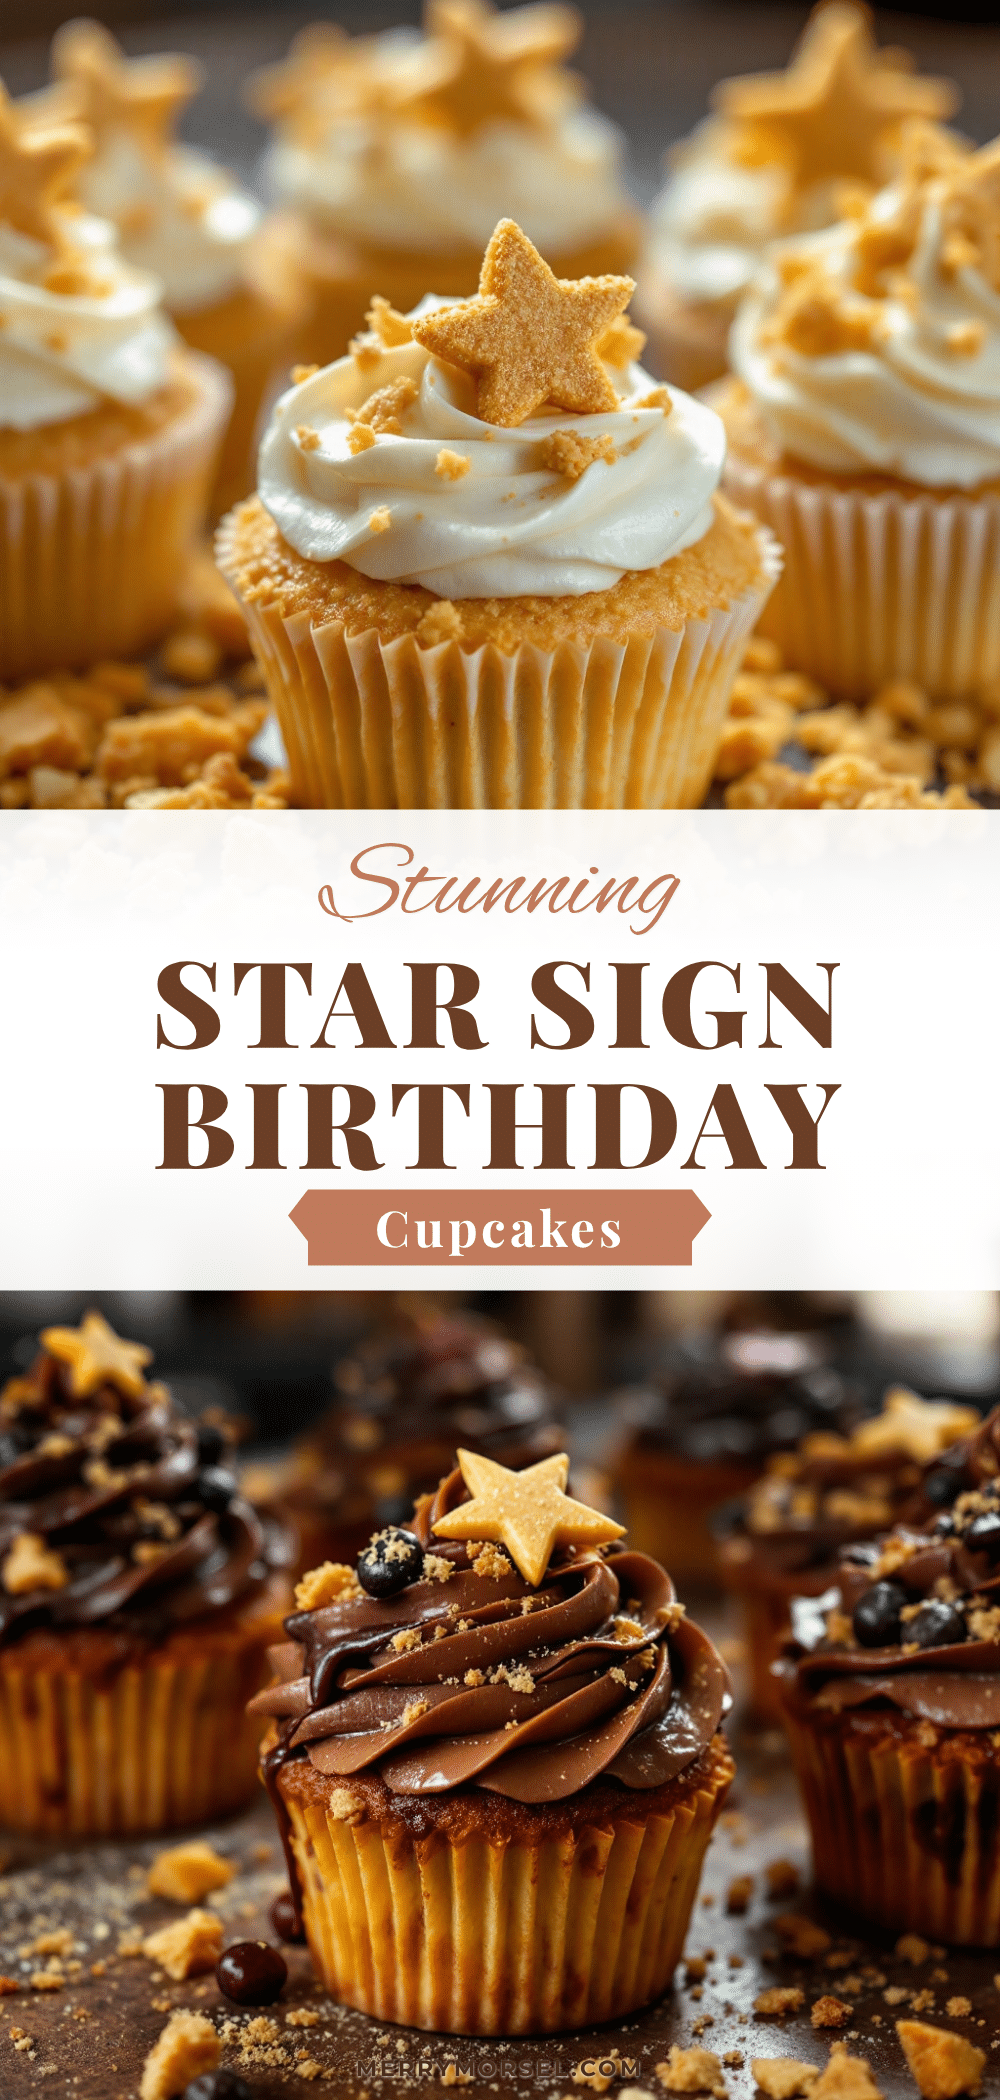
Perfect Star Sign Cupcakes: Easy Virgo Birthday Treat
These star sign cupcakes are designed to be forgiving, adaptable, and genuinely delicious. They capture the Virgo essence—attention to detail, love for things done right, and quiet satisfaction.
- Prep Time: 15 minutes
- Cook Time: 20 minutes
- Total Time: 45 minutes
- Yield: 12 servings 1x
- Category: Dessert
- Cuisine: American
Ingredients
- 1 ½ cups (190g) all-purpose flour
- 1 cup (200g) granulated sugar
- ½ cup (113g) unsalted butter, softened to room temperature
- 2 large eggs, room temperature
- ½ cup (120ml) whole milk, room temperature
- 1 ½ teaspoons vanilla extract
- 1 ½ teaspoons baking powder
- ¼ teaspoon salt
- 1 cup (226g) unsalted butter, softened (for frosting)
- 3 ½ cups (420g) powdered sugar, sifted (for frosting)
- 2–3 tablespoons heavy cream (for frosting)
- 1 teaspoon vanilla extract (for frosting)
- Pinch of salt (for frosting)
- Food coloring (optional, for frosting)
- Star sprinkles or edible glitter (for decorating)
- Yellow or gold sanding sugar (optional, for star decorations)
- Small star-shaped cookie cutter (optional)
- Fondant or gum paste (optional, for star toppers)
Instructions
- Preheat your oven to 350°F (175°C). Line your muffin tin with cupcake liners and set aside.
- In a medium bowl, whisk together the flour, baking powder, and salt.
- In a large mixing bowl, beat the softened butter and granulated sugar together on medium speed until light and fluffy, about 3-4 minutes. Scrape down the sides halfway through.
- Add the eggs one at a time, beating well after each addition. Then add the vanilla extract and mix until combined.
- With the mixer on low speed, add the flour mixture in three additions, alternating with the milk. Start and end with the flour mixture. Mix just until combined, then finish folding with a spatula if needed.
- Divide the batter evenly among the 12 cupcake liners, filling each about ⅔ full.
- Bake for 18-20 minutes, or until a toothpick inserted into the center comes out clean or with a few moist crumbs. Let cool in the pan for 5 minutes, then transfer to a wire rack to cool completely.
- While the cupcakes cool, make the buttercream: Beat the softened butter on medium speed until smooth and creamy, about 2 minutes. Gradually add the sifted powdered sugar, one cup at a time, beating on low speed. Add the vanilla extract and salt, then beat on medium-high speed for 3-4 minutes until light and fluffy. Add heavy cream one tablespoon at a time until desired consistency. If using food coloring, add and mix until evenly distributed.
- Once the cupcakes are completely cool, pipe the frosting using a star tip, starting from the outside and working inward to create a rosette pattern. Top with star sprinkles or a fondant star.
- To make fondant stars, roll out fondant to about ⅛ inch thickness, cut with a star cookie cutter, and brush lightly with edible glitter or sanding sugar.
Notes
Use room temperature ingredients for best results. Don’t overmix the batter. Let cupcakes cool completely before frosting. For gluten-free, use a 1:1 gluten-free flour blend and add an extra tablespoon of milk. For dairy-free, use vegan butter and oat milk. For chocolate version, replace ¼ cup flour with unsweetened cocoa powder. For lemon version, add 2 tablespoons lemon zest to batter and use lemon extract. For mini cupcakes, bake 10-12 minutes. Store unfrosted cupcakes at room temperature for up to 3 days; frosted cupcakes refrigerated for up to 5 days. Freeze unfrosted cupcakes for up to 3 months.
Nutrition
- Serving Size: 1 cupcake
- Calories: 380
- Sugar: 38
- Sodium: 150
- Fat: 18
- Saturated Fat: 11
- Carbohydrates: 52
- Protein: 3
Keywords: star sign cupcakes, Virgo birthday, easy cupcakes, vanilla cupcakes, buttercream frosting, star decorations