Love this? Save it for later!
Share the inspiration with your friends
My neighbor wasn’t trying to impress anyone. I’d stopped by to borrow a ladder—a deeply mundane Tuesday errand—and the smell hit me before I even got to her back porch. That rich, sweet, utterly tomatoey aroma that makes you stop mid-sentence and just breathe in. She was standing over a pot on the stove, stirring slowly, looking like she’d done it a thousand times before. Which, as it turns out, she had.
“Oh, it’s just sauce,” she said when I asked, wiping her hands on her jeans. “Tomatoes were getting soft.” Just sauce. As if the deep, complex fragrance filling her entire house was no big deal. I stood there for maybe twenty minutes, watching her work. She wasn’t following a recipe—she was just tasting, adding a pinch of salt, letting it simmer while she told me about her daughter’s soccer game. That casual confidence was something else.
I went home that night and tried to recreate what I’d smelled. My first attempt was a disaster—watery, bland, and honestly kind of sad. But I kept at it, and eventually, I figured out the secret. It wasn’t about fancy techniques or hard-to-find ingredients. It was about letting the tomatoes do what they do best, with just a little guidance. This easy small-batch canned tomato sauce is the result of that afternoon on my neighbor’s porch. It’s beginner-friendly, forgiving, and tastes like you spent all day in the kitchen—even when you didn’t. Maybe you’ve been there, standing in the produce aisle, wondering if canning your own sauce is worth the effort. Let me tell you, it absolutely is.
Why You’ll Love This Recipe
I’ve made this sauce more times than I can count, and every batch reminds me why I keep coming back. It’s not just about the taste—though honestly, the taste is incredible. It’s about the whole experience of making something from scratch that you’ll actually use all year long.
- Beginner-Friendly: If you’ve never canned anything before, this is the perfect place to start. No complicated equipment, no fussy techniques. Just good, honest sauce.
- Small-Batch Magic: You don’t need a bushel of tomatoes. This recipe uses about 5 pounds—enough to fill your pantry without overwhelming your kitchen or your life.
- Pantry Staple: Once you’ve tasted homemade canned tomato sauce, you’ll never go back to store-bought. It’s richer, fresher, and completely customizable.
- Budget-Friendly: When tomatoes are in season, they’re cheap. A few dollars worth of produce can yield several jars of sauce that would cost triple that at the store.
- Incredibly Versatile: Use it for pasta, pizza, soups, stews, or as a base for your favorite Italian dishes. It’s your secret weapon in the kitchen.
This isn’t just another tomato sauce recipe—it’s the one that finally made me feel confident in my canning skills. The texture is smooth but not watery, the flavor is bright but deeply savory, and the process is so straightforward you’ll wonder why you didn’t try it sooner. It’s the kind of recipe that makes you close your eyes after that first taste and think, “I made this.”
What Ingredients You Will Need
This recipe uses simple, honest ingredients to create a sauce that tastes like pure summer. Most of these are pantry staples, especially during tomato season.
- Roma Tomatoes (5 pounds) – These are my go-to for sauce. They’re meaty, have fewer seeds, and produce a thicker sauce with less cooking time. Look for firm, deep red tomatoes with no soft spots. If you can’t find Romas, San Marzano plum tomatoes are an excellent alternative.
- Yellow Onion (1 large) – Adds a subtle sweetness and depth. I prefer yellow onions for their balanced flavor, but white or sweet onions also work well.
- Garlic Cloves (4-6, depending on size) – Fresh garlic is non-negotiable here. It infuses the sauce with that unmistakable aromatic warmth. I sometimes add an extra clove or two because, honestly, can you have too much garlic?
- Extra Virgin Olive Oil (2 tablespoons) – Use a good-quality oil for the best flavor. It’s the base for sautéing the aromatics and adds a silky mouthfeel.
- Fresh Basil Leaves (about 10-12 large leaves) – This is where the magic happens. Fresh basil adds a bright, peppery sweetness that dried basil just can’t match. I tear the leaves by hand—no chopping needed.
- Kosher Salt (1-2 teaspoons, to taste) – Salt is crucial for bringing out the tomatoes’ natural sweetness. I start with 1 teaspoon and adjust at the end.
- Granulated Sugar (1 teaspoon, optional) – Only needed if your tomatoes are particularly acidic. A tiny pinch balances the flavor without making the sauce sweet.
- Freshly Ground Black Pepper (1/2 teaspoon) – Adds a gentle warmth. I prefer coarse ground for a bit of texture.
- Bottled Lemon Juice (2 tablespoons per pint jar) – This is essential for safe water bath canning. It ensures the correct acidity level. Use bottled, not fresh, for consistent pH.
Ingredient Selection Tip: I’ve tried this with supermarket tomatoes and with farmer’s market beauties. The difference is noticeable but not dramatic. Use the best tomatoes you can find, but don’t stress if they’re not perfect. Even slightly soft tomatoes make excellent sauce—that’s actually how my neighbor started!
Equipment Needed
You don’t need a professional kitchen to make this sauce. Here’s what you’ll actually use:
- Large Stockpot (8-10 quart) – For cooking down the tomatoes. A heavy-bottomed pot prevents scorching. I use my trusty enameled cast iron dutch oven, but any large pot works.
- Water Bath Canner or Large Pot with Rack – You need something deep enough to cover your jars by at least 1-2 inches of water. A dedicated canner is ideal, but a large stockpot with a folded kitchen towel in the bottom works in a pinch.
- Canning Jars (4-5 pint-sized) – Mason jars are the standard. Check for chips or cracks before using. I prefer wide-mouth jars for easier filling.
- New Canning Lids and Bands – Lids are one-time use only. Bands can be reused as long as they’re not rusty.
- Jar Lifter – This is non-negotiable for safety. Trying to grab hot jars with tongs is a disaster waiting to happen. Trust me, I learned the hard way.
- Canning Funnel – Makes filling jars neat and mess-free. Worth the few dollars it costs.
- Wooden Spoon or Silicone Spatula – For stirring the sauce as it cooks. Avoid metal utensils if using enameled pots.
- Immersion Blender or Food Mill – For achieving that smooth sauce texture. An immersion blender is easier and requires less cleanup. A food mill also works beautifully and removes seeds and skins.
- Kitchen Towels – For wiping jar rims and handling hot equipment.
Budget-Friendly Alternative: If you don’t have a food mill, you can peel the tomatoes before cooking. Simply score an X on the bottom of each tomato, blanch in boiling water for 30-60 seconds, then plunge into ice water. The skins slip right off. Then mash the cooked sauce with a potato masher for a rustic texture.
Preparation Method
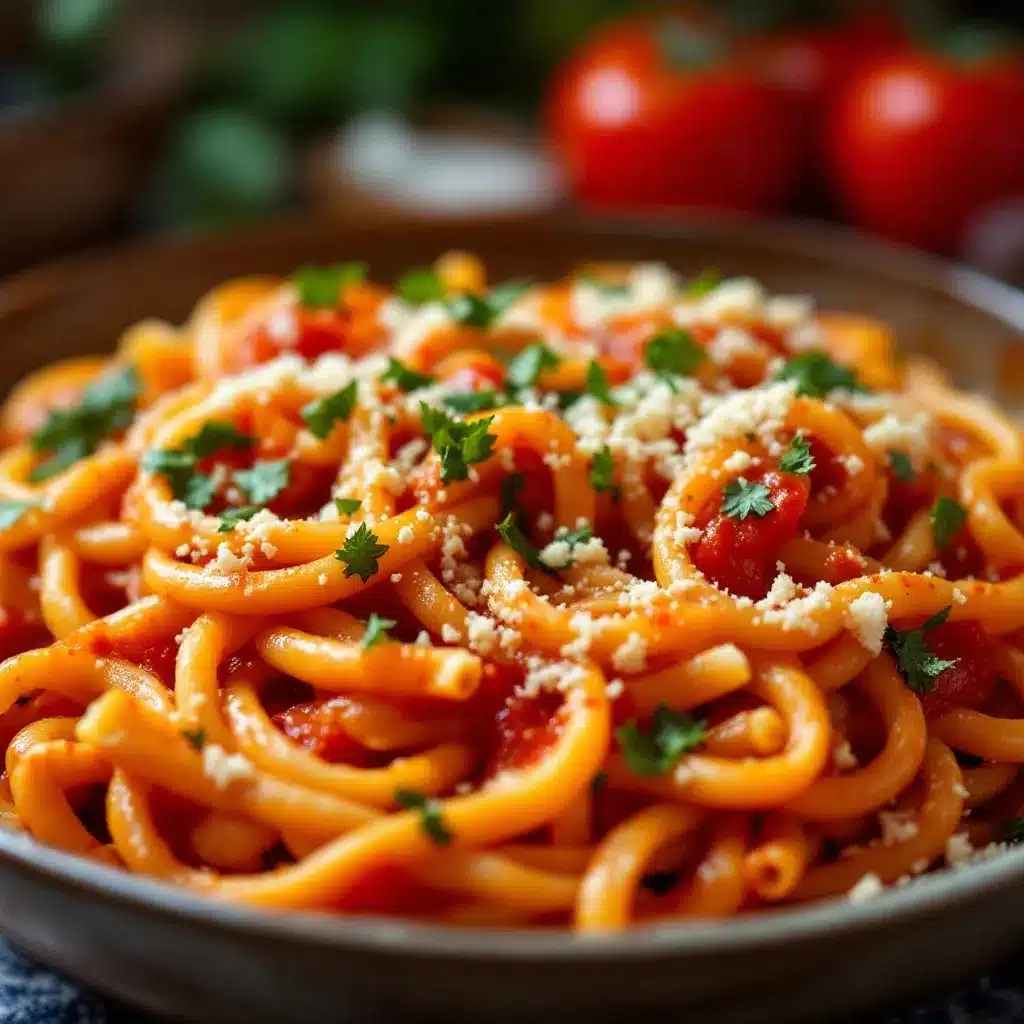
Let’s walk through this step by step. I’ll include all the little details I wish someone had told me the first time.
- Prepare Your Tomatoes (15 minutes)
Wash your tomatoes thoroughly. Cut out the core and any bruised spots. If you’re using a food mill later, you can leave the skins on—they’ll get strained out. If you’re using an immersion blender, I recommend peeling them first for a smoother sauce. To peel: score an X on the bottom of each tomato, blanch in boiling water for 45 seconds, then transfer to an ice bath. The skins will slide right off. - Chop the Aromatics (5 minutes)
Dice your onion into small pieces—about 1/4 inch. Mince the garlic cloves. Don’t stress about perfection here; everything gets blended later. I usually chop while the tomatoes are blanching to save time. - Sauté the Base (8-10 minutes)
In your large stockpot, heat the olive oil over medium heat. Add the diced onion and cook until translucent, about 5-6 minutes. Add the minced garlic and cook for another 1-2 minutes until fragrant. Be careful not to burn the garlic—it turns bitter quickly. You’ll know it’s ready when your kitchen smells incredible. - Add the Tomatoes (5 minutes)
Add your prepared tomatoes to the pot. If they’re whole, use a wooden spoon to break them up. If you peeled them, they’ll break down quickly. Stir everything together and bring to a gentle simmer. This is where the magic starts. - Simmer the Sauce (45-60 minutes)
Reduce the heat to low-medium and let the sauce simmer, stirring occasionally. You want a gentle bubble, not a rolling boil. As it cooks, the sauce will thicken and deepen in color. After about 30 minutes, add the torn basil leaves, salt, and pepper. Taste and adjust seasoning. If the sauce tastes too acidic, add the optional sugar. Continue simmering until the sauce reaches your desired consistency. I like mine thick enough to coat a spoon but still pourable. - Blend the Sauce (5 minutes)
Remove the pot from heat. Using an immersion blender, blend the sauce until smooth. If you’re using a food mill, process the sauce in batches. Be careful—the sauce is hot! I usually let it cool for 5 minutes before blending to avoid splatters. - Prepare Your Canning Equipment (20 minutes, can be done while sauce simmers)
Wash your jars, lids, and bands in hot, soapy water. Rinse thoroughly. Place the jars in your water bath canner, cover with water, and bring to a simmer. Keep the jars hot until ready to fill. Place the lids in a small saucepan of hot water (not boiling) to soften the sealing compound. - Fill the Jars (10 minutes)
Using your jar lifter, remove one hot jar from the canner. Place it on a clean kitchen towel. Add 2 tablespoons of bottled lemon juice to each pint jar. Using your canning funnel, ladle the hot sauce into the jar, leaving 1/2 inch of headspace. Remove air bubbles by running a non-metallic spatula around the inside of the jar. Wipe the rim clean with a damp paper towel—any residue can prevent sealing. Center a lid on the jar and screw on the band until fingertip-tight. - Process the Jars (35 minutes for pints at sea level)
Using your jar lifter, carefully place the filled jars back into the canner. Ensure they’re covered by at least 1-2 inches of water. Bring to a full rolling boil, then start your timer. Process for 35 minutes for pint jars. Adjust processing time for altitude if needed (add 5 minutes for 1,001-3,000 feet, 10 minutes for 3,001-6,000 feet, 15 minutes for 6,001-8,000 feet, 20 minutes for 8,001-10,000 feet). - Cool and Test Seals (12-24 hours)
After processing, turn off the heat and let the jars sit in the canner for 5 minutes. Remove them with your jar lifter and place them on a kitchen towel, leaving 1-2 inches of space between jars. Let them cool undisturbed for 12-24 hours. You’ll hear the satisfying “pop” of the lids sealing as they cool. After cooling, press the center of each lid—it shouldn’t flex up or down. Remove the bands and test the seal by gently lifting the jar by the lid. Label and store in a cool, dark place.
Cooking Tips & Techniques
I’ve made my share of mistakes with this sauce, and I’m sharing them so you don’t have to. Here’s what I’ve learned the hard way:
Don’t Rush the Simmer: The first time I made this, I was impatient and cranked the heat. The sauce scorched on the bottom, and I ended up with a faintly burnt flavor that no amount of basil could fix. Low and slow is the way to go. That gentle simmer is where the tomatoes concentrate their flavor and develop that rich, complex taste.
Taste as You Go: I know it sounds obvious, but I used to wait until the end to season. Big mistake. Salt and pepper need time to meld with the sauce. Add them early, taste midway, and adjust at the end. Your palate is the best tool you have.
The Lemon Juice is Non-Negotiable: I once thought, “My tomatoes are plenty acidic, I’ll skip the lemon juice.” That jar didn’t seal properly, and I lost a whole batch to spoilage. Bottled lemon juice has a consistent pH that ensures safe canning. Don’t substitute fresh lemon juice or vinegar—the acidity levels vary too much.
Headspace Matters: Too little headspace and sauce will bubble out during processing, preventing a seal. Too much and the jar might not create a proper vacuum. That 1/2 inch is your sweet spot. I use a ruler to check—yes, I’m that person.
Cold Sauce, Hot Jars: Always fill hot jars with hot sauce. Thermal shock can crack cold jars. Keep your jars simmering in the canner until you’re ready to fill them. This also prevents the sauce from cooling too quickly when it hits the jar.
Variations & Adaptations
One of the best things about this sauce is how adaptable it is. Here are some variations I’ve tried and loved:
- Herb-Infused Sauce: Add a sprig of fresh oregano or thyme along with the basil. Remove before blending. The herbs infuse a subtle earthiness that’s wonderful in Italian dishes.
- Roasted Tomato Sauce: For a deeper, smokier flavor, roast your tomatoes at 400°F for 30 minutes before adding them to the pot. This caramelizes the natural sugars and adds incredible complexity. I do this when I have extra time and want something truly special.
- Spicy Arrabbiata Style: Add 1/2 teaspoon of red pepper flakes along with the garlic. The heat builds gradually and pairs beautifully with the sweetness of the tomatoes. Perfect for pasta all’arrabbiata or pizza.
- Garlic Lover’s Version: Double the garlic. Roast the extra cloves before adding them for a mellow, nutty flavor. This is my personal favorite—I can never have too much garlic.
- No-Sugar Option: If your tomatoes are naturally sweet or you’re watching your sugar intake, simply omit the sugar. The sauce will still be delicious, just slightly more tangy.
Dietary Adaptations: This sauce is naturally vegan, gluten-free, and dairy-free. It’s also Whole30-compliant if you omit the sugar. For a low-acid version (though not safe for water bath canning), you can add a pinch of baking soda to neutralize some acidity—just know this will slightly alter the flavor.
Serving & Storage Suggestions
This sauce is incredibly versatile. Here’s how to make the most of it:
Serving: Heat the sauce gently in a saucepan over medium-low heat. Serve over your favorite pasta—I love it with spaghetti or rigatoni. It’s also fantastic as a pizza base, stirred into soups, or used as a dipping sauce for crusty bread. For a quick weeknight dinner, sauté some ground beef or Italian sausage, then stir in a jar of this sauce and serve over pasta. Dinner in 15 minutes.
Storage: Properly canned sauce will keep in a cool, dark pantry for 12-18 months. Once opened, refrigerate and use within 5-7 days. I label my jars with the date so I know which ones to use first. The flavor actually improves after a few weeks—the ingredients meld together beautifully.
Freezing Option: If you don’t want to can, this sauce freezes beautifully. Let it cool completely, then transfer to freezer-safe containers or zip-top bags. Leave 1 inch of headspace for expansion. Frozen sauce keeps for 4-6 months. Thaw overnight in the refrigerator before using.
Reheating: Reheat gently on the stovetop or in the microwave. If the sauce seems too thick after freezing, stir in a tablespoon of pasta water or broth to loosen it up. The texture might be slightly different after freezing, but the flavor remains fantastic.
Flavor Development: I’ve noticed that this sauce tastes even better after a month or two in the pantry. The flavors deepen and become more complex. It’s like a fine wine, but for tomato sauce. Don’t be afraid to make a big batch—you’ll be glad you did when you open a jar in the dead of winter.
Nutritional Information & Benefits
This sauce isn’t just delicious—it’s good for you too. Here’s a rough estimate per 1/2 cup serving:
| Nutrient | Amount |
|---|---|
| Calories | 45 |
| Total Fat | 2g |
| Sodium | 180mg |
| Total Carbohydrates | 7g |
| Dietary Fiber | 2g |
| Sugars | 4g |
| Protein | 1g |
| Vitamin C | 20% DV |
| Vitamin A | 10% DV |
Tomatoes are packed with lycopene, a powerful antioxidant linked to heart health and reduced inflammation. Cooking tomatoes actually increases the bioavailability of lycopene, so this sauce is even more beneficial than raw tomatoes. The olive oil adds healthy monounsaturated fats, which help your body absorb the fat-soluble vitamins in the tomatoes. Garlic and onions provide prebiotic fibers that support gut health. This sauce is naturally low in calories and fat, making it a smart choice for anyone watching their weight or managing blood sugar levels.
Dietary Considerations: This recipe is naturally vegan, gluten-free, and dairy-free. It’s also low in FODMAPs if you omit the garlic (use garlic-infused oil instead). Always check your specific dietary needs, but this sauce is a winner for most eating plans.
Conclusion
Making your own canned tomato sauce is one of those kitchen skills that feels intimidating until you actually do it. Then you wonder why you waited so long. This easy small-batch canned tomato sauce is forgiving, delicious, and genuinely beginner-friendly. It captures the essence of summer tomatoes and preserves it for those cold winter nights when you need a taste of sunshine.
I still think about that afternoon at my neighbor’s house—the casual way she stirred her pot, the incredible smell filling her kitchen, the way she made it look so effortless. That’s the spirit I tried to capture in this recipe. It’s not about perfection. It’s about the joy of making something with your own hands, something you can share with the people you love.
I’d love to hear how your batch turns out. Did you add extra garlic? Try the roasted version? Forget to leave enough headspace and have sauce bubbling everywhere? (Been there!) Drop a comment below and let me know. And if you’re feeling proud of those sealed jars—as you should be—share a photo on social media. Tag me so I can celebrate with you. Happy canning, friend. You’ve got this.
Frequently Asked Questions
Can I use this recipe for water bath canning if I add other vegetables?
Only if you maintain the proper acidity. Adding low-acid vegetables like peppers, onions (beyond the small amount in the recipe), or mushrooms changes the pH and requires pressure canning for safety. Stick to the recipe as written for water bath canning, or consult a trusted canning guide for tested recipes with added vegetables.
Why did my jars not seal?
Several things could cause a failed seal. The most common issues are: not wiping the jar rim clean before applying the lid, using old or damaged lids, not leaving enough headspace, or removing jars from the canner too quickly after processing. Let the jars sit undisturbed for 12-24 hours, then check the seals. Unsealed jars can be refrigerated and used within a week, or reprocessed with new lids within 24 hours.
Can I reduce the salt in this recipe?
Yes, you can reduce or omit the salt. Salt in canned goods is primarily for flavor, not preservation (for this recipe). However, salt does help maintain texture and can affect the flavor balance. If you reduce salt, taste the sauce before canning and adjust as needed. You can always add more salt when you use the sauce later.
How do I know if my canned sauce has spoiled?
Always inspect jars before using. Signs of spoilage include: a bulging lid (indicating gas buildup), liquid leaking from the seal, mold growth on the surface, an off or unpleasant odor, or any cloudiness in the liquid. When in doubt, throw it out. Properly canned sauce should have a clean, tomatoey smell and a uniform color.
Can I double this recipe?
Absolutely! This recipe scales beautifully. Just make sure your pot is large enough to accommodate the increased volume—you need room for the sauce to simmer without splattering. Processing times remain the same for pint jars, regardless of batch size. A double batch will yield about 8-10 pints, perfect for stocking your pantry for the year ahead.
Pin This Recipe!
Easy Small-Batch Canned Tomato Sauce From Scratch

This beginner-friendly recipe yields a rich, flavorful tomato sauce that captures the essence of summer. Perfect for pasta, pizza, and more, it’s a pantry staple you’ll be proud to make yourself.
- Prep Time: 20 minutes
- Cook Time: 1 hour 10 minutes
- Total Time: 1 hour 30 minutes (plus 12-24 hours cooling)
- Yield: 4-5 pint jars 1x
- Category: Condiment
- Cuisine: Italian-American
Ingredients
- 5 pounds Roma tomatoes (or San Marzano plum tomatoes)
- 1 large yellow onion, diced
- 4–6 garlic cloves, minced
- 2 tablespoons extra virgin olive oil
- 10–12 large fresh basil leaves, torn
- 1–2 teaspoons kosher salt (to taste)
- 1 teaspoon granulated sugar (optional, to reduce acidity)
- 1/2 teaspoon freshly ground black pepper
- 2 tablespoons bottled lemon juice per pint jar
Instructions
- Prepare your tomatoes: Wash, core, and remove any bruised spots. For smoother sauce, peel by scoring an X on the bottom, blanching in boiling water for 45 seconds, then transferring to an ice bath. Skins will slip off.
- Chop the aromatics: Dice the onion into small pieces (about 1/4 inch) and mince the garlic.
- Sauté the base: In a large stockpot, heat olive oil over medium heat. Add onion and cook until translucent (5-6 minutes). Add garlic and cook 1-2 minutes until fragrant.
- Add the tomatoes: Add prepared tomatoes to the pot, breaking them up with a wooden spoon. Stir and bring to a gentle simmer.
- Simmer the sauce: Reduce heat to low-medium and simmer for 45-60 minutes, stirring occasionally. After 30 minutes, add torn basil, salt, and pepper. Taste and adjust seasoning; add sugar if needed. Continue simmering until desired consistency (thick enough to coat a spoon but still pourable).
- Blend the sauce: Remove from heat. Using an immersion blender, blend until smooth. Alternatively, use a food mill. Let cool 5 minutes before blending to avoid splatters.
- Prepare canning equipment: Wash jars, lids, and bands in hot soapy water. Place jars in water bath canner, cover with water, and bring to a simmer. Keep jars hot. Place lids in hot water (not boiling) to soften sealing compound.
- Fill the jars: Using a jar lifter, remove one hot jar. Add 2 tablespoons bottled lemon juice per pint jar. Using a canning funnel, ladle hot sauce into jar, leaving 1/2 inch headspace. Remove air bubbles with a non-metallic spatula. Wipe rim clean. Center lid and screw on band until fingertip-tight.
- Process the jars: Place filled jars back into canner, ensuring they are covered by 1-2 inches of water. Bring to a full rolling boil. Process pint jars for 35 minutes at sea level (adjust for altitude: add 5 minutes for 1,001-3,000 ft, 10 minutes for 3,001-6,000 ft, 15 minutes for 6,001-8,000 ft, 20 minutes for 8,001-10,000 ft).
- Cool and test seals: Turn off heat, let jars sit in canner for 5 minutes. Remove with jar lifter and place on a kitchen towel, leaving space between jars. Cool undisturbed for 12-24 hours. Listen for the ‘pop’ of lids sealing. After cooling, press center of each lid—it should not flex. Remove bands and test seal by gently lifting jar by the lid. Label and store in a cool, dark place.
Notes
Don’t rush the simmer; low and slow develops flavor. Taste as you go and adjust seasoning. Bottled lemon juice is essential for safe canning—do not substitute fresh lemon juice or vinegar. Always fill hot jars with hot sauce to prevent thermal shock. Properly canned sauce keeps 12-18 months in a cool, dark pantry. Once opened, refrigerate and use within 5-7 days. For freezing, cool completely and store in freezer-safe containers for 4-6 months.
Nutrition
- Serving Size: 1/2 cup
- Calories: 45
- Sugar: 4
- Sodium: 180
- Fat: 2
- Carbohydrates: 7
- Fiber: 2
- Protein: 1
Keywords: canned tomato sauce, small batch, homemade, canning, beginner, pantry staple, summer tomatoes


