Love this? Save it for later!
Share the inspiration with your friends
Introduction
“Why can’t we just mix everything in one bowl and roll it into balls?” my friend asked while I was fussing over my usual complicated snack prep. I started to explain why that wouldn’t work — then stopped. Honestly, the idea made so much sense I decided to give it a shot, even if it felt too simple to be true.
That afternoon, in the middle of a chaotic Tuesday where I’d forgotten to buy snacks for my afternoon slump, I threw together oats, honey peanut butter, protein powder, and a handful of extras. No baking, no oven, no mess. The texture was just right—soft but firm—and the flavor hit that sweet and nutty spot I didn’t realize I’d been craving. It was a pleasant surprise, the kind of moment where you realize your friend’s instinct was spot on, and you were the one who needed to learn.
Maybe you’ve been there—rushing through the day, wishing for something quick, healthy, and satisfying without the hassle. That’s why this recipe for Easy No-Bake Protein Energy Balls with Oats & Honey Peanut Butter stayed with me. It’s a no-fuss, genuinely delicious snack that I keep coming back to, especially when life gets hectic and I need fuel that doesn’t slow me down.
Why You’ll Love This Recipe
After testing countless snack recipes over the years, these protein energy balls stand out as a reliable favorite. Here’s why you’ll appreciate making them:
- Quick & Easy: Comes together in under 15 minutes—perfect for busy mornings or mid-afternoon energy slumps.
- Simple Ingredients: Uses pantry staples like oats and peanut butter, plus a touch of honey for natural sweetness—no specialty shopping required.
- Perfect for On-the-Go: Ideal for packing in lunchboxes, post-workout fuel, or a grab-and-go office snack.
- Crowd-Pleaser: Kids and adults alike love the chewy texture and the subtle honey-peanut flavor.
- Unbelievably Delicious: The balance of creamy peanut butter and chewy oats with a hint of honey makes these balls satisfyingly rich without feeling heavy.
This isn’t just another protein ball recipe—it’s the one I trust when I want something wholesome but zero-fuss. I especially love blending the peanut butter and honey just right to get that smooth, sticky consistency that holds everything together perfectly. Plus, they keep well, so I can make a batch ahead and have a healthy treat ready whenever the craving hits. Honestly, it’s comfort and energy packed into a bite-sized snack.
What Ingredients You Will Need
This recipe uses simple, wholesome ingredients to deliver bold flavor and satisfying texture without the fuss. Most are pantry staples, and there’s some flexibility for substitutions if needed.
- Rolled oats (1 ½ cups / 135g) – the base that adds chewiness and fiber. Quick oats work too, but rolled oats give better texture.
- Honey peanut butter (1 cup / 250g) – creamy and naturally sweetened. I love using Smucker’s Natural Peanut Butter for its smoothness and no added sugars.
- Vanilla whey protein powder (½ cup / 45g) – adds protein and subtle vanilla flavor. You can swap for plant-based protein powder if you prefer.
- Honey (2 tablespoons / 30ml) – for extra sweetness and to help bind the mixture.
- Chia seeds (2 tablespoons / 20g) – optional but adds texture and omega-3s.
- Mini dark chocolate chips (¼ cup / 40g) – optional for a little indulgence, but they melt nicely and add richness.
- Ground flaxseed (2 tablespoons / 14g) – optional for added fiber and a nutty flavor.
- A pinch of salt – enhances the flavors, especially balancing the sweetness.
If you’re avoiding nuts, sunflower seed butter is a great alternative to peanut butter. Also, in warmer months, I sometimes swap honey for maple syrup or date syrup for a different twist. If you don’t have protein powder handy, adding extra oats and seeds still makes tasty energy balls, but the protein boost won’t be as high.
Equipment Needed
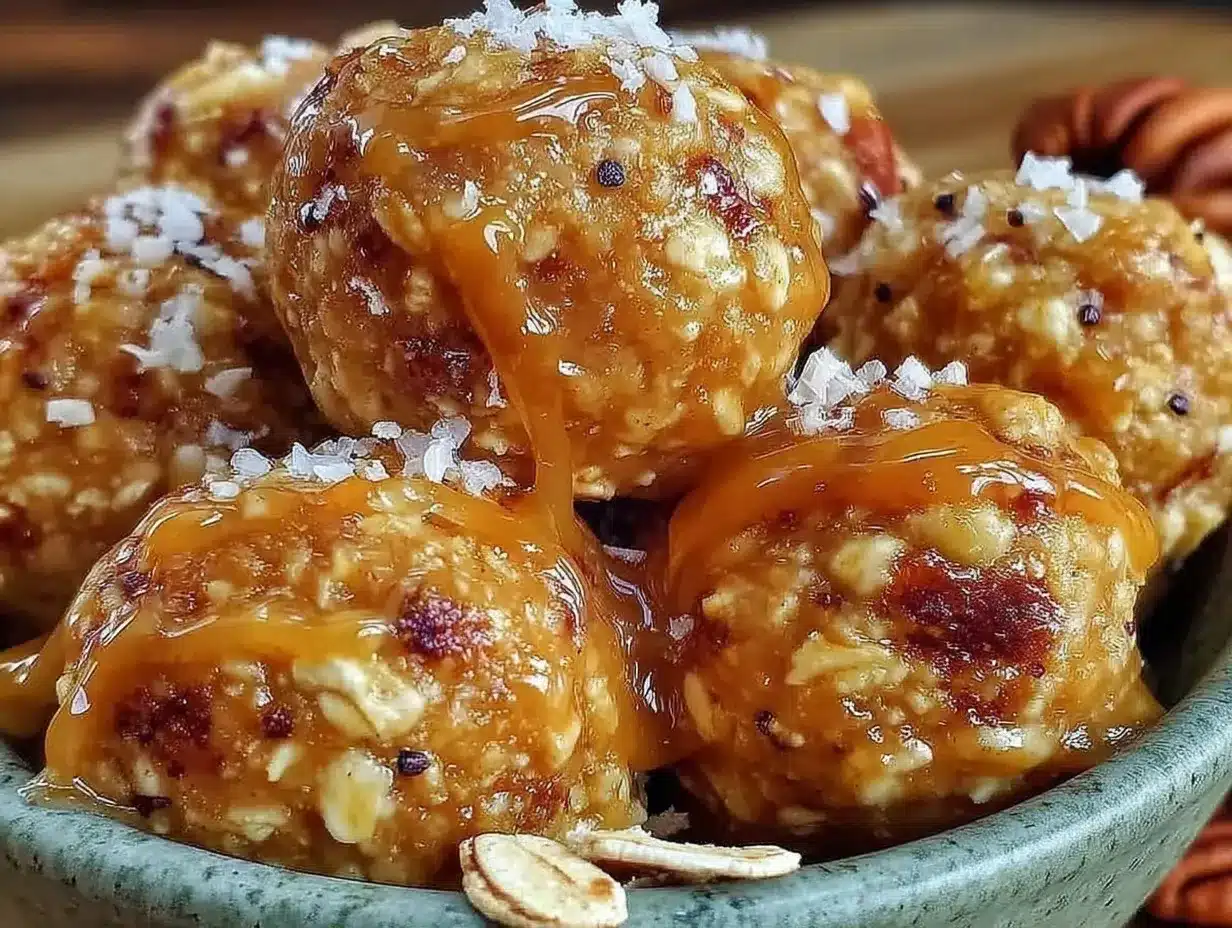
- Mixing bowl – a large one to comfortably mix all ingredients.
- Measuring cups and spoons – for accuracy, especially with sticky ingredients like honey peanut butter.
- Spatula or wooden spoon – to stir and combine the mixture without much mess.
- Baking sheet or tray – lined with parchment paper for rolling and setting the balls.
- Refrigerator – to chill and firm up the energy balls before serving.
If you don’t have a scale, measuring cups work fine here. I’ve also tried mixing with a stand mixer paddle attachment when making larger batches, which saves arm strength. For rolling, cold hands or lightly dampened hands help keep the mixture from sticking.
Preparation Method
- Combine dry ingredients: In your mixing bowl, add 1 ½ cups (135g) rolled oats, ½ cup (45g) vanilla whey protein powder, 2 tablespoons (20g) chia seeds, 2 tablespoons (14g) ground flaxseed, and a pinch of salt. Stir well to distribute everything evenly. (About 2 minutes)
- Add wet ingredients: Pour in 1 cup (250g) honey peanut butter and 2 tablespoons (30ml) honey to the dry mix. Using your spatula or wooden spoon, begin folding everything together. It will start sticky and dense. (3-4 minutes)
- Mix in chocolate chips: Once mostly combined, fold in ¼ cup (40g) mini dark chocolate chips for a lovely melty surprise. (1 minute)
- Check consistency: The mixture should hold together when pressed but not be overly wet. If it’s too crumbly, add a teaspoon of water or more honey peanut butter; if too sticky, add a little more oats. (1-2 minutes)
- Roll into balls: Scoop out roughly 1 tablespoon (15g) portions and roll between your palms to form compact balls. Place each on a parchment-lined baking sheet. (5-7 minutes)
- Chill: Refrigerate the tray for at least 30 minutes to firm up the energy balls. This step is key to keeping their shape and improving texture.
- Store: Transfer to an airtight container once chilled. They keep well in the fridge for up to a week or freeze for longer storage.
When mixing, don’t rush—take your time folding the peanut butter through the oats so each bite is perfectly balanced. Also, don’t skip the chilling step; it really helps the balls hold together and develops the flavors.
Cooking Tips & Techniques
When working with no-bake snacks, texture is everything. Here are some tips I’ve picked up over multiple batches:
- Choose the right oats: Rolled oats provide chewiness. Avoid instant oats here—they get mushy.
- Peanut butter matters: Creamy works best. Chunky peanut butter can make rolling tricky unless you like the extra texture.
- Protein powder tips: Using vanilla or plain protein powder avoids overpowering the flavor. If it’s too chalky, mix in a bit more honey peanut butter to smooth it out.
- Sticky hands hack: Wet or cold hands help roll the mixture without sticking. I usually keep a small bowl of water nearby.
- Don’t skip chilling: It’s tempting to eat them immediately, but the fridge step firms up the balls and lets flavors meld.
One time, I accidentally left out the honey, thinking the peanut butter’s sweetness would suffice. Big mistake—the balls were dry and crumbly. Lesson learned: the honey acts as a vital binder and sweetener. Also, mixing by hand feels more intuitive here than using a machine; you can feel when the texture is just right.
Variations & Adaptations
These energy balls are incredibly versatile, and I’ve tried a few adaptations to keep things interesting:
- Nut-free version: Swap peanut butter for sunflower seed butter and use pumpkin seeds instead of chocolate chips for allergy-friendly bites.
- Seasonal twist: Add dried cranberries or chopped dried apricots in autumn for a tart contrast.
- Superfood boost: Mix in a tablespoon of cacao nibs or shredded coconut for texture and added nutrients.
- Vegan option: Use maple syrup instead of honey and plant-based protein powder.
- Spiced flavor: Stir in a pinch of cinnamon or pumpkin pie spice for a warm, cozy vibe.
I once made a batch with almond butter and added a splash of espresso powder for a mocha flavor that was surprisingly addictive. Feel free to experiment and find your favorite combination!
Serving & Storage Suggestions
These protein energy balls are best served chilled or at room temperature. I like to pack them in small reusable containers or snack bags for easy grab-and-go fuel.
- Serve alongside a cup of black coffee or herbal tea for a balanced mid-morning break.
- Pair them with fresh fruit or a yogurt parfait for a more substantial snack.
- Store in an airtight container in the refrigerator for up to one week.
- Freeze in a single layer on a tray, then transfer to a sealed bag for up to three months. Thaw at room temperature before eating.
- Reheat is not recommended as it changes texture; just enjoy cold or at room temp.
Over time, the flavors mellow and deepen, especially if you add spices or dried fruit. I find they taste better after a day or two in the fridge, so making a batch ahead is a smart move.
Nutritional Information & Benefits
Each protein energy ball (makes about 20) roughly contains:
| Nutrient | Per Ball |
|---|---|
| Calories | 90-100 kcal |
| Protein | 5-6g |
| Carbohydrates | 8-9g |
| Fiber | 2g |
| Fat | 5-6g (mostly healthy fats) |
The oats provide sustained energy and fiber, while the peanut butter offers heart-healthy fats and protein. Adding chia and flax seeds boosts omega-3 fatty acids and antioxidants. This recipe fits nicely into gluten-free diets if using certified gluten-free oats. Be mindful of nut allergens and choose substitutions accordingly.
For me, these energy balls are a wholesome way to keep my energy steady throughout a busy day without the sugar crashes from typical snacks. They’re a little bite of satisfaction that’s also good for me.
Conclusion
Easy No-Bake Protein Energy Balls with Oats & Honey Peanut Butter have become my go-to snack for good reason. They’re fast, simple, and genuinely tasty—without compromising nutrition or flavor. The best part? You can customize them endlessly to suit your tastes and dietary needs.
I still smile thinking about that day I trusted a friend’s simple suggestion instead of my usual overthinking. It taught me that sometimes, the easiest route is exactly the right one.
Give this recipe a try and experiment with your favorite add-ins—then come back and share how you made it your own. I’d love to hear your twists and stories!
Happy snacking!
FAQs
Can I make these energy balls without protein powder?
Yes! You can omit the protein powder and add extra oats or seeds instead. The texture will be slightly different, but they’ll still be delicious and satisfying.
How long do these protein energy balls last?
Stored in an airtight container in the fridge, they last about one week. You can freeze them for up to three months for longer storage.
Can I use crunchy peanut butter instead of creamy?
You can, but the rolling process might be a bit trickier due to the chunks. If you like the texture, go for it!
Are these energy balls suitable for vegans?
Yes, by swapping honey for maple syrup and using a plant-based protein powder, you can make this recipe vegan-friendly.
What’s the best way to store these energy balls for travel?
Pack them in a small insulated container or cooler bag with an ice pack to keep them firm and fresh during transport.
Pin This Recipe!
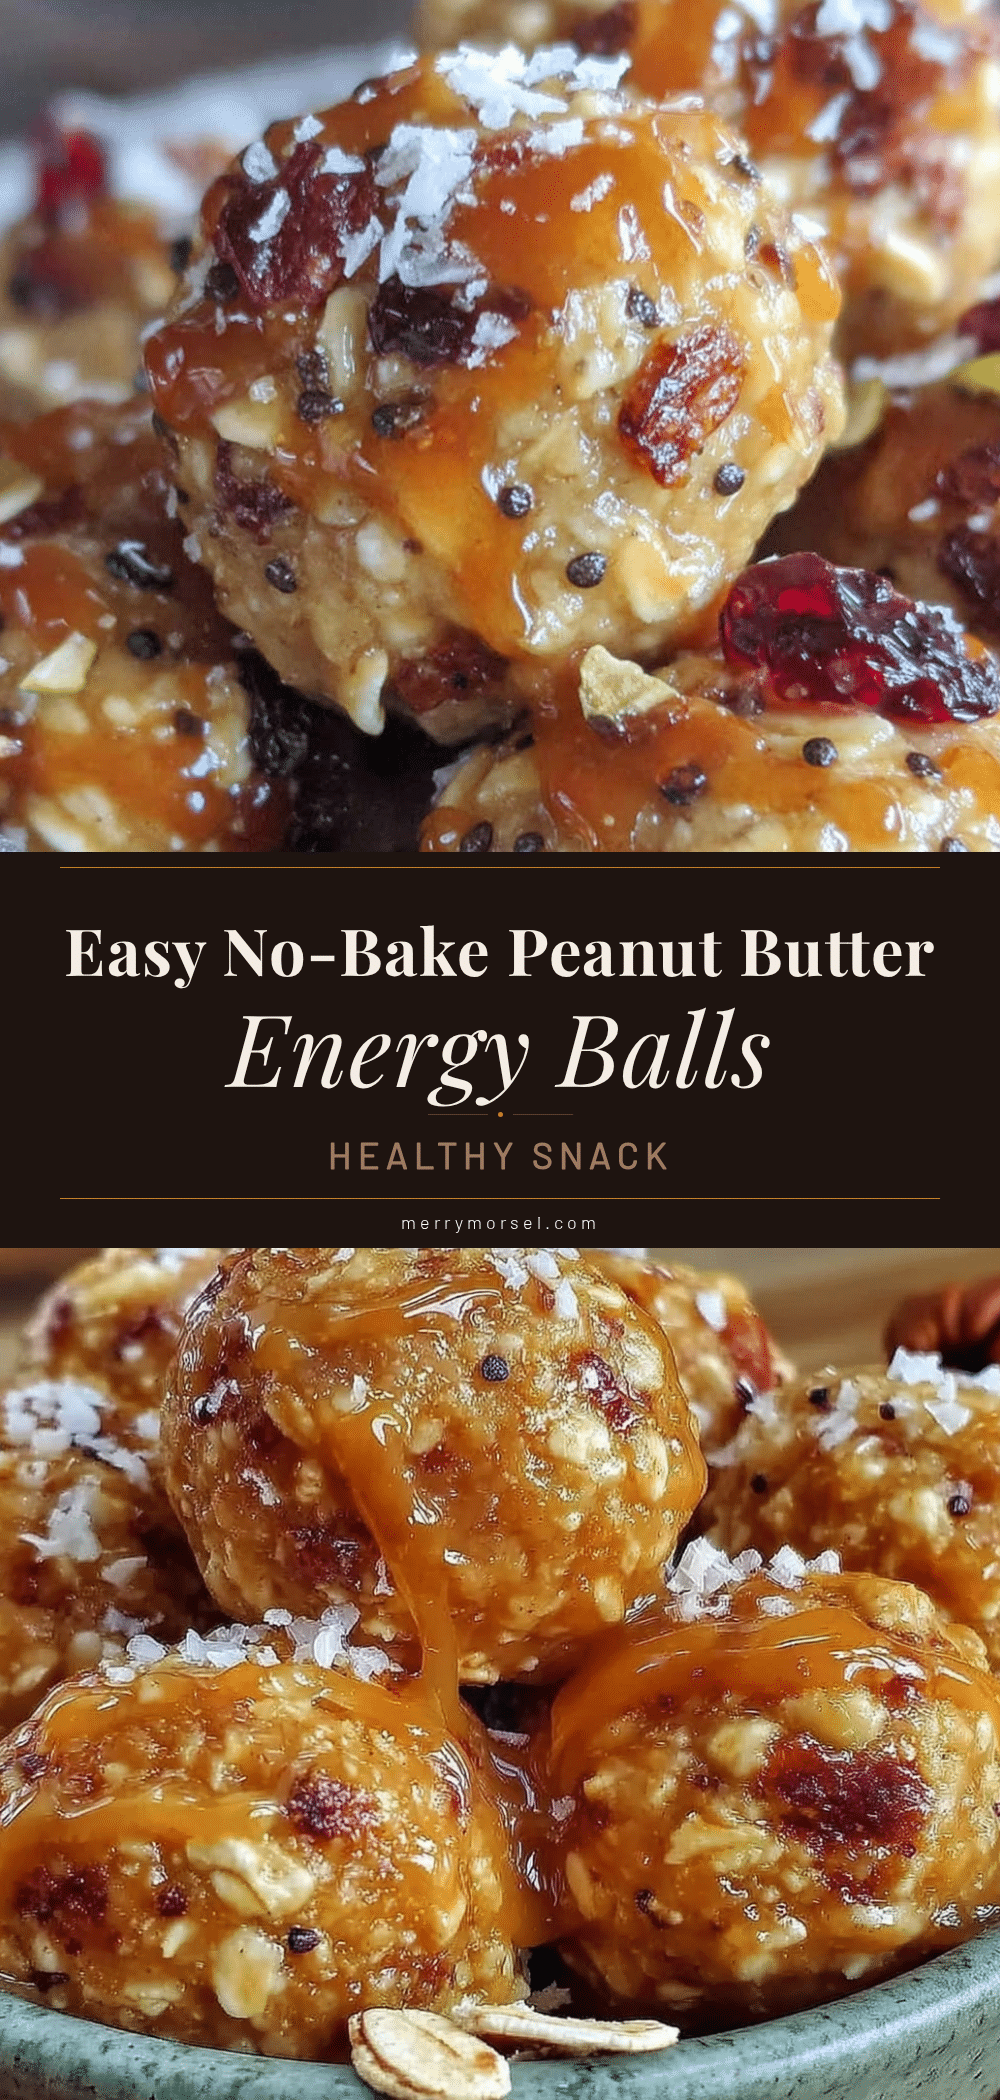
Easy No-Bake Protein Energy Balls Recipe with Oats and Honey Peanut Butter for Quick Healthy Snacks

A quick and easy no-bake recipe for protein energy balls made with oats, honey peanut butter, and protein powder. Perfect for a healthy, grab-and-go snack that is chewy, sweet, and satisfying.
- Prep Time: 10 minutes
- Cook Time: 0 minutes
- Total Time: 40 minutes
- Yield: 20 servings 1x
- Category: Snack
- Cuisine: American
Ingredients
- 1 ½ cups (135g) rolled oats
- 1 cup (250g) honey peanut butter
- ½ cup (45g) vanilla whey protein powder
- 2 tablespoons (30ml) honey
- 2 tablespoons (20g) chia seeds (optional)
- ¼ cup (40g) mini dark chocolate chips (optional)
- 2 tablespoons (14g) ground flaxseed (optional)
- A pinch of salt
Instructions
- Combine dry ingredients: In a mixing bowl, add rolled oats, vanilla whey protein powder, chia seeds, ground flaxseed, and a pinch of salt. Stir well to distribute evenly (about 2 minutes).
- Add wet ingredients: Pour in honey peanut butter and honey to the dry mix. Fold everything together using a spatula or wooden spoon until sticky and dense (3-4 minutes).
- Mix in chocolate chips: Fold in mini dark chocolate chips (1 minute).
- Check consistency: The mixture should hold together when pressed but not be overly wet. If too crumbly, add a teaspoon of water or more honey peanut butter; if too sticky, add more oats (1-2 minutes).
- Roll into balls: Scoop out roughly 1 tablespoon (15g) portions and roll between palms to form compact balls. Place on a parchment-lined baking sheet (5-7 minutes).
- Chill: Refrigerate the tray for at least 30 minutes to firm up the energy balls.
- Store: Transfer to an airtight container once chilled. Keep refrigerated for up to one week or freeze for longer storage.
Notes
Use rolled oats for better texture instead of instant oats. Creamy peanut butter works best for easy rolling. Wet or cold hands help prevent sticking when rolling balls. Chilling is essential to firm up the balls and meld flavors. For nut-free version, substitute peanut butter with sunflower seed butter and chocolate chips with pumpkin seeds. Vegan option available by using maple syrup and plant-based protein powder.
Nutrition
- Serving Size: 1 energy ball (appro
- Calories: 90100
- Sugar: 34
- Sodium: 50
- Fat: 56
- Saturated Fat: 1
- Carbohydrates: 89
- Fiber: 2
- Protein: 56
Keywords: no-bake, protein energy balls, oats, honey peanut butter, healthy snacks, quick snacks, no oven, easy recipe, on-the-go snack


