Love this? Save it for later!
Share the inspiration with your friends
Last summer, I was fumbling around with some leftover cream cheese and a bag of wild huckleberries that a vendor at the Saturday market had pressed into my hands with a knowing smile. I was trying to whip up something simple, but honestly, the kitchen was a bit chaotic—my toddler had decided that the flour was a new kind of sand, and I ended up with a cracked mixing bowl mid-prep. My neighbor, Lila, watched me struggling by the fence and didn’t say anything at first. Then she casually mentioned, “You should try making bars with those berries, cream cheese, and my grandma’s shortbread recipe. It’s foolproof.”
That offhand suggestion turned into a warm afternoon of swapping stories and swapping ingredients. I tweaked the recipe a bit, making the shortbread crust golden and crisp while keeping the cream cheese layer silky and just tangy enough to balance the sweet-tart huckleberries. This recipe for Delicious Huckleberry Cream Cheese Bars with Golden Shortbread Crust isn’t just about a dessert — it’s about a moment shared, a recipe passed along with no fuss or fanfare, just the kind of kitchen exchange that feels like conversation rather than a transaction.
Maybe you’ve been there — juggling a busy day but craving something that hits that perfect sweet spot. Honestly, these bars have stuck with me because they’re simple, comforting, and a little unexpected. Plus, they’re the kind of treat that makes you pause and savor the moment, which, let’s face it, is exactly what we need sometimes.
Why You’ll Love This Recipe
After making these huckleberry cream cheese bars countless times, I can say this recipe has a few standout perks that keep me coming back, and I think you’ll feel the same.
- Quick & Easy: The whole thing comes together in about 45 minutes, including baking time — perfect when you want a homemade treat without spending all day in the kitchen.
- Simple Ingredients: You likely have most of these staples already, and the huckleberries can be swapped with fresh or frozen berries depending on the season.
- Perfect for Gatherings: Whether it’s a casual brunch or a potluck, these bars are always a hit, offering a fresh twist on classic cream cheese desserts.
- Crowd-Pleaser: Kids love the creamy, fruity combo, and adults appreciate the buttery, golden shortbread crust that holds it all together.
- Unbelievably Delicious: The contrast between the crisp crust, smooth cream cheese layer, and juicy huckleberries is, honestly, next-level comforting.
This isn’t your everyday cream cheese bar. The secret is in the crust — it’s buttery and golden, with just enough crunch to give a satisfying bite, while the cream cheese remains silky smooth thanks to a little trick I picked up from a chef friend (I blend it until almost fluffy!). The tartness from the huckleberries keeps the sweetness in check, creating a perfectly balanced bar every time.
For anyone who loves desserts that feel like a hug in every bite, these bars are exactly that — comforting, nostalgic, but with a little something unexpected that keeps you coming back for more.
What Ingredients You Will Need
This recipe uses simple, wholesome ingredients to deliver bold flavor and satisfying texture without the fuss. Most are pantry staples, with fresh or frozen huckleberries adding that seasonal pop.
- For the Golden Shortbread Crust:
- 1 cup (2 sticks, 226g) unsalted butter, softened (I prefer Plugrá for a rich flavor)
- 1/2 cup (100g) granulated sugar
- 2 cups (250g) all-purpose flour (or King Arthur for best consistency)
- 1/4 teaspoon salt
- For the Cream Cheese Layer:
- 16 oz (450g) cream cheese, softened (use full-fat for best texture)
- 2/3 cup (130g) granulated sugar
- 2 large eggs, room temperature
- 1 teaspoon vanilla extract (pure vanilla is key!)
- 2 tablespoons all-purpose flour (helps stabilize the cream cheese layer)
- For the Huckleberry Topping:
- 2 cups fresh or frozen huckleberries (in summer, fresh picked are unbeatable)
- 1/3 cup (65g) granulated sugar
- 1 tablespoon lemon juice (balances the sweetness)
- 1 tablespoon cornstarch (to thicken the topping)
If huckleberries aren’t available, you can swap in blueberries or blackberries without any trouble. For a gluten-free crust, almond flour works well, though the texture shifts a bit. Also, if you prefer dairy-free, you can swap cream cheese and butter with coconut-based alternatives, but I haven’t tried this myself yet.
Equipment Needed
- 9×13-inch (23×33 cm) baking pan — glass or metal works fine
- Mixing bowls (medium and large)
- Electric mixer or sturdy whisk (I’ve done this by hand, but the mixer saves time)
- Rubber spatula for folding and scraping
- Measuring cups and spoons
- Fine mesh sieve (optional, for sifting flour)
- Small saucepan (for cooking the huckleberry topping)
- Cooling rack (for letting the bars cool evenly)
If you don’t have an electric mixer, a strong arm and patience work just fine — I’ve had days where the mixer was packed away, and the bars still turned out delicious. For the baking pan, I personally like glass because it heats evenly, but a metal pan will give a crisper crust edge. Just keep an eye on baking time if you switch!
Preparation Method
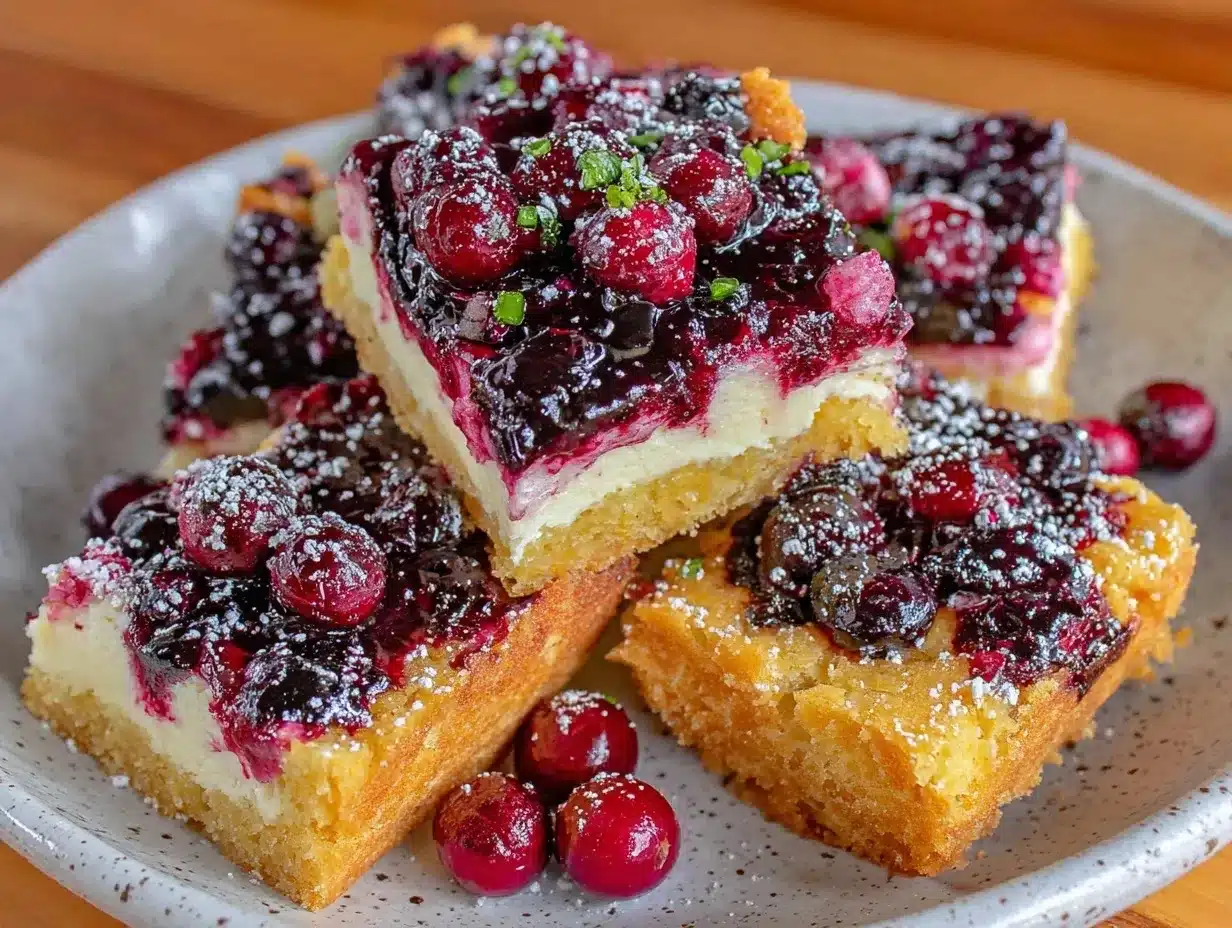
- Prepare the crust: Preheat your oven to 350°F (175°C). In a large bowl, cream together the softened butter and sugar until light and fluffy, about 3-4 minutes using an electric mixer. If you’re whisking by hand, it might take a bit longer, but keep at it! Add the flour and salt, then mix until the dough just comes together — it should feel soft but not sticky. Press the dough evenly into the bottom of your greased 9×13-inch pan. Bake for 15-18 minutes or until the edges start turning a golden brown. Remove from oven and let cool slightly.
- Make the cream cheese layer: While the crust bakes, beat the softened cream cheese and sugar together until smooth and creamy (a few minutes with a mixer). Add the eggs one at a time, mixing well after each addition. Stir in vanilla extract and flour until fully combined. Pour this mixture over the slightly cooled crust, smoothing it out evenly.
- Prepare the huckleberry topping: In a small saucepan over medium heat, combine the huckleberries, sugar, and lemon juice. Cook gently until the berries release their juices and the mixture starts to bubble, about 5 minutes. Stir in cornstarch dissolved in a teaspoon of water and cook for another 1-2 minutes until thickened. Remove from heat and let cool slightly.
- Assemble the bars: Spoon the warm huckleberry topping evenly over the cream cheese layer. Use a knife or skewer to gently swirl the topping into the cream cheese, creating a marbled effect (this gives a pretty visual and mixes flavors nicely). Avoid over-mixing to keep the layers distinct.
- Bake again: Return the pan to the oven and bake for another 30-35 minutes, or until the cream cheese layer is set but still slightly jiggly in the center. The crust edges should be golden and the topping bubbling gently.
- Cool and chill: Let the bars cool completely at room temperature, then refrigerate for at least 3 hours or overnight. This chilling step is crucial — it helps the bars set firmly, making them easier to cut and enjoy.
- Serve: Cut into squares with a sharp knife, wiping the blade between cuts for clean edges. Serve chilled or at room temperature.
If your cream cheese layer cracks a bit on top, don’t worry — it still tastes fantastic. The swirling technique also helps disguise minor imperfections. And if you notice the crust edges browning too fast, tent with foil halfway through baking.
Cooking Tips & Techniques
From my kitchen experiments, a few things make a real difference with these huckleberry cream cheese bars.
- Softened cream cheese is key: Make sure it’s room temperature before mixing to avoid lumps and to get that smooth, creamy texture you want.
- Don’t over-mix the batter: Once you add eggs and flour to the cream cheese, mix just until combined. Overworking can add air and cause cracks.
- Swirl gently: When adding the huckleberry topping, a light hand keeps the layers beautiful and distinct — too much stirring, and you lose that pretty marbled look.
- Watch your oven temperature: Every oven is different. If you know yours runs hot, lower the temperature by 10 degrees to prevent the crust from burning before the filling sets.
- Chill for firm bars: Cutting bars too soon after baking often means messy slices. Letting them rest in the fridge overnight works wonders.
I learned the hard way that skipping the chill step leads to a gooey mess, and yes, I’ve burned a batch of crusts trying to rush the process. But honestly, cooking is about these little lessons — and now these bars come out perfect more often than not.
Variations & Adaptations
Once you’ve nailed the classic version, there’s room to play around with these bars.
- Seasonal Fruit Swap: Try swapping huckleberries for raspberries, blackberries, or even diced peaches to match the season.
- Gluten-Free Option: Use almond flour or a 1:1 gluten-free baking mix for the crust. The texture will be a bit different but still delicious.
- Dairy-Free Adaptation: Substitute cream cheese with dairy-free cream cheese and butter with coconut oil or vegan butter. The flavor shifts but keeps the same creamy satisfaction.
- Nutty Crunch: Add chopped toasted almonds or pecans to the crust or sprinkle on top before baking for extra texture.
- Swirl with Chocolate: Add a drizzle of melted dark chocolate over the berry topping before baking for a decadent twist.
I’ve tried adding a bit of lemon zest to the cream cheese layer once, which added a lovely brightness that paired well with the berries. It’s fun to experiment with these bars and find your perfect combination.
Serving & Storage Suggestions
These bars are best served chilled or at room temperature — the cream cheese layer is silky and cool, while the crust stays crisp.
- For a special touch, dust with powdered sugar or serve with a dollop of whipped cream.
- Pair with a cup of strong coffee or a light herbal tea for a cozy afternoon treat.
- Store leftovers in an airtight container in the refrigerator for up to 4 days.
- Bars freeze well! Wrap individual squares in plastic wrap and place in a freezer-safe container for up to 3 months. Thaw overnight in the fridge before serving.
- Flavors deepen after a day or two, so if you can wait, the bars taste even better the next day.
Nutritional Information & Benefits
One serving (about a 2×2 inch square) of these huckleberry cream cheese bars contains approximately:
| Calories | 280 kcal |
|---|---|
| Fat | 18g |
| Carbohydrates | 24g |
| Protein | 4g |
| Sugar | 16g |
Huckleberries are packed with antioxidants and vitamin C, adding a nutritious punch to this indulgent treat. The cream cheese provides protein and calcium, while the shortbread crust delivers satisfying richness. While not a low-calorie dessert, these bars can fit nicely into a balanced diet when enjoyed in moderation. For gluten-free or dairy-free needs, the suggested swaps make this recipe accessible to many dietary preferences.
Personally, I appreciate having a dessert that feels like a treat but has some nutritional goodness thanks to the berries — it’s a little win in my wellness routine.
Conclusion
These Delicious Huckleberry Cream Cheese Bars with Golden Shortbread Crust are a perfect blend of buttery, creamy, and fruity that I keep coming back to. They’re simple enough for an everyday treat but special enough to impress friends without the fuss. I love how the recipe came from a casual chat with a neighbor and grew into something I make again and again — a little reminder that great food often comes from the easiest moments shared.
Feel free to make this recipe your own: switch up the berries, add nuts, or try a dairy-free version. I’d love to hear how you make it yours, so don’t hesitate to drop a comment or share your adaptations. Honestly, nothing makes me happier than knowing a recipe found a little home in your kitchen too.
Here’s to sweet moments and good company, one bar at a time.
FAQs
Can I use frozen huckleberries for this recipe?
Yes! Frozen huckleberries work well. Just thaw and drain any excess juice before using to avoid a soggy crust.
How do I prevent the cream cheese layer from cracking?
Make sure to use softened cream cheese and avoid overmixing. Baking at a moderate temperature and chilling the bars overnight also helps maintain a smooth top.
Can I prepare these bars ahead of time?
Absolutely. They taste great made a day in advance and stored in the fridge, which also makes cutting easier.
What can I substitute if I don’t have huckleberries?
Blueberries, blackberries, or raspberries are excellent substitutes that will provide a similar tartness and texture.
Is there a way to make these bars gluten-free?
Yes, swap the all-purpose flour in the crust for almond flour or a gluten-free baking mix, but expect a slightly different texture.
Pin This Recipe!
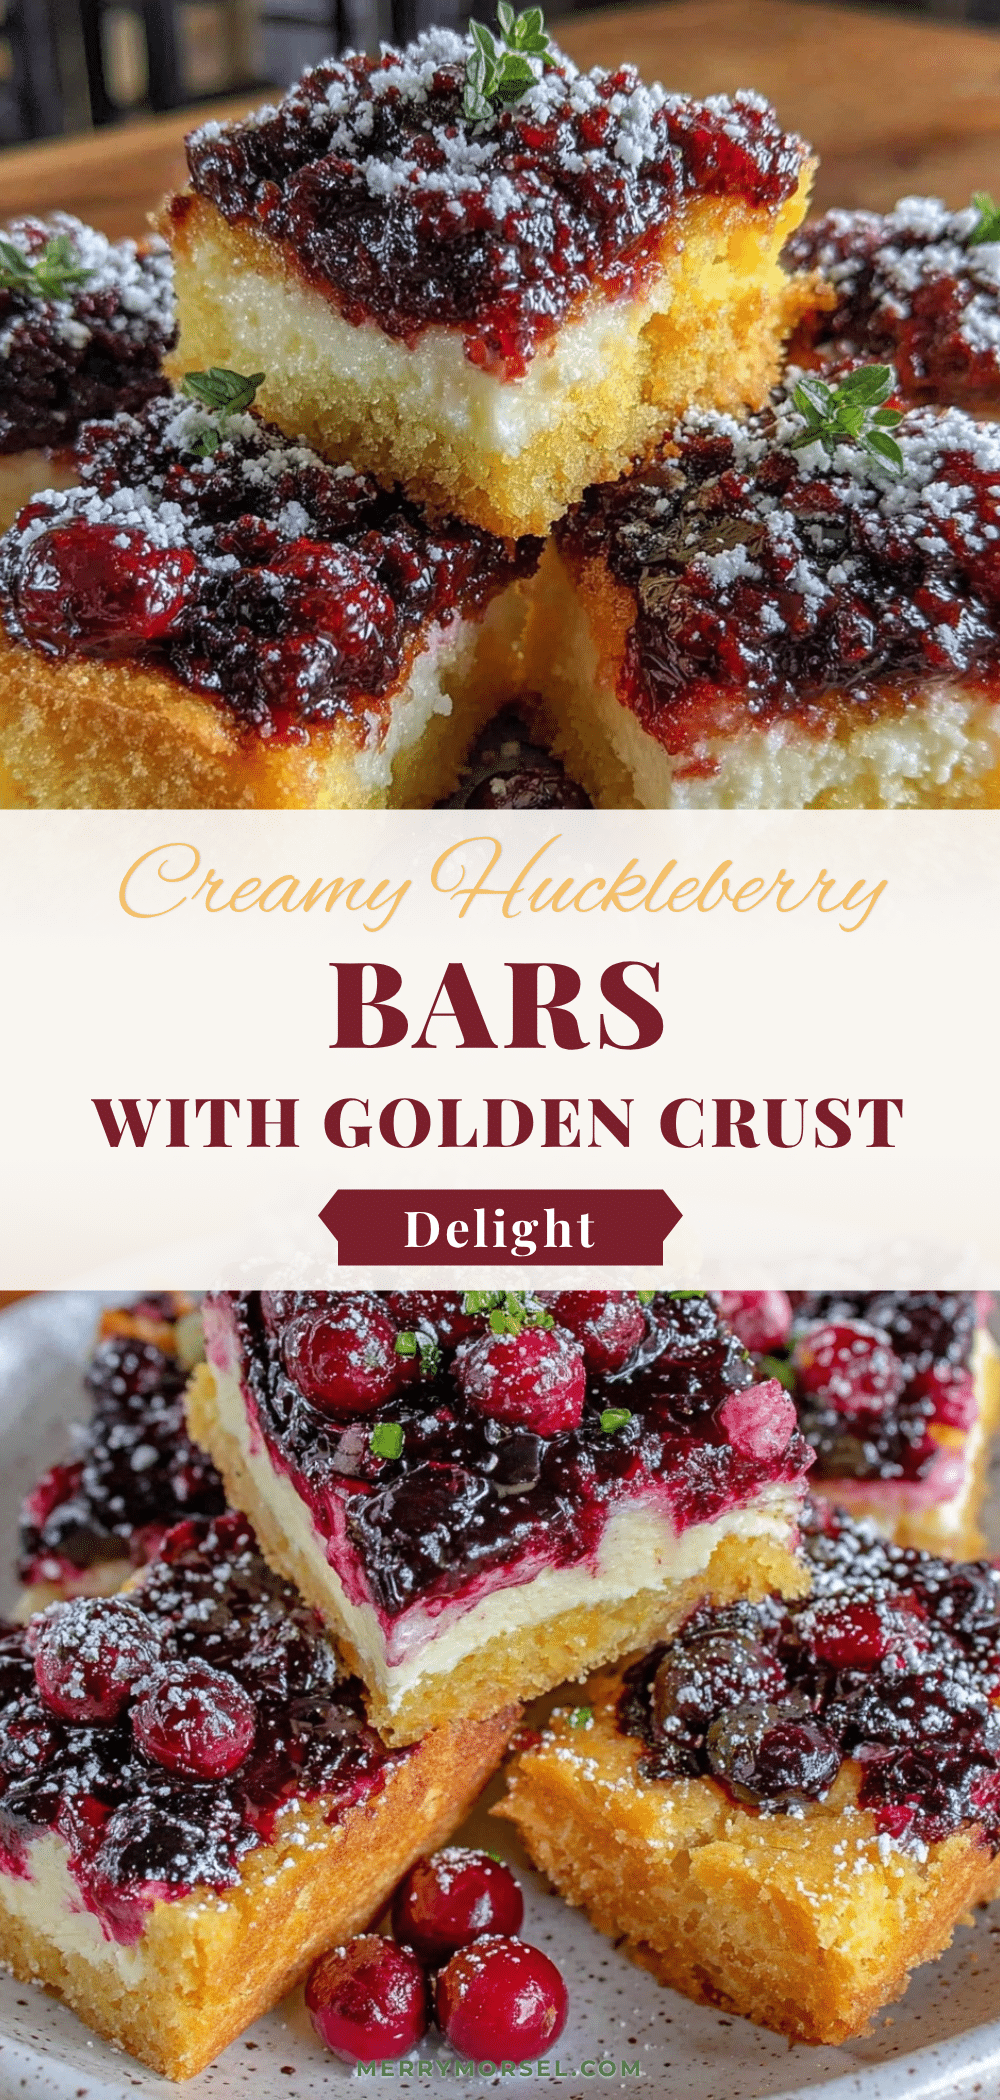
Huckleberry Cream Cheese Bars with Golden Shortbread Crust
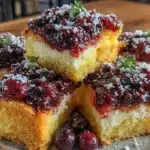
Delicious bars featuring a buttery golden shortbread crust, a silky cream cheese layer, and a sweet-tart huckleberry topping. Perfect for a quick, comforting homemade treat.
- Prep Time: 15 minutes
- Cook Time: 45 minutes
- Total Time: 1 hour
- Yield: 12 servings 1x
- Category: Dessert
- Cuisine: American
Ingredients
- 1 cup (2 sticks, 226g) unsalted butter, softened
- 1/2 cup (100g) granulated sugar
- 2 cups (250g) all-purpose flour
- 1/4 teaspoon salt
- 16 oz (450g) cream cheese, softened
- 2/3 cup (130g) granulated sugar
- 2 large eggs, room temperature
- 1 teaspoon vanilla extract
- 2 tablespoons all-purpose flour
- 2 cups fresh or frozen huckleberries
- 1/3 cup (65g) granulated sugar
- 1 tablespoon lemon juice
- 1 tablespoon cornstarch
Instructions
- Preheat oven to 350°F (175°C). In a large bowl, cream together softened butter and sugar until light and fluffy, about 3-4 minutes with an electric mixer.
- Add flour and salt, mix until dough just comes together. Press dough evenly into the bottom of a greased 9×13-inch baking pan.
- Bake crust for 15-18 minutes or until edges are golden brown. Remove from oven and let cool slightly.
- Beat softened cream cheese and sugar until smooth and creamy. Add eggs one at a time, mixing well after each addition.
- Stir in vanilla extract and flour until fully combined. Pour cream cheese mixture over the slightly cooled crust and smooth evenly.
- In a small saucepan over medium heat, combine huckleberries, sugar, and lemon juice. Cook until berries release juices and mixture bubbles, about 5 minutes.
- Stir in cornstarch dissolved in a teaspoon of water and cook for another 1-2 minutes until thickened. Remove from heat and let cool slightly.
- Spoon warm huckleberry topping evenly over cream cheese layer. Gently swirl topping into cream cheese with a knife or skewer to create a marbled effect.
- Return pan to oven and bake for 30-35 minutes, until cream cheese layer is set but slightly jiggly in center and crust edges are golden.
- Let bars cool completely at room temperature, then refrigerate for at least 3 hours or overnight to set.
- Cut into squares with a sharp knife, wiping blade between cuts. Serve chilled or at room temperature.
Notes
Use softened cream cheese at room temperature to avoid lumps. Avoid over-mixing the cream cheese layer to prevent cracks. Chill bars overnight for best slicing results. Tent with foil if crust edges brown too quickly. Frozen huckleberries can be used after thawing and draining excess juice.
Nutrition
- Serving Size: 1 bar (approximately
- Calories: 280
- Sugar: 16
- Fat: 18
- Carbohydrates: 24
- Protein: 4
Keywords: huckleberry bars, cream cheese bars, shortbread crust, easy dessert, homemade bars, berry dessert, summer dessert