Love this? Save it for later!
Share the inspiration with your friends
Introduction
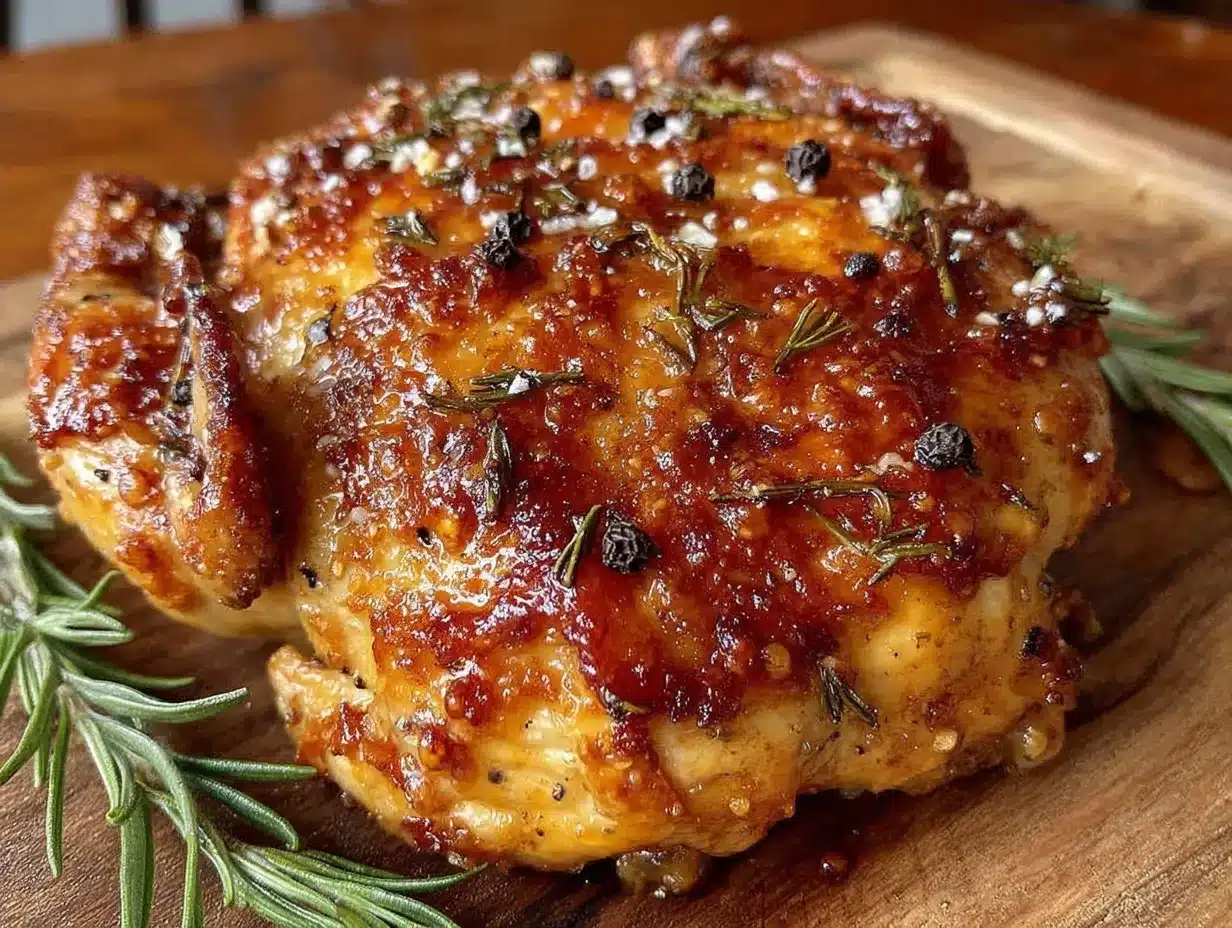
“I thought I knew how to roast chicken,” my neighbor Mark confessed last summer while we were swapping summer grilling tips on his back porch. “But then I tried this crispy dry brine chicken overnight method, and honestly, it changed my whole approach.” I wasn’t expecting to pick up a game-changing cooking tip from a guy who usually just grills burgers and hot dogs, but there I was, watching him toss salt and herbs on a whole chicken like some kind of kitchen wizard. The next day, the bird came out with this irresistible golden crust and juicy, flavorful meat that made me forget every other roast chicken recipe I’d tried before.
Let me tell you, the magic lies in the dry brine—and giving that chicken time to soak it all in overnight. You know that feeling when you bite into something so crispy and juicy at the same time, it’s like a little celebration in your mouth? That’s exactly what this recipe delivers. Honestly, it’s simple but feels special every time. Maybe you’ve been there, hunting for that perfect roast chicken recipe that’s fuss-free but never disappoints. Well, this might just be your new go-to. And do I make a mess? Oh yes, every time. But the payoff is worth every crumb and spilled pinch of salt.
Since that day on Mark’s porch, I’ve made this crispy dry brine chicken overnight recipe countless times—perfect for weeknight dinners or when friends come over with zero stress but maximum flavor. I’m excited to share it with you, so let’s get into why this method is a keeper.
Why You’ll Love This Recipe
This crispy dry brine chicken overnight recipe isn’t just another roast chicken—it’s the fruit of many trials, errors, and happy accidents in the kitchen. Tested thoroughly on busy weeknights and family dinners alike, it’s become a favorite because it reliably delivers juicy meat with a crackling skin that’s hard to beat. Let me walk you through why this recipe stands out:
- Quick & Easy: While it needs overnight resting, the hands-on time is under 15 minutes—perfect for prepping before bed or in the morning.
- Simple Ingredients: Uses everyday pantry staples—sea salt, pepper, and a few herbs. No need for specialty spices or hard-to-find items.
- Perfect for Cozy Dinners: Whether you’re feeding a family or just yourself, the crispy dry brine method gives you a restaurant-quality result without the fuss.
- Crowd-Pleaser: The savory, juicy meat and crispy skin consistently get rave reviews—even from picky eaters.
- Unbelievably Delicious: The dry brine locks in moisture, intensifies flavor, and creates that signature crackly skin that’s simply addictive.
What makes this recipe different? Well, instead of slathering the chicken in wet brine or marinades, the dry brine method uses salt and herbs applied directly to the skin and cavity, pulling moisture out and then reabsorbing it. This technique, combined with the overnight rest, guarantees a texture and flavor balance that’s honestly hard to replicate any other way. It’s comfort food, yes, but with a crispy punch that makes you savor each bite. Plus, you’ll impress dinner guests with minimal effort—no stress, just perfect roast chicken every time.
What Ingredients You Will Need
This crispy dry brine chicken overnight recipe relies on straightforward, wholesome ingredients to create bold flavor and satisfying texture without complicated steps. Most of these are pantry staples, and substitutions can be made easily to fit your taste or dietary needs.
- Whole chicken (about 4 to 5 pounds / 1.8 to 2.3 kg) – preferably organic or free-range for the best taste and texture
- Coarse sea salt (about 1 tablespoon / 18 grams) – essential for the dry brine; I recommend Maldon or Diamond Crystal for consistent texture
- Freshly ground black pepper (1 teaspoon / 2 grams) – adds a subtle heat and depth
- Garlic powder (1 teaspoon / 3 grams) – optional, but it adds a lovely savory note
- Dried thyme (1 teaspoon / 1 gram) – classic herb for poultry; fresh can be used if available (use 1 tablespoon fresh minced)
- Olive oil (2 tablespoons / 30 ml) – to help crisp the skin and add richness
- Lemon zest (from 1 lemon) – optional, but brightens the flavor beautifully
- Butter (2 tablespoons / 28 grams, softened) – optional, for rubbing under the skin for extra moisture and flavor
If you want to swap ingredients, feel free to use sea salt flakes if you don’t have coarse salt, or substitute dried herbs with Italian seasoning blend. For a dairy-free version, just skip the butter or replace it with a plant-based spread.
Equipment Needed
- Roasting pan or rimmed baking sheet: A sturdy pan that fits your whole chicken comfortably. I personally like using a rimmed sheet lined with a wire rack for even heat circulation.
- Wire rack: Keeps the chicken elevated so the skin crisps all around. If you don’t have one, placing the chicken on a bed of chopped vegetables works too.
- Kitchen twine: For trussing the chicken to help it cook evenly. You can skip this, but trussing helps the bird hold its shape.
- Meat thermometer: Super helpful for checking doneness without slicing into the bird and losing juices.
- Mixing bowls and small spoon: For mixing and applying the dry brine.
For budget-friendly options, a simple baking sheet and a metal cooling rack will do wonders. I’ve found that a meat thermometer is worth the investment—trust me, it takes the guesswork out of roasting!
Preparation Method
- Prepare your chicken: Remove the giblets from the cavity if included. Pat the chicken dry thoroughly with paper towels—this step is key to getting crispy skin.
- Mix the dry brine: In a small bowl, combine 1 tablespoon coarse sea salt, 1 teaspoon black pepper, garlic powder, and dried thyme. Add the lemon zest at this stage if using.
- Apply the dry brine: Rub the salt and herb mixture evenly all over the chicken, including inside the cavity. Don’t forget under the skin if you can gently separate it from the breast—this is where butter comes in if you’re using it. Rub softened butter under the skin for extra juiciness.
- Truss the chicken: Tie the legs together with kitchen twine and tuck the wing tips under the body. This helps it cook evenly and look neat. If you forgot the twine (like I did once), just wing it—no pun intended!
- Rest the chicken uncovered: Place the chicken breast-side up on a wire rack set over a rimmed baking sheet. Pop it into the fridge overnight (or at least 8 hours). This dry brine process draws moisture out, then reabsorbs it, seasoning the meat deeply and drying the skin for crispiness.
- Remove from fridge before roasting: About 30 minutes before cooking, take your chicken out to come to room temperature. This helps it cook more evenly.
- Preheat your oven: Set it to 425°F (220°C). High heat is crucial for that crispy skin.
- Roast the chicken: Place the chicken in the oven and roast for about 1 hour to 1 hour 15 minutes, depending on size. Use a meat thermometer inserted into the thickest part of the thigh (without touching bone)—it should read 165°F (74°C) when done.
- Rest before carving: Let the chicken rest at room temperature for 10-15 minutes after roasting. This locks in the juices and makes carving easier.
Tip: If the skin is browning too fast before the chicken is cooked through, loosely tent it with foil. Also, keep an eye (and nose)—that first sizzle and aroma when the chicken hits the hot oven is a good sign you’re on the right track!
Cooking Tips & Techniques
Getting that perfect balance of crispy skin and juicy meat is where this recipe shines, but it takes a few insider tips to nail it every time:
- Pat the chicken dry: Moisture on the skin steams rather than crisps. Use paper towels to get it as dry as possible before applying the dry brine.
- Don’t skip the overnight rest: The magic is in the time. If you’re in a rush, even a few hours help, but overnight is ideal.
- Use a wire rack: Elevating the chicken allows air to circulate under it, crisping the entire bird evenly.
- Monitor your oven temperature: Ovens vary, so use an oven thermometer if you have one. Too low and you lose crispiness; too high and you risk burning.
- Check doneness with a thermometer: Avoid slicing the chicken too early; the juices will run clear when fully cooked, but a thermometer is the safest bet.
- Let it rest: Resting keeps the juices inside the meat instead of running out on your cutting board.
From personal experience, I once skipped drying the chicken properly and ended up with soggy skin—not fun. Another time, I left the brine on less than 8 hours and noticed a big difference in flavor depth. Trust the process, even if it feels like waiting is the hardest part!
Variations & Adaptations
This recipe is wonderfully flexible and can be adapted to suit different tastes and dietary needs:
- Herb Variations: Swap thyme for rosemary, sage, or tarragon depending on what you have or prefer. Fresh herbs work beautifully if you have the time.
- Spicy Twist: Add a pinch of smoked paprika or cayenne pepper to the dry brine for a subtle kick that wakes up the flavor.
- Gluten-Free & Paleo Friendly: This recipe is naturally gluten-free and paleo-friendly as is, just double-check that your seasonings contain no additives.
- Cooking Method: While roasting is classic, you can try the dry brine on chicken pieces cooked on a grill or air fryer for a quicker meal with similar results.
- Butter-Free: For dairy-free, simply omit the butter and rely on olive oil for moisture and crispiness.
One of my favorite personal tweaks is using lemon zest and fresh thyme together—it adds this fresh brightness that makes the chicken taste like a summer picnic. I’ve also tested this dry brine on turkey breasts with great success during holidays.
Serving & Storage Suggestions
Serve this crispy dry brine chicken warm, ideally on a platter garnished with fresh herbs and lemon wedges. It pairs perfectly with roasted vegetables, mashed potatoes, or a crisp green salad. For drinks, a chilled glass of white wine or a light beer complements the savory, juicy flavor.
Leftovers? No problem. Store any uneaten chicken in an airtight container in the refrigerator for up to 3 days. To keep the skin crisp, reheat in a 375°F (190°C) oven for about 10-15 minutes instead of microwaving. If freezing, wrap tightly and consume within 2 months for best taste.
Flavors actually deepen after a day, making this recipe just as good, if not better, the next day—perfect for meal prep or quick lunches.
Nutritional Information & Benefits
This crispy dry brine chicken overnight recipe provides a great source of lean protein, essential vitamins like B6 and niacin, and minerals such as phosphorus and selenium. Using skin-on adds fat, but it’s mostly healthy monounsaturated fats from olive oil and butter, which support heart health in moderation.
It’s naturally low in carbs and gluten-free, making it suitable for many dietary plans. If you’re watching sodium, you can reduce salt slightly but keep in mind it’s key for the dry brine effect. Personally, I appreciate that this recipe offers a wholesome, satisfying meal without complicated ingredients or additives—just honest, flavorful chicken.
Conclusion
If you’ve been searching for a reliable roast chicken recipe that’s simple yet delivers unforgettable crispy skin and juicy, tender meat, this crispy dry brine chicken overnight method is your answer. It respects your time, your ingredients, and your palate—no fuss, just fantastic flavor.
I love this recipe because it feels like a little kitchen victory every time I make it. You can tweak it to your liking, impress guests, or enjoy a cozy meal with minimal stress. Go ahead, give it a try and let me know how it turns out in the comments below—I’m always curious about your own kitchen stories and tweaks!
Remember, cooking is all about experimenting and making recipes your own. Happy roasting!
FAQs
How long should I dry brine the chicken for best results?
Ideally, dry brine for at least 8 hours or overnight. This gives the salt time to penetrate and tenderize the meat while drying the skin for crispiness.
Can I use this dry brine method on chicken pieces instead of a whole bird?
Yes! Apply the dry brine evenly on pieces like thighs or breasts and refrigerate uncovered for several hours before cooking. Adjust cooking time accordingly.
What if I forget to take the chicken out of the fridge before roasting?
It’s best to let the chicken come to room temperature for about 30 minutes before roasting to ensure even cooking. If you forget, just roast it a bit longer and check the internal temperature carefully.
How do I know when the chicken is fully cooked?
Use a meat thermometer inserted into the thickest part of the thigh (avoiding bone). It should read 165°F (74°C) for safe, juicy chicken.
Can I prepare the dry brine chicken earlier and freeze it before roasting?
It’s best to dry brine and roast fresh for optimal crispiness. However, you can freeze the chicken after brining but before cooking; thaw fully in the fridge before roasting.
Pin This Recipe!
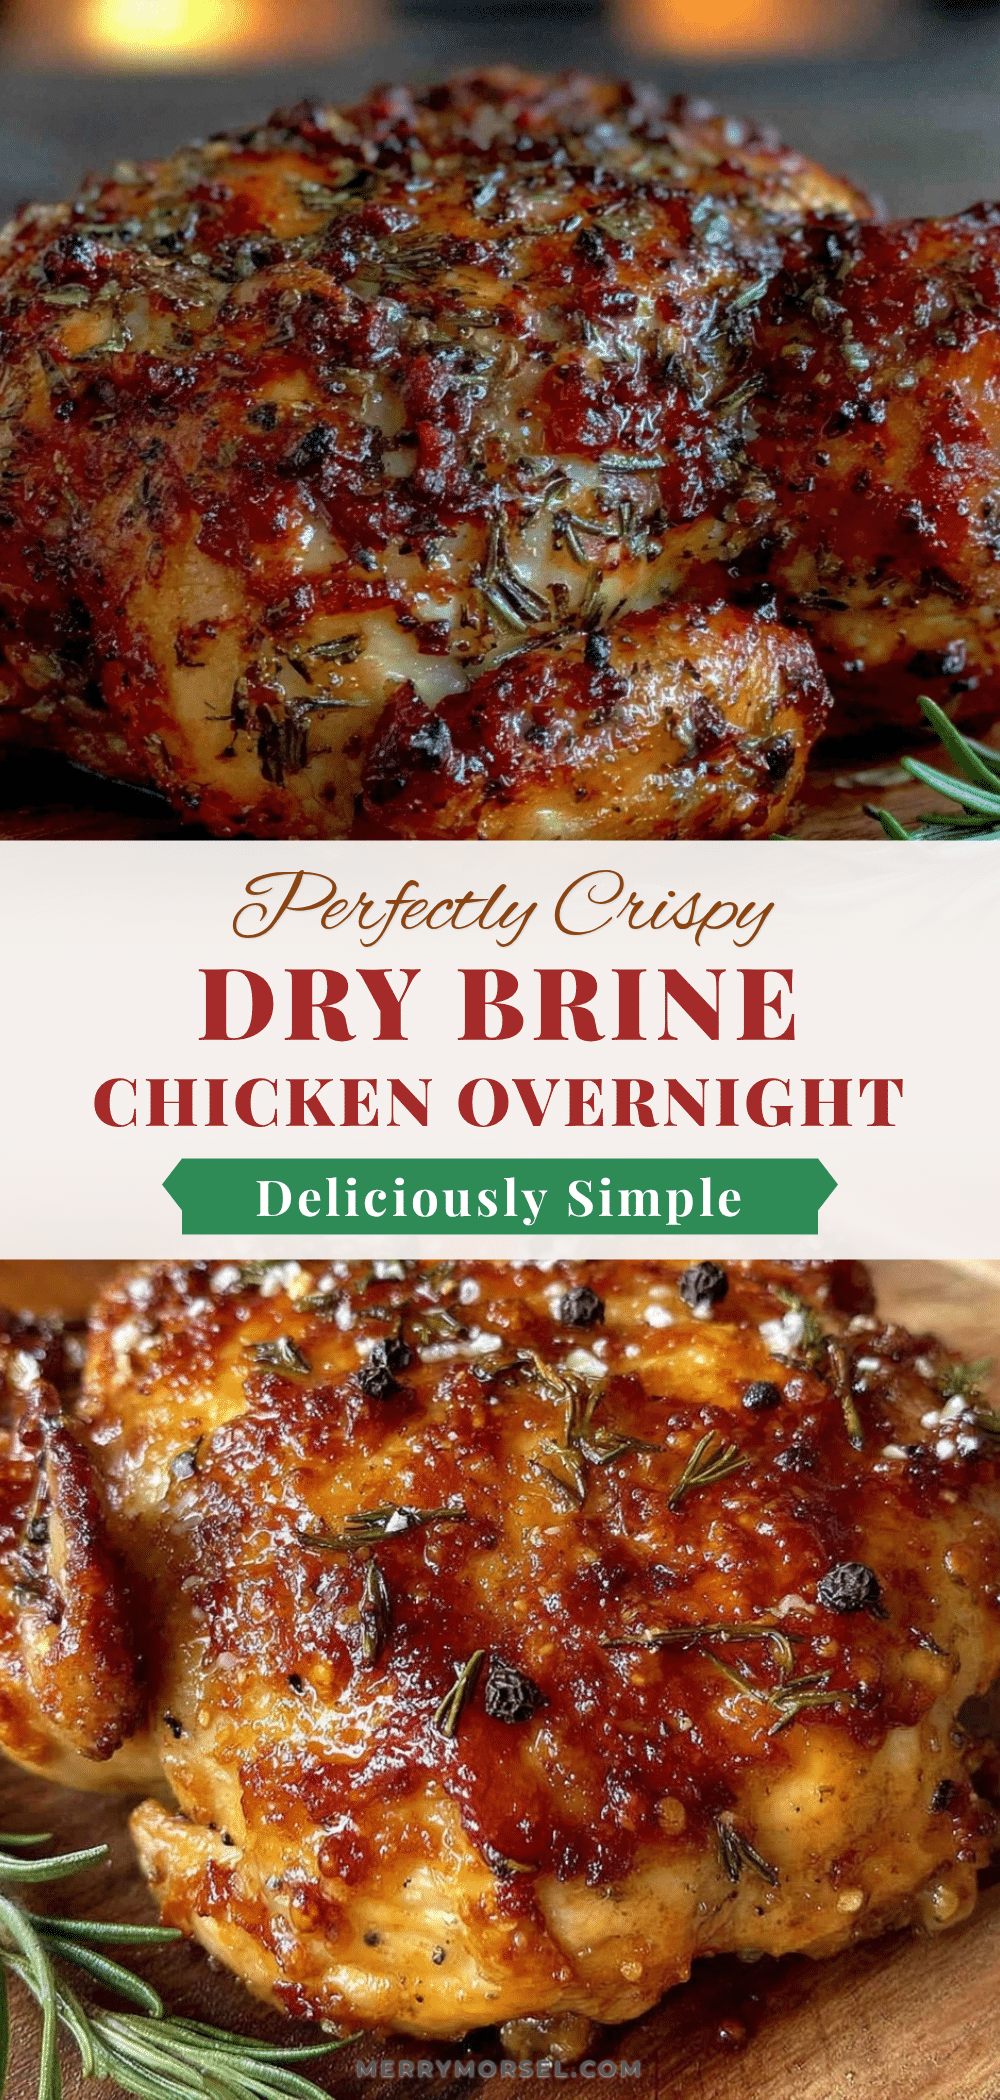
Crispy Dry Brine Chicken Overnight Recipe for Juicy Flavorful Meat

This recipe uses a dry brine method applied overnight to produce a roast chicken with irresistibly crispy skin and juicy, flavorful meat. Simple ingredients and minimal hands-on time make it perfect for weeknight dinners or special occasions.
- Prep Time: 15 minutes
- Cook Time: 1 hour 15 minutes
- Total Time: overnight plus 1 hour 30 minutes
- Yield: 4 to 6 servings 1x
- Category: Main Course
- Cuisine: American
Ingredients
- 1 whole chicken (4 to 5 pounds / 1.8 to 2.3 kg), preferably organic or free-range
- 1 tablespoon coarse sea salt (about 18 grams)
- 1 teaspoon freshly ground black pepper (about 2 grams)
- 1 teaspoon garlic powder (optional, about 3 grams)
- 1 teaspoon dried thyme (or 1 tablespoon fresh minced thyme)
- 2 tablespoons olive oil (about 30 ml)
- Lemon zest from 1 lemon (optional)
- 2 tablespoons softened butter (optional, about 28 grams)
Instructions
- Remove giblets from the chicken cavity if included and pat the chicken dry thoroughly with paper towels.
- In a small bowl, combine coarse sea salt, black pepper, garlic powder, dried thyme, and lemon zest if using.
- Rub the salt and herb mixture evenly all over the chicken, including inside the cavity and under the skin if possible. Rub softened butter under the skin if using.
- Truss the chicken by tying the legs together with kitchen twine and tucking wing tips under the body.
- Place the chicken breast-side up on a wire rack set over a rimmed baking sheet and refrigerate uncovered overnight or at least 8 hours.
- Remove the chicken from the fridge about 30 minutes before roasting to come to room temperature.
- Preheat the oven to 425°F (220°C).
- Roast the chicken for about 1 hour to 1 hour 15 minutes, until a meat thermometer inserted into the thickest part of the thigh reads 165°F (74°C).
- If the skin browns too quickly, tent loosely with foil.
- Let the chicken rest at room temperature for 10-15 minutes before carving.
Notes
Patting the chicken dry is essential for crispy skin. The overnight dry brine deeply seasons the meat and dries the skin for crispiness. Use a meat thermometer to ensure doneness. Let the chicken rest after roasting to lock in juices. If skin browns too fast, tent with foil. For dairy-free, omit butter or use plant-based spread.
Nutrition
- Serving Size: 1 serving (approxima
- Calories: 450
- Sodium: 700
- Fat: 30
- Saturated Fat: 8
- Carbohydrates: 1
- Protein: 40
Keywords: dry brine chicken, roast chicken, crispy chicken skin, overnight chicken, easy chicken recipe, juicy roast chicken, simple chicken dinner