Love this? Save it for later!
Share the inspiration with your friends
Introduction
“I never thought I’d be making perfect corn on the cob without a grill,” my friend Linda confessed one humid July afternoon. We were at her apartment’s tiny balcony, surrounded by the hum of city life, and honestly, the idea of firing up a grill in a cramped urban space sounded like a disaster waiting to happen. But she pulled out this simple, genius method for cooling and prepping corn on the cob that doesn’t need a grill at all. It was a game-changer.
The summer heat was relentless, and the last thing we wanted was more smoke or fire hazards in the middle of a city block. Instead, Linda showed me how to get that luscious, buttery corn taste without the fuss, using just a cooler and some boiling water. Maybe you’ve been there—craving that sweet, juicy corn but stuck without a grill or outdoor space. This recipe reminds me that sometimes, the best kitchen hacks come from necessity and a bit of creative thinking.
Honestly, the process felt almost too easy to be true. There was a moment when Linda absentmindedly dropped a cob into the cooler and almost forgot about it while we chatted. When she finally remembered and pulled it out, the corn was tender, flavorful, and ready to eat. That little cracked bowl I was holding might have gotten a butter spill or two, but it was worth every messy moment. This easy cooler corn on the cob recipe has stuck with me ever since—perfect for those summer days when you want fresh, delicious corn without the grill drama.
Why You’ll Love This Recipe
- Quick & Easy: This recipe comes together in under 30 minutes, making it perfect for busy summer afternoons or last-minute dinner ideas.
- Simple Ingredients: You likely have everything on hand—fresh corn, water, butter, and a few seasonings.
- Perfect for Small Spaces: No need for a bulky grill or outdoor setup; this method works great in apartments, dorms, or anywhere you lack outdoor space.
- Crowd-Pleaser: Whether it’s a family gathering or a casual potluck, this corn on the cob always earns compliments and second helpings.
- Unbelievably Delicious: The natural sweetness of the corn shines through with a juicy, tender bite that rivals any grilled version.
This isn’t just another boiled corn recipe. The secret lies in using your cooler as a gentle steaming chamber, which slowly cooks the corn and locks in moisture and flavor. It’s a technique I picked up from Linda’s urban kitchen experiments, and it’s helped me keep that “just off the grill” vibe without the charcoal mess. Plus, you get to skip the smoky flare-ups and unpredictable grill temps—just consistent, perfect corn every time.
Let me tell you, this recipe isn’t just convenient; it’s comforting. Maybe you’ve been there, craving that sweet corn but stuck inside on a rainy summer day or without access to outdoor cooking. This easy cooler corn on the cob method feels like a little summer miracle, turning a simple vegetable into a celebration.
What Ingredients You Will Need
This recipe uses simple, wholesome ingredients to deliver bold flavor and satisfying texture without the fuss. Most of these are pantry staples or fresh finds from your local market, and you can tweak them to suit your taste or dietary needs.
- Fresh Corn on the Cob: 4-6 ears, husked and cleaned. Look for plump kernels and tight husks for the best sweetness.
- Water: About 4 quarts (3.8 liters) for boiling—plain tap water works fine.
- Unsalted Butter: 4 tablespoons (60 grams), softened. I like using Plugrá for its creamy texture, but any good-quality butter will do.
- Salt: 1 teaspoon (5 grams), plus more for seasoning after cooking.
- Black Pepper: Freshly ground, to taste.
- Optional Seasonings: Smoked paprika, chili powder, or fresh herbs like chopped parsley or cilantro add a nice twist.
- Lemon or Lime Wedges: For a bright, fresh squeeze right before serving.
If you want to adapt this recipe for dietary preferences or availability, here are a couple of tips:
- Use vegan butter or olive oil for a dairy-free version.
- Swap salt for a low-sodium alternative if watching sodium intake.
- Try adding a sprinkle of Parmesan cheese after cooking for a savory touch.
Equipment Needed

- Large Cooler: A standard picnic cooler (about 30-48 quarts) works best to hold boiling water and the corn. I’ve used both hard plastic and soft-sided coolers; just be sure yours can handle hot water without warping.
- Large Pot or Kettle: For boiling the water before pouring it into the cooler.
- Tongs: To safely remove hot corn from the cooler.
- Kitchen Towels or Oven Mitts: For handling hot lids and pots.
- Butter Knife or Pastry Brush: To spread butter evenly on the cooked corn.
If you don’t have a large cooler, a large insulated container or even a clean, heat-safe bucket could work in a pinch, but the cooler’s insulation is key to slow, even cooking. I once tried this with a thermos flask (don’t laugh), and while it cooked the corn, it only fit one ear at a time—so patience is a virtue! For best results and safety, stick with a cooler designed to withstand heat.
Preparation Method
- Bring Water to a Boil: Fill a large pot or kettle with about 4 quarts (3.8 liters) of water and bring it to a rolling boil. This should take roughly 10-15 minutes depending on your stove and pot size.
- Prepare the Cooler: While waiting, husk and clean 4-6 ears of fresh corn. Remove all silk and trim the stalks if needed. Place the ears inside the cooler, arranging them so they’re not too tightly packed.
- Pour Boiling Water Into the Cooler: Carefully pour the boiling water over the corn, making sure the ears are fully submerged. Use tongs or a long spoon to gently press the corn down if some float.
- Seal and Let Sit: Close the cooler lid tightly and let the corn sit in the hot water for 25-30 minutes. The insulation will gently steam the corn, cooking it evenly without overcooking.
- Check for Doneness: After 25 minutes, open the cooler and test one ear by piercing a kernel with a fork. It should be tender but not mushy. If needed, leave it for another 5 minutes.
- Remove and Season: Use tongs to carefully lift the hot corn out. Pat it dry on a kitchen towel, then spread softened butter over each ear. Sprinkle with salt, pepper, and any optional seasonings.
- Serve Warm: Add lemon or lime wedges on the side for a fresh squeeze, and enjoy immediately.
Pro tip: If you want to prep this ahead of time, keep the cooked corn wrapped in foil or beeswax wraps in a warm oven (about 200°F / 95°C) to maintain temperature without drying out. Just avoid letting it sit in the cooler for more than 45 minutes, or it can get too soft.
Cooking Tips & Techniques
One of the best things about this easy cooler corn on the cob method is how forgiving it is, but a few tips will help you nail perfect corn every time.
- Use Fresh Corn: The fresher the corn, the sweeter and juicier it will be. Try to get ears that feel heavy for their size and have bright green husks.
- Don’t Skip the Boiling Step: Pouring boiling water into the cooler is key to jump-start the cooking. Lukewarm water won’t do the trick.
- Seal the Cooler Well: The insulation traps the heat and steams the corn gently. If your cooler’s lid isn’t tight, wrap a towel around it to keep heat in.
- Watch the Time: Leaving it too long can overcook the corn, making kernels mushy. If you’re multitasking, set a timer to check at 25 minutes.
- Butter While Warm: Butter spreads best when the corn is hot, melting into every crevice for that rich flavor.
I remember the first time I tried this, I got distracted by a phone call and left the corn in the cooler for almost an hour. The kernels were a bit too soft, but the flavor was still fantastic. You know that feeling when a little mess-up still turns out tasty? That’s the charm of this recipe—flexible and forgiving.
Variations & Adaptations
This easy cooler corn on the cob recipe is super versatile and easy to adjust based on what you have or your dietary needs.
- Spicy Kick: Mix softened butter with chili powder, garlic powder, and a dash of cayenne before spreading on the corn for a fiery twist.
- Herb-Infused: Add fresh chopped basil, cilantro, or thyme to your butter for a fragrant, garden-fresh flavor.
- Cheesy Delight: Sprinkle grated Parmesan or cotija cheese over buttered corn for a savory, salty contrast.
- Vegan Option: Use a plant-based butter or brush with olive oil and sprinkle with nutritional yeast for a cheesy flavor without dairy.
- Cold Corn Salad: After cooking, cool the corn completely, cut off the kernels, and toss with diced tomatoes, bell peppers, and a light vinaigrette for a refreshing summer salad.
One variation I tried last summer was adding a splash of lime juice and a sprinkle of smoked paprika right before serving. It reminded me a bit of the street corn I had in Mexico City—minus the grill smoke, of course! It’s a great way to customize the recipe to your mood or occasion.
Serving & Storage Suggestions
Serve your easy cooler corn on the cob warm, fresh from the butter bath, with a little extra sprinkled salt and freshly ground pepper. I love pairing it with light summer salads or grilled vegetables for a complete meal. It’s the perfect side for dishes like crispy garlic chicken or tangy barbecue ribs.
For storage, wrap leftover corn tightly in aluminum foil or place in an airtight container in the refrigerator for up to 2 days. To reheat, briefly steam it in a microwave-safe dish with a damp paper towel covering or warm it in a skillet over medium heat with a bit of butter.
Flavors tend to mellow and deepen if you let the butter and seasonings sit a bit, so leftovers can be surprisingly good chilled or at room temperature for a picnic or lunchbox treat.
Nutritional Information & Benefits
Each ear of corn provides about 90-100 calories, mostly from natural carbohydrates and fiber. Corn is a good source of antioxidants, including lutein and zeaxanthin, which support eye health. It’s naturally gluten-free and low in fat, making it a great option for many dietary needs.
Using unsalted butter keeps sodium in check, and you can easily swap for plant-based butter to make it vegan-friendly. Plus, corn’s fiber content helps with digestion, and its natural sweetness means you won’t need extra sugar or syrups to enjoy this summer favorite.
From a wellness standpoint, this recipe feels like a light indulgence that still honors wholesome ingredients and simple preparation.
Conclusion
This easy cooler corn on the cob recipe is a summer staple that I keep coming back to, especially when I’m short on outdoor space or just craving something simple and satisfying. It’s quick, mess-free, and honestly, kind of fun to watch the corn steam away in an insulated cooler instead of over hot coals.
Feel free to tweak the seasonings or try one of the flavor variations to make it your own. I love how this recipe invites experimentation without the pressure of complicated steps or fancy equipment.
Give it a go, and let me know how your corn turns out! Maybe you’ll discover a new favorite way to enjoy this classic that fits your lifestyle perfectly. Happy cooking and happy summer!
Frequently Asked Questions
- Can I use frozen corn for this recipe? Frozen corn is best cooked differently; this method works best with fresh ears for optimal flavor and texture.
- How many ears of corn can I cook at once in the cooler? Most standard coolers can comfortably hold 4-6 ears, depending on size. Don’t overfill to ensure even cooking.
- Is this method safe for all types of coolers? Use only coolers that can withstand hot water without damage. Avoid soft or foam coolers that might warp or leak.
- Can I add seasonings to the water in the cooler? It’s best to keep the water plain; season and butter the corn after cooking for better flavor control.
- How do I know when the corn is done? The kernels should be tender when pierced with a fork, usually after 25-30 minutes in the hot water inside the cooler.
Pin This Recipe!
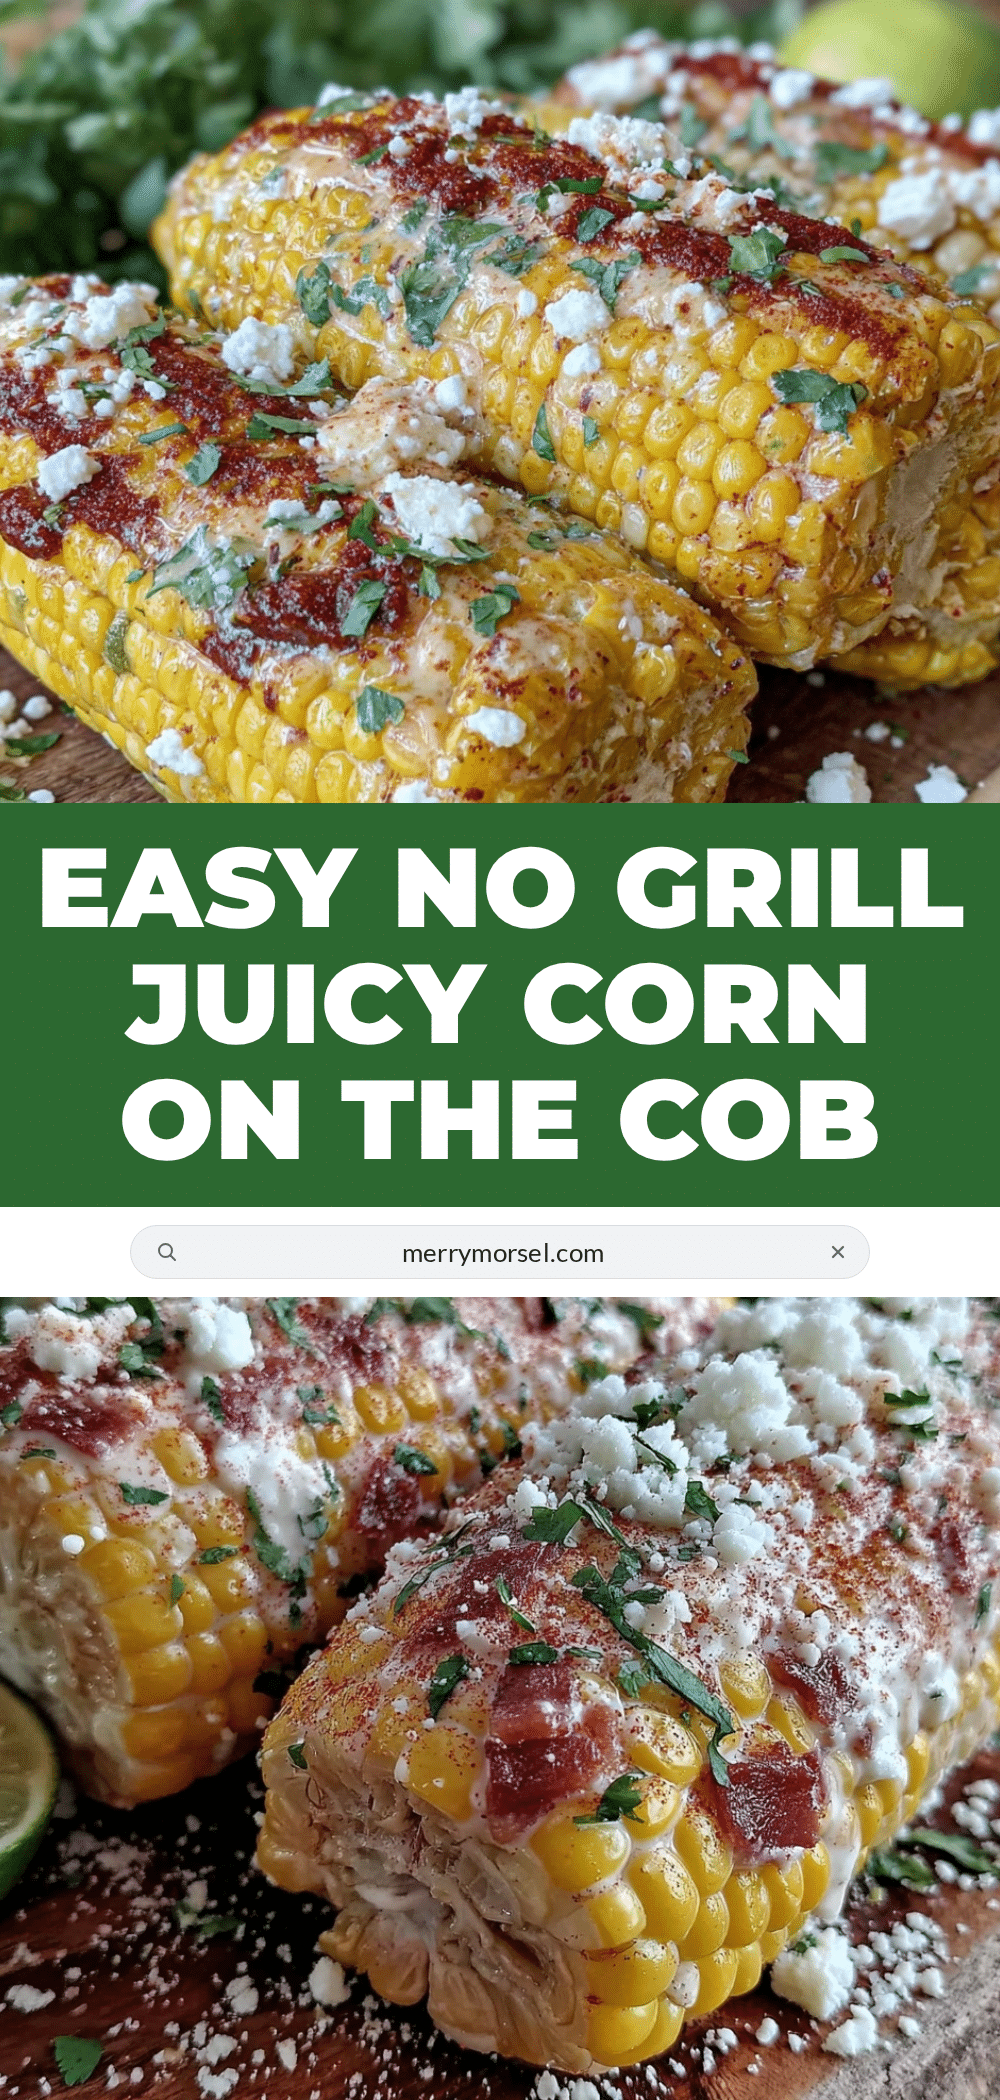
Easy Cooler Corn on the Cob Recipe No Grill Needed Perfect for Summer
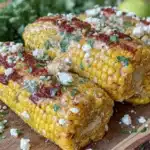
A simple and ingenious method to cook perfect corn on the cob using a cooler and boiling water, ideal for small spaces and summer days without a grill.
- Prep Time: 10 minutes
- Cook Time: 25-30 minutes
- Total Time: 35-40 minutes
- Yield: 4-6 servings 1x
- Category: Side Dish
- Cuisine: American
Ingredients
- 4–6 ears fresh corn on the cob, husked and cleaned
- 4 quarts (3.8 liters) water for boiling
- 4 tablespoons (60 grams) unsalted butter, softened
- 1 teaspoon (5 grams) salt, plus more for seasoning after cooking
- Freshly ground black pepper, to taste
- Optional seasonings: smoked paprika, chili powder, fresh herbs like chopped parsley or cilantro
- Lemon or lime wedges, for serving
Instructions
- Bring 4 quarts (3.8 liters) of water to a rolling boil in a large pot or kettle (about 10-15 minutes).
- While waiting, husk and clean 4-6 ears of fresh corn, removing all silk and trimming stalks if needed. Place the ears inside the cooler, arranging them so they are not too tightly packed.
- Carefully pour the boiling water over the corn in the cooler, making sure the ears are fully submerged. Use tongs or a long spoon to gently press the corn down if some float.
- Seal the cooler lid tightly and let the corn sit in the hot water for 25-30 minutes to steam gently and cook evenly.
- After 25 minutes, open the cooler and test one ear by piercing a kernel with a fork; it should be tender but not mushy. If needed, leave it for another 5 minutes.
- Use tongs to carefully lift the hot corn out. Pat dry on a kitchen towel, then spread softened butter over each ear. Sprinkle with salt, pepper, and any optional seasonings.
- Serve warm with lemon or lime wedges for a fresh squeeze.
Notes
Use fresh corn for best sweetness and juiciness. Ensure the cooler lid seals tightly to trap heat. Do not leave corn in the cooler for more than 45 minutes to avoid mushy kernels. Butter spreads best when corn is hot. For dairy-free, use vegan butter or olive oil. Leftovers can be wrapped and stored in the refrigerator for up to 2 days.
Nutrition
- Serving Size: 1 ear of corn
- Calories: 95
- Sugar: 6
- Sodium: 230
- Fat: 5
- Saturated Fat: 3
- Carbohydrates: 15
- Fiber: 2
- Protein: 3
Keywords: corn on the cob, cooler cooking, no grill corn, summer recipe, easy corn recipe, boiled corn, buttered corn, small space cooking