Love this? Save it for later!
Share the inspiration with your friends
“I wasn’t planning on baking that day,” I confessed to myself as I rummaged through the cluttered cupboard last Saturday afternoon. The power had flickered off briefly, leaving me staring at a half-empty red velvet cake mix box that had been sitting there since Valentine’s Day. Honestly, I was just looking for something sweet to lift the gloom of a rainy weekend. That’s when I remembered a little tweak a barista at a local coffee shop once mentioned while we were chatting about desserts. She swore by adding sour cream to boxed cake mixes for an unbeatable moistness. I figured, what the heck, let me try this ‘Moist Red Velvet Cake Mix Hack for a Perfect Dessert.’ The kitchen got a bit messy (I spilled the buttermilk, of course), but what came out of the oven surprised me—the cake was unbelievably tender, with that classic red velvet flavor, only better. Maybe you’ve been there too, staring at a boxed mix wondering if it could ever taste homemade. Well, this hack changed how I think about cake mixes forever, and I keep making it, especially when I’m short on time but craving something special.”
Why You’ll Love This Recipe
After testing dozens of cake mix tweaks, this Moist Red Velvet Cake Mix Hack stands out for a bunch of reasons. Let me break it down for you:
- Quick & Easy: Whips up in under 40 minutes, perfect for those last-minute dessert emergencies or casual get-togethers.
- Simple Ingredients: No need to hunt for fancy stuff—you probably have sour cream, buttermilk, and eggs right in your fridge.
- Perfect for Celebrations: Whether it’s a birthday, a cozy date night, or just because, this cake fits the bill.
- Crowd-Pleaser: I promise, even the skeptics at my last potluck went back for seconds.
- Unbelievably Delicious: That moist crumb and subtle tang from the sour cream? It’s like the cake is whispering, “Eat me!”
This isn’t your average red velvet cake mix recipe. The magic lies in swapping some water for buttermilk and stirring in sour cream, which adds richness and a velvety texture that boxed mixes usually lack. Plus, a splash of vanilla and a pinch of vinegar help balance the flavors perfectly. Honestly, it’s the kind of dessert that makes you close your eyes on the first bite and smile like you just found a secret. I love how it’s fuss-free yet feels like you spent hours in the kitchen. This recipe became my go-to whenever I want to impress guests without the stress.
What Ingredients You Will Need
This recipe uses simple, wholesome ingredients to deliver bold flavor and satisfying texture without any fuss. Most are pantry staples, and if you don’t have one or two, there are easy swaps you can make.
- 1 box red velvet cake mix (I recommend Betty Crocker for best texture and color consistency)
- 1 cup buttermilk (240 ml; adds tang and moisture; if unavailable, mix 1 cup milk with 1 tbsp lemon juice and let sit 5 minutes)
- 1/2 cup sour cream (120 ml; use full-fat for richness, but low-fat works too)
- 1/2 cup vegetable oil (120 ml; neutral flavor, but can substitute with melted coconut oil)
- 3 large eggs (room temperature; helps with structure and richness)
- 1 tsp vanilla extract (5 ml; enhances flavor depth)
- 1 tsp white vinegar (5 ml; brightens the red color and balances sweetness)
If you want a dairy-free version, swap the buttermilk and sour cream with coconut yogurt or almond milk mixed with a bit of vinegar. For a gluten-free twist, you might try a gluten-free red velvet cake mix, though texture will vary slightly. Seasonal tip: in cooler months, adding a pinch of cinnamon or nutmeg can give a warm undertone without overpowering the classic flavor.
Equipment Needed
- Mixing bowls (one large for batter mixing; I use glass bowls for easy cleanup)
- Whisk or electric hand mixer (a stand mixer works but isn’t necessary)
- Measuring cups and spoons (essential for accuracy; I swear by my stainless steel set)
- 9×13 inch (23×33 cm) baking pan or two 8-inch (20 cm) cake pans
- Spatula for scraping bowls (silicone ones are gentle and flexible)
- Cooling rack (helps the cake cool evenly without sogginess)
If you don’t have a hand mixer, you can whisk by hand—it just takes a bit more elbow grease, especially to get the batter smooth. For budget-friendly options, silicon spatulas and glass bowls from dollar stores work surprisingly well. Just make sure your baking pan is greased or lined with parchment paper to avoid sticking. I learned the hard way once when the cake stuck to a cold pan and I had to slice it out piece by piece!
Preparation Method
- Preheat your oven to 350°F (175°C). Grease and flour your baking pan(s) or line with parchment paper; this helps ensure a clean release.
- Mix the wet ingredients: In your large bowl, whisk together 1 cup buttermilk, 1/2 cup sour cream, 1/2 cup vegetable oil, 3 large eggs, 1 tsp vanilla extract, and 1 tsp white vinegar until smooth. This usually takes about 2-3 minutes by hand or 1 minute with a mixer.
- Add the dry mix: Slowly pour in the red velvet cake mix. Gently fold with a spatula or beat on low speed just until combined—overmixing can make the cake tough. The batter should be thick but pourable.
- Pour the batter into your prepared pan(s), smoothing the top with a spatula for even baking.
- Bake: Place in the oven and bake for 30-35 minutes (for 9×13 inch) or about 25-30 minutes (for 8-inch rounds). Check doneness by inserting a toothpick in the center—it should come out with just a few moist crumbs.
- Cool: Let the cake cool in the pan for 15 minutes, then transfer to a wire rack to cool completely before frosting. This step is crucial to avoid melting your frosting.
If you notice the edges browning too fast, tent loosely with foil halfway through baking. Also, don’t open the oven door too often or the cake might sink. When mixing, I sometimes forget to soften the sour cream, which makes blending a bit harder, but it still works out fine. Just a small kitchen adventure!
Cooking Tips & Techniques
To get that perfect moist crumb every time, here are a few tricks I’ve picked up:
- Room temperature ingredients: Eggs, sour cream, and buttermilk blend better and trap air more effectively, leading to a lighter texture.
- Don’t overmix the batter: Once the dry ingredients are added, mix just until you don’t see streaks of flour. Overmixing develops gluten, making the cake dense.
- Use buttermilk or acidulated milk: The acidity reacts with the baking soda in the cake mix, helping it rise and keeping it tender.
- Check the oven temperature: Oven temps vary—if your cake consistently comes out dry, try lowering the heat by 10-15°F (5-8°C) and baking a little longer.
- Let it cool properly: Frosting warm cake leads to melting and sliding. Patience pays off!
Once, I baked straight from the fridge without letting the eggs warm up first, and the batter separated a bit—lesson learned. Also, I recommend investing in an oven thermometer if your oven is old or unreliable; it’s a game-changer for consistent baking. Multitasking tip: while the cake is baking, clean your mixing bowls and prep your frosting, so everything flows smoothly.
Variations & Adaptations
This recipe is surprisingly versatile—here are some ways to make it your own:
- Dairy-free: Swap buttermilk and sour cream with coconut milk mixed with lemon juice, and use a dairy-free cake mix.
- Flavor twist: Add a teaspoon of espresso powder to the batter to deepen the chocolate notes in the red velvet.
- Healthier version: Use Greek yogurt instead of sour cream to add protein and reduce fat, plus swap oil for applesauce for lower calories.
For a fun seasonal spin, I once added fresh raspberries to the batter (about 1/2 cup), gently folded in at the end, and it made the cake pop with a tart surprise. If you prefer cupcakes, this batter works beautifully—just reduce baking time to about 18-22 minutes. You can also try baking this in a bundt pan for a stunning presentation. Just remember to adjust baking times accordingly.
Serving & Storage Suggestions
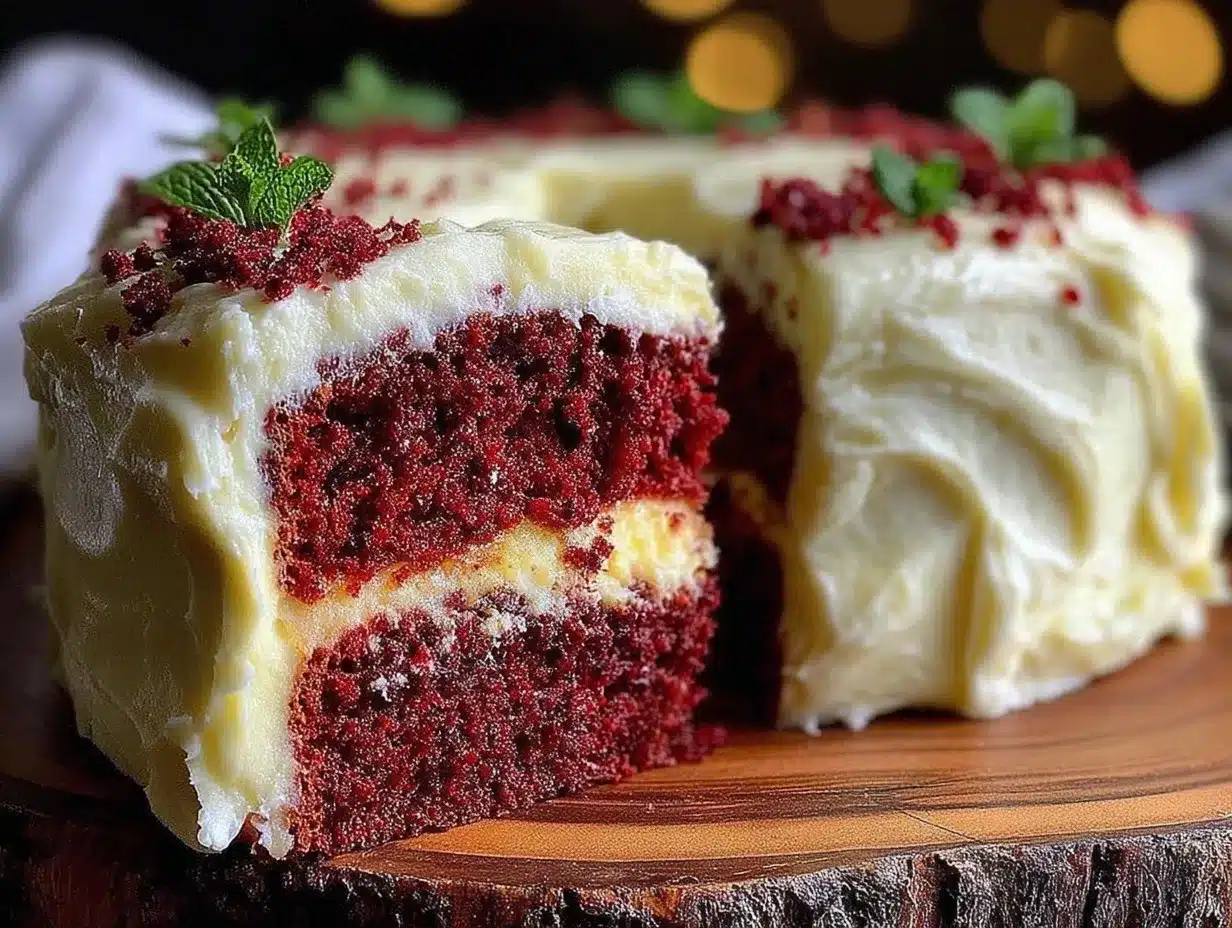
The classic way to serve red velvet is with cream cheese frosting—tangy, creamy, and sweet. I like to chill the cake for about an hour after frosting to let the flavors meld and the frosting set perfectly. Serve at room temperature; cold cake tends to mute flavors.
This cake pairs wonderfully with a cup of black coffee or a glass of milk to balance the sweetness. For an extra indulgent touch, top with fresh berries or a sprinkle of toasted pecans.
Store leftovers in an airtight container in the refrigerator for up to 4 days. You can also freeze unfrosted cake layers wrapped tightly in plastic wrap and foil for up to 2 months. To reheat, thaw overnight in the fridge and bring to room temp before serving, or warm gently in a microwave for 15-20 seconds. The moistness holds up well, but frosting may soften.
Flavors actually deepen a little after a day, making this one of those cakes that tastes even better the next day. I’ve learned not to rush into slicing it immediately—patience really pays off here.
Nutritional Information & Benefits
Per serving (based on 12 servings): approximately 320 calories, 12g fat, 45g carbohydrates, 3g protein.
This recipe’s key ingredients bring more than just taste to the table. The buttermilk and sour cream add calcium and probiotics, which are good for gut health. Using real eggs contributes protein and essential vitamins. Switching to Greek yogurt or applesauce can boost protein and reduce fat if you want a lighter version.
Keep in mind, traditional red velvet cake contains gluten and dairy, so if you have allergies or sensitivities, try the dairy-free and gluten-free adaptations mentioned earlier. Honestly, I appreciate how this recipe balances indulgence with approachable nutrition—it feels like a treat without too much guilt.
Conclusion
This Moist Red Velvet Cake Mix Hack for a Perfect Dessert has become a staple in my kitchen because it’s just that good and so easy. It’s perfect for anyone who loves the charm of boxed cake mixes but wishes they were moister, richer, and more homemade. The simple swaps and little tricks make all the difference—plus, you get that satisfying, velvety crumb every time.
Feel free to tweak the ingredients to your liking or dietary needs—this recipe is forgiving and happy to adapt. I love how it turns a humble cake mix into a showstopper with minimal effort and maximum flavor. Let me know if you try it out or have your own tweaks to share—I’m always up for swapping tips and stories. Now, go ahead and treat yourself—you deserve it!
FAQs
Can I use regular milk instead of buttermilk?
Yes, but for best results, acidulate your milk by adding 1 tablespoon of lemon juice or white vinegar to 1 cup of milk, letting it sit for 5 minutes before using.
How do I keep my red velvet cake moist for longer?
Wrap leftover cake tightly in plastic wrap and store in the refrigerator. Bringing it to room temperature before serving helps restore softness.
Can I make this recipe into cupcakes?
Absolutely! Use cupcake liners and bake for 18-22 minutes, checking doneness with a toothpick.
What frosting pairs best with this cake?
Classic cream cheese frosting is ideal. Its tanginess balances the sweet, rich cake perfectly.
Is it necessary to add vinegar to the batter?
While not mandatory, vinegar enhances the cake’s red color and balances the sweetness, making it worth adding.
Pin This Recipe!
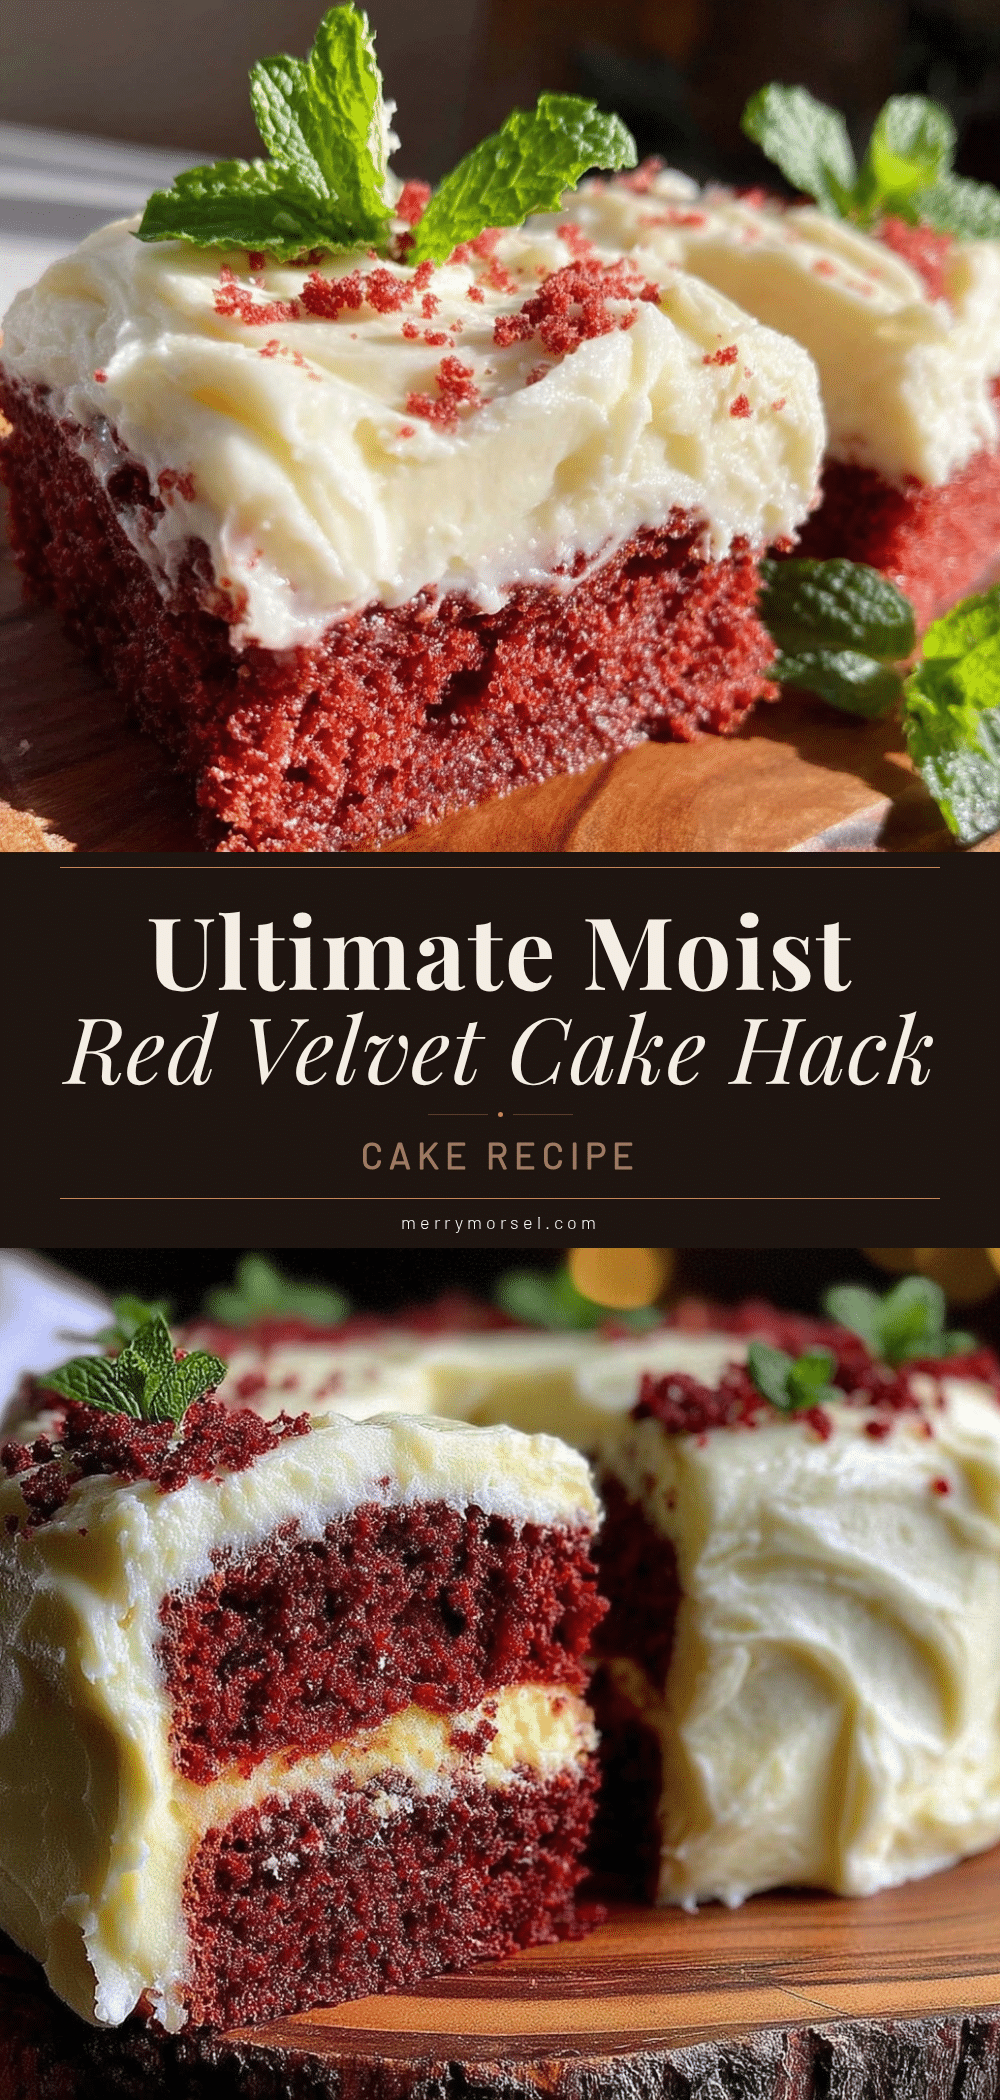
Moist Red Velvet Cake Mix Hack Easy Recipe for Perfect Dessert

A quick and easy red velvet cake mix hack that uses sour cream and buttermilk to create a moist, tender, and flavorful cake perfect for celebrations and last-minute desserts.
- Prep Time: 10 minutes
- Cook Time: 30-35 minutes
- Total Time: 40-45 minutes
- Yield: 12 servings 1x
- Category: Dessert
- Cuisine: American
Ingredients
- 1 box red velvet cake mix (Betty Crocker recommended)
- 1 cup buttermilk (240 ml; or 1 cup milk + 1 tbsp lemon juice, let sit 5 minutes)
- 1/2 cup sour cream (120 ml; full-fat preferred)
- 1/2 cup vegetable oil (120 ml; can substitute with melted coconut oil)
- 3 large eggs (room temperature)
- 1 tsp vanilla extract (5 ml)
- 1 tsp white vinegar (5 ml)
Instructions
- Preheat your oven to 350°F (175°C). Grease and flour your baking pan(s) or line with parchment paper.
- In a large bowl, whisk together buttermilk, sour cream, vegetable oil, eggs, vanilla extract, and white vinegar until smooth (2-3 minutes by hand or 1 minute with mixer).
- Slowly add the red velvet cake mix to the wet ingredients. Gently fold with a spatula or beat on low speed just until combined; avoid overmixing.
- Pour the batter into prepared pan(s) and smooth the top with a spatula.
- Bake for 30-35 minutes for a 9×13 inch pan or 25-30 minutes for two 8-inch rounds. Check doneness with a toothpick; it should come out with a few moist crumbs.
- Let the cake cool in the pan for 15 minutes, then transfer to a wire rack to cool completely before frosting.
Notes
Use room temperature eggs, sour cream, and buttermilk for best texture. Avoid overmixing the batter to prevent toughness. Tent with foil if edges brown too quickly. Let cake cool completely before frosting to avoid melting.
Nutrition
- Serving Size: 1 slice (1/12 of cak
- Calories: 320
- Fat: 12
- Carbohydrates: 45
- Protein: 3
Keywords: red velvet cake, cake mix hack, moist cake, easy dessert, sour cream cake, buttermilk cake, quick cake recipe