Love this? Save it for later!
Share the inspiration with your friends
Introduction
“I was scrambling around the kitchen last Thursday evening, trying to whip up something fast before my book club arrived. Honestly, I didn’t have much time or energy, and the fridge looked pretty bare—classic scenario, right? Then, my neighbor Mark popped in unexpectedly with a bag of farm-fresh eggs and some leftover veggies from his garden. That’s when the idea hit me: quick mini quiche cups. I’d seen similar recipes before but never thought they could come together so quickly and taste this good.
These mini quiche cups turned out to be a total lifesaver that night. I mean, there was laughter, a little flour on the counter, and yes, a cracked muffin tin (don’t ask). But the best part? Everyone kept asking for seconds, and I loved how easy they were to customize with whatever ingredients I had lying around. Maybe you’ve been there—needing a snack or light meal that’s fast, tasty, and just right for sharing. Let me tell you, these quiche cups fit that bill perfectly, and after making them a bunch of times since, I’m excited to share my version with you.”
Why You’ll Love This Recipe
After several trials and plenty of happy taste-testers, I’m confident this Easy 30-Minute Mini Quiche Cups recipe is one snack you’ll turn to again and again. Here’s why it’s become a staple in my kitchen:
- Quick & Easy: Ready in under 30 minutes, these mini quiches are perfect for busy weeknights or last-minute guests.
- Simple Ingredients: You probably already have eggs, cheese, and a few veggies sitting around—no special trips needed.
- Perfect for Any Occasion: Whether it’s brunch, a potluck, or a cozy afternoon snack, these bite-sized treats fit right in.
- Crowd-Pleaser: Kids, adults, picky eaters—they all love these little cups packed with flavor.
- Unbelievably Delicious: The combination of creamy egg filling and a crisp, golden crust is just next-level comfort food.
What sets this recipe apart? It’s the balance—light, fluffy, and not too heavy, with just enough cheese and seasoning. Plus, the muffin tin format means you get perfectly portioned, handheld quiches every time. Honestly, once you make these, you might find yourself sneaking a couple while no one’s looking. That’s how good they are.
What Ingredients You Will Need
This recipe relies on straightforward, wholesome ingredients that come together beautifully. You can keep it simple or get creative depending on your pantry.
- Eggs: 6 large eggs, room temperature (they’re the star, so fresh is best)
- Milk or Cream: 1/2 cup (120 ml) whole milk or half-and-half for creamier texture (I often use half-and-half for richness)
- Shredded Cheese: 1 cup (about 100 grams) cheddar, Swiss, or mozzarella (I like Cabot cheddar for sharp flavor)
- Pie Crust or Puff Pastry: 1 sheet, thawed (store-bought works great—Pillsbury is a favorite for ease)
- Vegetables: 1/2 cup diced bell peppers, spinach, mushrooms, or zucchini (use whatever’s fresh or frozen; remember to squeeze excess moisture)
- Cooked Meat (optional): 1/2 cup diced ham, bacon bits, or cooked sausage (adds a nice savory punch)
- Onion or Shallots: 1/4 cup finely chopped (optional, but adds sweetness and depth)
- Salt & Pepper: To taste
- Dried Herbs: 1/2 teaspoon dried thyme or parsley (optional)
Feel free to swap dairy milk with almond or oat milk if you want a lighter or dairy-free version. For gluten-free, you can use pre-made gluten-free pie crust or even a crustless version by greasing the muffin tin well.
Equipment Needed

- Muffin Tin: Ideally a standard 12-cup size for perfect mini quiche portions. I’ve tried silicone muffin cups, but metal tins give the best crispness.
- Mixing Bowls: One large for whisking eggs and milk, plus smaller bowls if prepping veggies separately.
- Whisk or Fork: To beat the eggs and combine the filling smoothly.
- Sharp Knife and Cutting Board: For dicing vegetables and meats.
- Rolling Pin: If you’re rolling out the pie crust or puff pastry (optional if pre-rolled).
- Non-stick Spray or Butter: To grease the muffin tin well and prevent sticking.
If you’re on a budget, a simple metal muffin pan from any kitchen store works just fine. Just make sure to grease it generously. For cleanup, a silicone liner can help, but the texture won’t be quite as crisp.
Preparation Method
- Preheat the oven: Set it to 375°F (190°C). This will give you that perfect golden crust without overcooking the filling.
- Prepare the crust: Roll out your pie crust or puff pastry on a lightly floured surface. Using a round cutter or a glass (about 3 inches/7.5 cm in diameter), cut out circles to fit snugly into the muffin cups.
- Line the muffin tin: Grease each cup with butter or non-stick spray, then gently press a dough circle into each cup, making sure it reaches the edges without tearing.
- Sauté vegetables and meat (if using): In a non-stick skillet over medium heat, cook diced onions, peppers, or mushrooms until softened (about 3-4 minutes). Add cooked meats just to warm through. Drain any excess moisture to avoid soggy quiches.
- Whisk the filling: In a large bowl, beat the eggs with milk, salt, pepper, and dried herbs until well combined and slightly frothy (about 1-2 minutes). This helps give a fluffy texture.
- Assemble the quiche cups: Divide the sautéed veggies and meat evenly among the crust-lined muffin cups. Sprinkle shredded cheese on top, then carefully pour the egg mixture over each until nearly full but not overflowing.
- Bake: Place the muffin tin in the oven and bake for 20-25 minutes. The quiches should puff up slightly and the crust edges turn golden brown. A toothpick inserted in the center should come out clean.
- Cool briefly: Let them rest for about 5 minutes before removing from the tin. This helps them set and makes them easier to handle.
Quick tip: If the crust edges brown too fast, tent the muffin tin loosely with foil halfway through baking. You don’t want burnt edges before the filling is set. Also, don’t overfill the cups — it’s tempting, but spills make a mess and uneven cooking.
Cooking Tips & Techniques
Making mini quiche cups is pretty forgiving, but a few tricks can help you get consistent results:
- Don’t skip greasing the tin: I learned this the hard way after one batch got stuck and half the crust stayed behind. Butter and a little flour or non-stick spray is your best friend here.
- Drain veggie moisture: Mushrooms and spinach release water when cooked. Squeeze them in a clean towel or drain in a sieve to keep quiches from getting soggy.
- Use room temperature eggs and dairy: This helps the filling blend smoothly and bake evenly without cracking.
- Evenly distribute fillings: For balanced bites, portion your veggies, meats, and cheese evenly across cups before adding the egg mix.
- Multitask wisely: While the crust chills or the veggies sauté, whisk your eggs to save time. This keeps everything flowing without waiting around.
One time, I got distracted mid-prep (hello, phone call), and left the egg mixture sitting too long. The quiches still turned out fine, but it’s best to assemble and bake promptly for optimal texture and rise.
Variations & Adaptations
These mini quiche cups are incredibly versatile, and I love switching things up depending on the season or my mood. Here are some ideas:
- Vegetarian Version: Skip the meat and add extra veggies like roasted red peppers, sun-dried tomatoes, or kale for a fresh twist.
- Gluten-Free Option: Skip the crust entirely and grease the muffin tin well. Pour the egg mixture directly in with fillings for crustless quiche cups.
- Spicy Kick: Add diced jalapeños or a pinch of cayenne pepper to the egg mix for some heat.
- Dairy-Free: Use dairy-free cheese substitutes and almond or oat milk instead of cream.
- Seasonal Flavors: Swap in fresh summer herbs like basil or dill instead of dried thyme, or add roasted butternut squash and sage in fall.
Personally, I once made a batch with caramelized onions and goat cheese that disappeared in minutes. It’s a fun way to impress without fuss.
Serving & Storage Suggestions
Mini quiche cups are best served warm, straight from the oven, with a little fresh salad or some crunchy pickles on the side. They’re perfect finger food for casual gatherings or a quick snack on the go.
For storing, keep any leftovers in an airtight container in the refrigerator for up to 3 days. To reheat, pop them in a preheated oven at 350°F (175°C) for about 10 minutes to regain their crispness. Avoid microwaving if you want to keep that lovely flaky crust.
They also freeze well! Just cool completely, wrap individually in plastic wrap, and place in a freezer bag. When you’re ready, thaw overnight in the fridge and reheat as above. The flavors actually develop nicely overnight, making for an even tastier snack the next day.
Nutritional Information & Benefits
This recipe offers a balanced snack that combines protein, healthy fats, and veggies in each bite. A single mini quiche cup provides approximately:
| Nutrient | Approximate Amount |
|---|---|
| Calories | 140-160 kcal |
| Protein | 7-8 grams |
| Fat | 10 grams (mostly from cheese and eggs) |
| Carbohydrates | 8-10 grams (mostly from crust) |
| Fiber | 1-2 grams (depending on veggies) |
Eggs bring in high-quality protein and essential vitamins like B12 and choline. Vegetables add fiber and antioxidants, while cheese supplies calcium and richness. If you make a crustless version, it lowers carbs and calories, fitting nicely into low-carb or gluten-free diets.
Conclusion
Honestly, these Easy 30-Minute Mini Quiche Cups have become one of my go-to recipes whenever I need a quick, satisfying snack that doesn’t skimp on flavor. They’re easy to tweak, come together fast, and impress more than you’d expect for such simple ingredients.
Feel free to make them your own—change up the fillings, try different cheeses, or go crustless if you prefer. I’d love to hear what combos you come up with!
Don’t hesitate to leave a comment below sharing your experience, or tag me if you post your mini quiche creations on social media. Let’s keep making quick snacks that bring a little joy and ease to our busy days!
FAQs
Can I make mini quiche cups ahead of time?
Yes! You can prepare them a day ahead and refrigerate. Just reheat in the oven before serving for the best texture.
What can I use instead of pie crust?
If you want to skip the crust, simply grease the muffin tin well and bake the filling directly for crustless mini quiches.
How do I prevent the quiche crust from getting soggy?
Sauté and drain veggies well before adding them to the crust, and avoid overfilling with wet ingredients.
Can I freeze these mini quiche cups?
Absolutely! Freeze cooled quiches wrapped individually and thaw overnight before reheating.
What’s the best cheese for mini quiche cups?
Cheddar, Swiss, and mozzarella all work well. For a tangier twist, try goat cheese or feta in combination with fresh herbs.
By the way, if you enjoy recipes with eggs and quick prep, you might appreciate my crispy garlic chicken for a hearty dinner, or these easy garlic roasted potatoes as a classic side. Both are simple and packed with flavor!
Pin This Recipe!

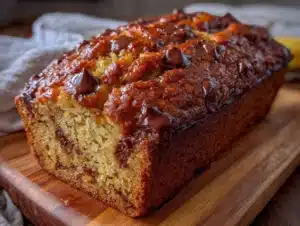
Easy 30-Minute Mini Quiche Cups Recipe for Quick Snacks at Home

These mini quiche cups are quick, easy, and perfect for busy weeknights or last-minute guests. They feature a creamy egg filling with a crisp, golden crust and are highly customizable with various veggies, meats, and cheeses.
- Prep Time: 10 minutes
- Cook Time: 20-25 minutes
- Total Time: 30-35 minutes
- Yield: 12 mini quiche cups 1x
- Category: Snack
- Cuisine: American
Ingredients
- 6 large eggs, room temperature
- 1/2 cup (120 ml) whole milk or half-and-half
- 1 cup (about 100 grams) shredded cheddar, Swiss, or mozzarella cheese
- 1 sheet pie crust or puff pastry, thawed
- 1/2 cup diced vegetables (bell peppers, spinach, mushrooms, or zucchini)
- 1/2 cup cooked meat (diced ham, bacon bits, or cooked sausage) – optional
- 1/4 cup finely chopped onion or shallots – optional
- Salt and pepper to taste
- 1/2 teaspoon dried thyme or parsley – optional
- Butter or non-stick spray for greasing muffin tin
Instructions
- Preheat the oven to 375°F (190°C).
- Roll out the pie crust or puff pastry on a lightly floured surface. Using a round cutter or glass about 3 inches (7.5 cm) in diameter, cut out circles to fit snugly into the muffin cups.
- Grease each muffin cup with butter or non-stick spray, then gently press a dough circle into each cup, making sure it reaches the edges without tearing.
- In a non-stick skillet over medium heat, sauté diced onions, peppers, or mushrooms until softened (about 3-4 minutes). Add cooked meats just to warm through. Drain any excess moisture.
- In a large bowl, whisk the eggs with milk, salt, pepper, and dried herbs until well combined and slightly frothy (about 1-2 minutes).
- Divide the sautéed veggies and meat evenly among the crust-lined muffin cups. Sprinkle shredded cheese on top, then carefully pour the egg mixture over each until nearly full but not overflowing.
- Bake in the preheated oven for 20-25 minutes until the quiches puff up slightly and crust edges turn golden brown. A toothpick inserted in the center should come out clean.
- Let the mini quiche cups rest for about 5 minutes before removing from the tin to set and cool slightly.
Notes
Grease the muffin tin well to prevent sticking. Drain excess moisture from vegetables to avoid soggy quiches. Use room temperature eggs and dairy for smooth filling. Tent with foil if crust edges brown too fast. Do not overfill cups to prevent spills and uneven cooking.
Nutrition
- Serving Size: 1 mini quiche cup
- Calories: 140160
- Fat: 10
- Carbohydrates: 810
- Fiber: 12
- Protein: 78
Keywords: mini quiche, quick snacks, easy quiche cups, savory snacks, party appetizers, brunch recipes, egg recipes