Love this? Save it for later!
Share the inspiration with your friends
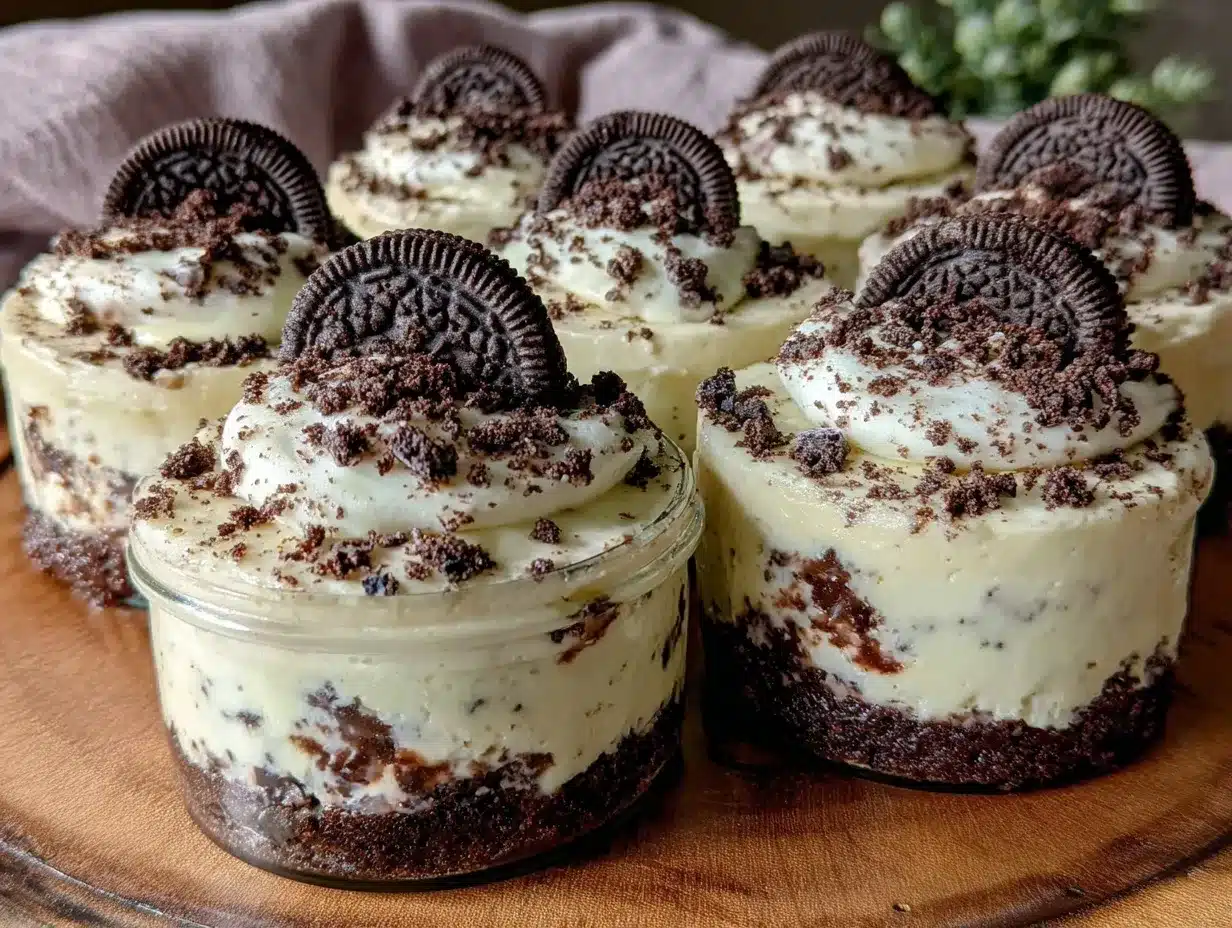
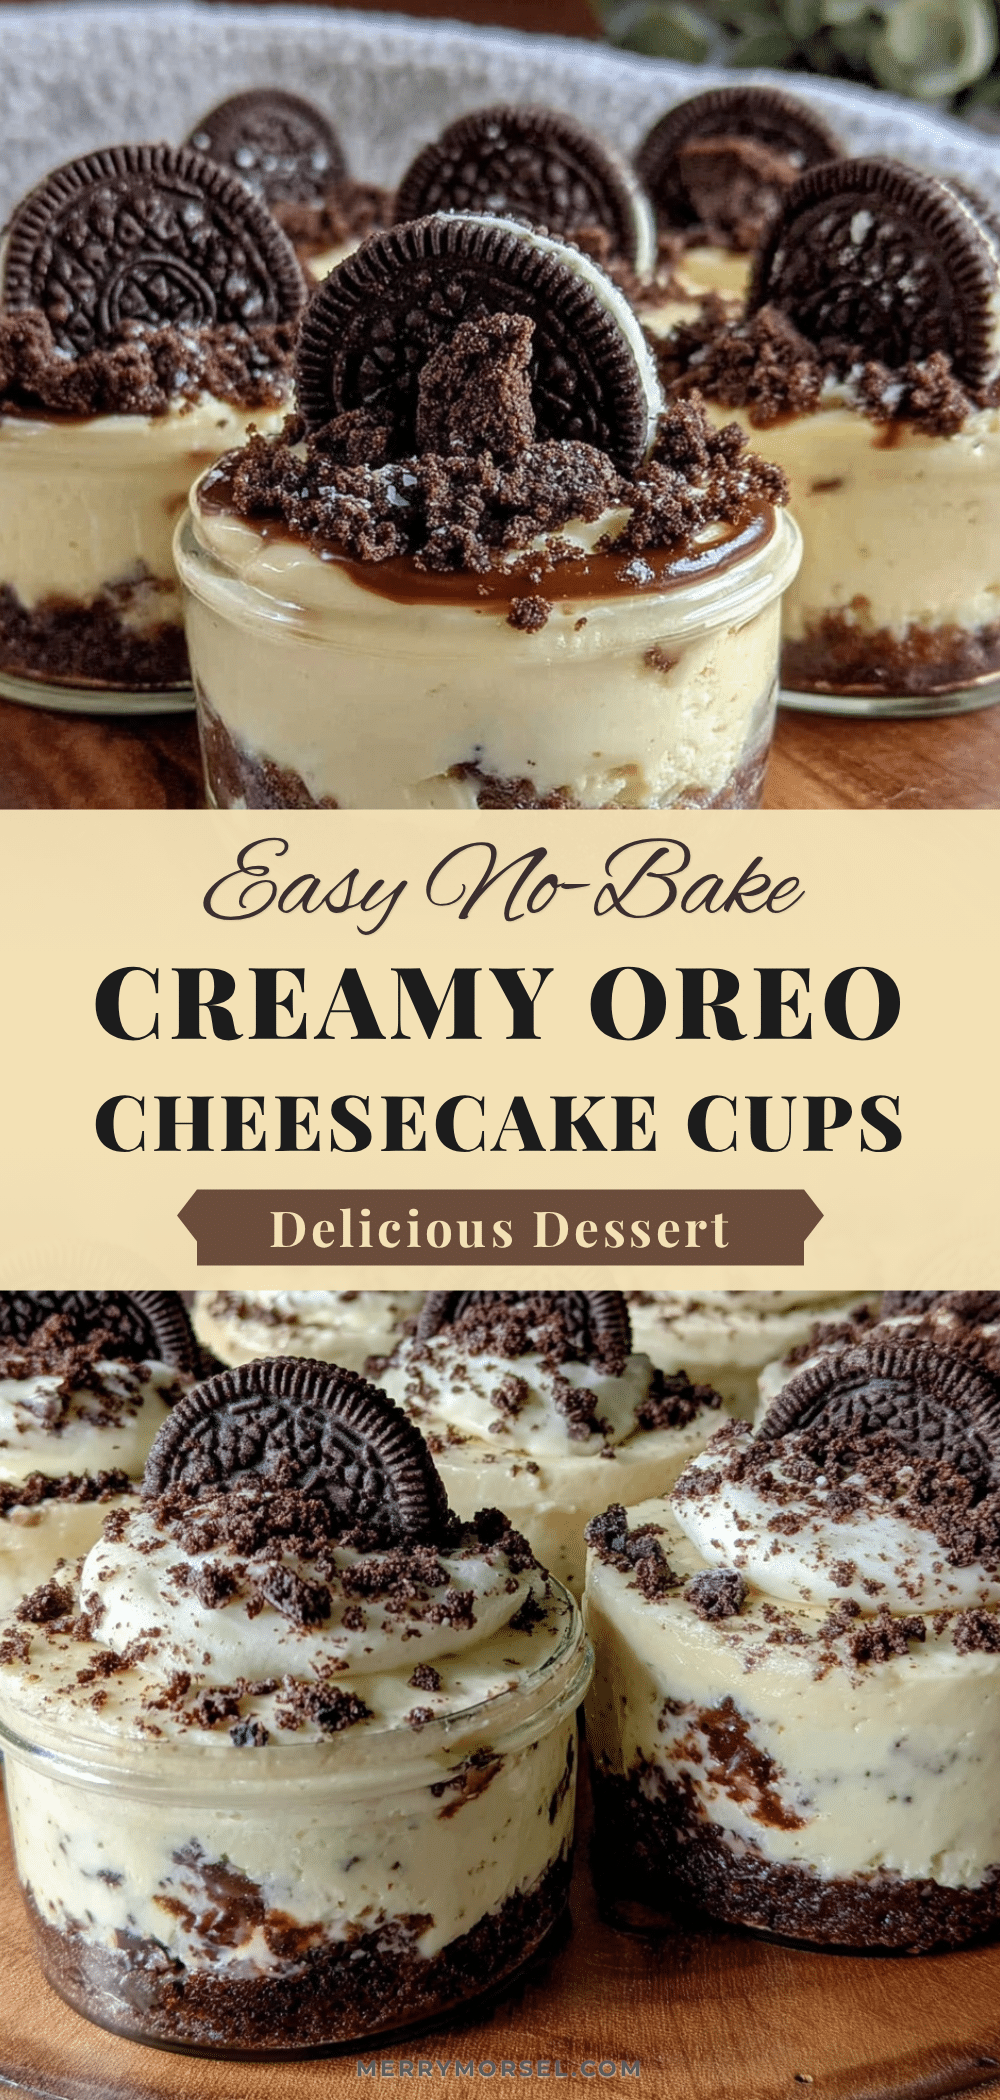
“I wasn’t planning on making dessert that night,” I admitted to my friend Sophie as we stood in her tiny apartment kitchen, surrounded by the usual chaos of takeout boxes and scattered recipe books. It was one of those evenings where nothing went according to plan—the oven had died, and the grocery store was closing in ten minutes. Honestly, I was feeling defeated. But Sophie, ever the calm problem-solver, pulled out a pack of Oreos, a tub of cream cheese, and some whipped topping. “Let’s just whip up something quick,” she said with a grin. What came out of that impromptu kitchen session was these Easy No-Bake Oreo Cheesecake Cups—rich, creamy, and downright addictive.
You know that feeling when you expect a disaster but end up with a surprise hit? That’s exactly what happened here. The best part? No oven, no fuss, and just a handful of ingredients we both had on hand. I remember the way the crushed Oreos layered with the silky cheesecake filling looked in those little clear cups—like tiny treasures waiting to be devoured. Sophie joked about how even her picky nephew would probably sneak a spoonful, and honestly, I wouldn’t be surprised if that’s true.
Maybe you’ve been there too—late-night cravings with nothing ready to satisfy them. This recipe has stuck with me ever since because it’s just so simple, yet feels special. It’s the kind of treat you can pull together when life gets hectic but you still want to indulge a little. And let me tell you, once you try these Easy No-Bake Oreo Cheesecake Cups, they might just become your new quick go-to for dessert emergencies (or anytime, really!).
Why You’ll Love This Recipe
Let me tell you why these Easy No-Bake Oreo Cheesecake Cups have become a staple in my recipe box:
- Quick & Easy: Ready in under 20 minutes, perfect for those last-minute dessert cravings or when you’re short on time after work.
- Simple Ingredients: No fancy shopping trips needed—just basic pantry staples and Oreos, which most folks already have on hand.
- Perfect for Any Occasion: Whether it’s a casual movie night, a potluck, or a birthday party, these cups always impress without the stress.
- Crowd-Pleaser: Kids and adults alike can’t get enough of the creamy, crunchy combo. I’ve seen these vanish at gatherings faster than anything else.
- Unbelievably Delicious: The texture contrast between the crunchy Oreo crust and the smooth cheesecake filling is honestly next-level comfort food.
What sets this recipe apart? The secret lies in the perfectly balanced filling—soft cream cheese whipped together with light whipped topping, creating a smooth, airy texture that’s not too heavy. Plus, layering the crushed Oreos both at the base and sprinkled on top adds a delightful crunch with every bite. I’ve even tried swapping in low-fat cream cheese and it still came out creamy, so feel free to tweak it to your taste!
This isn’t just another cheesecake recipe; it’s the kind of treat that makes you pause and savor each spoonful. It’s comfort food in a cup—fast, fuss-free, and totally satisfying. Trust me, you’re going to want to keep this one handy for all those quick indulgence moments.
What Ingredients You Will Need
This recipe uses simple, wholesome ingredients to deliver bold flavor and a satisfying texture without the fuss. Most of these are pantry staples, and you can easily swap a few items if needed.
- Oreo Cookies: About 24 regular Oreos, divided (around 20 crushed for the base and 4 finely chopped for topping). I prefer the classic Oreo brand for that perfect balance of crunch and sweetness.
- Unsalted Butter: 5 tablespoons (70g), melted (adds richness and helps bind the crust).
- Cream Cheese: 8 ounces (225g), softened to room temperature (the base for that creamy, tangy filling). Philadelphia cream cheese works great here.
- Powdered Sugar: 1/2 cup (60g) for sweetness without graininess.
- Vanilla Extract: 1 teaspoon for a subtle warm note.
- Whipped Topping: 1 cup (240ml) of store-bought whipped cream or homemade whipped topping (lightens the filling, making it fluffy and airy). Cool Whip is a reliable choice if you want convenience.
Optional: If you want to keep it dairy-free, swap cream cheese with a vegan cream cheese and use coconut whipped topping.
Equipment Needed
- Mixing bowls – I like using glass or stainless steel for easy cleanup.
- Electric mixer or handheld mixer – This makes whipping the cream cheese and topping a breeze, but you can also whisk by hand if you’re up for a little arm workout.
- Measuring cups and spoons – Accurate measurements ensure the perfect balance of flavors.
- Spatula – For folding the whipped topping gently into the cream cheese mixture.
- Serving cups or small jars – Clear cups work best to show off those beautiful Oreo layers.
- Food processor or plastic bag and rolling pin – To crush the Oreos finely. I’ve used both methods; the rolling pin gives a slightly chunkier texture which some folks love.
If you don’t have a food processor, no worries! Just put Oreos in a ziplock bag and crush with a rolling pin or even a heavy pan. I’ve done this many times in a pinch.
Preparation Method
- Crush the Oreos: Place 20 Oreos in a food processor and pulse until fine crumbs form. If you don’t have a processor, crush them in a ziplock bag using a rolling pin. This should take about 5 minutes.
- Make the crust: In a medium bowl, combine crushed Oreos with melted butter. Stir until the mixture resembles wet sand. This binding step ensures the crust holds together nicely.
- Assemble the base: Spoon about 2 tablespoons of the crust mixture into each serving cup. Press it down firmly with the back of a spoon to create an even base layer. Set aside while you prepare the filling.
- Prepare the filling: In a large bowl, beat the softened cream cheese with powdered sugar and vanilla extract until smooth and creamy—about 2 to 3 minutes on medium speed. The mixture should be free of lumps and fluffy.
- Fold in whipped topping: Gently fold the whipped topping into the cream cheese mixture using a spatula. Be careful not to overmix; you want to keep it light and airy. This step takes about 2 minutes.
- Layer the cups: Spoon the cheesecake filling over the Oreo crust in each cup, filling nearly to the top. Smooth the surface gently with the back of a spoon or an offset spatula.
- Top with chopped Oreos: Sprinkle the remaining 4 Oreos, finely chopped, over each cup for that extra crunch and visual appeal.
- Chill: Refrigerate the cups for at least 2 hours to set. Overnight chilling works even better if you can wait. The cheesecake filling firms up nicely and flavors meld together.
Tip: If you forget to chill for long enough, the filling might be too soft. Just pop the cups back in the fridge for another hour and they’ll firm up beautifully.
Cooking Tips & Techniques
Let me share some tips I’ve picked up to make sure your Easy No-Bake Oreo Cheesecake Cups turn out just right every time:
- Softening cream cheese: This is crucial. Cold cream cheese makes the filling lumpy and hard to mix. I usually leave mine on the counter for 30 minutes or zap it in 10-second bursts in the microwave.
- Folding technique: When adding whipped topping, gently fold it in rather than stirring vigorously. This keeps the filling light and fluffy, rather than dense.
- Crust texture: If you like a chunkier crust, crush some Oreos coarsely instead of finely. I sometimes leave half the crumbs chunky for extra texture.
- Chilling time: Don’t rush this. The longer you chill, the better the texture and flavor meld. I learned this the hard way after an impatient first try!
- Multitasking: While the cups chill, it’s a perfect time to clean up your kitchen or prep toppings like fresh berries or chocolate drizzle for extra flair.
Variations & Adaptations
Want to switch things up? Here are a few ways I’ve mixed up this recipe to suit different tastes or occasions:
- Chocolate Lover’s Twist: Add a tablespoon of cocoa powder to the cream cheese filling or drizzle melted chocolate on top for an extra chocolate punch.
- Berry Delight: Layer fresh raspberries or strawberries between the crust and filling for a fruity contrast. I love this in spring when berries are fresh.
- Gluten-Free Option: Use gluten-free sandwich cookies instead of Oreos. Brands like Enjoy Life make great substitutes that don’t skimp on flavor.
- Dairy-Free Version: Swap cream cheese for vegan cream cheese and use coconut whipped cream. The texture is a bit different but still delicious.
- Mini Cheesecake Bites: Use mini cupcake liners and make bite-sized versions for parties or kid-friendly snacks.
Once, I even stirred in a spoonful of peanut butter into the filling for a rich, nutty surprise—highly recommend if you’re a peanut butter fan!
Serving & Storage Suggestions
These Oreo cheesecake cups are best served chilled straight from the fridge. The cool, creamy texture is part of their charm. Serve them in clear cups or jars to show off those gorgeous layers—trust me, presentation counts!
Pair with a hot cup of coffee or a cold glass of milk for a classic combo that never disappoints. If you’re hosting, these go great alongside other finger foods or your favorite crispy garlic chicken for a balanced meal and dessert lineup.
Store leftovers covered in the refrigerator for up to 3 days. If you want to prep ahead, these cups freeze wonderfully—just thaw overnight in the fridge before serving. Flavors actually deepen after chilling, so sometimes they taste even better the next day.
For reheating (if you want a softer texture), let them sit at room temperature for 15 minutes, but honestly, I prefer them cold. The chilled crunch of Oreos against the creamy filling is the true delight.
Nutritional Information & Benefits
Each serving of these Easy No-Bake Oreo Cheesecake Cups contains approximately:
| Nutrient | Amount per Serving |
|---|---|
| Calories | 320 |
| Fat | 22g |
| Carbohydrates | 28g |
| Protein | 4g |
| Sugar | 18g |
The recipe includes calcium and protein from the cream cheese and whipped topping, though it’s definitely a treat best enjoyed in moderation. Using whipped topping instead of heavy cream helps keep the texture lighter and slightly reduces fat content. For a lower sugar version, try using a powdered sugar substitute.
If you’re watching gluten intake, swapping to gluten-free cookies is an easy fix. Just a heads up—Oreos do contain soy lecithin, so check labels if you have sensitivities.
Conclusion
If you’re after a dessert that’s quick to make, ridiculously tasty, and requires almost zero effort, these Easy No-Bake Oreo Cheesecake Cups are a no-brainer. The simple ingredients come together in a way that feels indulgent without the stress of baking or complicated steps. I love how versatile they are—you can dress them up or keep them classic, and they always hit the spot.
Honestly, I keep coming back to this recipe because it’s reliable and satisfying, especially on those days when I just want a sweet treat without the kitchen marathon. Give it a try, tweak it to your liking, and let me know how it goes—I’d love to hear if you added a twist of your own!
Ready to whip up your own? Grab those Oreos and cream cheese, and get started—your next quick indulgence awaits!
FAQs about Easy No-Bake Oreo Cheesecake Cups
Can I make these cheesecake cups ahead of time?
Absolutely! They taste even better after chilling overnight. Just cover them tightly and store in the fridge.
What if I don’t have a food processor to crush the Oreos?
No problem! Place Oreos in a ziplock bag and crush with a rolling pin or heavy pan until finely crushed.
Can I substitute regular Oreos with another cookie?
Yes, you can try chocolate graham crackers or gluten-free cookies if needed. Just adjust sweetness to taste.
Is it possible to make these dairy-free?
Definitely. Use vegan cream cheese and coconut whipped topping to keep the recipe dairy-free and still delicious.
How long should I chill the cups before serving?
At least 2 hours in the fridge is best, but overnight chilling gives the creamiest texture and best flavor melding.
Pin This Recipe!
Easy No-Bake Oreo Cheesecake Cups
A quick and indulgent no-bake dessert featuring layers of crushed Oreos and creamy cheesecake filling, perfect for any occasion.
- Prep Time: 15 minutes
- Cook Time: 0 minutes
- Total Time: 2 hours 15 minutes
- Yield: 8 servings 1x
- Category: Dessert
- Cuisine: American
Ingredients
- 24 Oreo Cookies, divided (about 20 crushed for the base and 4 finely chopped for topping)
- 5 tablespoons (70g) unsalted butter, melted
- 8 ounces (225g) cream cheese, softened to room temperature
- 1/2 cup (60g) powdered sugar
- 1 teaspoon vanilla extract
- 1 cup (240ml) whipped topping (store-bought or homemade)
Instructions
- Crush 20 Oreos in a food processor until fine crumbs form, or crush in a ziplock bag using a rolling pin (about 5 minutes).
- In a medium bowl, combine crushed Oreos with melted butter and stir until mixture resembles wet sand.
- Spoon about 2 tablespoons of the crust mixture into each serving cup and press down firmly to create an even base layer. Set aside.
- In a large bowl, beat softened cream cheese with powdered sugar and vanilla extract until smooth and creamy (2-3 minutes on medium speed).
- Gently fold whipped topping into the cream cheese mixture using a spatula, being careful not to overmix (about 2 minutes).
- Spoon the cheesecake filling over the Oreo crust in each cup, filling nearly to the top and smoothing the surface.
- Sprinkle the remaining 4 Oreos, finely chopped, over each cup for topping.
- Refrigerate the cups for at least 2 hours to set; overnight chilling is recommended for best texture and flavor.
Notes
Softening cream cheese is crucial to avoid lumps; fold whipped topping gently to keep filling light and airy. Chilling overnight improves texture and flavor. Can substitute gluten-free cookies or vegan cream cheese and coconut whipped topping for dietary needs.
Nutrition
- Serving Size: 1 cup
- Calories: 320
- Sugar: 18
- Fat: 22
- Carbohydrates: 28
- Protein: 4
Keywords: no-bake, Oreo, cheesecake, quick dessert, easy dessert, no oven, creamy, crunchy, party dessert